LIEFERUNG
Vor der ersten Inbetriebnahme und direkt nach Erhalt der Ware prüfen Sie bitte die Lieferung auf Transportschäden
und Vollständigkeit.
Der Lieferumfang enthält:
XOOP LED EL100 Strahler
Power Input Kabel
•
•
SICHERHEITSINFORMATIONEN
Stellen Sie sicher, dass das Gerät keine Beschädigungen aufweist.
Die am Gerät befestigten Kabel müssen fest mit diesem verbunden sein und dürfen keine Knicke oder andere
Beschädigungen aufweisen.
Stellen Sie vor dem Anschluss des Gerätes sicher, dass die Stromversorgung zu den Anschlusswerten des Gerätes
passt.
Bitte nutzen Sie nur das mitgelieferte Stromvbersorgungskabel um die Lampe zu versorgen.
Verbinden Sie die Lampe nicht mit einem Dimmer.
Das Gerät enthält im Inneren keinerlei vom Benutzer zu wartende Teile, weshalb ein Öffnen des Gerätes den
Verlust der Gewährleistung zur Folge hat.
Verwenden Sie bei hängender Montage dafür geeignete Materialien und sichern Sie das Gerät mit einem
Sicherungsseil.
•
•
•
•
•
•
•
TECHNISCHE DATEN
Anschlusswerte 100-240 V, 50/60 Hz // 200 Watt
Abmessung 320 x 275 x 235 mm (Bügel hängend)
Gewicht 4,1 kg
Schutzklasse Stecker IP44
Umgebungstemperatur -30 °C / +50 °C
Anschluss Schutzkontaktstecker (CEE 7/7; Typ F/E)
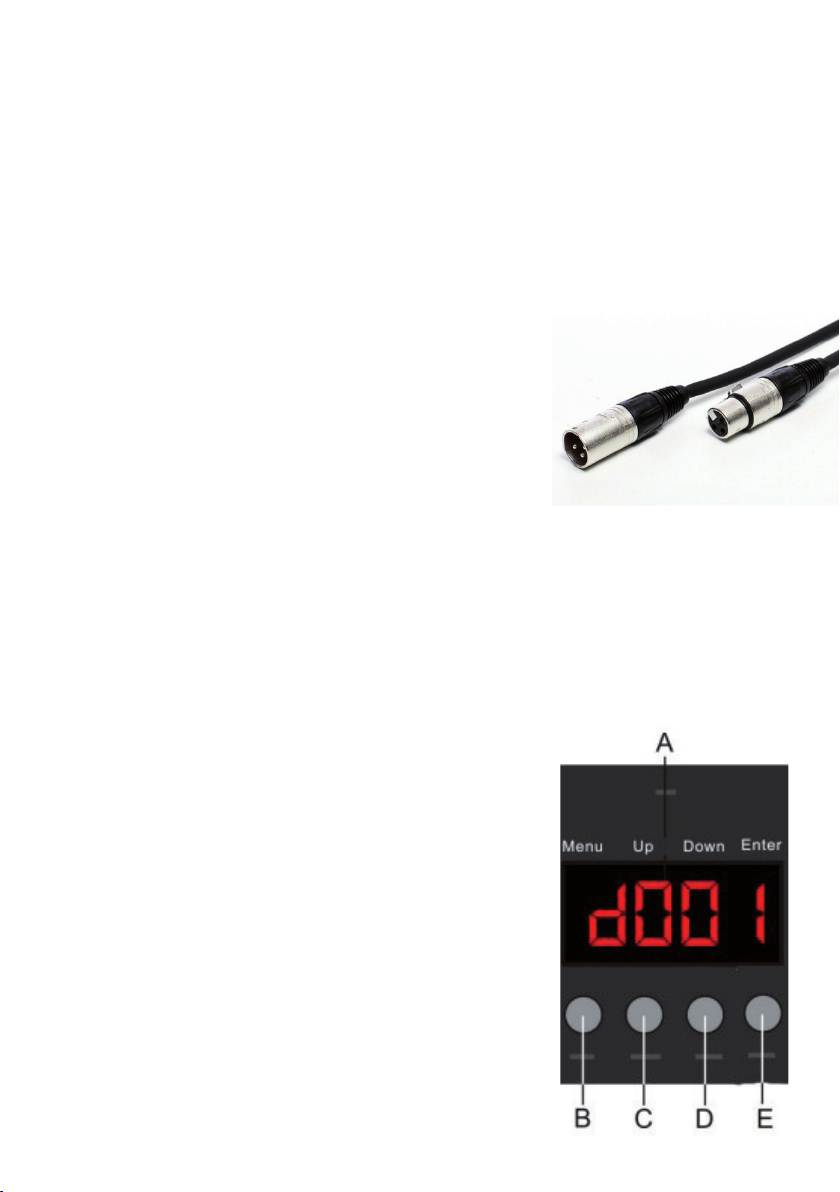
DMX 512 In/Out; XLR 3 Pol.
Abstrahlwinkel 24° Beam / 44° Außenbereich
Befestigung (Bügel) 1x mittige Bohrung (13 mm)
Leuchtmittel 1x CW/WW COB LED
Lebensdauer LED Chip 20.000 Std.
Farbtemperatur 3200-5600 K stufenlos
DMX512 2/3/4 Kanäle
Einstellung per DMX oder Menü (LCD Display)
Lüftung temperaturgesteuerter Lüfter
3