Store configuration:
If you need to make the changed configuration still valid when you use it next time after exiting
the driver, please click the "OK" button on the left side of the driver interface to save the
settings after changing the configuration. If the settings are successfully saved, the prompt
"Configuration saved successfully" will be given; otherwise, the changed configuration will be
valid only when it is currently used.
1.4 Work area
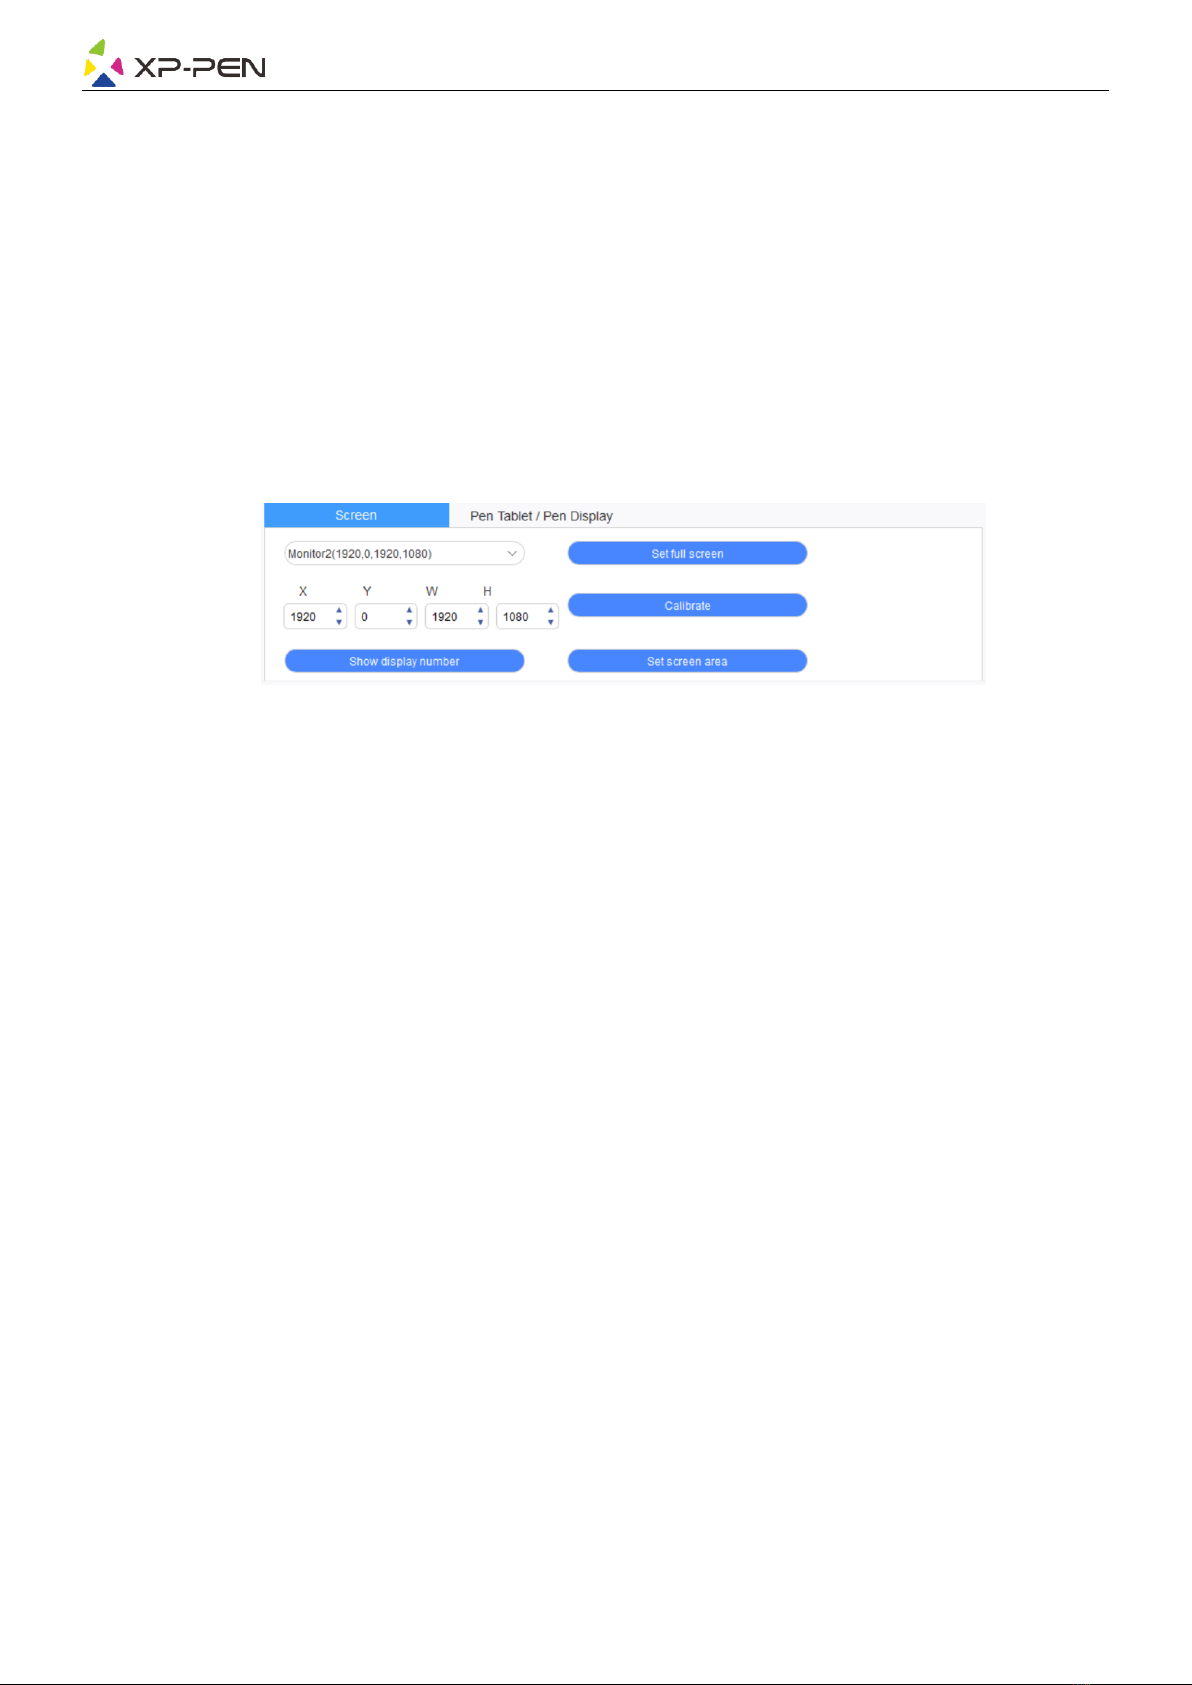
2.4.1 Screen
If multiple monitors are used in duplicate mode (i.e. All monitors display the same picture), the
work area of the device will be mapped to all monitors. When the pen moves in the work area,
the cursor on all monitors will move at the same time.
If multiple monitors are used in extended mode, it is necessary to select the work area of the
device on the driver interface to map to the corresponding monitor.
The driver provides three modes to set the display area of the screen:
(1) Set full screen: Set the screen area of the selected monitor to the maximum.
(2) Set screen area: Use the mouse to manually set the display area of the screen. Click the first
position (top left) of the display area of the screen with the mouse, and then click the
second position (bottom right).
(3) Customize: Manually enter coordinates in the corresponding input boxes below X, Y, W, and
H to customize the size of the display area of the screen, or use the mouse to drag on the
screen icon of the driver interface to adjust the display area of the screen.
Calibration:
Calibrate the offset between the stylus and the cursor.
Show display number:
Identify all connected monitors, and numeric identifiers will be displayed in the
lower-left corner of each monitor.