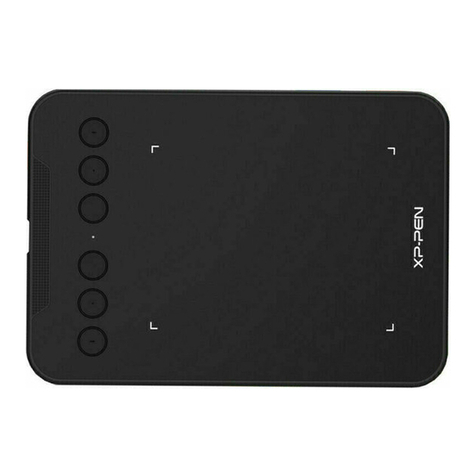
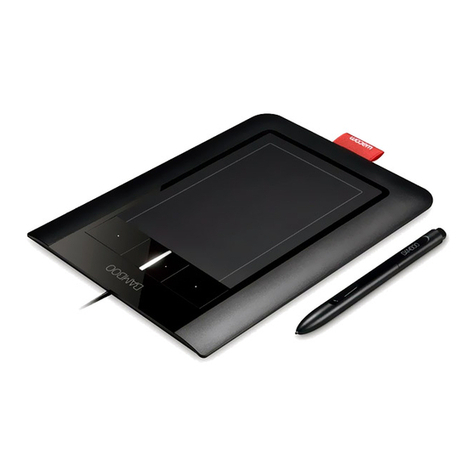
XPPen Deco Pro SW User manual

1-23-4English5-6繁体中文7-89-1011-1213-1415-1617-18한국어Français日本語EspañolDeutschItaliano19-2021-2223-24Русский языкPortuguêsPolskiContentsNederlands

PAGE1PAGE2英语I. Overview
1. USB-C port
2. Trackpad/Touch
3. Indicator 1
In blue status:
a. Flashing slowly: No Bluetooth connected
b. Flashing quickly: Waiting for pairing with Bluetooth connection (Long
press the shortcut key on the top left for 3 seconds)
c. Always On: Successfully paired
In red status:
a. Flashing: Low battery (20%)
b. Always On: Charging
c. Off: Fully charged
A purple color indicates that the red and the blue indicator are both On
simultaneously
4. Roller
5. Shortcut keys
6. Active area
7. Indicator 2:
Handwriting indicator:
a. Flashing: The stylus is in the active area, but not touching the pen tablet
b. Always On: The stylus is in contact with the active area
c. Off: The stylus is outside the active area
8. Power key
Deco Pro SW/MW Quick Guide
Note:
For the best performance of your device, we highly recommend you check and
update driver regularly from XP-PEN website.
III. Install the Driver
1. Make sure your pen tablet was connected to the computer.
2. Visit the XP-PEN website (www.xp-pen.com), choose Support section and
click Download. Choose product model and download the latest driver
according to your computer system.
3. Follow the prompts to finish the driver installation.
Wired Connection
Connect the pen tablet to your computer. The pen tablet will get started
automatically.
Wireless Connection
A. Connection to the Bluetooth receiver
Plug the Bluetooth receiver into the computer and then toggle the power key to
turn the pen tablet on.
B. Direct Bluetooth connection (Windows/Mac OS only)
1. Toggle the power key to turn the pen tablet on. Then long press the
shortcut key on the top left for 3 seconds to enter Bluetooth pairing (with
the blue indicator flashing quickly).
2. Turn on the Bluetooth on the computer, set up and add Bluetooth device,
search for device name Deco Pro SW/MW and complete Bluetooth pairing
by clicking the device name (with the blue indicator always on).
3. Toggle the power key to turn the pen tablet off after use.
If you need any further assistance, please contact us:www.xp-pen.comservice@xp-pen.comII. Getting Started
1 2 3456 8
7

繁中PAGE3PAGE4一. 產品概覽1. USB-C介面2. 觸控板3. 滾輪指示燈 藍色狀態 a. 慢閃: 無藍牙連接 b. 快閃: 藍牙等待配對(長按左上角快速鍵3秒進入配對狀態) c. 恒亮: 藍牙配對成功 紅色狀態 a. 閃爍: 電池低電量(20%以下) b. 恒亮: 電池充電中 c. 無燈號: 電池充滿電 紅/藍燈同亮時為紫色4. 滾輪5. 快速按鍵6. 工作區域7. 板面指示燈 手寫狀態顯示 a. 閃爍: 筆位於感應區域內但未觸碰到繪圖板 b. 恒亮: 筆觸碰到感應區域 c. 無燈號: 筆位於感應區域之外8. 電源開關鍵Deco Pro SW/MW快速指南1. 有線連接使用數據線將繪圖板連接至電腦,繪圖板自動開機 。2. 無線連接A. 藍牙接收器 將藍牙接收器插入電腦並開啟繪圖板 。B. 藍牙無線直連(僅支援Windows/Mac OS) 1. 開啟繪圖板后長按左上角快速鍵3S,進入等待配對狀態(藍燈快閃)。 2. 打開電腦藍牙功能,添加藍牙設備,搜尋到Deco Pro SW/MW設備名 稱,點擊後完成藍牙配對(藍燈常亮)。 3. 撥動電源開關至OFF位置關機 。二. 連接方式1 2 3456 8
7溫馨提示:為了使您的繪圖板/繪圖顯示器能夠展現最佳性能,建議您定期查看官網驅動更新 。三. 下載安裝驅動程式1. 確保您的繪圖板/繪圖顯示器與電腦處於連接狀態 。2. 登陸XP-PEN 官網(www.xp-pen.com),進入“支持”頁面,點擊“下載”,依 照產品型號和您電腦作業系統,下載並安裝對應的驅動程式 。3. 開啟驅動程式, 設定參數並測試產品功能 。若您需要任何與產品相關的協助,請與我們聯系service@xp-pen.comwww.xp-pen.com

PAGE5PAGE6德语okHinweis:
Um die optimale Leistung Ihres Geräts zu erzielen, empfehlen wir Ihnen, den Treiber
regelmäßig auf der XP-PEN Website zu überprüfen und zu aktualisieren.
Wenn Sie weitere Unterstützung benötigen, kontaktieren Sie uns bitte unter:III. Treiber installieren
1. Stellen Sie sicher, dass Ihr Tablet/Display an den Computer angeschlossen
wurde.
2. Besuchen Sie die XP-PEN Website (www.xp-pen.de), wählen Sie den
Bereich „Unterstützung“ und klicken Sie auf „Herunterladen“. Wählen
Sie das gewünschte Produktmodell aus und laden Sie den neuesten
Treiber herunter.
3. Befolgen Sie die Anweisungen, um den Treiber zu installieren.
www.xp-pen.deservicede@xp-pen.comI. Übersicht
1. USB-C-Anschluss
2. Touchpad/Trackpad
3. Kontrolllampe 1
Im blauen Status:
a. Blinkt langsam: Keine Bluetooth-Verbindung
b. Blinkt schnell: Wartet auf Kopplung mit Bluetooth-Verbindung (die
Schnellzugriffstaste oben links 3 Sekunden lang drücken)
c. Kontinuierlich an: Erfolgreich gekoppelt
Im roten Status:
a. Blinkt: Niedrige Akkukapazität (20 %)
b. Kontinuierlich an: Wird geladen
c. Aus: Vollständig geladen
Leuchtet die Kontrolllampe violett, sind der rote und blaue Status gleichzeitig
aktiv
4. Dreh-Taste
5. Tastenkombinationen
6. Arbeitsbereich
7. Kontrolllampe 2
a. Blinkt: Der Stift befindet sich im aktiven Bereich, berührt aber das Tablet
nicht
b. Kontinuierlich an: Der Stift ist mit dem aktiven Bereich in Kontakt
c. Aus: Der Stift befindet sich außerhalb des aktiven Bereichs
8. Power-Taste
Kurzanleitung für die Deco SW/MW
Kabelverbindung
Schließen Sie das Grafiktablett über das USB-C Kabel an Ihren Computer an. Das
Tablet wird automatisch gestartet.
Drahtlose Verbindung
A. Anschluss an den Bluetooth-Empfänger
Schließen Sie den Bluetooth-Empfänger an den Computer an und schalten
Sie dann das Tablet mit der Power-Taste ein.
B. Direkte Bluetooth-Verbindung (nur Windows/Mac OS)
1. Schalten Sie das Tablet mit der Power-Taste ein. Drücken Sie dann 3
Sekunden lang die Schnellzugriffstaste oben links, um die
Bluetooth-Kopplung zu starten (die blaue Anzeige blinkt schnell).
2. Schalten Sie Bluetooth am Computer ein, richten Sie ein
Bluetooth-Gerät ein und fügen Sie es hinzu. Suchen Sie nach dem
Gerätenamen Deco Pro SW/MW, dann klicken Sie auf den Gerätenamen
(die blaue Anzeige ist kontinuierlich an).
3. Schalten Sie das Tablet nach der Verwendung mit der Power-Taste aus.
II. Einrichten
1 2 3456 8
7

西语okPAGE7PAGE8I. Descripción general
1. Puerto USB-C
2. Rueda de control/táctil
3. Indicador 1
Estado en azul:
a. Si parpadea lentamente: el Bluetooth no está conectado
b. Si parpadea rápidamente: está esperando el emparejamiento con la
conexión Bluetooth (pulse prolongadamente la tecla de acceso
directo en la parte superior izquierda durante 3 segundos)
c. Siempre encendido: emparejado correctamente
Estado en rojo:
a. Si parpadea: batería baja (20%)
b. Siempre encendido: cargando
c. Apagado: totalmente cargado
El color morado indica que el indicador rojo y el azul están encendidos a la vez
4. Tecla giratoria
5. Teclas de acceso directo
6. Área activa
7. Indicador 2:
Indicador de escritura:
a. Si parpadea: el lápiz pasivo se encuentra en el área activa, pero no está
en contacto con la tableta de lápiz
b. Siempre encendido: el lápiz pasivo se encuentra en contacto con el área
activa
c. Apagado: el lápiz pasivo se encuentra fuera del área activa
8. Tecla de encendido
Guía rápida de Deco Pro SW/MW
Conexión por cable
Conecte la tableta de lápiz a su ordenador. La tableta de lápiz empezará a
funcionar automáticamente.
Conexión inalámbrica
A. Conexión con el receptor de Bluetooth
Enchufe el receptor de Bluetooth en el ordenador y, a continuación, pulse
la tecla de encendido para encender la tableta de lápiz.
B. Conexión Bluetooth directa (solo para Windows/Mac OS)
1. Pulse la tecla de encendido para encender la tableta de lápiz.
A continuación, pulse prolongadamente la tecla de acceso directo situada
en la parte superior izquierda durante 3 segundos para acceder al empareja
miento por Bluetooth (si el indicador azul parpadea rápidamente).
2. Active el Bluetooth en el ordenador, configure y añada el dispositivo
Bluetooth, busque el nombre del dispositivo Deco Pro SW/MW y complete
el emparejamiento por Bluetooth haciendo clic en el nombre del
dispositivo (con el indicador azul siempre encendido).
3. Pulse la tecla de encendido para apagar la tableta de lápiz después de
usarla.
II. Primeros pasos
1 2 3456 8
7
Nota:
Para obtener el mejor rendimiento de su dispositivo, le recomendamos encarecida-
mente que revise y actualice el controlador con regularidad desde la página web
de XP-PEN.
III. Instalación del controlador
1. Asegúrese de que su tableta/pantalla esté conectada al ordenador.
2. Visite la página web de XP-PEN (www.xp-pen.es), seleccione la sección de
Asistencia y haga clic en Descargar. Elija el modelo del producto y
descargue el último controlador acorde a su sistema informático.
3. Siga las indicaciones para completar la instalación del controlador.
www.xp-pen.esservicees@xp-pen.com

PAGE9PAGE10法语okI. Vue d’ensemble
1. Port USB-C
2. Trackpad/pavé tactile
3. Témoin lumineux 1
Bleu
a. Clignote lentement: aucune connexion Bluetooth
b. Clignote rapidement: en cours d’association Bluetooth (maintenez la
touche de fonction en haut à gauche appuyée pendant 3secondes)
c. Allumé en continu: association réussie
Rouge
a. Clignote: batterie faible (20%)
b. Allumé en continu: en cours de charge
c. Éteint: charge complète
Le violet indique que les témoins rouge et bleu sont tous deux allumés en
même temps
4. Molette
5. Touches de fonction
6. Zone active
7. Témoin lumineux 2:
Témoin de dessin manuel:
a. Clignote: le stylet se trouve dans la zone active mais ne touche pas la
tablette
b. Allumé en continu: le stylet est en contact avec la zone active
c. Éteint: le stylet se trouve en dehors de la zone active
8. Touche marche/arrêt
Guide rapide Deco Pro SW/MW
Connexion filaire
Branchez la tablette à stylet à votre ordinateur. Elle démarre automatiquement.
Connexion sans fil
A. Connexion à un adaptateur Bluetooth
Branchez l’adaptateur Bluetooth sur l'ordinateur, puis appuyez sur la touche
marche/arrêt pour allumer la tablette.
B. Connexion Bluetooth directe (Windows/Mac OS uniquement)
1. Appuyez sur la touche marche/arrêt pour allumer la tablette à stylet.
Ensuite, maintenez la touche de fonction en haut à gauche appuyée pendant
3secondes pour accéder à l’association Bluetooth (le témoin bleu clignote
rapidement).
2. Activez le Bluetooth sur l'ordinateur, configurez et ajoutez un périphérique
Bluetooth, recherchez le nom du périphérique Deco Pro SW/MW et
terminez l’association Bluetooth en cliquant sur le nom du périphérique
(avec le témoin bleu allumé en continu).
3. Appuyez sur la touches marche/arrêt pour éteindre la tablette à stylet
après utilisation.
II. Prise en main1 2 3456 8
7
Remarque:
Pour obtenir les meilleures performances de votre appareil, nous vous recomman-
dons vivement de consulter et de mettre à jour régulièrement le pilote à partir du
siteWeb de XP-PEN.
Si vous avez besoin d'aide, veuillez nous contacter :III. Installation du pilote
1. Vérifiez que votre tablette/écran est bien connecté(e) à l'ordinateur.
2. Visitez le siteWeb de XP-PEN (www.xp-pen.fr), allez dans la section Support
et cliquez sur Télécharger. Choisissez le modèle du produit et téléchargez le
dernier pilote en fonction de votre système informatique.
3. Suivez les instructions pour terminer l'installation du pilote.
www.xp-pen.frservicefr@xp-pen.com
PAGE11PAGE12意大利语okNota: Per prestazioni ottimali del tuo dispositivo, ti consigliamo vivamente di rivedere e
aggiornare regolarmente il driver dal sito XP-PEN.
Se hai bisogno di ulteriore assistenza, contattaci:III. Installazione del driver
1. Assicurati che la tavoletta / il display sia stato collegato al computer.
2. Visita il sito web XP-PEN (www.xp-pen.it), scegli la sezione Supporto e clicca
su Download. Scegli il modello del prodotto e scarica l'ultimo driver in base
al tuo sistema operativo.
3. Segui le istruzioni per finire l'installazione del driver.
www.xp-pen.itserviceit@xp-pen.comI. Panoramica
1. Porta USB-C
2. Trackpad/touch
3. Indicatore 1
Nello stato blu:
a. Lampeggia lentamente: Bluetooth non connesso
b. Lampeggia rapidamente: in attesa dell'accoppiamento con la connessione
Bluetooth (premere il tasto di scelta rapida in alto a sinistra per 3 secondi)
c. Sempre acceso: accoppiato con successo
Nello stato rosso:
a. Lampeggiante: batteria quasi scarica (20%)
b. Sempre acceso: in carica
c. Spento: batteria pienamente carica
Il colore viola indica che l'indicatore rosso e quello blu sono entrambi accesi
contemporaneamente
4. Roller
5. Tasti di scelta rapida
6. Area attiva
7. Indicatore 2:
Indicatore di calligrafia:
a. Lampeggiante: la stilo si trova nell'area attiva, ma non tocca la tavoletta
grafica
b. Sempre acceso: la stilo è a contatto con l'area attiva
c. Spento: la stilo è al di fuori dell'area attiva
8. Tasto di accensione
Guida rapida Deco Pro SW/MW
Connessione cablata
Collegare la tavoletta grafica al computer. La tavoletta grafica si avvia automati-
camente.
Connessione senza fili
A. Connessione al ricevitore Bluetooth
Collegare il ricevitore Bluetooth al computer e poi azionare il tasto di
accensione per accendere la tavoletta grafica.
B. Connessione Bluetooth diretta (solo Windows/Mac OS)
1. Azionare il tasto di accensione per accendere la tavoletta grafica. Poi
premere il tasto di scelta rapida in alto a sinistra per 3 secondi per entrare
nell'accoppiamento Bluetooth (con l'indicatore blu che lampeggia
rapidamente).
2. Accendere il Bluetooth sul computer, impostare e aggiungere il dispositivo
Bluetooth, cercare il nome del dispositivo Deco Pro SW/MW e completare
l'accoppiamento Bluetooth cliccando sul nome del dispositivo (con
l'indicatore blu sempre acceso).
3. Azionare il tasto di accensione per spegnere la tavoletta grafica dopo l'uso.
II. Guida introduttiva
1 2 3456 8
7

日语okPAGE13PAGE14※ Deco Funペンタブレットの最高のパフォーマンスを発揮するためには、定期 的に公式サイトでドライバのアップデートをチェックすることをお勧めします。詳細はXP-PEN公式サイト→「サポート」→「ダウンロード」より当製品の取扱説明書をダウンロードしてご覧いただけます。III. ドライバのインストール1. Deco Funペンタブレットがパソコンに接続されていることを確認してく ださい。2. XP-PEN公式サイト(www.xp-pen.jp)にアクセスしてください。「サポート」 セクションを選択し、「ダウンロード」をクリックします。製品のモデルを 選択し、お使いのパソコンシステムに応じた最新のドライバをダウンロ ードしてください。3. プロンプトに従って、ドライバのインストールを終了してください。www.xp-pen.jpservicejp@xp-pen.comI. 概要1. USB-Cポート2.トラックパッド/タッチ3.ステータス表示ライト1 青色ライト: a. ゆっくりと点滅(1秒ごとに1回点滅):Bluetooth接続していません。 b. 高速点滅: Bluetoothペアリングを待っています。(ペンタブレット本体の エクスプレスキー「K1」を3秒間長押しすれば、ペアリングモードに入る) c. 常時点灯: ペアリング完了し、Bluetoothで接続されています。 赤色ライト: a. 点滅: バッテリー残量低下(≤20%) b. 常時点灯: 充電中 c. 消灯: 満充電 赤と青のステータスライトが同時に点灯する場合、表示色が紫になります。4. ホイール5. エクスプレスキー(ショットカットキー)6. 作業エリア7. ステータス表示ライト2 a. 点滅: スタイラスペンは作業エリア内にありますが、タブレットに接触して いません。 b. 常時点灯: スタイラスペンは作業エリア内にあり、タブレットに接触してい ます。 c. 消灯: スタイラスペンは作業エリア外にあります。8. 電源キーDeco Pro SW/MWクイックガイドUSBケーブルで接続付属のUSBケーブルでペンタブレットをお使いのパソコンやAndroid端末に接続します。(USBケーブルで接続する場合、ペンタブレットが自動的に起動します)ワイヤレス接続A. Bluetoothレシーバーで接続 Bluetoothレシーバーをお使いのパソコンやAndroid端末に接続した後、電源 キーを切り替えてペンタブレットの電源を入れます。 B. ダイレクトBluetooth接続(Windows/Mac OSのみ対応) 1. 電源キーを切り替えて、ペンタブレットの電源を入れます。その後、左上 のエクスプレスキーK1を3秒間長押しして、Bluetoothペアリングモードに 入ります(青色インジケーターが高速点滅します)。 2. パソコンのBluetoothをオンにし、Bluetoothデバイスの設定・追加を行 い、デバイス名Deco Pro SW/MWを追加した後、Bluetoothペアリングが完 了します(ペアリング完了後、青色インジケーターが常時点灯になります)。 ※ 長時間使用しないときや一日の終わりには、ペンタブレットの電源を切ってく ださい。II. 接続方法1 2 3456 8
7ご不明な点がございましたら、弊社サポートまでお気軽にお問い合わせください。

PAGE15PAGE16韩语ok참고:장치를 최고 성능으로 유지하기 위해 XP-PEN 웹 사이트에서 정기적으로 드라이버를 확인하고 업데이트하실 것을 권장합니다.추가적으로 도움이 필요하신 경우 당사에 문의하십시오.III. 드라이버 설치1. 액정 타블렛이 컴퓨터에 연결되어 있는지 확인하십시오.2. XP-PEN 웹 사이트(www.xp-pen.kr)를 방문하여 지원 섹션을 선택하고, 다운로드를 클릭하십시오. 제품 모델을 선택하고, 컴퓨터 시스템 사양에 따라 최신 드라이버를 다운로드하십시오.3. 지시에 따라 드라이버 설치를 완료하십시오.servicekr@xp-pen.comwww.xp-pen.krI. 개요1. Type-C포트2. 더블휠3. 표시등1 파란색 상태: a. 천천히 깜빡임: 블루투스 연결되지 않음 b. 빠른 깜빡임: 블루투스 연결로 페어링 대기 중(왼쪽 상단의 단축키를 3 초 동안 길게 누름) c. 항상 켜짐: 성공적으로 페어링됨 빨간색 상태: a. 점멸: 저전력 (20%) b. 점등: 충전 중 c. 꺼짐: 충전 완료 보라색은 빨간색과 파란색 표시기가 동시에 켜져 있음을 나타냅니다.4. 롤러휠5. 단축키6. 활성 영역7. 표시등 2: 필기 표시기: a. 점멸: 스타일러스가 활성 영역 내에 있으나 펜 타블렛에 접촉하지 않은 상태 b. 점등: 스타일러스가 활성 영역에 접촉함 c. 꺼짐: 스타일러스가 활성 영역을 벗어남8. 전원 키Deco Pro SW/MW 퀵 가이드유선 연결연결선을 이용하여 펜 타블렛을 컴퓨터에 연결하십시오.무선 연결A. 블루투스로 연결하십시오.전원을 켜주신후, 블루투스 수신기를 컴퓨터와 연결하여 무선 상태로 전환합니다.B. 직접 Bluetooth 연결(Windows/Mac OS만 해당)1. 전원 키를 눌러 펜 타블렛을 켭니다. 그런 다음 왼쪽 상단의 바로 가기 키를 3초 동안 길게 눌러 블루투스 페어링상태로 접속합니다.(파란색 표시기가 빠르게 깜박임).2. 컴퓨터에서 블루투스를 켜고 블루투스 장치를 설정 및 추가 하신후, 장치 이름 Deco Pro SW/MW를 클릭하여 블루투스 페어링을 완료합니다(파란색 표시기가 항상 켜져 있음).3. 사용이 끝난 후 전원 키를 눌러 펜 타블렛을 Off 하십시오.II. 시작하기1 2 3456 8
7

PAGE17PAGE18波兰语okUwaga:
Dla najlepszej wydajności urządzenia zalecamy regularne przeglądanie i
aktualizowanie sterowników ze strony XP-PEN.
Jeśli potrzebujesz dalszej pomocy, skontaktuj się z nami:III. Instalacja sterownika
1. Upewnij się, że tablet/ekran został podłączony do komputera.
2. Odwiedź stronę internetową XP-PEN (www.xp-pen.com), wybierz sekcję
Support i kliknij Download. Wybierz model produktu i pobierz najnowszy
sterownik odpowiedni dla Twojego systemu komputerowego.
3. Postępuj zgodnie z instrukcjami, aby zakończyć instalację sterownika.
www.xp-pen.comservice@xp-pen.comI. Przegląd
1. Port USB-C
2. Gładzik/przycisk dotykowy
3. Wskaźnik 1
Świeci w kolorze niebieskim:
a. Miga powoli: Brak połączenia Bluetooth
b. Miga szybko: Oczekiwanie na sparowanie z urządzeniem poprzez połączenie
Bluetooth (naciśnięcie klawisza skrótu w lewym górnym rogu i przytrzymanie
przez 3 sekundy)
c. Świeci ciągle: Pomyślnie sparowane
Świeci w kolorze czerwonym:
a. Miga: Niski poziom naładowania (20%)
b. Świeci ciągle: Ładowanie
c. Nie świeci: Całkowicie naładowany
Kolor fioletowy oznacza, że wskaźnik czerwony i niebieski są włączone
jednocześnie
4. Rolka
5. Klawisze skrótów
6. Aktywny obszar
7. Wskaźnik 2:
Wskaźnik pisma ręcznego:
a. Miga: Rysik znajduje się w aktywnym obszarze, ale nie dotyka tabletu z
piórem
b. Świeci ciągle: Rysik dotyka aktywnego obszaru
c. Nie świeci: Rysik znajduje się poza aktywnym obszarem
8. Przycisk zasilania
Deco Pro SW/MW – Krótki przewodnik
Połączenie przewodowe
Podłącz tablet z piórem do komputera. Tablet z piórem zostanie automatycznie
uruchomiony.
Połączenie bezprzewodowe
A. Połączenie z odbiornikiem Bluetooth
Podłącz odbiornik Bluetooth do komputera, a następnie przesuń przycisk
zasilania, aby włączyć tablet z piórem.
B. Bezpośrednie połączenie Bluetooth (tylko komputery z systemem Windows/
Mac OS)
1. Przesuń przycisk zasilania, aby włączyć tablet z piórem. Następnie naciśnij
klawisz skrótu w lewym górnym rogu i przytrzymaj przez 3 sekundy, aby
rozpocząć parowanie z urządzeniem poprzez połączenie Bluetooth (niebieski
wskaźnik miga szybko).
2. Włącz połączenie Bluetooth w komputerze, skonfiguruj i dodaj urządzenie
Bluetooth, wyszukaj nazwę urządzenia Deco Pro SW/MW i zakończ
parowanie poprzez połączenie Bluetooth, klikając nazwę urządzenia
(niebieski wskaźnik świeci ciągłym światłem).
3. Po użyciu przesuń przycisk zasilania, aby wyłączyć tablet z piórem.
II. Pierwsze kroki
1 2 3456 8
7

俄语okPAGE19PAGE20Примечание:Для лучшей производительности вашего устройства мы настоятельно рекомендуем регулярно проверять версию и обновлять драйвер с сайта XP-PEN.Если вам нужна дополнительная помощь, обращайтесь к нам по адресу:III. Установка драйвера1. Убедитесь, что ваш графический планшет/монитор подключен к компьютеру.2. Зайдите на веб-сайт XP-PEN (www.xp-pen.ru), выберите раздел «Поддержка» и нажмите «Скачать». Выберите модель продукта и загрузите последнюю версию драйвера в соответствии с вашей компьютерной системой.3. Следуйте инструкциям для завершения установки драйвера.serviceru@xp-pen.comwww.xp-pen.ruI. Обзор1. Разъем USB-C2. Трекпад/сенсор3. Индикатор 1 Синий цвет: a. Медленно мигает: нет соединения с Bluetooth b. Быстро мигает: ожидание сопряжения с Bluetooth (нажать и удерживать клавишу быстрого доступа в левом верхнем углу в течение 3 секунд) c. Постоянно светится: соединение установлено Красный цвет: a. Мигает: низкий заряд батареи (20%) b. Постоянно светится: идет зарядка c. Индикатор не светится: полный заряд Фиолетовый цвет указывает на то, что красный и синий индикаторы светятся одновременно4. Колесо управления5. Клавиши быстрого доступа6. Рабочая область7. Индикатор 2: Индикатор рукописного ввода: a. Мигает: стилус находится в рабочей области, но не касается планшета b. Постоянно светится: стилус соприкасается с рабочей областью c. Индикатор не светится: стилус находится за пределами рабочей области.8. Кнопка питанияКраткое руководство по эксплуатации Deco SW/MWПроводное подключениеПодключить планшет к компьютеру. Планшет запустится автоматически.Беспроводное подключениеA. Подключение к приемнику Bluetooth Подключить приемник Bluetooth к компьютеру, а затем нажать кнопку питания, чтобы включить планшет.B. Прямое соединение через Bluetooth (только для Windows/Mac OS) 1. Нажать кнопку питания, чтобы включить планшет. Затем нажать и удерживать в течение 3 секунд клавишу быстрого доступа в левом верхнем углу, чтобы выполнить сопряжение с Bluetooth (при этом быстро мигает синий индикатор). 2. Включить Bluetooth на компьютере, настроить и добавить устройство Bluetooth, найти имя устройства Deco Pro SW/MW и завершить сопряжение с Bluetooth, нажав на это имя (при этом синий индикатор светится постоянно). 3. Нажать кнопку питания, чтобы выключить планшет после использования.II. Начало работы1 2 3456 8
7

PAGE21PAGE22葡萄牙OKI. Visão geral
1. Porta USB-C
2. Trackpad/Touch
3. Indicador 1
Estado azul:
a. Piscando lentamente: sem Bluetooth conectado
b. Piscando rapidamente: aguardando o emparelhamento com conexão
Bluetooth (prima durante 3 segundos a tecla de atalho no canto superior
esquerdo)
c. Sempre ligado: emparelhado com sucesso
Estado vermelho:
a. Piscando: bateria fraca (20%)
b. Sempre ligado: carregando
c. Desligado: totalmente carregado
Uma cor roxa indica que o indicador vermelho e o azul estão ligados
simultaneamente
4. Tecla rotativa
5. Teclas de atalho
6. Área ativa
7. Indicador 2:
Indicador de caligrafia:
a. Piscando: a caneta está na área ativa, mas não está tocando no tablet
b. Sempre ligado: a caneta está em contato com a área ativa
c. Desligado: a caneta está fora da área ativa
8. Botão liga/desliga
Guia rápido da Deco Pro SW/MW
Conexão por cabo
Conecte o tablet ao computador. O tablet iniciará automaticamente.
Conexão sem fios
A. Conexão com o recetor Bluetooth
Ligue o recetor Bluetooth ao computador e, em seguida, ative o botão
liga/desliga para ligar o tablet.
B. Conexão Bluetooth direta (apenas Windows/Mac OS)
1. Ative o botão liga/desliga para ligar o tablet. Em seguida, prima durante 3
segundos a tecla de atalho no canto superior esquerdo para entrar no
emparelhamento Bluetooth (com o indicador azul piscando rapidamente).
2. Ligue o Bluetooth no computador, configure e adicione o dispositivo
Bluetooth, procure o nome do dispositivo Deco Pro SW/MW e complete o
emparelhamento Bluetooth clicando no nome do dispositivo (com o
indicador azul sempre ligado).
3. Desative o botão liga/desliga para desligar o tablet depois de usar.
II. Introdução
1 2 3456 8
7
Observação:
Para o melhor desempenho do seu dispositivo, recomendamos que você revise e
atualize o driver regularmente a partir do site XP-PEN.
Se precisar de mais alguma assistência, entre em contato conosco:IV. Instalar o driver
1. Certifique-se de que o seu tablet/display esteja conectado ao computador.
2. Visite o site XP-PEN (www.xp-pen.pt), escolha a seção Suporte e clique em
Download. Escolha o modelo do produto e faça o download do driver mais
recente de acordo com o sistema do seu computador.
3. Siga as instruções para terminar a instalação do driver.
www.xp-pen.ptservicebr@xp-pen.com
PAGE23PAGE24荷兰语okOpmerking:
Voor de beste prestaties van uw apparaat raden wij u aan de stuurprogramma's
regelmatig te controleren en bij te werken via de website van XP-PEN.
Als u verdere hulp nodig hebt, neem dan contact met ons op via:IV. Stuurprogramma installeren
1. Zorg dat uw tablet/display aangesloten is op de computer.
2. Bezoek de website van XP-PEN (www.xp-pen.com), kies de sectie Support
en klik op Download. Kies het productmodel en download het nieuwste
stuurprogramma dat bij uw computersysteem past.
3. Volg de aanwijzingen op om de installatie van het stuurprogramma te
voltooien.
[email protected]www.xp-pen.comI. Overzicht
1. USB-C-aansluiting
2. Trackpad/Touch
3. Lampje1
Blauw:
a. Knippert langzaam: Geen bluetooth aangesloten
b. Knippert snel: Wachten op koppeling met bluetooth-verbinding (druk 3
seconden lang op de sneltoets linksboven)
c. Altijd aan: Gekoppeld
Rood:
a. Knippert: Laag vermogen (20%)
b. Altijd aan: Opladen
c. Uit: Volledig opgeladen
Een paarse kleur geeft aan dat het rode en het blauwe lampje gelijktijdig aan zijn
4. Rol
5. Sneltoetsen
6. Actief gebied
7. Lampje2:
Handschriftlampje:
a. Knippert: De stylus bevindt zich in het actieve gebied, maar raakt de
pentablet niet aan
b. Altijd aan: De stylus is in contact met het actieve gebied
c. Uit: De stylus bevindt zich buiten het actieve gebied
8. Aan-uit-toets
Beknopte handleiding voor de
Deco Pro SW/MW Bekabelde verbinding
Sluit de pentablet aan op uw computer. De pentablet wordt automatisch
opgestart.
Draadloze verbinding
A. Verbinding met de bluetooth-ontvanger
Sluit de bluetooth-ontvanger aan op de computer en schakel vervolgens de
aan-uit-toets aan om de pentablet in te schakelen.
B. Directe bluetooth-verbinding (alleen Windows/MacOS)
1. Schakel de aan-uit-toets aan om de pentablet in te schakelen. Druk
vervolgens 3 seconden lang op de sneltoets linksboven om bluetooth-koppel
ing in te schakelen (waarbij het blauwe lampje snel knippert).
2. Zet bluetooth aan op de computer, stel bluetooth-apparaten in en voeg ze
toe, zoek naar de apparaatnaam Deco Pro SW/MW en voltooi de
bluetooth-koppeling door op de apparaatnaam te klikken (waarbij het
blauwe lampje altijd aan is).
3. Schakel de aan-uit-toets uit om de pentablet na gebruik uit te schakelen.
II. Aan de slag
1 2 3456 8
7

1
XP-PEN Driver
User Manual

2
The supported product models are as follows:
Pen tablet
Deco Fun series
Deco Fun XS/S/L

1
I. Connection
Please follow the quick guide that came with your pen tablet to connect your device.
II. Support system
Windows 7 and above, Mac OS X 10.10 and above
Certain products support Android 6.0 and above, see Table 1 for details
Certain products support Chrome OS 88 and above, see Table 2 for details
III. Download
Please download the corresponding driver from the XP-PEN official website
(https://www.xp-pen.com) according to the model of the product you purchased.
IV. Installation
After downloading is completed, please unzip the folder and operate the “.exe” file
(Windows) or “.dmg” (Mac) file, and then follow the prompts until installation is
completed.
Notes:
1. Before installation, please temporarily close the antivirus software and firewall,
as well as all opened software.
2. If other pen tablet drivers have been installed on the computer, please uninstall
them first.
3. It is recommended to restart the computer after installation is completed.
V. Introduction to Driver
After the driver is installed, connect your device to your computer, and then open
the driver to start customizing your device.
Notes:
This document describes all the functions of the driver, but the functions in the
actual use process will vary due to different connected devices. Please refer to the

2
device you actually purchased and used for specific functions.
Store configuration:
If you need to make the changed configuration still valid when you use it next time
after exiting the driver, please click the “OK” button on the left side of the driver
interface to save the settings after changing the configuration. If the settings are
successfully saved, the prompt “Configuration saved successfully” will be given;
otherwise, the changed configuration will be valid only when it is currently used.
1. Work area
1.1 Screen
If multiple monitors are used in copy mode (i.e. All monitors display the same
picture), the working area of the device will be mapped to all monitors. When the
pen moves in the work area, the cursor on all monitors will move at the same time.
If multiple monitors are used in extended mode, it is necessary to select the work
area of the device on the driver interface to map to the corresponding monitor.
The driver provides three modes to set the display area of the screen:
(1) Set full screen: Set the screen area of the selected monitor to the maximum.
(2) Set screen area: Use the mouse to manually set the display area of the screen.
Click the first position (top left) of the display area of the screen with the mouse, and
then click the second position (bottom right).
(3) Customize: Manually enter coordinates in the corresponding input boxes below X,
Y, W and H to customize the size of the display area of the screen, or use the mouse
to drag on the screen icon of the driver interface to adjust the display area of the
screen.
Show display number:
Identify all connected monitors, and numeric identifiers will be displayed in the lower
left corner of each monitor.
1.2 Tablet/Display

3
Set any part of the work area of the device to be mapped as the display area of the
screen. The driver provides four modes for selection:
(1) Full tablet area: Maximize the work area of the device.
(2) Tablet proportion: Scale the work area of the device and your screen in equal
proportions.
(3) Set tablet area: Use the stylus to click the "upper left corner" position and the
"lower right corner" position on the pen tablet to select the working area of the
device.
(4) Customize: Manually enter coordinates in the corresponding input boxes below X,
Y, W and H to determine the size of the work area of the device, or use the stylus to
drag on the device icon on the driver interface to set the size of the work area.
Rotation setting:
You may set the device to 0°, 90°, 180° & 270°. After finishing settings, you also need
to rotate the device to the corresponding direction.
Rotating 180° means to change to the left-handed mode.
2. Application
After selecting the application, set the function you want for this application.
a. Click the “+” on the top right of the application bar to open the application
selection interface.
b. Select software to be added from the running program or click the “browse”
button to add from the installed software; after the application is selected, the path
of the selected application will be displayed at the bottom.

4
c. Click the “OK” button at the bottom of the interface, and the application just
selected will be added to the application bar.
3. Pen settings
Pen keys:
Set functions of the pen keys here. You may click the drop-down menu to use
“Customize” to do so.
This manual suits for next models
1
Table of contents
Languages:
Other XPPen Graphic Tablet manuals

XPPen
XPPen Artist 22E Pro User manual

XPPen
XPPen Artist 12 User manual

XPPen
XPPen Artist 22 Plus Installation guide

XPPen
XPPen Artist 13.3 User manual

XPPen
XPPen Artist 22 Pro User manual

XPPen
XPPen Artist 15.6 User manual

XPPen
XPPen Deco 01 V2 User manual

XPPen
XPPen Deco Series User manual

XPPen
XPPen Star 06C User manual

XPPen
XPPen Artist 13.3 User manual

XPPen
XPPen Note + 2 User manual

XPPen
XPPen Artist 22 Pro User manual

XPPen
XPPen Deco mini4 User manual

XPPen
XPPen G960 User manual

XPPen
XPPen STAR 05 User manual

XPPen
XPPen Artist 12 Pro User manual

XPPen
XPPen Artist Pro 16TP User manual

XPPen
XPPen Artist 16 Pro User manual

XPPen
XPPen Artist 22E Pro User manual