manuals.online logo
Brands
  1. Home
  2. •
  3. Brands
  4. •
  5. Xylem
  6. •
  7. Control Unit
  8. •
  9. Xylem sensus HRI-Mei FS User manual

Xylem sensus HRI-Mei FS User manual

HRI-Mei FS
MS 8410
www.sensus.com
[email protected]
[email protected]
MS 8410 INT4 / 0002
Description HRI-Mei FS
Is a pulser that is plugged on the flow sensor MeiStream FS.
Basically it can be installed on a water meter for cold water
but it is especially stated for the application in connection with
MeiStream FS as a flow sensor for heat energy measurement.
• HRI-Mei FS captures the volume pulses of the meter (10l for
DN 40-100, 100l for DN 150-300)
• Forward and reverse flow is detected
• Balanced pulses will be exported at the output. Therefore
possible reverse pulses are detected, saved and
compensated.
Required tools
No tools are required when installing the HRI-Mei FS
Installation of the HRI-Mei FS
1. Release the round cover from the hinge and replace it
with the supplied semicircular cover
2. Open the cover for OD with light pressure against the left
side
3. Turn red ring all the way counterclockwise (ca. 10°); pulser
sockets are open
4. Remove aluminum foil from the bottom of the HRI-Mei FS
5. Insert the two hooks of the HRI-Mei diagonally from above
into the holes of the backfitting ring
6. Push HRI-Mei FS down until it lies flat on the backfitting
ring
7. Turn red ring all the way clockwise (ca. 10°); pulser
sockets are locked
8. Close cover of the OD socket
The HRI-Mei FS should be protected with a seal against
unauthorized taking off.
Pulse value and length of the HRI-Mei FS are preset and may
not be changed.
Installation notes
Disposal instructions
Technical data
Pulse value: 10, 25, 100 or 250 l/pulse alternative
Switch type: OC acc. EN 1434-2 (open Drain)
Maximum voltage: 28 Volt
Maximum power: 20 mA
Pulse length: ≥100 ms
Pulse pause: ≥100 ms
On position: ≥0,3V at 0,1 mA
Off position: ≥6 MΩ
Cable length: 3 m
Connection: white = plus, grey = minus
Protection class: IP 68
Power supply: Lithium battery (not replaceable)
Battery life: typ. 6 years operation + 1 year
storage
Ambient temperature: - 10 .... + 70 °C
Humidity: 100%
Installation manual Bedienungsanleitung
Material-Nr. 28505092
Remove aluminum foil from the bottom of
the HRI-Mei FS right before installation
This product contains lithium batteries.To
protect the environment it should not be
disposed of in household waste when its
serviceable life is over. Disposal can take
place through a Sensus Service Centre. If
however you want to take care of the dis-
posal yourself, please comply with the local
and national regulations for environmental
protection.
The meter head with put on HRI-Mei FS may
not be isolated
Danger of overheating!
The HRI-Mei FS may not be heated up
above 100 °C because of the Lithium cell!
Consider polarity at electrical connection!
pulse output
Pulsausgang
reverse pulse
Rückwärtsimpuls
Beschreibung HRI-Mei FS
Ist ein Impulsgeber, der auf das Volumenmessteil MeiStream
FS aufgesetzt wird. Prinzipiell kann er auch auf Wasserzähler
für den Kaltwasserbereich aufgebaut werden, ist jedoch speziell
für die Anwendung in Verbindung mit MeiStream FS als
Volumenmessteil für die Wärmemengemessung spezifiziert.
• HRI-Mei FS erfasst die Volumenimpulse des Zählers (10l für
DN40-100, 100l für DN 150-300)
• Vorwärts- und Rückwärtsfluss wird erkannt
• Am Ausgang werden saldierende Impulse ausgegeben.
D.h. evtl. Rückwärtsimpulse werden erkannt, gespeichert
und kompensiert.
Benötigte Werkzeuge
Zur Montage des HRI-Mei FS werden keine Werkzeuge benötigt
Montage des HRI-Mei FS
1. Lösen des runden Deckels vom Scharnier und Ersetzen
durch den mitgelieferten halbrunden Deckel.
2. Öffnen der Abdeckung für den OD mit leichten Druck nach
links.
3. Drehen des roten Rings entgegen dem Uhrzeigersinn
bis zum Anschlag (ca. 10°); die Steckplätze für die
Impulsgeber sind freigegeben.
4. Aluminiumfolie von der Unterseite des HRI-Mei FS
abziehen
5. Stecken der beiden Haken des HRI-Mei diagonal von oben
in die Aufnahmelöcher des Halterings.
6. Herunterdrücken des HRI-Mei FS bis er flach auf den
Haltering aufliegt.
7. Drehen des roten Rings im Uhrzeigersinn bis zum
Anschlag (ca. 10°); die Steckplätze für die Impulsgeber
sind verriegelt.
8. Schließen des Abdeckung des OD-Steckplatzes.
Der HRI-Mei FS sollte mit einer Plombe gegen unbefugtes
Abnehmen gesichert werden.
Die Pulswertigkeit und Pulslänge des HRI-Mei FS sind bereits
eingestellt und können nicht verändert werden
Installationshinweise
Entsorgungshinweise
Technische Daten
Pulswertigkeit: 10, 25, 100 oder 250 l/Impulse
alternative
Schalterart: OC gem. EN 1434-2 (open Drain)
Maximale Spannung: 28 Volt
Maximaler Strom: 20 mA
Pulslänge: ≥100 ms
Pulspause: ≥100 ms
Einschaltzustand: ≥0,3V bei 0,1 mA
Ausschaltzustand: ≥6 MΩ
Kabellänge: 3 m
Anschluss: weiß = plus, grau = minus
Schutzklasse: IP 68
Stromversorgung: Lithiumbatterie
(nicht austauschbar)
Batterielebensdauer: typ. 6 Jahre Betrieb + 1 Jahr
Lagerung
Umgebungstemperatur: - 10 .... + 70 °C
Luftfeuchtigkeit: 100%
Unmittelbar vor der Montage muss die
Aluminiumfolie an der Unterseite des HRI-Mei
abgezogen werden.
Der Zählerkopf mit aufgestecktem HRI-Mei FS darf
nicht isoliert werden, da sonst die Gefahr einer
Überhitzung besteht!
Wegen der Lithiumbatterie darf der HRI-Mei FS
nicht über 100 °C erwärmt werden
Beim elektrischen Anschluss unbedingt Polarität
beachten!
Dieses Produkt enthält Lithiumbatterien
und soll zum Schutz unserer Umwelt nach
Ablauf der Verwendungsdauer nicht im
Hausmüll entsorgt werden.
Die Entsorgung kann über ein Sensus
Service Center erfolgen. Sollten Sie die
Entsorgung dennoch selbst übernehmen,
beachten Sie bitte die örtlichen und nation-
alen Bestimmungen zum Umweltschutz.
The meter head with put on HRI-Mei FS may not be isolated
Danger of overheating!
Der Zählerkopf mit aufgestecktem HRI-Mei FS darf nicht iso-
liert erden, da sonst die Gefahr einer Überhitzung besteht!
HRI-Mei FS
MS 8410
www.sensus.com
[email protected]
[email protected]
MS 8410 INT4 / 0002
Descripción HRI-Mei FS
Es un emisor de pulso para el medidor MeiStream FS. Se puede
instalar en un contador de agua fría pero está especialmente
indicado para la utilización con Meistream FS como sensor de
flujo en la medida de energía calorífica.
• HRI-Mei FS captura los pulsos de volumen del contador (10l
para DN 40-100, 100l para DN 150-300)
• Detecta el flujo directo e inverso
• La salida de pulsos es balanceada, siendo los pulsos de
caudal inverso detectados, almacenados y compensados
Herramientas necesarias
No se requieren herramientas para instalar el HRI-Mei FS
Instalación del HRI-Mei FS
1. Retire la tapa circular del totalizador y monte la tapa
semicircular suministrada
2. Abra la tapa para el OD con una ligera presión en el lado
izquierdo
3. Gire el aro rojo en sentido anti horario hasta su tope
(10 ºC)
4. Retire la etiqueta metálica de debajo del HRI-Mei FS
5. Inserte los dos ganchos del HRI-Mei diagonalmente en los
agujeros del aro
6. Empuje el HRI-Mei FS hasta que quede plano encima del
totalizador
7. Gire el aro rojo en sentido horario (10°); el emisor queda
fijado
8. Cierre la tapa del OD
El HRI-Mei FS se debería proteger mediante sellado.
El valor y longitud de pulso del HRI-Mei FS se fijan en
producción y no se pueden cambiar.
Installation notes
Instrucciones de deshecho
Datos Técnicos
Valor de pulso: 10, 25, 100 o 250 l/pulso
Tipo de salida: OC ac. EN1434-2 (open Drain)
Voltaje máximo: 28 Voltios
Potencia máxima: 20 mA
Longitud de pulso: ≥100 ms
Pausa pulso: ≥100 ms
Posición On: ≥0,3V a 0,1 mA
Posición Off: ≥6 MΩ
Longitud de cable: 3 m
Conexión: blanco = positivo, gris = negativo
Protección: IP 68
Fuente de
alimentación:
Batería de litio (no reemplazable)
Duración batería: 6 años de funcionamiento + 1 año
de almacenamiento
Temperatura ambiente: - 10 .... + 70 °C
Humedad: 100%
Manual de instalación Manuel d’installation
Material-Nr. 28505092
Retire la pegatina metálica de debajo del
HRI-Mei FS antes de instalarlo.
Este producto contiene baterías de litio,
para proteger el medioambiente se debe
seguir las regulaciones local y nacional en
cuanto al correcto deshecho y eliminación.
También el desecho se puede llevar a cabo
a través del Sensus Service Center
El cabezal del contador con HRI-Mei FS no
se debe tapar ni aislar.
¡Peligro de sobrecalentamiento!
El HRI-Mei FS no se debe calentar por en-
cima de 100 ºC debido a la pila de Litio!
Considerar la polaridad en la conexión
eléctrica!
Salida de pulso
Impulsions ux
Pulso reverso
Impulsions reux
Description HRI-Mei FS
C’est un générateur d’impulsion qui est utilisé comme capteur de
débit pour les compteurs MeiStream eau chaude.
Il peut être installé dans un compteur d’eau froide, mais il a été
spécialement conçu pour être installé sur le Meistream FS pour le
comptage de l’énergie thermique.
• HRI-Mei FS mesure les impulsions volume : Pour les DN 50
à 100 -> 10 L par impulsion
• Détection du flux et du reflux
• Lecture en sortie des impulsions volume compensée. Cela
signifie que les impulsions volume retours sont détectées,
sauvegardées et compensées
Outils nécessaires
Aucuns outils n’est nécessaire pour l’installation du module
HRI-Mei FS
Installation du HRI-Mei FS
1. Remplacer le couvercle rond par le couvercle semi
circulaire fourni.
2. Retirer le capot du capteur OD avec une légère pression
sur le côté gauche de celui-ci.
3. Tourner la bague rouge dans le sens antihoraire (environ
10°) pour déverrouiller la sécurité.
4. Enlever la bande aluminium collée sur le dessous du
module.
5. Insérez les deux crochets du HRI-Mei dans les trous de la
bague prévus à cet effet.
6. Poussez le HRI-Mei FS jusqu’à ce qu’il repose à plat sur le
totalisateur.
7. Tourner la bague rouge dans le sens horaire (environ 10°)
pour verrouiller le module.
8. Remettre en place le capot du capteur OD.
Le HRI-Mei FS doit être protégé par un plomb contre
l’enlèvement non autorisé.
La durée et le poids d’impulsion sont réglés d’usine et ne
peuvent être modifiés sur site.
Précautions d’installations
Instructions pour le recyclage
Caractéristiques techniques
Poids d’impulsions : 10 Litres/impulsion (standard)
25, 100, 250 Litres/impulsion sur
demande
Type de contact : collecteur ouvert (conforme EN
1434-2)
Tension maximum
admissible :
28 Volt
Courant maximum
admissible :
20 mA
Durée impulsions : ≥ 100 ms
Durée mini entre 2
impulsions :
≥ 100 ms
Contact ouvert : ≥ 0,3V 0,1 mA
Contact fermé : ≥ 6 MΩ
Longueur câble : 3 m
Raccordement : Fil Blanc = borne +
Fil Gris = borne -
Classe de protection : IP 68
Alimentation : Batterie lithium non remplaçable
Durée de vie batterie : 6 ans + 1 an de stockage
Température d’utilisation : - 10 .... + 70 °C
Humidité : 100%
Enlever la bande aluminium collée sur le dessous
du module avant son installation.
La tête du compteur assemblée avec le HRI-Mei FS
ne doit pas être isolée. Risque de surchauffe !
Veiller à ce que le HRI-Mei FS ne soit pas exposé à
une température supérieure à 100 °C du fait qu’il
possède une batterie au Lithium.
Respecter la polarité lors du raccordement élect-
rique.
Ce produit contient des piles au lithium. An
de protéger l’environnement, il ne doit pas
être éliminé avec les ordures ménagères
lorsque les piles sont usées. L’élimination
peut avoir lieu grâce à un centre de
service Sensus. Si toutefois vous voulez
prendre soin vous-même l’élimination,
veuillez respecter les réglementations
locales et nationales pour la protection de
l’environnement.
El cabezal del contador con HRI-Mei FS no se debe tapar ni
aislar. ¡Peligro de sobrecalentamiento!
La tête du compteur assemblée avec le HRI-Mei FS ne doit
pas être isolée. Risque de surchauffe !


Other Xylem Control Unit manuals

Xylem Hoffman Specialty 792 User manual

Xylem

Xylem Hoffman Specialty 792 User manual

Xylem McDonnell & Miller PSE-800-M User manual

Xylem

Xylem McDonnell & Miller PSE-800-M User manual

Xylem Sensus CompactRF User manual

Xylem

Xylem Sensus CompactRF User manual

Xylem Bell & Gossett Hoffman Specialty 78 User manual

Xylem

Xylem Bell & Gossett Hoffman Specialty 78 User manual

Xylem SIRT 868 MHz User manual

Xylem

Xylem SIRT 868 MHz User manual

Xylem FST User manual

Xylem

Xylem FST User manual

Xylem McDonnell & Miller 750B-C3 Series User manual

Xylem

Xylem McDonnell & Miller 750B-C3 Series User manual

Xylem McDonnell & Miller GuardDog RB-122-E User manual

Xylem

Xylem McDonnell & Miller GuardDog RB-122-E User manual

Xylem McDonnell & Miller SA25A-15 Guide

Xylem

Xylem McDonnell & Miller SA25A-15 Guide

Xylem WTW MIQ/CHV PLUS User manual

Xylem

Xylem WTW MIQ/CHV PLUS User manual

Xylem McDonnell & Miller 69 Series User manual

Xylem

Xylem McDonnell & Miller 69 Series User manual

Xylem SI Analytics TITRATOR TitroLine 7500 KF User manual

Xylem

Xylem SI Analytics TITRATOR TitroLine 7500 KF User manual

Xylem FLYGT Pareo DCM 711 User manual

Xylem

Xylem FLYGT Pareo DCM 711 User manual

Xylem Hoffman Specialty 2000 Series User manual

Xylem

Xylem Hoffman Specialty 2000 Series User manual

Xylem Bell & Gossett GF60 User manual

Xylem

Xylem Bell & Gossett GF60 User manual

Xylem McDonnell & Miller RB-24E User manual

Xylem

Xylem McDonnell & Miller RB-24E User manual

Xylem Lowara Gen Series User manual

Xylem

Xylem Lowara Gen Series User manual

Xylem IQ SensorNet User manual

Xylem

Xylem IQ SensorNet User manual

Xylem LOWARA Aquavara IPC User manual

Xylem

Xylem LOWARA Aquavara IPC User manual

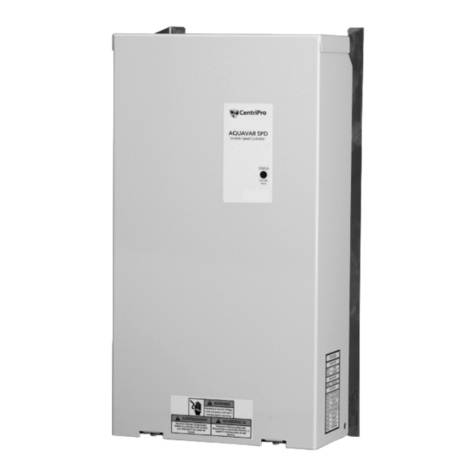
Xylem Aquavar SPD SPD20050 User manual

Xylem

Xylem Aquavar SPD SPD20050 User manual

Xylem McDonnell & Miller SA47-4 User manual

Xylem

Xylem McDonnell & Miller SA47-4 User manual

Popular Control Unit manuals by other brands

Telit Wireless Solutions GE866-QUAD Hardware user's guide

Telit Wireless Solutions

Telit Wireless Solutions GE866-QUAD Hardware user's guide

Carrier INFINITY SYSTXCCITC01 owner's manual

Carrier

Carrier INFINITY SYSTXCCITC01 owner's manual

Siemens SIRIUS 3RW44 manual

Siemens

Siemens SIRIUS 3RW44 manual

Sanhua RFGD Series instructions

Sanhua

Sanhua RFGD Series instructions

Burkert 2030 quick start

Burkert

Burkert 2030 quick start

Gaymar SPR Plus III Service manual

Gaymar

Gaymar SPR Plus III Service manual

Solid State Logic E Series user guide

Solid State Logic

Solid State Logic E Series user guide

Trenz Electronic TE0712 200 2C10 Series Schematics

Trenz Electronic

Trenz Electronic TE0712 200 2C10 Series Schematics

WAGO SPEEDWAY 767 Series manual

WAGO

WAGO SPEEDWAY 767 Series manual

Flame DUALKEY EURO MODUL manual

Flame

Flame DUALKEY EURO MODUL manual

Theben LUXOR Installation and operating instructions

Theben

Theben LUXOR Installation and operating instructions

Vimar NEVE UP 09594.0 manual

Vimar

Vimar NEVE UP 09594.0 manual

Circutor CDP-0 instruction manual

Circutor

Circutor CDP-0 instruction manual

MECHAPRO Slider SFX manual

MECHAPRO

MECHAPRO Slider SFX manual

Jomox T-RACKONIZER manual

Jomox

Jomox T-RACKONIZER manual

DFI OPS150-CS installation guide

DFI

DFI OPS150-CS installation guide

Ecolab MULTILINE 1000 Short operating instructions

Ecolab

Ecolab MULTILINE 1000 Short operating instructions

Praher Plastics K4 Assembly instructions

Praher Plastics

Praher Plastics K4 Assembly instructions

manuals.online logo
manuals.online logoBrands
  • About & Mission
  • Contact us
  • Privacy Policy
  • Terms and Conditions

Copyright 2025 Manuals.Online. All Rights Reserved.