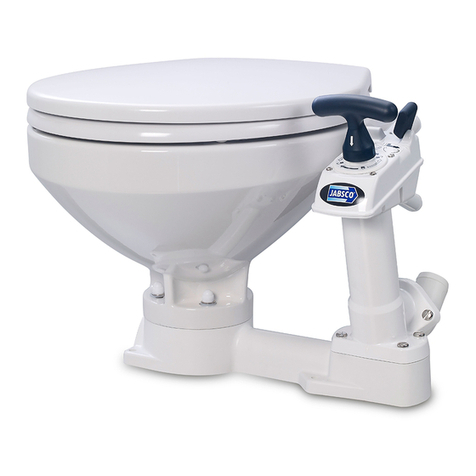
Xylem JABSCO Quiet Flush E2 Installation instructions

Quiet Flush E2
INSTALLATION & OPERATING MANUAL
Quiet Flush E2 − Toilette Électrique
MANUEL D’INSTALLATION ET D’UTILISATION
Quiet Flush E2 − Elektrische Toilette
INSTALLATIONS- UND BEDIENUNGSANLEITUNG
Quiet Flush E2 − WC Elettrico
INSTALLAZIONE E MANUALE D’USO
Quiet Flush E2 − Elektrisch Toilet
INSTALLATIE- EN BEDIENINGSHANDLEIDING
Quiet Flush E2 − Elektrisk Toalett
INSTALLATIONS- OCH BRUKSANVISNING
Quiet Flush E2 − Inodoro Eléctrico
MANUAL DE INSTALACIÓN Y OPERACIÓN
FR
DE
IT
NL
SE
ES

2
PURPOSE OF THIS MANUAL
The purpose of this manual is to provide necessary information for product
installation, operation, and maintenance. Electronic versions of this manual,
as well as data sheets and other information can be found on:
xylem.com/jabsco
MANUAL CONTENTS Page
Kit Contents & Pump Mounting 3
Installation Instructions 4
Controls & Electrics 7
Operation Instructions 10
Servicing & Winterization 11
Spare Parts 13
Troubleshooting 15
Warranty & Additional Information 15-16

3
Quiet Flush E2 Kit Contents
• Quiet Flush E2 Electric Toilet Assembly
• Seat and Lid
• Touch pad control panel and control box
• Solenoid valve kit (Fresh water version)
• Intake rinse pump kit (Raw water version)
• White 3/4” (19mm) inlet hose, 6ft (1.8m)
• 1” (25mm) > 1.5” (38mm) hose adaptor
• Installation & Operating Manual
• Datasheet
• Warning Label Kit
Mounting Configuration Options:
The Quiet Flush E2 can be mounted in multiple configurations to enable rear facing discharge pipework routing.The
toilet base can be mounted in 90° increments allowing the base to be mounted to the left, right or rear of the bowl. The
discharge pump can be rotated 180° to allow for rear discharge pipework routing.
To rotate discharge pump
Loosen base shroud screw,
remove base shroud and
motor cover.
Lift C-clip to release discharge
pump Discharge rotation completedRotate pump/motor,reinsert
C-clip to resecure discharge
pump
To rotate toilet base
• Remove toilet base to bowl mounting nuts, washers and bolts
• Rotate bowl in 90° increments to desired mounting position
• Re-install base to bowl mounting nuts, washers and bolts (ensure bowl to base o-ring is located correctly before
refitting)
• Tighten nuts to 4Nm (2.9 ft-lb)
Ceramic bowl
Discharge
port

4
Applications
Jabsco Quiet Flush electrically operated marine toilets can
be installed in both power and sailing craft, either above
or below the waterline, for use on sea, river, lake or canal.
CAUTION: Jabsco electrical toilets are
designed specifically for marine use. Consult
Jabsco for advice about possible non-marine
applications.
A typical installation may discharge the waste either over-
board (provided that your national and local regulations
allow this), or into a treatment system or into an on-board
holding tank (U.S.C.G. Marine Sanitation Devices Type I,
II and III).
Installation Instructions
The toilet is just one part of a system. Correct installation
of the whole system is essential if you want the toilet to
perform properly, operate reliably and safely, and give
satisfactory length of life.
Location
• Select a location that will give sufficient clearance all
round and above the bowl.
• The mounting surface must be flat, rigid and strong
enough to support the weight of both the toilet and
user. Ensure the surface is at least 2” (50mm) wider
and 2” (50mm) deeper than the base of the toilet and
pump assembly.
• Ensure there is sufficient clearance below the mount-
ing surface to be able to secure the mounting bolts,
and to be able to remove them for maintenance.
• Offer up the seat and lid to the bowl.They should be
able to swing up and over, so that they will not fall
forward when the craft heels or pitches.When they are
swung over they must be supported so that the hinges
are not strained. Remove the seat and lid and put
them aside until the installation is complete.
Mounting
Hardware Requirements:
• 3 x 5/16” (8mm) diameter stainless steel bolts or lag
bolts of length to suit the thickness of the surface
mounting
• 3 stainless steel nuts, preferably self-locking. If you do
not use self-locking nuts you will need some nut-lock-
ing compound.
• 6 stainless steel 5/16” (8mm) washers, 3 under the
bolt heads and 3 under the nuts if used.
• A tube of white silicone sealant.
• Offer up the toilet in the selected position and, using
the holes in the base as a guide, mark the positions
for the 3 bolt holes on the mounting surface. Remove
the toilet and drill 3 vertical holes of 5/16” (8mm)
diameter through the mounting surface.
• Now complete all of the rest of the installation before
you secure the bowl.
Through-Hull Fittings
Hardware Requirements:
• 3/4” (19mm) bore seacock for the rinse pump and, if
you are discharging the waste over board, a 1” (25mm)
bore seacock for the waste outlet.An additional 1” to
1-1/2” (25mm to 38mm) adapter is supplied with the
toilet.
• Follow the seacock manufacturer’s own instructions
concerning materials and methods of installation.
• Ensure the inlet seacock is positioned where it will be
below the waterline at all times when the craft is un-
derway, and also ensure that any other outlet seacock
is both aft of, and higher than, the inlet seacock.

5
NOTE: Total discharge head should not exceed 4 feet (1.2m). To retain water in the bowl, the discharge
hose should be looped upward about 8 to 10” (20-25cm) above the base of the toilet and as near to the
toilet as can be practically accomplished without creating an unsightly plumbing situation.
CAUTION: Do not apply flame to the hose. Do not apply flame or heat to the plastic hose tails on the
toilet, rinse pump or solenoid valve. Do not use oils, greases or synthetic lubricants. Do not apply sealing
compounds to any hose connections. Do not over tighten hose clips.Any of these actions may result in
cracking or breakage of the plastic parts.
HAZARD RISK: Through-Hull Fittings – FOLLOW THESE INSTRUCTIONS!
If the installation of the toilet results in it being connected to ANY through-hull fitting that may possibly be
below the waterline at ANY time, whether when the craft is at rest, underway and heeling or rolling or pitching,
you must install the toilet in accordance with these Installation Instructions. If you do not, water may flood in,
causing the craft to sink, which may result in loss of life.
HAZARD RISK: Accidental Damage – USE SEACOCKS!
If the toilet is connected to ANY through-hull fittings and if the toilet or pipework is damaged, water may flood
in causing the craft to sink, which may result in loss of life. Therefore, if you are making connections between
the toilet and ANY through-hull fittings that may possibly be below the waterline at ANYtime, full bore seacocks
must be fitted to those hull fittings,to allow them to be shut off.
The seacocks MUST also be positioned where they are easily accessible to all users of the toilet. If,for any reason,
it is not possible to do this, then secondary bore marine quality valves MUST be fitted to the hoses where they
are easily accessible.
HAZARD RISK: Bowl Rim Below Waterline – USE VENTED LOOPS!
If the toilet is connected to ANY through-hull fittings, and if the rim of the bowl falls below the waterline, water
may flood in causing the craft to sink, which may result in loss of life.
Therefore, if the rim of the toilet is less than 8” (20cm) above the waterline when the craft is at rest, or if there is
ANY possibility that the rim of the bowl may be below the waterline at ANY time, a ventilated anti-syphon loop
MUST be fitted in any pipework connected to a through-hull fitting,irrespective of whether inlet or outlet.
SPECIAL NOTE 1: The smaller bore inlet pipework is more hazardous than the larger outlet pipework.
Unless there is a ventilated anti-syphon loop in the inlet pipework, water will flow into the bowl whenever both
the inlet seacock is open and the rim of the bowl is below the actual waterline.
SPECIAL NOTE 2: Making a loop in the hose without fitting a vent may be just as hazardous as no loop at all,
because water may syphon over a loop. It is the vent that actually prevents the syphon.
Pipework – General Instructions for All Options
Hardware Requirements:
• Spiral reinforced smooth bore flexible hoses for both the 3/4” (19mm) inlet and the 1” (25mm) or 1.5” (38 mm) outlet
pipework. Toilet supplied with 1” (25 mm) to 1.5” (38 mm) adaptor
• Two stainless steel worm-drive hose clips for every hose tail connection.
• Secure the hose runs so that the hoses cannot move and chafe, and so that they do not exert any leverage on the hose
tail fittings to which they are connected, as this may cause adjacent joints to leak.
• Avoid sharp bends in the hoses as this may cause them to become kinked.
• Keep all pipework runs as straight and as short as possible, avoiding rising and falling over obstructions which creates
airlocks.
• If it is difficult to fit the hose onto the hose tails of the toilet or seacocks, lubricate it with water, or soften the hose by
dipping the end in hot water.
• Secure the ends of all hoses to the hose tails with two stainless steel worm-drive hose clips, ensuring that all inlet
connections are airtight and that all the outlet connections are water tight.
6
Fresh Water Rinse Pipework
Hardware Requirements:
CAUTION: Turn off power to the water pressure system pump, and open cold water faucet to
depressurize the system.
CAUTION: If you ever connect your water system to unregulated USA city water supplies, you MUST fit
or use a pressure regulator to prevent risk of flooding.
CAUTION: Pipework – Selection of Correct Method
You MUST select the correct method for the inlet pipework from 2 options and for the outlet pipework from
4 options, according to whether the toilet is above or below the waterline, and to whether it discharges the
waste overboard or into an on-board holding tank.
CAUTION: Do not position the ventilated anti-syphon loop between the inlet seacock and the rinse
pump , because it may prevent the rinse pump from priming.
• A ‘T’ piece that fits your boat’s pressurized water system pipework with a 1/2” (13mm) nipple going to the solenoid
valve.
• Install a ‘T’ fitting in the pressurized cold water pipework near to the toilet to provide a 1/2” (13mm) feed to the
solenoid valve.
• The solenoid valve should be mounted to a suitable secure surface using the supplied mounting plate in a dry position.
The valve can be mounted in any orientation.
• Install suitable pipework between the ‘T’ fitting and the 1/2” (13mm) inlet port on the solenoid valve.
• Run 3/4” (19mm) hose by the most direct route from the 3/4” (19mm) outlet port on the solenoid valve to the rinse
intake elbow.
Raw Water Rinse Pipework – 2 Options
• Install the raw water rinse pump in a dry position close to the toilet where it will not be more than 6ft (2m) above the
heeled waterline at any time.
• Fit the Pumpguard™ supplied to the inlet of the rinse pump.
• For more detail refer to the separate data sheet supplied with the rinse pump.
Option 1: Toilet below the heeled waterline
• You MUST fit a 3/4” (19mm) vented loop fitting, Jabsco part number 29015-0000.
• Run 3/4” (19mm) hose by the most direct route from the inlet seacock to the inlet of the Pumpguard™ fitted to the
rinse pump.
• Arrange a length of 3/4” (19mm) hose between the rinse pump outlet and the rinse intake elbow to form an anti-sy-
phon loop whose highest point is at least 8” (20cm) above the highest possible waterline, and fit the 3/4” (19mm)
vented loop at the highest point.
Option 2: Toilet always above the heeled waterline
• Run 3/4” (19mm) hose by the most direct route from the inlet seacock to the inlet of the Pumpguard™ fitted to the
rinse pump.
• Run 3/4” (19mm) hose by the most direct route from the outlet of the rinse pump to the rinse intake elbow.

7
CAUTION: Inadequate wire size will result in voltage drop,and will reduce performance.
NOTE: Ensure all pipework is arranged so that when the base, bowl and pump are installed, the hoses can
easily be attached to the inlet elbow and discharge port.
CAUTION: Remove fuse, or turn circuit breaker off, while installing controls and electrics.
Discharge Pipework – 4 Options
Option 1: Toilet below the waterline and discharging overboard
• A 1” (25mm) or 1.5” (38mm) vented loop MUST be fitted, Jabsco part number 29015-0020 1” (25mm) or 29015-0010
1.5” (38mm).
• Run the outlet hose from the non-return valve assembly to form a loop which is at least 8” (20cm) above the highest
possible waterline, and fit the vented loop at the highest point
Option 2: Toilet always above the heeled waterline and discharging overboard
• Run the outlet hose from the non-return valve assembly down to the outlet seacock by the most direct route.
Option 3: Toilet discharging into holding tank AND top of holding tank above non-return
valve at any time
• A 1” (25mm) or 1.5” (38mm) vented loop MUST be fitted, Jabsco part number 29015-0020 1” (25mm) or 29015-0010
1.5” (38mm).
• If there is ANY possibility that the discharge non-return valve assembly may be below the top of the tank at ANY time, a
ventilated anti-syphon loop must be fitted in the outlet pipework to ensure that the contents of the tank do not syphon
out through the bowl.
• Arrange the outlet hose to form a loop which is at least 8” (20cm) above the highest possible level that the top of the
tank may reach, and fit the vented loop at that highest point.
Option 4: Toilet discharging into holding tank, AND non-return valve always above the top
of holding tank
• Run the outlet hose by the most direct route from the non-return valve assembly down to the holding tank inlet.
Controls and Electrics
• The control box MUST be connected either directly to the battery or to a primary distribution board with sufficient spare
amperage capacity.
• Keep the total length of both the positive and negative wires to a minimum, selecting your wire size from the Electrical
Specifications table (page 8).
• Make all joints with appropriately rated marine grade terminal blocks and crimp connectors.
• Use marine grade multi-strand copper wire.
• Support all wires approximately every 18” (45cm) with plastic cable clips.
• Fit the correct size of fuseholder or circuit breaker, selected from the Electrical Specifications table.
If you connect the control box directly to the battery, fit your fuseholder or circuit breaker within 7” (17cm) of the battery.
• Select a position for the Control Panel that is convenient for both standing and seated users, and which allows you to
run the 10ft (3m) control cable to the toilet.
• To use the Jabsco Fascia Panel provided, drill a 5⁄8” (16mm) hole for the 6 way control cable connector. Screw the
control panel onto selected location with suitable counter sunk head screws. Clip on fascia panel.
• Slide the Heat Shrink Sleeve over the control cable. Plug in the 6 way control cable to the toilet, and carefully use a hot
air gun or hairdryer to seal the Heat Shrink Sleeve over the 6 way connector.
Fix the Control Box in a dry but accessible position close to the Flush pump.

8
Screw into place with four counter
sunk head screws
Fascia panel
Orange
Blue
Black
Black
2 x common
negative
Battery
(+ve and -ve)
6 pin plug
for two button
control panel
Waste pump
Rinse pump
or solenoid
• Connect the boat’s positive (+) feed to the red DC supply (+) input lead of the control box, and your boat’s negative (—)
return to the black DC supply (—) output lead of the control box.
• Connect the orange (+) output lead of the control box to the red (+) input lead of the flush pump motor. Connect the
black (—) lead of the flush pump to one of the common negative leads on the control box.
• Either connect the blue (+) output lead of the control box to any terminal of the solenoid valve or to the red (+) input
lead of the raw water rinse pump.
• Either connect the remaining terminal of the solenoid valve or the black (—) output lead of the rinse pump to one of the
common negative (—) leads on the control box.
ELECTRICAL SPECIFICATIONS
Voltage Amp Draw Fuse/Breaker
Wire size AWG (mm2) per foot (meter) of length*
0 – 13 ft
(0 – 4 m)
13 – 20 ft
(4 – 6 m)
20 – 40 ft
(6 – 12 m)
40 – 60 ft
(12 – 18 m)
12 Vdc 20 25 Amp 14 AWG
(2.5 mm²)
12 AWG
(4 mm²)
10 AWG
(4 mm²)
8 AWG
(6 mm²)
24 Vdc 10 15 Amp 16 AWG
(2.5 mm²)
16 AWG
(2.5 mm²)
14 AWG
(4 mm²)
12 AWG
(4 mm²)
*Wire length is the total distance from the battery to the flush pump and back to the battery.

9
Securing the Toilet Base & Installation of Motor Support
Note: To help with the installation, the discharge pump assembly may be removed prior to completing this task.
Bolt down the toilet base using the selected hardware (page 4).Tighten all fixings securely, if you are not using self locking
nut, use nut locking compound.
IMPORTANT: Install Motor Support.
• It is recommended the motor support block is fitted to the mounting surface rather than the motor casing.
• Ensure the mounting surface is clean and dry,
• Remove the 3m protective tape, position the support block so that it is directly under the rear section of the
motor when connected to the toilet base.
• Ensure it is located in the center of the motor, approximately 1" (2.5cm) from the rear of the motor casing.
• The support block must not overlap the rear of the motor casing as this will interfere with the motor cover.
• Press the support block down firmly to ensure the block adheres to the mounting surface.
• Connect the discharge pump to the base ensuring the quick release C-clip is securely snapped into place.
• Connect the discharge hose (if disconnected during base mounting section).
• Fit the seat and lid using the adjustable fastenings supplied with it.
Testing
• Before testing, ensure all connections are secure.
• Ensure that the battery is fully charged, and that the circuits are live.
• Turn on fresh water pump for the fresh water toilet or open the seacock for the raw water toilet.
• Refer to the section — Operating Instructions.
• To prime the solenoid valve or rinse pump on first installation, operate the ‘eco mode’ function several times until water
flows into the toilet bowl. Thereafter, they are automatically switched by the control panel.
• Inspect all hose connections and discharge pump assembly, ensure none are leaking. If any leaks are found, check all
hose clips are secure, check discharge pump C-clip is fully snapped into toilet base housing.
• ON COMPLETION — CLOSE BOTH SEACOCKS or turn off fresh water pump.
SAFETY: Ensure that this INSTRUCTION MANUAL reaches the owner, skipper or operator of the
craft as it contains essential safety information.
Operating Touch Pad Controller
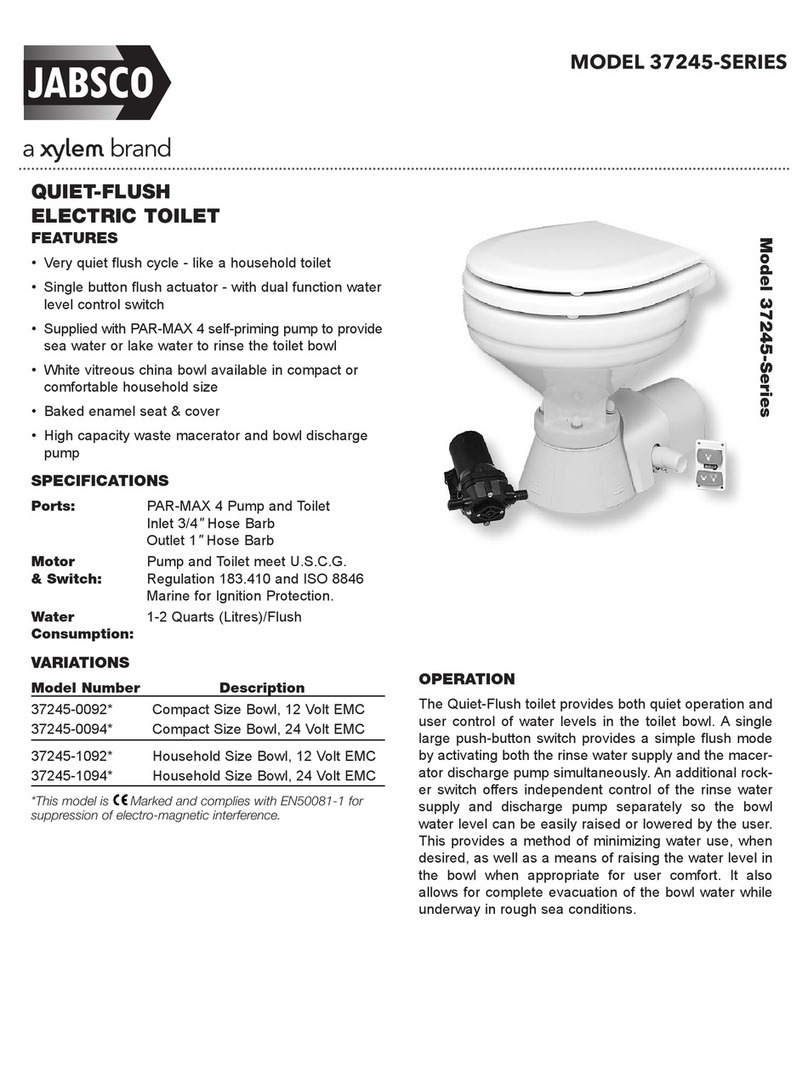
The Quiet Flush toilet range features a multifunction ‘one touch’ control pad offering three options:
The Quiet Flush E2 Toilet features a ‘one touch’ control pad offering three options – ‘eco flush’ and ‘normal flush’ and
‘dry bowl’
• Press ‘eco’ or ‘normal’ to activate flushing cycle. For first use the system will need to be primed.Activate ‘eco’ or ‘normal’
function 2-3 times to ensure system is fully primed with water held in the bottom of the bowl.
• ‘eco’ and ‘normal’ — Ensure rinse water is present in bowl before use. Use toilet, then activate desired flush function.
An additional volume of water will be added followed by the discharge function. Water will then be added to the bowl
ready for next use.
• ‘dry bowl’ is a hidden function — Activate this function to ensure bowl is discharged with no new rinse water added. This
will leave the bowl dry — desirable when sailing/motoring to avoid splash.To activate, press and hold both ‘eco flush’
and 'normal flush' simultaneously for 4 seconds, the discharge pump will activate without any additional rinse water
entering the bowl. Ensure ‘eco’ or ‘normal’ flush function is activated to add water to bowl before using the toilet.

10
Rinse Options
1. Fresh Water 2. Raw Water
1. Quiet Flush Series are supplied with a combined solenoid valve and double non-return valve for connection to any
existing pressurized water system capable of 3 GPM or more. The double non-return valve prevents back-flow from the
toilet into the potable water system. conforming to ABYC TH-29
2. Quiet Flush Series are supplied with a remote mounted self-priming pump to bring in sea, river or lake rinse water.
Complete with a Pumpguard™ strainer.
Operating Instructions
The toilet is one of the most used pieces of equipment on a boat. Correct operation of the toilet is essential for the safety
and comfort of all users on-board.
• Open inlet and outlet seacock or turn on fresh water pump (and secondary valves if fitted). Use touch pad controller as
as described above.
CAUTION: Only human waste and toilet paper should be put into the toilet. NEVER FLUSH ANY
FOREIGN MATERIALS such as paper towels, nappies, pre-moistened wipes, condoms, feminine hygiene
products, dental floss, household garbage, etc. The manufacturer does not accept responsibility for any
damage caused to the toilet or system from improper use.
CAUTION: Do NOT use aggressive chemical agents such as acetone or bleach because the
plastic parts may crack and the enamel coating on the seat and lid may blister.
CAUTION: Do not use abrasive pads on any part of the toilet and do not use cream cleaners
except for the bowl.
CAUTION: Do not use thick liquid toilet cleansers or bleach. They may damage the valves,
gaskets, seals and the enamel coating of the seat and lid.
HAZARD RISK: Accidental Damage – USE SEACOCKS!
If the toilet is connected to ANY through-hull fittings that are below the waterline at any time, and if the
toilet or pipework is damaged, water may flood in,causing the craft to sink, which may result in loss of life.
Therefore after every usage, both seacocks (or secondary valves) MUST be shut. Whenever your craft is
unattended, even if for only a short period of time, both seacocks (even if secondary valves are fitted)
MUST be shut.
• Ensure that ALL users understand how to operate the toilet systems correctly and safely, including seacocks and second-
ary valves.
• Take special care to instruct children and vistors.
Cleaning
• To clean the bowl, use any liquid or cream ceramic cleaner.
• To clean the rest of the toilet, including the seat and lid, use a non-abrasive liquid cleaner. Polish with a dry cloth only.
• To disinfect the toilet, use a liquid disinfectant diluted in accordance with the manufacturer’s instructions. You may
apply it to all parts of the toilet using a sponge or soft brush as necessary.

11
Servicing Instructions
Jabsco Quiet Flush electric toilets do not normally require maintenance during the season,provided that they are winterized
in the autumn.
• Regularly check all fastenings for tightness and leaks.
HAZARD RISK: Leaks – REPAIR LEAKS IMMEDIATELY!
If the toilet is connected to ANY through-hull fittings and, if the toilet or the pipework develops a minor
leak, it can suddenly become a major leak that allows water to flood in, causing the craft to sink,which may
result in loss of life.
Therefore, if ANY leak develops you must repair it immediately.
Control Panel and Control Box
• These ‘sealed for life’ units are maintenance free.
Solenoid Valve
• See separate solenoid valve data sheet.
Rinse Pump
• Please refer to the data sheet provided for the 31331-Series Rinse Pump.
Shaft Seal
• In the unlikely event that water begins to drip from the shaft of the flush pump motor,the seal may be worn and must
be replaced.
• Service instructions are contained in the service kit, see spare parts section for details.
Electrical Connections
• Carefully inspect all electrical connections, even if they are protected. Remove any corrosion on the terminals or in the
cables, and remake any loose or weak connections because these cause voltage drop when under load,which directly
reduces both rinse and flush pump performance.
Protect all electrical connections against moisture.
Servicing & Winterization — Preparation
Jabsco Quiet Flush electric toilets are designed to be user serviceable and no special skills are required.
• Flush the toilet in accordance with the Operating Instructions and ensure that all waste has left the discharge pipework
and that the bowl is empty.
• CLOSE BOTH SEACOCKS (even if secondary valves are fitted).
• SWITCH OFF POWER OR REMOVE FUSE.
• Be ready to clean up any water that may come out of the system.
Servicing — Winterization
In order to protect the toilet waste system over winter, the system can be fully drained and dismantled or left connected
and filled with non-toxic anti-freeze.
• Drain the complete system, both as protection against freeze damage and to discourage the growth in the pipework of
bacteria that cause unpleasant smells.
• Close seacocks, loosen hose clips and disconnect the hose ends from both the seacock hose tails.
Ensure that all water is drained from the toilet system.
• Fasten down the seat and lid to prevent use and attach a warning notice.

12
Filling system with non-toxic anti-freeze
CAUTION: If using antifreeze to winterize the toilet system, use only Propylene glycol (pink marine/
RV antifreeze).
• Flush enough antifreeze to ensure the antifreeze reaches any directional valves (if equipped) and the black water
holding tank(s).
• If the toilet is equipped with a fresh water flush, flush antifreeze through the rinse side of the system when winterizing
the pressurized fresh water system. If equipped with a raw or salt water flush, you must winterize the rinse side of the
system independent of the toilet according to the manufacturer’s recommendation for winterizing the rinse pump.
• Failure to properly winterize the toilet and its associated components could result in damage to the system.
HAZARD RISK: Seacocks opened by mistake – ATTACH WARNING NOTICE!
If you leave the toilet disassembled and, if the seacocks are opened when the craft is afloat,water will flood
in and may cause the craft to sink, which may result in the loss of life. Therefore, you MUST attach a warning
notice to the seacocks and, if possible wire the seacocks shut.
Seasonal Start-Up:
• Reconnect any hoses that have been loosened for winter draining, ensure all hose connections are secure with no leaks.
• Prime and test the system in accordance with the operating instructions.
• Check all hose connections for leaks again.
QUIET FLUSH E2 Quick Release — Flush Pump
The Quiet Flush discharge pump has been designed to be removed simply and quickly using minimal tools.This feature is
particularly useful if the discharge pump has become blocked by an item such as a wet wipe or sanitary towel.
• Before removing the pump, press the empty function on the control panel to remove as much water as possible
from the bowl and discharge line. NOW TURN OFF THE POWER TO THE TOILETAND CLOSE THE INLETAND DISCHARGE
SEACOCKS.
• Ensure an empty bucket is on hand to catch any residual water left in the pump housing.
• Loosen the screw at the back of the toilet base shroud; remove the shroud.
• Remove the motor cover.
• If there is enough flexibility in the discharge line, do not remove it from the pump assembly.
• If required, remove the discharge line from the pump assembly by lifting the retaining clip; carefully remove the
hose and place into a bucket. In most instances, the non-return valve will stop any residual water running out of the
discharge hose.
• Lift the large retaining clip at the top of the pump base unit until it clicks and is retained in place.
• Carefully remove the pump; tip any residual water into a bucket. Remove any material that has gathered in the pump
head and discharge port.
• Reinsert the pump into the toilet base; push down the retaining clip firmly until you hear it click.
• If the discharge port was removed, reinsert and push the retaining clip down until you hear a click.
• Check all connections are secure and the clips are securely in place.
• Turn on power to toilet and open seacocks; resume use of toilet.
• Dispose of removed material following local waste handling regulations.

13
1
1a
2
3
4
5
6
HOSE (NOT SHOWN)
27cMOTOR SUPPORT
(NOT SHOWN)
4a1” TO 1.5” DISCHARGE
HOSE ADAPTER
(25mm to 38mm)
7
8
9
10
28
11
12
13
14
14a
9a
18a
15
16
17
18
19
20
21 22
23
24
25
26
29
30
31
27
16a16b
Key Part name Qty. Raw Part Number A B C D E
1 Seat and cover (compact bowl) 1 29097-1000
1 Seat and cover (slow close, regular bowl) 1 58104-2000
1a Hinge kit - (1 pair) Compact seat 1 29098-1000
Hinge kit - (1 pair) Regular slow close 1 58105-3000
2a Compact bowl 1 29096-0001
2b Regular bowl 1 29126-0001
3 Intake elbow and seal 1 58107-1000
4 Hos-inlet, white 6ft (1.8m), 3/4” (19mm) 1 29035-1031
4a 1” to 1.5” hose adaptor (25mm to 38mm) 1 98023-0080
5 Motor cover 1 38509-1000
6 Motor slide cover 1 38010-1000
7a Toilet base screw M6 x 50LG 4 See kits 1
7b Shakeproof washer 4 See kits 1
7c Hex head nut M6 8 See kits 1
7d Washer - plastic 8 See kits 1
7e Washer SS 4 See kits 1
Spare Parts

14
8 Base O-ring 1 44101-1000 1
9 Base cover 1 38508-1000
9a Base cover screw 1 91045-0441 1
10 Base mounting feet 4 38510-1000
11 Discharge pump clip 1 38504-1000
12 Toilet base 1 See kits 1
13 O-ring 1 See kits 1 1
14 Waste pump housing 1 38500-1000 1
14a O-ring 1 See kits 1 1 1 1
15 Joker valve 1 44106-1000 1 1 1
16a Discharge port - straight 1 See kits 1
16b Discharge port - 90º 1 See kits 1
17 Discharge port clip 1 See kits 1 1
18 Impeller 1 38502-1000 1
18a Impeller set screw 1 Included with impeller 1
19 O-ring 1 See kits 1 1
20 Motor adaptor 1 38501-1000 1
21 Screw 10-32x 3/4 PHPN 2 See kits 1
22 Washer seal 2 See kits 1 1
23 Lock washer 4 See kits 1
24 SS screw 4 See kits 1
25 Shaft seal 1 See kits 1 1
26 Slinger 1 See kits 1 1
27 Motor 12V 1 See kits 1
Motor 24V 1 See kits 1
27c Motor support 1 38511-1000
28 Control panel & control box 1 38580-1000
29 Solenoid valve 12V 1 37038-2012
Solenoid valve 24V 1 37038-2024
30 Rinse pump 12V 1 31331-0092
Rinse pump 24V 1 31331-0094
31 Rinse pump strainer 1 46400-9500
See Kits Available
Kit Description Part No.
AService Kit 38595-1000
BPump Assembly Kit 12V 38072-0092
Pump Assembly Kit 24V 38072-0094
CBase Assembly 38503-1000
DDischarge Port Kit Straight 38505-1000
EDischarge Port Kit 90º 38506-1000

15
Troubleshooting Probable Cuase Solution
Bowl fills with rinse water
when not in use
Fresh Water System - Debris within
solenoid valve
Isolate solenoid valve, check for debris within valve
seat, rinse valve body, rinse filtter, replace valve.
Raw Water System - Rinse Pump Isolate rinse pump, check valve assembly for
debris. Clean.
Bowl does not empty Blocked pump or blocked
discharge pipework
Check valves within discharge system are open
Check holding tank is not full, check holding tank
vent is not blocked
Check toilet discharge pump, non-return valve and
discharge pipework for blockages
Water not entering bowl
Inlet hose leakage Check inlet hose connections are airtight
No power to solenoid valve or
rinse pump
Check power to solenoid valve or raw water rinse
pump
Make sure the fresh water pump is on
Make sure intake seacock is open and not blocked
Check PumpguardTM cap is tight and not blocked
Bowl drains after flushing
toilet
Incorrect discharge pipework
arrangement
Ensure discharge pipework is looped above base
of toilet with a vented loop installed, see installa-
tion manual
Water leaking from waste
pump
Quick release clip not fully
insterted
Ensure discharge pump is fully inserted into toilet
base, ensure quick release clip is fully engaged
Loose hose clips Ensure all hose clips are fully tightened
Shaft seal and/or o-ring worn Replace seal and/or o-ring
Troubleshooting
Warranty
XYLEM LIMITED WARRANTY WARRANTS THIS PRODUCT TO BE FREE OF DEFECTS AND WORKMANSHIP FOR A PERIOD OF 1 YEAR FROM DATE
OF MANUFACTURE. THE WARRANTY IS EXCLUSIVE AND IN LIEU OF ANY AND ALL OTHER EXPRESS OR IMPLIED WARRANTIES, GUARANTEES,
CONDITIONS OR TERMS OF WHATEVER NATURE RELATING TO THE GOODS PROVIDED HEREUNDER, INCLUDING WITHOUT LIMITATION ANY
IMPLIED WARRANTIES OF MERCHANTABILITY AND FITNESS FOR A PARTICULAR PURPOSE, WHICH ARE HEREBY EXPRESSLY DISCLAIMED AND
EXCLUDED. EXCEPT AS OTHERWISE PROVIDED BY LAW, BUYER’S EXCLUSIVE REMEDY AND SELLER’S AGGREGATE LIABILITY FOR BREACH OF
ANY OF THE FOREGOING WARRANTIES ARE LIMITED TO REPAIRING OR REPLACING THE PRODUCT AND SHALL IN ALL CASES BE LIMITED TO THE
AMOUNT PAID BY THE BUYER HEREUNDER. IN NO EVENT IS SELLER LIABLE FOR ANY OTHER FORM OF DAMAGES, WHETHER DIRECT,INDIRECT,
LIQUIDATED, INCIDENTAL, CONSEQUENTIAL, PUNITIVE, EXEMPLARY OR SPECIAL DAMAGES, INCLUDING BUT NOT LIMITED TO LOSS OF PROFIT,
LOSS OF ANTICIPATED SAVINGS OR REVENUE, LOSS OF INCOME, LOSS OF BUSINESS, LOSS OF PRODUCTION,LOSS OF OPPORTUNITY OR LOSS
OF REPUTATION. THIS WARRANTY IS ONLYA REPRESENTATION OFTHE COMPLETE LIMITED WARRANTY. FOR A DETAILED EXPLANATION, PLEASE
VISIT US AT www.xylem.com/en-us/support/, CALL OUR OFFICE NUMBER LISTED, OR WRITE A LETTER TO YOUR REGIONAL OFFICE.

16
1
2012/19/EU
Waste Electrical & Electronic
Equipment (WEEE)
1.1 End of life product disposal
Handle and dispose of all waste in compliance with local laws and regulations.
EU only: Correct disposal of this product — WEEE Directive on waste electrical
and electronic equipment.
This marking on the product, accessories or literature indicates that the product should
not be disposed of with other waste at the end of its working life.
To prevent possible harm to the environment or human health from uncontrolled waste
disposal, please separate these items from other types of waste and recycle them
responsibly to promote the sustainable reuse of material resources.
Waste from electrical and electronic equipment can be returned to the producer or
distributor.
1.2
Изхвърляне на продукта в края на
живота му
Управлявайте иизхвърляйте всички отпадъци в
съответствие с местните закони иразпоредби.
Само за ЕС; Правилноизхвърляне натози продукт –
Директива за отпадъците от електрическо иелектронно
оборудване (ОЕЕО).
Тази маркировка върху продукта, аксесоарите или
документите показва, че продуктът нетрябва да се
изхвърля с другиотпадъци в края натози работен живот.
За да предотвратите възможна вреда за околната среда
или човешкото здраве от неконтролирано изхвърляне на
отпадъци, моля, отделете тези предмети от други видове
отпадъци и гирециклирайте отговорно, за да насърчите
устойчивото повторно използване наматериалните
ресурси.
Отпадъците от електрическо иелектроннооборудване
могат да бъдат върнати на производителя.
1.3 Likvidace produktu na konci životnosti
S veškerým odpadem zacházejte a likvidujte jej v souladu s
místními zákony a předpisy.
platí pouze v EU; Správná likvidace tohoto produktu -
směrnice WEEE o odpadu z elektrických a elektronických
zařízení.
Tato značka na výrobku, příslušenství nebo návodu či
doprovodných dokumentech označuje, že po skončení této
životnosti by výrobek neměl být likvidován spolu s jiným
odpadem.
Abyste předešli možnému poškození životního prostředí nebo
lidského zdraví nekontrolovanou likvidací odpadu, oddělte tyto
položky od ostatních druhů odpadu a recyklujte je odpovědně a
podpořte tak udržitelné opětovné použití materiálových zdrojů.
Odpad z elektrických a elektronických zařízení lze vrátit výrobci.
1.4 Bortskaffelse af end-of-life produkter
Håndter og bortskaf alt affald i overensstemmelse med lokale
love og regler.
Kun EU; Korrekt bortskaffelse af dette produkt - WEEE-
direktivet om bortskaffelse af elektrisk og elektronisk
udstyr.
Denne mærkning på produktet, tilbehør eller litteratur indikerer,
at produktet ikke bør bortskaffes sammen med andet affald i
slutningen af produktets levetid.
For at forhindre mulig skade på miljøet eller menneskers
sundhed ved ukontrolleret bortskaffelse af affald, skal du
adskille disse genstande fra andre typer affald og genbruge
dem ansvarligt for at fremme bæredygtig genbrug af materielle
ressourcer.
Affald fra elektrisk og elektronisk udstyr kan returneres til
producenten.
1.5 Entsorgung von Produkten am Ende
ihrer Nutzungsdauer
Behandeln und entsorgen Sie alle Abfälle unter Einhaltung der
örtlichen Gesetze und Vorschriften.
Gilt nur für die EU: Fachgerechte Entsorgung dieses
Produkts – WEEE-Richtlinie 2012/19/EU über Elektro- und
Elektronik-Altgeräte.
Diese Aufschrift auf dem Produkt, dem Zubehör oder der
Dokumentation weist darauf hin, dass das Produkt am Ende
seiner Lebensdauer nicht zusammen mit anderem Abfall
entsorgt werden darf.
Um mögliche Schäden für die Umwelt oder die menschliche
Gesundheit durch unkontrollierte Abfallentsorgung zu
vermeiden, trennen Sie diese Gegenstände bitte von anderen
Abfallarten und recyceln Sie sie verantwortungsvoll, um die
nachhaltige Wiederverwendung von Materialressourcen zu
fördern.
Abfälle von Elektro- und Elektronikgeräten können an den
Hersteller zurückgegeben werden.
1.6
Διάθεση προϊόντος που έχει φτάσει στο
τέλος του κύκλου της ζωής του
Διαχειριστείτε και διαθέστε όλα τααπόβλητα σύμφωνα με τους
τοπικούς νόμους και κανονισμούς.
Μόνο για την ΕΕ Ορθή διάθεση αυτού του προϊόντος
σύμφωνα με την Οδηγία για τααπόβλητα ηλεκτρικού και
ηλεκτρονικού εξοπλισμού (ΑΗΗΕ).
Ηπαρούσα σήμανση στο προϊόν, ταεξαρτήματα ή τα
εγχειρίδια υποδεικνύει ότι τοπροϊόν δεν θα πρέπει να
διατίθεται μαζί με άλλααπόβλητα στο τέλος του κύκλου της
ζωής του.
Παρακαλούμε διαχωρίζετε ταπροϊόντααυτάαπό άλλους
τύπους αποβλήτων, ούτως ώστε νααποτρέψετε πιθανές
ζημίες στο περιβάλλον ή την ανθρώπινη υγεία που μπορεί να
προκληθούν από τημη ελεγχόμενη διάθεση αποβλήτων, και
ανακυκλώνετέ τα υπεύθυναμε σκοπό ναπροάγετε τη βιώσιμη
επαναχρησιμοποίηση υλικών πόρων.
Τα απόβλητα ηλεκτρικού και ηλεκτρονικού εξοπλισμού
μπορούν ναεπιστρέφονται στον παραγωγό.
1.7 Desechado al final de la vida útil del
producto
Manipule y deseche todos los residuos de acuerdo con las leyes y
las normativas locales.
Solo UE: desechado de las baterías de este
producto – Directiva RAEE sobre de aparatos eléctricos y
electrónicos.
Esta marca en el producto, los accesorios o la documentación
indica que el producto no se debe desechar con otros residuos al
final de su vida útil.
Para evitar un posible daño en el entorno o la salud humana
derivado del desechado de residuos no controlados, separe
esos elementos de otros tipos de residuos y recíclelos de forma
responsable para promover la reutilización sostenible de los
recursos materiales.
Residuos de los aparatos eléctricos y electrónicos se pueden
devolver al fabricante o distribuidor.
1.8 Kõrvaldamine elutsükli lõppedes
Järgige jäätmete kõrvaldamisel kõiki kohalikke seadusseid ja
eeskirju.
Ainult Euroopa Liidus: toote õigeks kõrvaldamiseks
järgige elektri- ja elektroonikaseadmete direktiivi
WEEE.
Kui tootel, lisatarvikutel või dokumentidel on ülalesitatud

17
2
märgistus, tähendab see seda, et toodet ei tohi elutsükli
lõppedes kõrvaldada koos muude jäätmetega.
Jäätmete kontrollimata kõrvaldamise tõttu tekkida võivate
keskkondlike või terviseseisundi kahjude vältimiseks eraldage
need esemed muud tüüpi jäätmetest ja taaskäidelge neid
vastutustundlikult, et edendada materiaalsete ressursside
jätkusuutlikku taaskasutamist.
Elektri- ja elektroonikaseadmetest tekkinud jäätmed võib
tagastada tootjale või edasimüüjale.
1.9 Tuotteen hävittäminen sen elinkaaren
lopussa
Käsittele ja hävitä kaikki jätteet paikallisten lakien ja asetusten
mukaisesti.
Vain EU; Tämän tuotteen oikeaoppinen hävittäminen
– WEEE:n sähkö- ja elektroniikkalaiteromua koskeva
direktiivi.
Tämä tuotteessa, lisälaitteessa tai kirjallisuustiedoissa oleva
merkintä osoittaa, että tuotetta ei saa hävittää yhdessä muun
jätteen mukana sen elinkaaren lopussa.
Välttyäksesi jätteiden hallitsemattoman hävittämisen
aiheuttamilta mahdollisilta ympäristöhaitoilta tai ihmisille
aiheutuvilta terveysriskeiltä, lajittele nämä tavarat erilleen
muun tyyppisistä jätteistä ja kierrätä ne vastuullisesti
edistääksesi aineellisten resurssien kestävää uudelleenkäyttöä.
Sähkö- ja elektroniikkalaiteromu voidaan palauttaa
valmistajalle.
1.10 Élimination des produits en fin de vie
Traiter et éliminer tous les déchets conformément aux lois et
réglementations locales.
UE uniquement; Élimination correcte de ce produit
- Directive DEEE relative aux déchets d'équipements
électriques et électroniques.
Cette mention sur le produit, les accessoires ou la
documentation indique qu'il ne faut pas jeter le produit avec
d'autres déchets suite à la fin de cette durée de vie.
Par mesure de prévention pour l'environnement et pour la
santé humaine, veuillez séparer ces composants des autres
types de déchets et les recycler conformément au principe de
réutilisation des ressources matérielles.
Les déchets d'équipements électriques et électroniques peuvent
être renvoyés au fabricant.
1.11 A termék ártalmatlanítása az
élettartama végén
Az összes hulladékot kezelje és ártalmatlanítsa a helyi
jogszabályoknak és előírásoknak megfelelően.
Csak EU; A termék megfelelő ártalmatlanítása – WEEE
irányelv az elektromos és elektronikus berendezések
hulladékairól.
A terméken, a tartozékokon vagy a dokumentáción látható ezen
jelzés azt mutatja, hogy a terméket az élettartama végén nem
szabad más hulladékkal együtt kezelni.
Az ellenőrizetlen hulladékkezelés következtében a környezetre
vagy az emberi egészségre gyakorolt esetleges károk elkerülése
érdekében, kérjük, különítse el ezeket a tárgyakat a más
típusú hulladékoktól, és az anyagi erőforrások fenntartható
újrafelhasználása érdekében felelősségteljesen hasznosítsa
újra azokat.
Az elektromos és elektronikus berendezésekből származó
hulladékot a gyártó visszaveszi.
1.12 Förgun vöru við lok líftíma hennar
Meðhöndla skal og farga öllum úrgangi í samræmi við gildandi
lög og reglugerðir.
Eingöngu innan ESB; Rétt förgun þessarar vöru - WEEE
tilskipun um raf- og rafeindatækjaúrgang.
Ef þetta merki er á vöru, fylgihlut eða lesefni gefur það til kynna
að vörunni skuli ekki farga með öðrum úrgangi við lok líftíma
hennar.
Til að koma í veg fyrir mögulegan skaða á umhverfinu og heilsu
manna sem hlýst af óhindraðri förgun úrgangs skaltu aðskilja
þessa hluti frá öðrum úrgangi og endurvinna þá á ábyrgan hátt
til að stuðla að sjálfbærri endurnýtingu hráefna.
Raf- og rafeindatækjaúrgangi er hægt að skila aftur til
framleiðanda.
1.13 Nebenaudojamų produktų išmetimas
Visų atliekų tvarkymas ir išmetimas laikantis vietinių įstatymų
ir taisyklių.
Tik ES; Tinkamas šio produkto išmetimas – EEĮ direktyva
dėl elektros ir elektroninės įrangos atliekų.
Šis produkto, priedų ar literatūros žymėjimas nurodo, kad
pasibaigus produkto veikimui, jis neturi būti išmetamas kartu su
kitomis šiukšlėmis.
Siekiant išvengti galimo pavojaus aplinkai ar žmonių sveikatai
kilusio dėl netinkamo atliekų šalinimo, prašome atskirti šiuos
daiktus nuo kitų atliekų tipų ir juos rūšiuoti atsakingai skatinant
tvarų išteklių naudojimą.
Elektros ir elektroninės įrangos atliekas galite grąžinti
gamintojui.
1.14 Inzameling en recycling van
afgedankte elektrische en elektronische
apparatuur
Verwerk al uw afval en voer het af conform de lokale wetten en
regelgeving.
Alleen voor de EU; correcte afvoer van dit product - AEEA-
verordening betreffende afgedankte elektrische en
elektronische apparatuur.
Deze markering op het product, op de accessoires of op de
documentatie geeft aan dat het product op het einde van zijn
levensduur niet mag worden weggegooid met ander afval.
Om mogelijke schade aan het milieu of aan de volksgezondheid
te voorkomen door ongecontroleerd afval, moeten deze
producten worden gescheiden van ander soort afval en op
verantwoorde wijze worden gerecycled om het duurzame
hergebruik van grondstoffen te promoten.
Afval van elektrische en elektronische apparatuur mag worden
teruggestuurd naar de producent.
1.15 Avfallshåndtering av produktet
Håndter og kast alt avfall i samsvar med lokale regler og
forskrifter.
Kun i EU Riktig avfallshåndtering av dette
produktet – WEEE-direktivet om innsamling og
gjenvinning av elektrisk og elektronisk avfall.
Denne fremstillingen av produktet, tilbehøret eller litteraturen,
angir at produktet ikke skal kastes med annet avfall.
For å hindre potensiell skade på miljøet eller menneskers helse
fra ukontrollert avfallshåndtering, må du skille disse produktene
fra andre typer avfall og resirkulere dem på en ansvarlig måte for
å fremme bærekraftig gjenbruk av materielle ressurser.
Avfall fra elektrisk og elektronisk utstyr kan returneres til
produsenten.
1.16 Smaltimento al termine della vita utile
del prodotto.
Maneggiare e smaltire tutti i rifiuti in conformità con le leggi e le
normative locali.
Solo UE: smaltimento corretto di questo prodotto -
Direttiva WEEE sullo smaltimento di apparecchiature
elettriche elettroniche.
Questo marchio sul prodotto, sugli accessori o sulla
documentazione indica che il prodotto non deve essere smaltito
con altri rifiuti al termine della sua vita utile.
Per evitare possibili danni all'ambiente o alla salute umana
causati dallo smaltimento incontrollato dei rifiuti, separare
questi articoli da altri tipi di rifiuti e riciclarli in modo
responsabile per promuovere il riutilizzo sostenibile delle
risorse materiali.
Le apparecchiature elettroniche elettriche di scarto possono
essere restituite al produttore o al rivenditore.
WEEE Directive Insert 43696-0000

www.xylem.com/jabsco
© 2022 Xylem Inc. All rights reserved
Jabsco is a trademark of Xylem Inc. or one of its subsidiaries
43000-0619 Rev. A 03/2022
Xylem Inc. — USA
17942 Cowan
Irvine, CA 92614
Xylem Inc. — HUNGARY KFT
2700 Cegléd
Külso-Kátai út 41
Xylem Inc. — UK
Harlow Innovation Park,
London Road, Harlow, Essex, CM17 9LX
Xylem Inc. — AUSTRALIA
2/2 Capicure Drive
Eastern Creek, NSW 2766
Xylem Inc. — CHINA
30/F Tower A, 100 Zunyi Road, Shanghai
200051
Table of contents
Other Xylem Toilet manuals

Xylem
Xylem JABSCO Twist'N'Lock COMPACT 29090-3000 User manual

Xylem
Xylem Jabsco 37010 Series User manual

Xylem
Xylem Jabsco 37010 Series User manual

Xylem
Xylem JABSCO 29120-5000 User manual

Xylem
Xylem JABSCO 37245 Series User manual

Xylem
Xylem JABSCO 37075 Series User manual

Xylem
Xylem Jabsco Lite Flush User manual

Xylem
Xylem Jabsco 37045 Series User manual
Popular Toilet manuals by other brands

Kohler
Kohler K-4108 Homeowner's guide

Helvex
Helvex ATM installation guide

Drive DeVilbiss Healthcare
Drive DeVilbiss Healthcare TICCO Instructions for use

Toto
Toto UT105UV installation manual

BEMIS
BEMIS bioBidet USPA 6800U owner's manual

Signature Hardware
Signature Hardware SITKA SHSK241S quick start guide