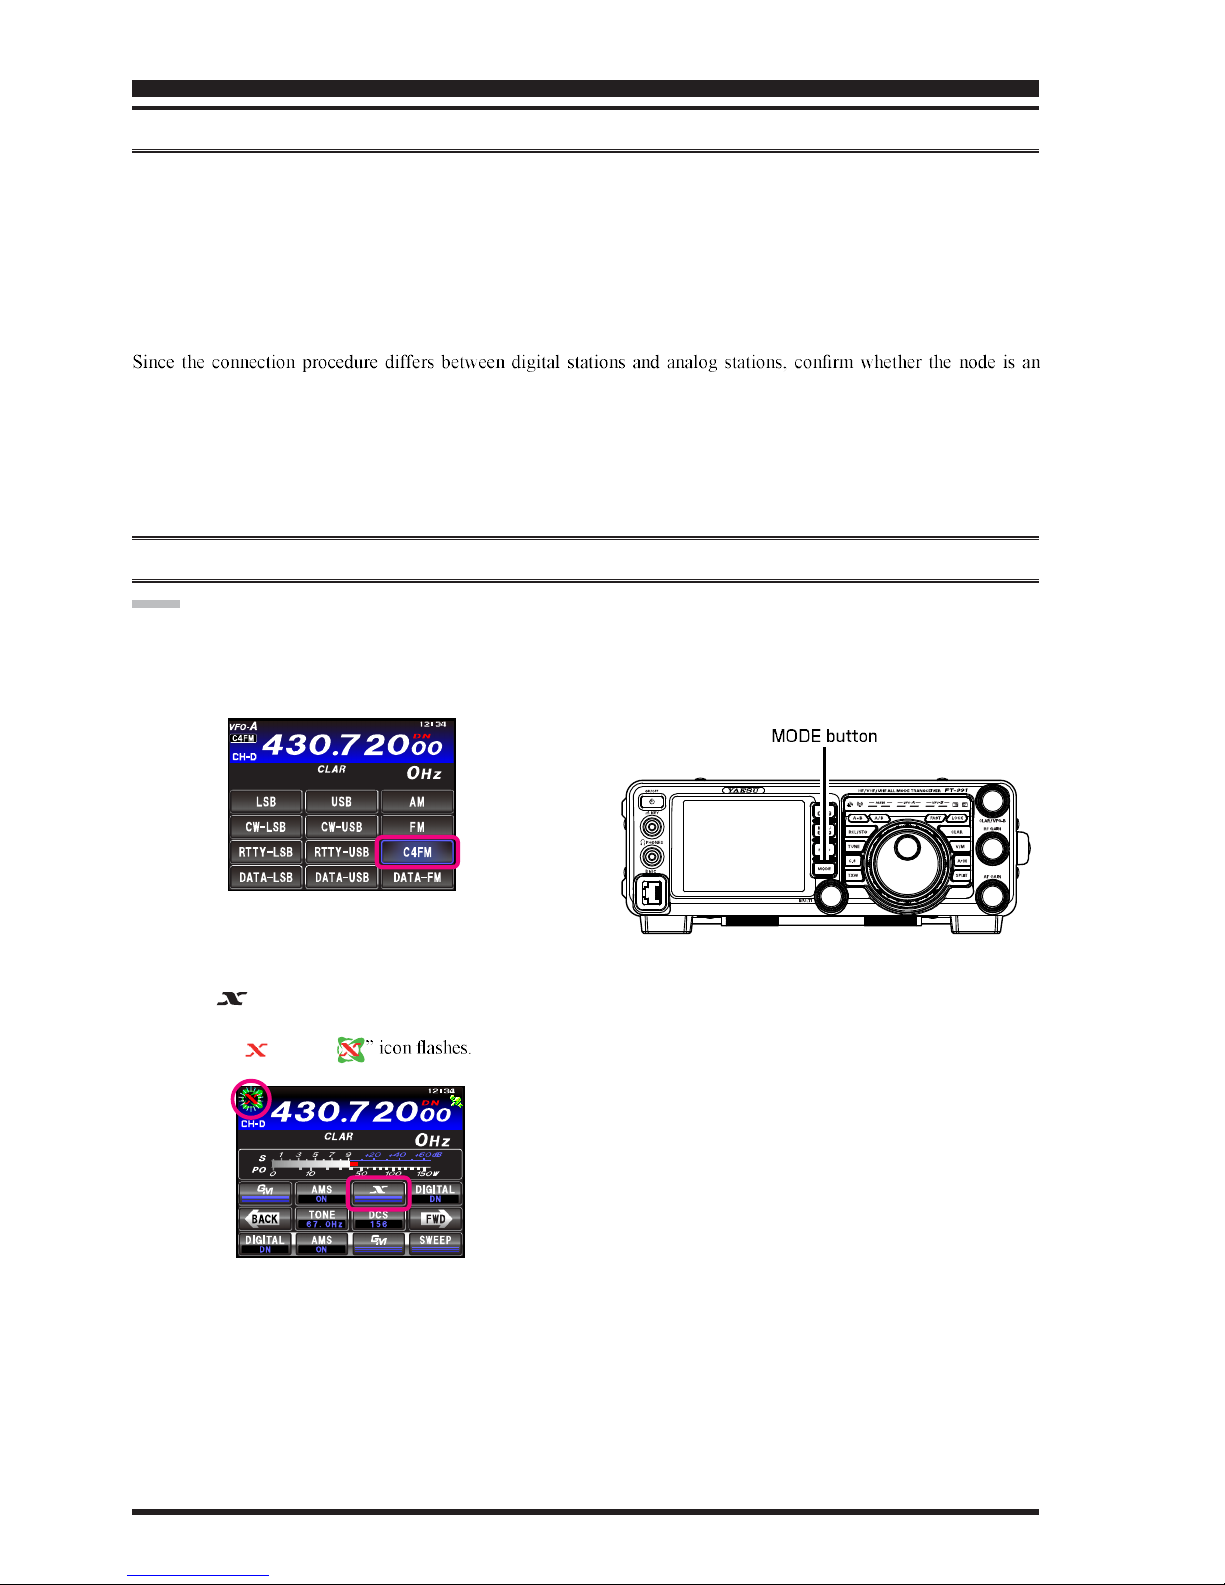
FT-991 OPERATING MANUAL (WIRES-X EDITION)Page 8
CONNECTING TO A NODE OR ROOM ON THE INTERNET IN DIGITAL MODE
You can connect to the desired node or room in one of the following ways:
• Selecting an accessible node or room from the list
• Specifying the node name (call sign) or room name
• Selecting the most recently connected node or room
• Specifying the DTMF ID of the node or room you want to connect with
Searching from the Node or Room List
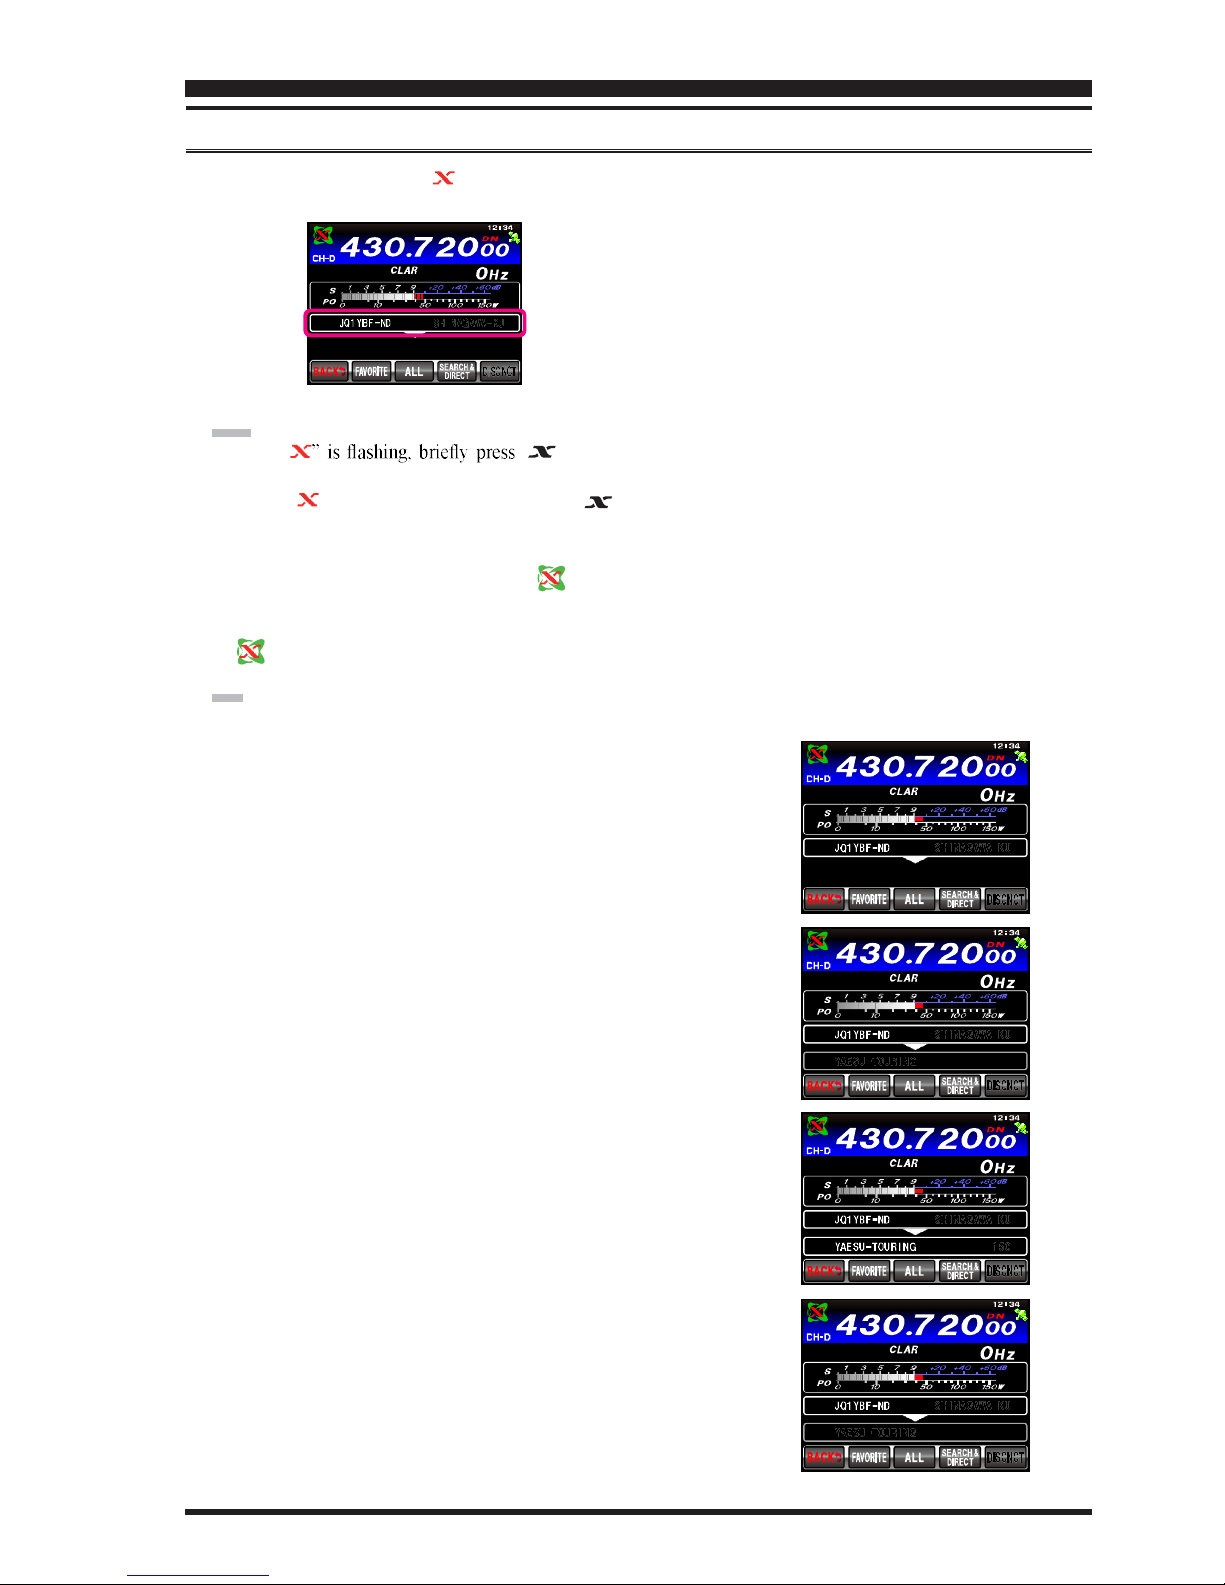
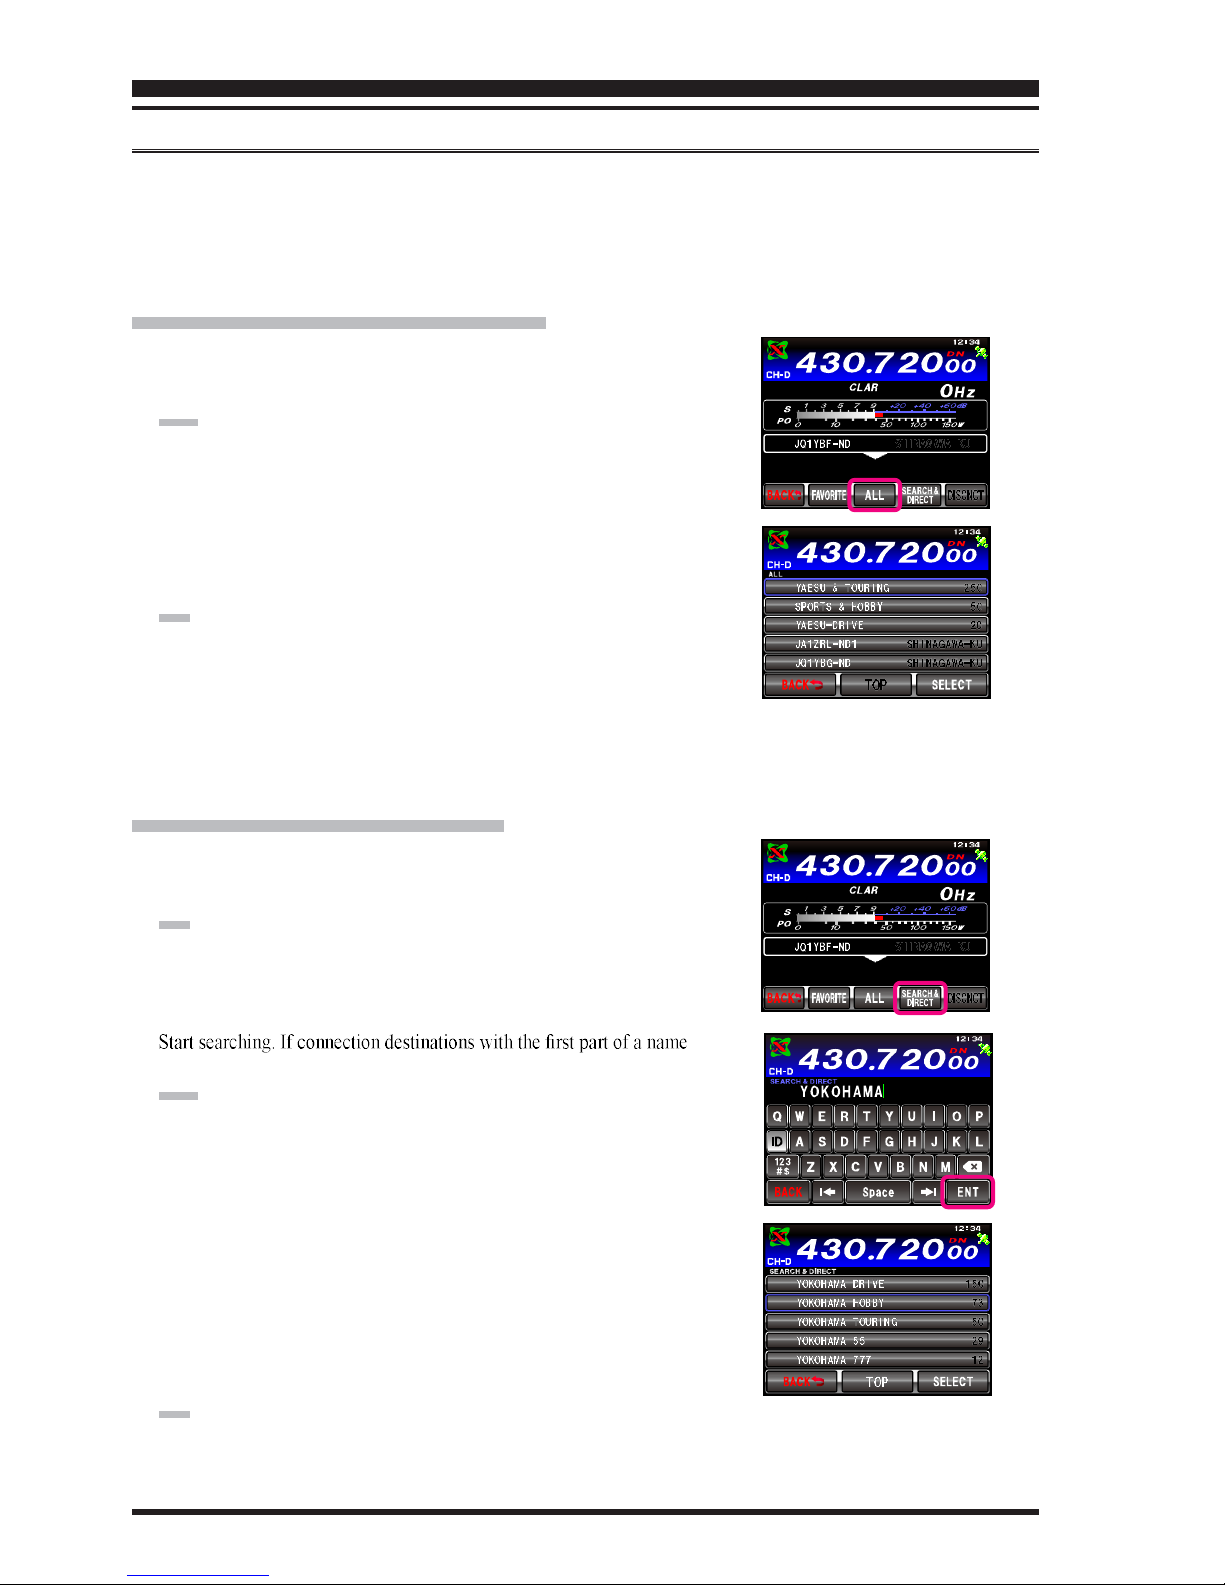
1. When the transceiver is connected to a local node, touch [ALL].
After “Waiting” flashes, displays the list of accessible nodes and
rooms.
TIPS:
• Connection destinations are displayed from the room list and then
node list.
• On the connection destination room columns, the number of
activities (the number of nodes connected to each room) appears on
the right side.
2. Rotate the MULTI knob or touch the screen to select the node or room
you want to connect with.
TIP:
Touching [TOP] jumps to the top of the list.
3. Touch [SELECT].
Connection to the selected node or room from the local node is
started. Once connection is successfully established, displays
“Connected” is displayed, followed by the information of the node or
room you are connected to.
[ 1 / 2 3 ]
Searching by Node or Room Name
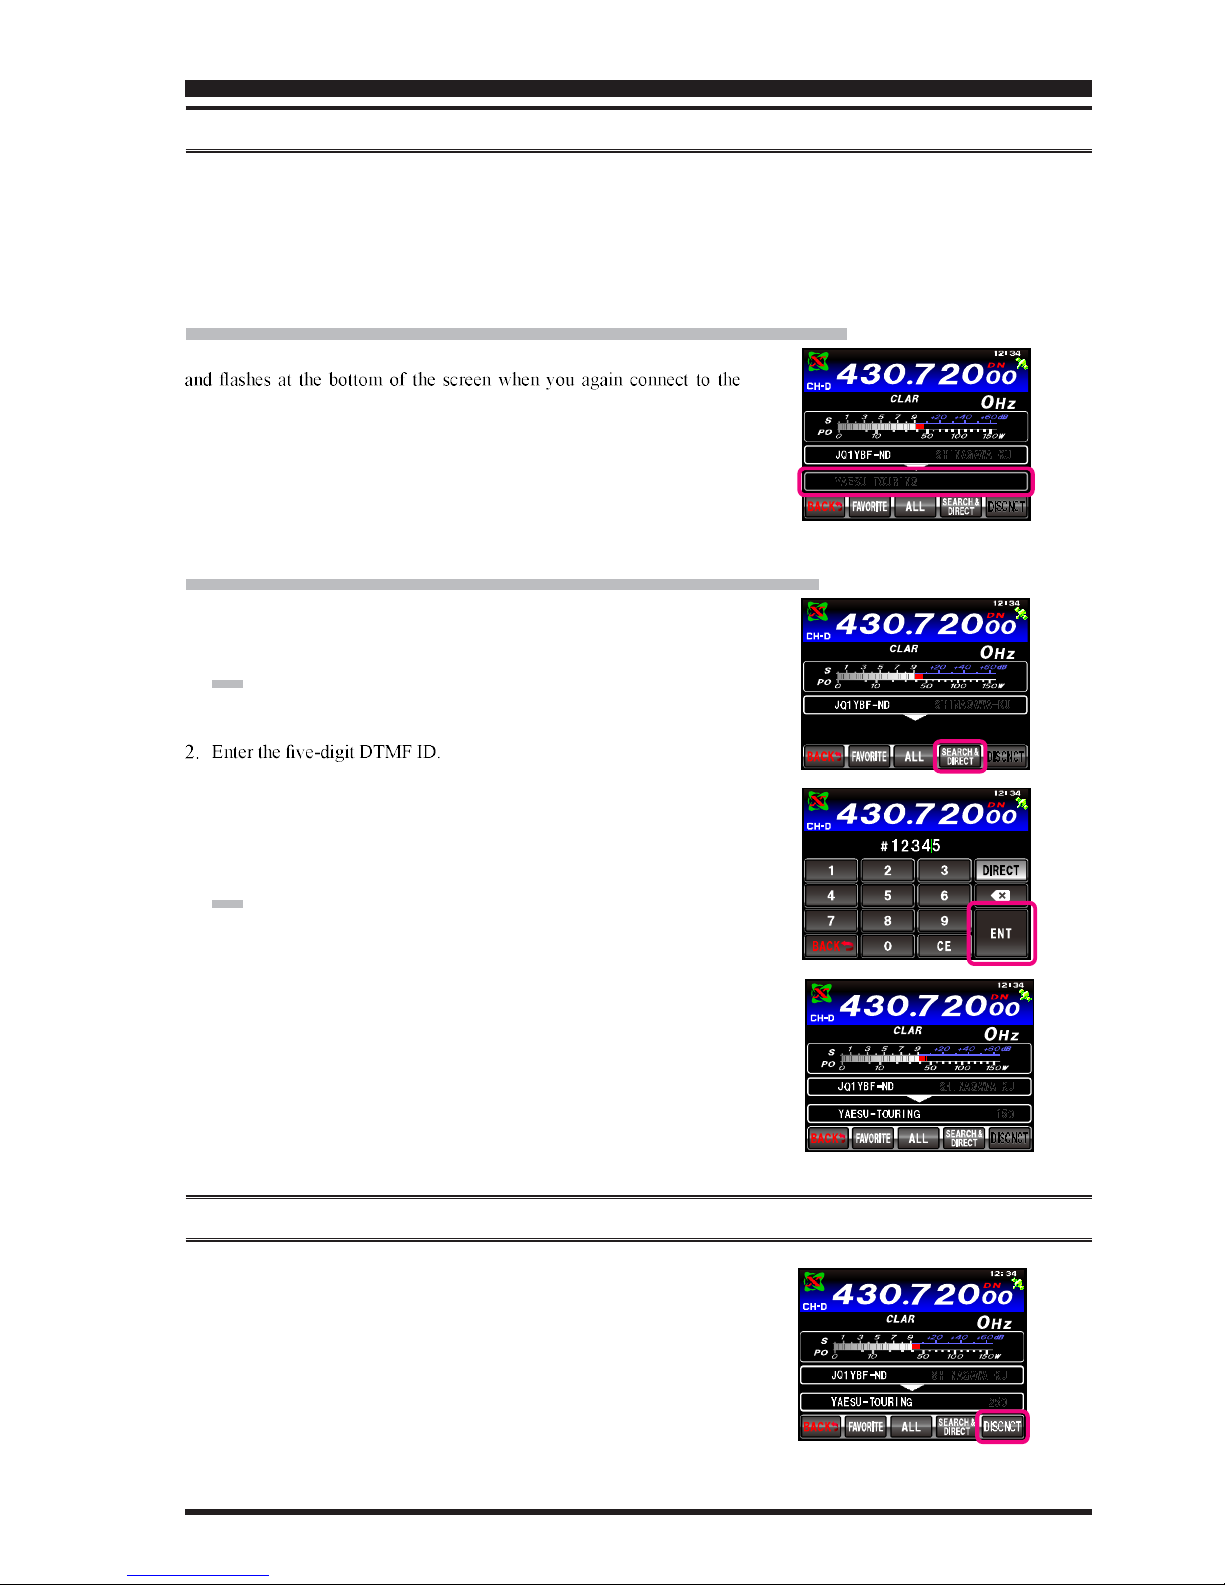
1. When the transceiver is connected to a local node, touch [SEARCH
& DIRECT].
The alphabet input screen is displayed.
TIP:
If the number and symbol input screen appears, touch [DIRECT] to
switch the screen to the alphabet input screen.
2. Enter all or part of the room name or user ID.
3. Touch [ENT].
partially matching the name you entered are found, they will be listed.
TIPS:
• If there is no connection destination matching the entered name,
“No Data” appears and then the screen returns to the [SEARCH &
DIRECT] screen. Input the letters you want to search by again.
• If the name you entered is found, the transceiver establishes
connection immediately.
• The screen displays the room list search results followed by the
node list search results.
• On the room columns in the search results, the number of activities
(the number of nodes connected to each room) appears on the right
side.
4. Rotate the MULTI knob or touch the screen to select the node or room
you want to connect to.
TIP:
Touching [TOP] jumps to the top of the list.
[ 2 / 1 6 ]
COMMUNICATING USING WIRES-X