manuals.online logo
Brands
  1. Home
  2. •
  3. Brands
  4. •
  5. Yaesu
  6. •
  7. Transceiver
  8. •
  9. Yaesu FT2DR User manual

Yaesu FT2DR User manual

C4FM/FM
144/430 MHz
DIGITAL/ANALOG
TRANSCEIVER
Operating Manual
Before Using the Transceiver
Preparation
Basic Operation
Repeater Operation
Using the Memory
Scanning Function
Digital Group Monitor Function
Using the APRS Functions
Using the WIRES-X Functions
Using the GPS Function
Convenient Functions
Communicating with a
Customize Menu Settings for
Individual Use (Set Mode)
Functions to Use a Necessary
Appendix
2
Before Using the Transceiver
Table of Contents
Before Using the Transceiver .................................. 2
Introduction ................................................................. 6
Features of the FT2DR/DE .................................... 6
Using the Touch Screen ......................................... 7
How to Read This Manual ...................................... 7
Checking the Supplied Items ................................. 8
Safety Precautions (Be Sure to Read) ....................... 9
Names and Functions of Controls ............................ 14
Transceiver .......................................................... 14
Touch Screen Display .......................................... 15
Entering Letters.................................................... 19
Preparation.............................................................. 20
Attaching the Supplied Accessories ......................... 20
Installing the Antenna........................................... 20
Attaching the Accessory Protective Cap/Belt
Clip ....................................................................... 20
Attaching the Protective Cap ........................... 20
Attaching the Belt Clip ..................................... 20
Attaching a Hand Strap ........................................ 21
Preparing the Battery Pack/External Power
Supply....................................................................... 22
Installing/Removing the Battery Pack .................. 22
Installing the Battery Pack ............................... 22
Removing the Battery Pack ............................. 22
Charging the Battery Pack ................................... 22
How to Use the Battery Case (FBA-39) ............... 25
Connecting an External Power Supply for Use in
Vehicle ................................................................. 26
Connecting to an External Power Supply Using a
Power Cable ........................................................ 27
Using a microSD Memory Card ................................ 29
Usable microSD Memory Cards .......................... 29
Cautions when Using a microSD Memory
Card ..................................................................... 29
Mounting and Dismounting microSD Memory
Card ..................................................................... 29
Formatting a microSD Memory Card ................... 31
Basic Operation ...................................................... 32
Performing Communication ...................................... 32
Turning on the Transceiver .................................. 32
Adjusting the Volume Level.................................. 34
Toggling the Operating Band ............................... 34
Selecting a Frequency Band ................................ 37
Tuning to a Frequency ......................................... 38
Selecting the Communication Mode .................... 39
Transmitting/Receiving Signals ............................ 40
Listening to the Radio ............................................... 42
Listening to the AM/FM Radio .............................. 42
Miscellaneous Settings ............................................. 43
Setting Clock Time ............................................... 43
Muting Audio ........................................................ 44
Changing the Transmission Power Level............. 46
Adjusting the Squelch Level................................. 47
Setting the Frequency Step ................................. 47
Changing the Mode.............................................. 48
Locking Keys and Switches ................................. 49
Attenuator (ATT) Function .................................... 50
Restoring to Defaults (All Reset).......................... 51
Repeater Operation ................................................ 52
Repeater Operation .................................................. 52
Communicating Via the Repeater ........................ 52
Repeater Shift........................................................... 53
Automatic Repeater Shift (ARS) .......................... 53
Tone Calling (1750 Hz) ........................................ 53
Using the Memory .................................................. 54
A Wide Variety of Memory Functions ........................ 54
Registering to Memory Channel .......................... 55
Split Memory ........................................................ 56
Recalling a Memory Channel ............................... 57
Recalling the Home Channels ............................. 57
Returning to the Previous Frequency .............. 58
Changing the Home Channel Frequency ........ 58
Clearing Memories ............................................... 59
Restoring the Cleared Memories .................... 59
Using Memory Tag ............................................... 59
Assigning a Name to a Memory Channel ........ 60
Displaying the Memory Tag ............................. 61
Using Memory Bank ................................................. 62
Registering to Memory Banks .............................. 62
Recalling Memory Bank ....................................... 63
Canceling Memory Channel Registration in
Memory Bank ....................................................... 63
Assigning Name to Memory Bank........................ 64
Convenient Preset Receiver Memory Channels....... 65
Registering Preset Receiver Memory Channels
into Memory Banks .............................................. 66
Recalling Preset Receiver Memory Channel to
Listen to the Weather Broadcast .......................... 66
Recalling Preset Receiver Memory Channel to
Listen to the International VHF (Marine) Radio.... 67
Recalling Preset Receiver Memory Channels to
Listen to World Wide Broadcasts ......................... 68
Worldwide short wave broadcast .................... 69
Scanning Function ................................................. 71
VFO Scan ................................................................. 71
Canceling Scanning ........................................ 72
3
Before Using the Transceiver
Table of Contents
Skipping Frequencies You Do Not Want to
Scan (Skip Search Memory) ........................... 72
Specifying the Frequencies You Do Not Want
to Scan ............................................................ 73
Deleting the Frequency Registered to the Skip
Search Memory Channel ................................ 73
Setting the Receive Operation When
Scanning Stops ............................................... 74
Memory Channel Scanning ...................................... 76
Specifying Skip/Selected Memory
Channels ......................................................... 77
Scanning Only the Specified Memory
Channels ......................................................... 78
Scanning the Memory Bank ................................. 79
Memory Bank Link Scanning .......................... 79
Programmable Memory Channel Scan (PMS) ......... 81
Registering to the Programmable Memory
Channels ......................................................... 81
Performing Programmable Memory Channel
Scan ................................................................ 81
Digital Group Monitor Function
Using the Digital GM Function ................... 83
What is the GM function? ......................................... 83
Standard Operation of the GM Function................... 83
Displaying All Stations (up to 24 Stations)
Operating with the GM Function .......................... 83
Registering IDs of Friends in a Group and
Displaying Only Registered GM Users ................ 84
Deactivating the GM Function.............................. 84
Using the APRS / WIRES-X Functions .................. 85
The APRS (Automatic Packet Reporting System)
Function .................................................................... 85
What is the WIRES-X Function? .............................. 85
Using the GPS Function ........................................ 86
The GPS Function .................................................... 86
Activating the GPS Function..................................... 86
Method of Positioning by GPS.................................. 88
Displaying Position Information of Remote
Stations in Digital Mode ....................................... 88
Saving GPS Information (GPS Log Function)...... 89
Checking Tracks on Your PC ............................... 90
GPS Screen Information and Operation ................... 91
Displaying the GPS Information ........................... 91
Smart Navigation Function ....................................... 93
Real-Time Navigation Function ............................ 93
Backtrack Function .............................................. 93
Registering Your Current Position
(Departure Point) (up to 3 Positions can Be
Registered) ................................................ 93
Using the Back Track Function ....................... 94
Description of the BACK TRACK Function
Screen.................................................................. 95
Convenient Functions ............................................ 96
Dual Receive (DW) Function .................................... 96
VFO Dual Receive
......... 97
Memory Channel Dual Receive
channel ........................................................... 98
Home Channel Dual Receive
.... 98
AF-DUAL Receive Function (Receiving Signals
on Other Frequency Channels While Listening to
Broadcast Radio) .................................................... 100
Listening to a Radio Broadcast Using the
AF-DUAL Receive Function ............................... 100
Setting the Resumption Time of Radio
Reception ........................................................... 101
Using the DTMF Function....................................... 103
Setting the DTMF Memory ................................. 103
Transmitting the Registered DTMF Code .......... 104
Manually Transmitting the DTMF Code ............. 105
Spectrum Analyzer with Signal Strength Graph
Band Scope Function ............................................. 106
Taking Picture Using the Optional Camera-Mounted
Speaker Microphone
Snapshot Function ..............107
Viewing the Saved Image .................................. 108
Transmitting the Saved Image to Other
Transceivers ...................................................... 108
Communicating with a Specific Remote
Station ................................................................... 109
Using the Tone Squelch Function ........................... 109
Selecting the Squelch Type ............................... 109
Setting the Tone Frequency ................................110
Searching for the CTCSS Tone transmitted
by the Remote Station ........................................111
Setting the DCS Code.........................................112
Searching for the DCS Code Used
by the Remote Station ........................................112
Notification of a Call from a Remote Station
by Vibration .........................................................113
Selecting the Vibrator Operation Mode ..........114
Notification of a Call from a Remote Station
by the Bell Function ............................................114
Changing the Number of Times the Bell
Rings ..............................................................115
Calling Only a Specific Station
New Pager Function ................................................116
Flow of Operation to Use the Pager Function .....116
4
Before Using the Transceiver
Table of Contents
Setting the Code for Your Station .......................116
Activating the New Pager Function .....................117
Calling a Specific Station ....................................117
Being Called by the Remote Station
(Standby Operation)............................................118
Customize Menu Settings for Individual Use
(Set Mode) ............................................................. 119
Using Set Mode .......................................................119
Set Mode Operation ............................................119
Resetting the All Set Mode Settings................... 120
Tables of Set Mode Operations .............................. 121
Set Mode: DISPLAY Menu Operations ................... 128
Setting What to Display Using the Smart
Navigation Function ........................................... 128
Setting the Compass Display ............................. 128
Setting the Search Channels for the BAND
SCOPE Function................................................ 128
Changing the Lighting Condition ........................ 129
Selecting the Display Language ........................ 129
Adjusting the LCD Contrast Level ...................... 129
Adjusting the LCD Backlight and Key Button
Light Brightness Level........................................ 130
Changing the Opening Message Displayed
Immediately after Power-on ............................... 130
Displaying the Battery Voltage ........................... 130
Changing the Display Pattern of the S-Meter .... 131
Displaying the Software Version ........................ 131
Set Mode: TX/RX Menu Operations ....................... 132
Reducing Receiver Sensitivity
Attenuator (ATT) Function .................................. 132
Setting the Transmit Modulation Level ............... 132
Switching the Receive Mode.............................. 133
Setting the Squelch Type for the Digital Mode ... 133
Setting the Pop-up Time of the Remote Station
Information ......................................................... 133
Displaying Your Location in Digital Mode ........... 134
Setting the Standby Beep .................................. 134
Adjusting the Microphone Sensitivity
Microphone Gain................................................ 134
Muting Audio ...................................................... 135
Simultaneous Radio Broadcast Reception ........ 135
Set Mode: MEMORY Menu Operations ................. 136
Setting Memory Bank Link ................................. 136
Assigning Name to Memory Bank...................... 136
Assigning Name to Memory Channel ................ 136
Prohibiting Registration to a Memory Channel
Memory Channel Protect Function .................... 137
Setting Memory Skip Function ........................... 137
Setting the Memory Channels Used for
Registration ........................................................ 137
Set Mode: SIGNALING Menu Operations .............. 138
Notification of a Call from a Remote Station
by the Bell .......................................................... 138
Selecting a DCS Code ....................................... 138
Transmitting and Receiving a DCS Code with an
Inverted Phase DCS INVERSION Function....... 138
Setting the Transmission Method of the DTMF
Code .................................................................. 138
Setting the DTMF Code ..................................... 139
Calling Only a Specific Station (New Pager
Function) ............................................................ 139
Enabling No-communication Squelch Function
PR FREQUENCY Function ................................ 139
Adjusting the Squelch Level SQL LEVEL
Function ............................................................. 139
Setting the Squelch to Activate at a Specified
Signal Strength S-Meter Squelch Function ........ 140
Setting the Squelch Type for Transmit and
Receive SQL EXPANSION Function ................. 141
Setting the Type of Squelch ............................... 141
Selecting a CTCSS Tone Frequency ................. 141
Setting the Sound and Speed During Tone
Search Tone Search Function ............................ 141
Set Mode: SCAN Menu Operations........................ 142
Setting the Surveillance Interval Time for Priority
Channels DW INTERVAL TIME Function .......... 142
Setting the Illumination On/Off When Scanning
Stops LAMP Function ........................................ 142
Setting the Time to Resume Scanning SCAN
RE-START Function........................................... 142
Selecting a Receive Operation When Scanning
Stops .................................................................. 143
Setting the Scanning Range .............................. 143
Set Mode: GM Menu Operations ............................ 144
Set Mode: WIRES-X Menu Operations .................. 144
Set Mode: CONFIG Menu Operations.................... 145
Turn Power Off Automatically
Auto Power-Off Function .................................... 145
Preventing Accidental Transmission Busy
Channel Lockout (BCLO) Function .................... 145
Setting the Key Operation Confirmation
Sound................................................................. 146
Turning off the BUSY Indicator .......................... 146
Setting the Clock Shift for the Micro Computer
Clock Type Function .......................................... 147
Setting a Time Interval for Saving GPS Position
Information ......................................................... 147
Permitting/Prohibiting Transfer of Home Channel
Frequency to VFO.............................................. 147
Using the LED Light ........................................... 148
Setting the LOCK Function ................................ 148
5
Before Using the Transceiver
Table of Contents
Setting the Operation of the Key .................. 148
Turning on/off the Transceiver at the Specified Time
Timer Function ................................................... 149
Password Function ............................................ 149
Setting the PTT Delay Time PTT DELAY
Function ............................................................. 150
Setting the ARS Function RPT ARS Function .... 150
Setting the Repeater Shift Direction RPT SHIFT
Function ............................................................. 150
Setting the frequency offset for Repeater Shift
RPT SHIFT FREQ Function ............................... 151
Disabling Receiver While No Signal Is Received
Receiver Battery Save Function ........................ 151
Changing the Frequency Step Manually ............ 151
Setting Clock Time ............................................. 151
Limit the time of a continuous transmission
(TOT Function) ................................................... 152
Setting the Frequency Selection Range for
Operation in VFO Mode VFO MODE
Function ............................................................. 152
Notifying a Call From a Remote Station by
Vibration ............................................................. 152
Swapping the Dial Knob Functions .................... 152
Set Mode: APRS Menu Operations ........................ 153
Set Mode: SD CARD Menu Operations ................. 154
Saving/Loading Data to/from microSD Memory
Card ................................................................... 154
Saving/Loading Memory Channel Information to/
from microSD Memory Card .............................. 155
Saving/Loading GROUP ID Information
to/from a microSD Memory Card ....................... 155
Formatting a microSD Memory Card ................. 156
Set Mode: OPTION Menu Operations .................... 157
Setting the Optional Microphone With Camera
for Use ............................................................... 157
Set Mode: CALLSIGN Menu Operations ................ 158
Functions to Use as Necessary .......................... 159
Using the Transceiver for Packet
Communication....................................................... 159
Clone Operation ..................................................... 160
Connecting an External Device .............................. 161
Connecting to a PC ............................................ 161
Connecting to an External Device...................... 162
Connection Cables............................................. 162
Data Cable (CT-170) ..................................... 162
Data Output Cable (CT-176) ......................... 162
Appendix ............................................................... 163
Optional Parts ......................................................... 163
If you suspect malfunction Check the following
items before requesting a repair. ...................... 164
The transceiver does not turn on. ................. 164
There is no sound. ........................................ 164
There is no transmission of radio waves. ...... 164
The keys or DIAL does not respond. ............. 164
Index ....................................................................... 166
Specifications ......................................................... 168
6
Before Using the Transceiver
Introduction
Features of the FT2DR/DE
Digital communication (C4FM (Quaternary FSK), FDMA system) ............................. 39
Equipped with AMS (Automatic Mode Select) Function ............................................. 39
Automatically selects between 4 modes of transmission according to the signal being
received.
External power supply connection ............................................................................. 15
Simultaneous reception on two different bands,
or within the same band (V+V/U+U) .................................................................... 34, 36
Independent switching keys for A-band and B-band and TX/BUSY display .............. 36
Wide-band reception over the range of 500 kHz to 999.900 MHz ............................. 36
Waterproof design equivalent to IPX5, which protects the transceiver
from rain and splashes ............................................................................................... 13
Large 160×160 dot LCD screen and touch panel ...................................................... 15
WIRES-X connection support ..................................See WIRES-X instruction manual*
Equipped with GM function ..................................See GM function instruction manual*
Large-capacity 1266ch with 24 memory banks (maximum of 100 channels can be
saved on each bank) .................................................................................................. 54
Display memory tags comprised of up to 16 one-byte characters ............................. 59
Convenient reception of preset receiver memory channels ....................................... 65
By selecting preset frequencies, you can receive shortwave broadcast,
and international VHF radio stations with ease.
A wide variety of scan functions ................................................................................. 71
Built-in GPS unit allowing display of your current location and heading
information ................................................................................................................. 86
Ready for APRS® communication using the world standard 1200 / 9600bps AX25
modem (B-band only) ................................................... See APRS instruction manual*
High-resolution band scope function to display ± 35 channels ................................ 106
Equipped with the smart navigation function ............................................................. 93
A variety of individual selective calling functions; such as tone squelch (CTCSS)
and DCS functions ...................................................................................................109
Vibrator to alert you of signal reception, in addition to the audible bell .................... 113
New pager function for calling only specific stations ................................................ 116
LED Backlight for easy viewing of the LCD outdoors .............................................. 147
Battery save function to extend battery operating time .............................................. 46
Data terminal for communication with external equipment and firmware updates ... 162
Compatible with microSD memory cards ................................................................... 29
Snapshot function (an optional camera microphone MH-85A11U is required) ....... 107
* WIRES-X, GM function and APRS instruction manuals are not included in the product
package.
They are available and may be downloaded from the Yaesu.com website.
7
Before Using the Transceiver
Introduction
Using the Touch Screen
Caution when Using the Touch Screen
Observe the following precautions when using the touch screen. Failing to do so may
result in malfunction or damage.
Operate the touch screen with your fingers. Do not operate with any pointed objects
including your fingernail or pen.
Do not apply any excessive force to the touch screen.
Do not scrub or scratch on the touch screen when cleaning it.
Restrictions on touch operations
The touch screen does not respond to any of the flicking and pinching-in/out operations.
Due to the characteristics of the LCD, when the ambient temperature is low, the touch
screen may respond slowly.
Touch Screen Upkeep
After turning off the transceiver, wipe the touch screen with a soft dry cloth.
Do not use water, chemical agents or mild detergents.
How to Read This Manual
Common explanatory expressions used in this manual are as follows:
Press ...................................................... Indicates to simply press a key or switch.
Press and hold for over one second ....... Indicates to press a key or switch for over
one second.
Touch [F MW] .................................................. Indicates briefly touching the screen.
Touch [F MW] for over one second ................ Indicates touching the screen for over
one second.
The following notations are also used in this manual.
Caution
...Explains caution to observe during operation.
Tip
...Explains operating suggestions or useful tips.
8
Before Using the Transceiver
Introduction
Checking the Supplied Items
Transceiver
Battery charger
PA-48B/C/F/U* or SAD-14B
* “B” suffix is for use with 120 VAC
(Type-A plug), “C” suffix is for use
with 230-240 VAC (Type-C plug), “F”
suffix is for use with 220 VAC,
and “U” suffix is for use with
230 VAC (Type-BF plug).
Antenna
Belt clip
Battery pack
protective cap
Long life
lithium-ion battery pack
(SBR-14LI: 7.2V,
2,200 mAh)
USB cable
• Quick Manual
• Operating Manual
(this manual)
• Warranty Card
Cautions
Ensure that the name of the dealer from which you purchased the transceiver and the date of
purchase are indicated on the warranty card.
If any item is missing, contact the dealer from which you purchased the transceiver.
9
Before Using the Transceiver
Safety Precautions (Be Sure to Read)
Be sure to read the safety precautions to use this product safely.
Yaesu is not liable for failures and other problems caused due to misuse or use of this
product by you or a third party. Also, Yaesu is not liable for damages caused through
use of this product by you or a third party except in the case where ordered to pay for
damages under the laws.
Types and Meanings of Symbols
DANGER Indicates an imminently hazardous situation which, if not
avoided, could result in death or serious injury.
WARNING Indicates a potentially hazardous situation which, if not
avoided, could result in death or serious injury.
CAUTION
Indicates a potentially hazardous situation which, if not
avoided, may result in minor or moderate injury or only
property damage.
Types and Meanings of Legends
Indicates a prohibited action, not to be done in order to use this product safely.
For example, indicates that the product should not be disassembled.
Indicates a required action, to be done in order to use this product safely.
For example, indicates that the power plug should be removed.
DANGER
Do not use this product in “an area
where use of it is prohibited”, e.g., in-
side the hospital, airplane, or train.”
This product can affect electronic or
medical devices.
Do not use this product while riding
a bicycle or driving a car. Accidents
can result.
Be sure to stop the bicycle or car at a safe
place before using this product.
Those who are carrying a medical
device such as a cardiac pacemaker
should not perform transmission
near the device. When transmitting,
use an external antenna and keep as
far as possible away from the exter-
nal antenna.
The radio wave emitted by the transmit-
ter can cause the medical device to mal-
function and result in an accident.
Do not use this product or the battery
charger in a place where inflammable
gas is generated.
A fire or explosion can occur.
10
Before Using the Transceiver
Safety Precautions (Be Sure to Read)
Do not perform transmission in a
crowded place for the safety of per-
sons using a medical device such as
a cardiac pacemaker.
The radio wave emitted from this prod-
uct can cause the medical device to mal-
function and result in an accident.
Do not touch any material leak-
ing from the battery pack with bare
hands.
The chemical that has stuck to your skin
or entered your eye can cause chemical
burns. In such a case, consult the doctor
immediately.
Do not solder or short-circuit the ter-
minal of the battery pack.
A fire, leak, overheating, explosion, or igni-
tion can result.
Do not carry the battery pack together
with a necklace, hair pin, or small metal
objects. A short circuit can result.
If it starts thundering when the exter-
nal antenna is used, immediately turn
off this product and disconnect the
external antenna from it.
A fire, electrical shock, or damage may
result.
WARNING
Do not power this transceiver with a
voltage other than the specified pow-
er supply voltage.
A fire, electric shock, or damage may
result.
Do not use the battery pack for any
model other than the specified trans-
ceiver.
A fire, leak, overheating, explosion, or
ignition can result.
This product has a waterproof struc-
ture and conforms to “IPX5” when
the included antenna and battery
pack are installed and rubber caps
are securely attached to the MIC/SP
jack, EXTDC IN jack, DATA terminal,
and micro SD slot. If this transceiver
gets wet, wipe it with a dry cloth, etc.
do not leave it exposed to the mois-
ture.
Leaving this product in a wet condition
can degrade its performance, shorten its
life, or cause a failure or electrical shock.
Do not make very long transmissions.
The main body of the transceiver may
overheat, resulting in a failure or burns.
Do not disassemble or make any al-
teration to this product.
An injury, electric shock, or failure can
result.
Do not handle the battery pack or
charger with wet hands. Do not insert
or remove the power plug with wet
hands.
An injury, leak, fire, or failure can result.
If smoke or strange odor is emitted
from the main body, battery pack,
or battery charger, immediately turn
the transceiver off; remove the bat-
tery pack, and remove the power plug
from the outlet.
A fire, leak, overheating, damage, igni-
tion, or failure can result. Contact the
dealer from which you purchased this
product or Yaesu Amateur Customer
Support.
Do not use the battery pack which is
externally damaged or deformed.
A fire, leak, heating, explosion, or igni-
tion can result.
Do not use any battery charger which
is not specified by Yaesu.
A fire or failure can result.
When transmitting, keep the trans-
ceiver at least 5.0 mm (3/16 inch)
away from your body.
Use only the supplied antenna. Do
not use modified or damaged anten-
nas.
11
Before Using the Transceiver
Safety Precautions (Be Sure to Read)
Keep the terminals of the battery
pack clean.
If terminal contacts are dirty or corroded,
a fire, leak, overheating, explosion, or
ignition can result.
If charging of the battery pack can-
not be completed within the specified
charging time, immediately remove
the power plug of the battery charger
from the outlet.
A fire, leak, overheating, explosion, or
ignition can result.
CAUTION
Do not dangle or throw this product
by holding its antenna.
This product can hit and injure some-
one. In addition, doing so can result in a
transceiver failure or damage.
Do not use transceiver in a crowded
place.
The antenna can hit someone, resulting
in a injury.
Do not place this transceiver in a
place subject to direct sunlight or
near a heater.
The transceiver can deform or discolor.
Do not place this transceiver in a hu-
mid or dusty place.
A fire or failure can result.
During transmission, keep the anten-
na as far from you as possible.
Long-time exposure to electromagnetic
waves can have a negative impact on
your health.
Do not clean the case with thinner or
benzene.
Use a soft, dry cloth to clean the case.
If the transceiver is not being used
for an extended period, turn it off and
remove the battery pack for safety.
Do not drop, strike, or throw the
transceiver.
A failure or damage may result.
Keep magnetic cards and video tape
away from the transceiver.
The data recorded on cash cards or
video tape can be erased.
Do not use the earpiece microphone,
earphones, or headphones at an ex-
tremely high volume level.
Hearing impairment can result.
Keep this product out of reach of chil-
dren.
An injury, etc. can result.
Install the hand strap and belt clip
securely.
If they are installed improperly, the FT-
2DR/DE may fall or drop, resulting in an
injury or damage.
Do not place a heavy object on the
power cord of the battery charger.
The battery cord can be damaged, re-
sulting in a fire or electric shock.
Do not use the included battery char-
ger to charge any battery pack which
is not specified for use with the char-
ger.
A fire can result.
Do not operate the transmitter near
the TV or radio.
Radio disturbance can occur in the
transceiver, the TV, or the radio.
Do not use any products other than
the specified options and accesso-
ries.
A failure can result.
When the battery charger is not in
use, remove its power plug from the
outlet
12
Before Using the Transceiver
Safety Precautions (Be Sure to Read)
Charge the battery pack within the
temperature range from +5 °C to
+35 °C (+41 °F to +95 °F).
Charging the battery pack outside this
temperature range can cause leak,
overheating, decrease in performance,
or reduction in service life can result.
When unplugging the power cord of
the battery charger, be sure to hold
the power plug.
Pulling the power cord can damage it
and cause a fire or electronic shock.
Before discarding the worn battery
pack, affix tape or the like to its ter-
minals.
Before using this transceiver in a
hybrid or fuel-saving car, be sure to
check with the automobile manufac-
turer regarding use of the transceiver
in that car.
Noise generated by an onboard electri-
cal device (inverter, etc.) can disrupt the
normal operation of the transceiver.
13
Before Using the Transceiver
Safety Precautions (Be Sure to Read)
When the included antenna and battery pack are installed and the MIC/SP jack, EXT
DC IN jack, DATA terminal, and micro SD slot are securely covered with rubber caps,
this product is moisture and splash resistant. To ensure continued waterproofing
protection, be sure to check the following points before use.
Check for damages, deterioration, and dirt.
Antenna rubber, key switch rubber, MIC/SP jack, EXT DC IN jack, DATA terminal, micro SD
slot rubber cap, and battery pack joint.
Cleaning
When this product is contaminated with seawater, sand, or dirt, rinse with fresh water, and then
wipe with a dry cloth immediately.
Recommended maintenance interval
To insure continued water resistance and optimal performance, it is recommended that
maintenance be performed annually, or when any damage or deterioration is found. Note that
the maintenance service is subject to fees.
Do not immerse this product in the following liquids:
Sea, pool, hot spring, water containing soap, detergent, or bath additive, alcohol, or chemicals
Do not leave this product for an extended time in the following places:
Bathroom, kitchen, or humid place
Other precautions
Since this product is not totally waterproof, it cannot be immersed in water.
14
Before Using the Transceiver
Names and Functions of Controls
Transceiver
Antenna terminal (SMA)*
TX/BUSY LED
Lights green (A-band) or blue (B-band) during
receive and lights red during transmit.
Touch screen display
Touch to set the frequency and various other
settings.
[PTT] switch
• Press and hold to transmit, and release it to
receive.
• Pressing [PTT] while in Set mode completes the
Set mode function.
[MONI/T-CALL] switch
USA/EXP version
While is pressed: Squelch OFF
European version
While is pressed: T.CALL (1750 Hz)
[SQL] switch
Press , rotate VOL: Squelch level adjustment
Power switch
• When the power is off, press and hold for
over one second: Power on
• When the power is on, press and hold for
over one second: Power off
• When the power is on, press : Engages and
releases the key lock
[BACK] key
• Press to return to the previous screen.
[x] key
• In normal mode, press to start WIRES-X.
• When WIRES-X is activated, press and hold for
over one second to return to the normal mode.
Battery pack*
DIAL
Rotate to change the frequency or select a
memory channel.
VOL
Adjusts volume. Turn clockwise to increase
the audio level, and turn counterclockwise to
decrease the audio level.
GPS antenna
[DISP] key
• Pressing each time switches between the
frequency display and the backtrack display.
• Press and hold for over one second to enter Set
mode.
[BAND] key
• Pressing each time increases the frequency
band.
[V/M] key
• Pressing each time switches between VFO
mode and memory mode.
[A/B] key (switching between operating
bands)
• Pressing each time switches between A-band
and B-band.
• Press and hold for over one second to switch
between the Dual Band Receive mode and the
Mono Band Receive mode.
Microphone
[GM] key
Press to turn the GM function on/off.
microSD memory card slot*
Open the cover and insert your microSD memory
card.
15
Before Using the Transceiver
Names and Functions of Controls
DATA terminal*
• To use the clone function, connect to another
FT2DR/DE with an optional clone cable (CT-
168).
• When updating the firmware, connect to your
PC using a USB cable.
* For instruction to update the firmware, access
our website.
• Connect the optional camera-equipped
microphone (MH-85A11U) to this terminal.
• Connect an external GPS to this terminal.
MIC/SP jack*
Connect a speaker microphone or earpiece
microphone to this jack.
The waterproof protection cannot be attained
when an external microphone is connected.
Do not connect any microphone which is
not specified by Yaesu. A failure can result.
EXT DC IN jack*
• When charging the battery pack, connect the
battery charger (PA-48 or SAD-14B) to this jack.
• In the USA/EXP market, connect an external
power supply adapter with a cigarette lighter
plug (SDD-13) or an external power cable (E-
DC-6) to this jack.
Do not connect any battery charger which
is not specified by Yaesu. A failure can
result.
*: When the included antenna and battery pack are
installed and the MIC/SP jack, EXT DC IN jack, DATA
terminal, and micro SD slot are securely covered with
rubber caps, the FT2DR/DE meets the waterproofing
performance conforming to IPX5 (See page 13).
Touch Screen Display
This is the A-band display area.
This is the B-band display area.
Displays touch keys.
Displays mode.
In VFO mode, “VFO” is displayed.
In Memory mode, “MR” and the channel
number are displayed.
Display Bar indicates the volume level.
Displays the transmit output icon, the S
meter and the PO meter levels.
S meter: Displays the received signal
strength in 9 steps.
PO meter: Displays the transmit power level
in 4 steps.
H I: High power (5W)
L 3: LOW 3 power (2.5W)
L 2: LOW 2 power (1W)
L 1: LOW 1 power (0.1W*1)
Displays the time.
Displays the frequency shift direction during
repeater operation ( see page 52).
-: Minus shift
+: Plus shift
@: Split operation
lights when the mute function is active
( see page 44).
Displays the frequency.
Displays icon types.
: Lights when Auto Power Off is active
( see page 145).
: Lights when DTMF function is
enabled ( see page 103).
: Lights when GPS is acquired ( see
page 86).
: Lights when GPS Log Function is
enabled ( see page 89).
: Lights when a microSD memory card
is inserted ( see page 29).
The battery condition is displayed in 8
steps.
: Full battery power
: Battery is depleted. Charge battery.
: (When blinking) Charge battery
immediately.
*1: European version (VHF: 0.05W)
16
Before Using the Transceiver
Names and Functions of Controls
Displays squelch type ( see page 109)
TN: Lights when the tone encoder
function is enabled.
TSQ: Lights when the tone squelch
function is enabled.
DCS: Lights up when the DCS function is
enabled.
RTN: Lights when the reverse tone
function is enabled.
PR: Lights when the idle signal squelch
function is enabled.
PAG: Lights when the pager is enabled.
DC: Lights when the transceiver is set
to send the DCS code only during
transmission.
T-D: Lights when the transceiver is set
to send the CTCSS tone signal
during transmit, and wait for the
DCS code in receive mode.
D-T: Lights when the transceiver is
set to send the DCS code during
transmit, and wait for the CTCSS
tone signal in receive mode.
Displays the APRS baud rate (B-band only)
( APRS function Instruction manual).
Displays operation mode.
FM: FM (Analog) mode
: Auto mode (automatic switching
among Analog AM, Analog FM,
and Digital) *The display of the
“FM” portion differs according to
the selected mode.
DN: Wide digital mode (digital mode
using C4FM modulation)
VW: Wide digital mode (high-quality
digital communication)
appears when the bell function is active
( see page 114).
17
Before Using the Transceiver
Names and Functions of Controls
Dual Band Screen
A-band and B-band are displayed in a top-down fashion.
• Touching [F MW] displays the function menu screen.
• Touching [TX M] enables the communication mode to be
fixed on the transmission side.
• Touching [MODE] each time switches the operation
mode.
Function Menu Screen
Touching [F MW] displays the function menu screen.
Band Scope Screen
The band scope screen can be displayed by touching [SCOPE] from the function menu
screen.
Reference You can change the number of band scope channels
by pressing and holding the key for over one
second to enter Set mode, then select [DISPLAY] [3
BAND SCOPE] to select the desired number of channels
(17ch/35ch/71ch).
18
Before Using the Transceiver
Names and Functions of Controls
BACKTRACK Screen
Pressing the key displays the BACKTRACK screen.
• The compass setting is displayed to the upper left of the
compass icon. “H-UP” indicates the vehicle direction
of travel is shown at the top of the compass. “N-UP” is
shown when the compass is set to always indicate North
at the top. To change the compass setting, enter Set
mode, then select [DISPLAY] [2 HEADING UP].
• Upon retrieval of the registered position information, the
distance from the current position is displayed the upper
right of the compass icon.
• Touching [YR] displays the position of the received
station on the compass icon (only when the received
signal carries the position information).
• Touching [MY] displays your station’s heading direction
on the compass icon.
• Touching [MEM] switches to the registration mode to
record.
• Touching [ ] displays the position information registered
with the “ ” tag. Touching “ ” while flashing, stores the
position information displayed on the compass icon in the
memory with a “ ” tag.
• Touching [L1] displays the position information registered
with the “L1” tag. Touching [L1] while flashing, the
position information displayed on the compass icon is
stored in the memory with an “L1” tag.
• Touching [L2] displays the position information registered
with the “L2” tag. When touching [L2] while flashing,
stores the position information displayed on the compass
icon in the stored in the memory with an “L2” tag.
19
Before Using the Transceiver
Names and Functions of Controls
Entering Letters
The keyboard screen appears for inputting letters, numbers and symbols for your call
sign or a memory channel tag.
Number Input Screen
Alphabet Input Screen
• Touch [ABC] to display the alphabet input screen.
• Touch [A] to display the alphabet (2 byte character)
input screen.
• Touch the [1] key to display the numeric (2 byte
character) keypad input screen.
• Touch the [123] key to display the numeric keypad input
screen.
• Touch [#$%] to display the symbol input screen.
• Touch [#] to display the symbol (2 byte character) input
screen.
• Repeatedly touch the same key to advance in order through
the characters assigned to the key. Lowercase letters are
displayed, and then uppercase. For example, every time
you touch [abc] key, it changes the characters as follows:
• Touch [ ] [ ] to move the cursor to left/right in the
text input area.
20
Preparation
Preparation
Attaching the Supplied Accessories
Installing the Antenna
1 Align the bottom side of the antenna with the antenna connector
on the transceiver.
Caution Be sure to hold the thick base of the antenna when installing it
2 Turn the antenna clockwise until it is secured.
Cautions
Do not hold or twist the upper part of the antenna when
installing or removing it. To do so may break the conductors
inside the antenna.
Do not key the transmit without installing the antenna. The
transmitter components may be damaged.
When using an antenna other than the one supplied, or
connecting to an external antenna, ensure that the SWR is
adjusted to 1.5 or lower.
Attaching the Accessory Protective Cap/Belt Clip
Attaching the Protective Cap
If you do not use the belt clip, install the protective cap to
cover the belt clip attaching screw holes on the battery
pack.
Attaching the Belt Clip
1 Turn the battery pack over.
2 Attach the belt clip to the battery pack using the
supplied screws (two).
Cautions
Be sure to use the supplied screws when attaching the belt
clip. If any other screws are used, the belt clip cannot be
secured firmly to the battery pack and the transceiver may
drop off together with the battery pack; the transceiver and
battery pack may fall off, causing injury, breakage and other
damage.
Be sure to attach the protective cap when the belt clip is not
used.

Other manuals for FT2DR

7

This manual suits for next models

1

Other Yaesu Transceiver manuals

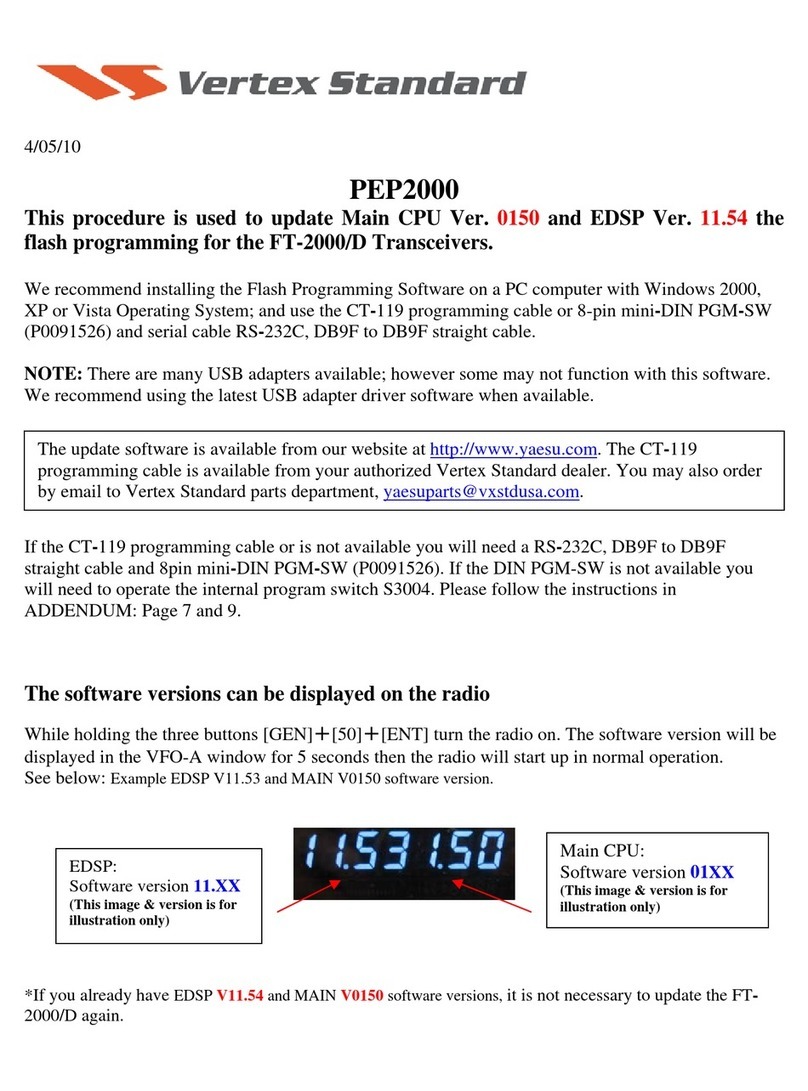
Yaesu FT-2000D - UPDATE V0150 AND V11.54 Technical manual

Yaesu

Yaesu FT-2000D - UPDATE V0150 AND V11.54 Technical manual

Yaesu FTdx5000MP User manual

Yaesu

Yaesu FTdx5000MP User manual

Yaesu VX-2500V User manual

Yaesu

Yaesu VX-2500V User manual

Yaesu FT-480R User manual

Yaesu

Yaesu FT-480R User manual

Yaesu FT-950 Manual

Yaesu

Yaesu FT-950 Manual

Yaesu FT-991 Manual

Yaesu

Yaesu FT-991 Manual

Yaesu FT-1500M User manual

Yaesu

Yaesu FT-1500M User manual

Yaesu FTM-3207D User manual

Yaesu

Yaesu FTM-3207D User manual

Yaesu FT-410 User manual

Yaesu

Yaesu FT-410 User manual

Yaesu FT-991 Manual

Yaesu

Yaesu FT-991 Manual

Yaesu FT-100 Micro Mobile User manual

Yaesu

Yaesu FT-100 Micro Mobile User manual

Yaesu FT+850 User manual

Yaesu

Yaesu FT+850 User manual

Yaesu FTM-100DR User manual

Yaesu

Yaesu FTM-100DR User manual

Yaesu VX-510 User manual

Yaesu

Yaesu VX-510 User manual

Yaesu FT1DR User manual

Yaesu

Yaesu FT1DR User manual

Yaesu FT-2600M User manual

Yaesu

Yaesu FT-2600M User manual

Yaesu FT-102 User manual

Yaesu

Yaesu FT-102 User manual

Yaesu FT-8800R Manual

Yaesu

Yaesu FT-8800R Manual

Yaesu FT-221 Series Manual

Yaesu

Yaesu FT-221 Series Manual

Yaesu FT-7100M User manual

Yaesu

Yaesu FT-7100M User manual

Yaesu FT-2800M Manual

Yaesu

Yaesu FT-2800M Manual

Yaesu FTM-3100R User manual

Yaesu

Yaesu FTM-3100R User manual

Yaesu FT-100D User manual

Yaesu

Yaesu FT-100D User manual

Yaesu FT-767GX User manual

Yaesu

Yaesu FT-767GX User manual

Popular Transceiver manuals by other brands

Uniden UH835S owner's manual

Uniden

Uniden UH835S owner's manual

Vigitron Vi1004 user manual

Vigitron

Vigitron Vi1004 user manual

Icom IC-Delta1A instruction manual

Icom

Icom IC-Delta1A instruction manual

Kenwood TS-530S Service manual

Kenwood

Kenwood TS-530S Service manual

Realistic HTX-100 Service manual

Realistic

Realistic HTX-100 Service manual

Realistic TRC-9A Service manual

Realistic

Realistic TRC-9A Service manual

Sailor VHF 5000 Series Workshop manual

Sailor

Sailor VHF 5000 Series Workshop manual

Altronix HubWayLD8D installation guide

Altronix

Altronix HubWayLD8D installation guide

Vertex Standard EVX-S24 Service manual

Vertex Standard

Vertex Standard EVX-S24 Service manual

Siemens FPX installation instructions

Siemens

Siemens FPX installation instructions

Standard Horizon HX400 Service manual

Standard Horizon

Standard Horizon HX400 Service manual

AMSTRAD CB900 manual

AMSTRAD

AMSTRAD CB900 manual

Aurora IPX-TC3A Series user guide

Aurora

Aurora IPX-TC3A Series user guide

Epiq Solutions Sidekiq X4 Getting started guide

Epiq Solutions

Epiq Solutions Sidekiq X4 Getting started guide

Em-Trak B923 installation guide

Em-Trak

Em-Trak B923 installation guide

Kenwood TK-3230DX instruction manual

Kenwood

Kenwood TK-3230DX instruction manual

Icom IC-30A instruction manual

Icom

Icom IC-30A instruction manual

Icom IC-91A Service manual

Icom

Icom IC-91A Service manual

manuals.online logo
manuals.online logoBrands
  • About & Mission
  • Contact us
  • Privacy Policy
  • Terms and Conditions

Copyright 2025 Manuals.Online. All Rights Reserved.