YATO YT-85021 User manual

SPALINOWE NOŻYCE DO ŻYWOPŁOTU
PETROL HEDGE TRIMMER
BENZIN-HECKENSCHEREN
БЕНЗОНОЖНИЦЫ
БЕНЗОНОЖИЦІ
BENZININĖS GYVATVORIŲŽIRKLĖS
BENZĪNA DZĪVŽOGU ŠĶĒRES
PLOTOSTŘIH NA ŽIVÉ PLOTY
PLOTOSTRIH NA ŽIVÉ PLOTY
BENZINES SÖVÉNYVÁGÓ
TUNS GARD VIU
CORTASETO DE GASOLINA
PL
GB
D
RUS
UA
LT
LV
CZ
SK
H
RO
E
YT-85021
INSTRUKCJA ORYGINALNA 1
UWAGA! Przed pierwszym uruchomieniem urządzenia należy dokładnie zapo-
znaćsięz tekstem instrukcji obsługi.

INSTRUKCJA ORYGINALNA
2
PL GB D RUS UA LT LV CZ SK H RO E
TOYA S.A. ul. Sołtysowicka 13-15, 51-168 Wrocław, Polska
Rok produkcji:
Production year: Produktionsjahr:
Год выпуска:Рік випуску:
Pagaminimo metai:
2016 Ražošanas gads:
Rok výroby: Rok výroby:
Gyártási év: Anul producţiei utilajului:
Año de fabricación:
I
IV V
VI VII
I
II III
1
23
4
5
10 9
8
7
6
12
13
14
15
16
18
21
17 22

INSTRUKCJA ORYGINALNA 3
PL GB D RUS UA LT LV CZ SK H RO E
0,6 - 0,7 mm
XIV XV
XIIIXII
X XI
IXVIII
11
20
19

INSTRUKCJA ORYGINALNA
4
PL GB D RUS UA LT LV CZ SK H RO E
1. noże
2. osłona
3. uchwyt przedni
4. uchwyt tylny
5. blokada położenia uchwytu tylnego
6. górny przycisk przepustnicy
7. dolny przycisk przepustnicy
8. silnik
9. układ wydechowy
10. pokrywa filtru powietrza
11. filtr powietrza
12. dźwignia dławika
13. zbiornik paliwa
14. wlew zbiornika paliwa
15. pompa paliwowa
16. linka startowa
17. świeca zapłonowa
18. smarownica mechanizmu nożyc
19. dźwignia przepustnicy
20. śruba regulacji biegu jałowego
21. włącznik
22. osłona przekładni
1. Messer
2. Abdeckung
3. vorderer Handgriff
4. hinterer Handgriff
5. Blockade der Stellung des hinteren Handgriffes
6. obere Taste der Drosselklappe
7. untere Taste der Drosselklappe
8. Motor
9. Abgassystem
10. Abdeckung des Luftfilters
11. Luftfilter
12.Hebel der Drossel
13. Kraftstoffbehälter
14. Einlaßstutzen des Kraftstoffbehälters
15. Kraftstoffpumpe
16. Starterseil
17. Zündkerze
18. Schmiereinrichtung der Messermechanik
19. Hebel der Drosselklappe
20. Schraube für die Leerlaufregelung
21. Schalter
22. Abdeckung des Getriebes
1. ножи
2. защитный кожух
3. передняя ручка
4. задняя ручка
5. замок для блокировки положения задней ручки
6. верхняя кнопка дроссельной заслонки
7. нижняя кнопка дроссельной заслонки
8. двигатель
9. выхлопная система
10. крышка воздушного фильтра
11. воздушный фильтр
12. рычаг дросселя
13. топливный бак
14. заливная горловина топливного бака
15. топливный насос
16. трос стартера
17. свеча зажигания
18. смазывающее устройство режущего механизма
19. рычаг дроссельной заслонки
20. болт регулировки холостого хода
21. включатель
22. кожух передачи
1. ножі
2. захисний кожух
3. передня ручка
4. задня ручка
5. замок для блокування положення задньої ручки
6. верхня кнопка дросельної заслінки
7. нижня кнопка дросельної заслінки
8. двигун
9. вихлопна система
10. кришка повітряного фільтра
11. повітряний фільтр
12. важіль дроселя
13. паливний бак
14. заливна горловина паливного бака
15. паливний насос
16. трос стартера
17. свічка запалювання
18. пристрій змащування ріжучого механізму
19. важіль дросельної заслінки
20. болт регулювання холостого ходу
21. вмикач
22. кожух передачі
1. peiliai
2. gaubtas
3. priekinis laikiklis
4. galinis laikiklis
5. galinio laikiklio pozicijos blokuotė
6. viršutinis droselinės sklendės mygtukas
7. apatinis droselinės sklendės mygtukas
8. variklis
9. išmetamųjųdujųsistema
10. oro filtro dangtis
11. oro filtras
12. droselio svertas
13. kuro bakas
14. kuro įpylimo anga
15. kuro siurblys
16. paleidimo virvutė
17. uždegimo žvakė
18. žirkliųmechanizmo tepalinė
19. droselinės sklendės svertas
20. tuščios eigos reguliavimo varžtas
21. jungiklis
22. pavaros gaubtas
1. knives
2. cover
3. front handle
4. back handle
5. lock of the position of rear handle
6. upper throttle button
7. lower throttle button
8. engine
9. exhaust system
10. air filter cover
11. air filter
12. choke lever
13. fuel tank
14. fuel tank filler
15. fulel pump
16. starting cable
17. spark plug
18. lubricator of the shear mechanism
19. lever of throttle
20. idling adjustment screw
21. switch
22. gearabox cover
PL GB D
RUS UA LT
XVIIXVI

INSTRUKCJA ORYGINALNA 5
PL GB D RUS UA LT LV CZ SK H RO E
1. naži
2. apvalks
3. priekšējais rokturis
4. aizmugures rokturis
5. aizmugures roktura pozīcijas blokāde
6. droseles augšējāpoga
7. droseles apakšējāpoga
8. dzinējs
9. izplūdes gāzes sistēma
10. gaisa filtra vāks
11. gaisa filtrs
12. droseles svira
13. degvielas tvertne
14. degvielas tvertnes ieplūdes caurums
15. degvielas sūknis
16. starta trose
17. aizdedzes svece
18. šķēres mehānisma eļļošanas kanniņa
19. droseles svira
20. brīvgaitas regulēšanas skrūve
21. ieslēdzējs
22. pārnesuma apvalks
1. stříhací nože
2. kryt
3. přední rukojeť
4. zadní rukojeť
5. aretace polohy zadní rukojeti
6. horní tlačítko plynu
7. dolní tlačítko plynu
8. motor
9. výfukové potrubí
10. víko vzduchového filtru
11. vzduchový filtr
12. páčka sytiče
13. palivová nádrž
14. plnící otvor palivové nádrže
15. palivové čerpadlo
16. startovací lanko
17. zapalovací svíčka
18. maznice mechanizmu nůžek
19. páčka plynu
20. šroub nastavení volnoběhu
21. vypínač
22. skříňpřevodovky
1. strihacie nože
2. kryt
3. predná rukoväť
4. zadná rukoväť
5. aretácia polohy zadnej rukoväte
6. horné tlačidlo plynu
7. dolné tlačidlo plynu
8. motor
9. výfukové potrubie
10. veko vzduchového filtra
11. vzduchový filter
12. páčka sýtiča
13. palivová nádrž
14. plniaci otvor palivovej nádrže
15. palivové čerpadlo
16. štartovacie lanko
17. zapaľovacia sviečka
18. maznica mechanizmu nožníc
19. páčka plynu
20. skrutka nastavenia voľnobehu
21. vypínač
22. skriňa prevodovky
1. kések
2. burkolat
3. elsőfogantyú
4. hátsó fogantyú
5. a hátsó fogantyú helyzetének retesze
6. a gázkar felsőnyomógombja
7. a gázkar alsó nyomógombja
8. motor
9. kipufogó rendszer
10. a légszűrőfedele
11. légszűrő
12. szivató karja
13. üzemanyagtartály
14. az üzemanyagtartály beöntőnyílása
15. üzemanyag-szivattyú
16. indító zsinór
17. gyújtógyertya
18. a pengék mechanikájának zsírzószeme
19. gázkar
20. az üresjáratot szabályozó csavar
21. kapcsoló
22. az áttétel védőburkolata
1. cuţite
2. carcasa
3. suportul anterior
4. suportul posterior
5. blocada poziţiei pentru suportul posterior
6. butonul de sus al clapetei de acceleraţie
7. butonul de jos al clapetei de acceleraţie
8. motor
9. sistem evacuare
10. capacul filtrului de aer
11. filtru de aer
12. leviera obturatorului
13. rezervorul de combustibil
14. orificiu intrare rezervor de combustibil
15. pompăde combustibil
16. cablu de demarare
17. bujie de aprindere
18. gresor mecanism de foarfece
19. leviera clapetei de acceleraţie
20. buton de ajustare a vitezei în gol
21. comutator
22. carcasa transmisiei
1. cuchillos
2. resguardo
3. asa delantera
4. asa trasera
5. bloqueo de posición del asa trasera
6. botón superior del acelerador
7. botón inferior del acelerador
8. motor
9. sistema de escape
10. tapa del filtro de aire
11. filtro aéreo
12. palanca del estrangulador
13. depósito de combustible
14. unidad de llenado del depósito de combustible
15. bomba del combustible
16. cuerda arranque
17. bujía
18. mecanismo de lubricación de tijeras
19. palanca del acelerador
20. tornillo de ajuste de ralentí
21. interruptor
22. resguardo de engranajes
LV CZ SK
HROE

INSTRUKCJA ORYGINALNA
6
PL GB D RUS UA LT LV CZ SK H RO E
Przeczytaćinstrukcję
Read the operating instruction
Bedienungsanleitung durchgelesen
Прочитать инструкцию
Прочитать iнструкцiю
Perskaityti instrukciją
Jālasa instrukciju
Přečtet návod k použití
Prečítaťnávod k obsluhe
Olvasni utasítást
Citeşti instrucţunile
Lea la instrucción
Używaćgogli ochronnych
Wear protective goggles
Пользоваться защитными очками
Користуйтесь захисними окулярами
Vartok apsauginius akinius
Jālieto drošības brilles
Používej ochranné brýle
Používaj ochranné okuliare
Használjon védőszemüveget!
Intrebuinţeazăochelari de protejare
Use protectores del oído
Używaćochrony słuchu
Wear hearing protectors
Пользоваться средствами защиты слуха
Користуйтесь засобами захисту слуху
Vartoti ausines klausai apsaugoti
Jālieto dzirdes drošības līdzekļu
Používej chrániče sluchu
Používaj chrániče sluchu
Használjon fülvédőt!
Intrebuinţeazăantifoane
Use protectores de la vista
Stosowaćrękawice ochronne
Schutzhandschuhe verwenden
Необходимо пользоваться защитными
перчатками
Слід користуватися захисними рукавицями
Vartoti apsaugines pirštines
Lietot aizsardzības cimdus
Používejte ochranné rukavice
Používajte ochranné rukavice
Használjon védőkesztyűt
Utilizarea mănuşilor de protrcţie
Use guantes de protección
Moc znamionowa
Rating power
Nennleistung
Номинальная мощность
Номінальна потужність
Nominali galia
Nomināla spēja
Jmenovitý výkon
Menovitý výkon
Névleges teljesítmény
Consum de putere nominală
Potencia nominal
0,7 kW
Znamionowa prędkość obrotowa
Nominal rotation
Nennumdrehungsgeschwindigkeit
Номинальные обороты
Номінальні оберти
Nominalus apsisukimųgreitis
Nomināls griezes ātrums
Jmenovité otáčky
Menovité otáčky
Névleges fordulatszám
Viteza de rotire nominală
Velocidad de la rotación nominal
7000 min-1
Pojemność skokowa silnika
Engine displacement
Hubraum des Motors
Емкость двигателя
Обєм двигуна
Variklio tūris
Dzinēja tilpums
Objem motoru
Objem motora
A motor űrtartalma
Cilindree
Capacidad del motor
25,4
cm3
1850min-1
Szybkość cięcia
Cutting speed
Schnittgeschwindigkeit
Скорость обрезания
Швидкість обрізання
Pjovimo greitis
Griešanas ātrums
Počet zdvihů
Počet zdvihov
A vágás sebessége
Viteza de tăiere
Velocidad del corte
Długość cięcia
Cutting length
Längschläge
Длинa резания
Довжинa різання
Pjovimo ilgio
Griešanas garuma
Délka řezání
Dľžka pretínania
Vágáshossz
Lungimii de tăiere
Longitud del corte
550 mm
0,6 l
Pojemność zbiornika paliwa
Fuel tank capacity
Volumen des Kraftstoffbehälters
Емкость топливного бака
Обєм топливного бака
Kuro bakelio tūris
Degvielas tvertnes tilpums
Objem palivové nádrže
Objem palivovej nádrže
Üzemanyagtartály térfogata
Capacitatea recipientului pentru conbustibil
Capacidad del tanque de combustible
Ostrzeżenie!
Warning!
Warnung!
Внимание!
Увага!
Įspėjimas!
Brīdinājums!
Upozornění!
Varovanie!
Figyelmeztetés!
Avertizare!
¡Advertencia!
108
Hałas - moc LwA
Noise - power LwA
Lärm – Leistung LwA
Сила шума LwA
Сила шуму LwA
Triukšmas - galia LwA
Trokšņa līmenis - jauda LwA
Hluk – výkon LwA
Hluk – výkon LwA
Zaj - LwA teljesítmény
Zgomotul - puterea LwA
Ruido - potencia LwA

INSTRUKCJA ORYGINALNA 7
PL GB D RUS UA LT LV CZ SK H RO E
Zachowaćbezpiecznąodległość od gorącej powierzchni
Keep the safe distance from hot surface
Sicherheitsabstand von der heißen Oberfläche beachten
Необходимо соблюдать безопасное расстояние от горячих
поверхностей
Необхідно забезпечити безпечну відстань від гарячої поверхні
Laikytis saugiame nuotolyje nuo karštųpaviršių
Ieturēt drošu attālumu no karstām virsmām
Dodržujte bezpečnou vzdálenost od horkých ploch
Dodržujte bezpečnú vzdialenosťod horúceho povrchu
Tartson biztonságos távolságot a forró felületektől
Menţine o distanţă corespunzatoare dela suprafeţele fierbinţi
Guarde la distancia segura de las superficies calientes
40 : 1
Benzynęzamieszaćz olejem w proporcjach, benzyna : olej - 40:1
Petrol is to be mixed with oil in the following proportions: petrol: oil - 40:1
Das Benzin ist mit Öl zu mischen im Verhältnis von Benzin : Öl wie 40:1
Следует развести бензин маслом, придерживаясь соотношения бензин:масло - 40:1
Слід розвести бензин змаслом успіввідношенні бензин:масло - 40:1
Benzinąreikia sumaišyti su alyva santykiu benzinas:alyva - 40:1
Benzīnu samaisīt ar eļļu proporcijās: benzīns:eļļa 40:1
Benzín smíchat s olejem v poměru benzín:olej - 40:1
Benzín zmiešaťs olejom v pomere benzín:olej - 40:1
Az olajat - 40:1 benzin:olaj arányban kell a benzinbe bekeverni
Benzina trebuie mestecatăcu ulei în prporţie benzină:ulei – 40:1
La gasolina debe mezclarse con aceite en proporciones gasolina:aceite - 40:1
Essence doit être mélangé avec de l’huile dans les proportions suivantes: essence: huile - 40: 1
Dławik w pozycji „ZAMKNIĘTY”
Choke in the „CLOSED” position
Drossel in der Position „GESCHLOSSEN”
Дроссельная заслонка вположении „ЗАКРЫТО”
Дросельна заслінка вположенні „ЗАКРИТО”
Droselis „UŽDARYTOJE“ pozicijoje
Drosele „SLĒGTĀ” pozīcijā
Sytičv poloze „ZAVŘENÝ“
Sýtičv polohe „ZATVORENÝ”
Fojtószelep „ZÁRT” állapotban
Obturator la poziţia „ÎNCHIS”
EL estrangulador en la posición „CERRADO”
Dławik w pozycji „OTWARTY”
Choke in the „OPEN” position
Drossel in der Position „OFFEN”
Дросельна заслінка вположенні „ВІДКРИТО”
Droselis „ATIDARYTOJE“ pozicijoje
Drosele „ATVĒRTA” pozīcijā
Sytičv poloze „OTEVŘENÝ“
Sýtičv polohe „OTVORENÝ”
Fojtószelep „NYITOTT” állapotban
Дроссельная заслонка вположении „ОТКРЫТО”
Obturator la poziţia „DESCHIS”
EL estrangulador en la posición „ABIERTO”

INSTRUKCJA ORYGINALNA
8
PL
CHARAKTERYSTYKA NARZĘDZIA
Spalinowe nożyce do żywopłotu sąprzeznaczona wyłącznie do przycinania i formowania koron krzewów oraz przycinania cien-
kich gałązek. Dzięki napędowi spalinowemu zachowująwiększąmobilność niżnożyce elektryczne. Prawidłowa, niezawodna i
bezpieczna praca przyrządu jest zależna od właściwej eksploatacji, dlatego:
Przed przystąpieniem do pracy z narzędziem należy przeczytaćcałą instrukcjęi zachowaćją.
Za wszelkie szkody i obrażenia powstałe w wyniku używania narzędzia niezgodnie z przeznaczeniem, nie przestrzegania prze-
pisów bezpieczeństwa i zaleceńniniejszej instrukcji dostawca nie ponosi odpowiedzialności. Używanie narzędzia niezgodnie z
przeznaczeniem, powoduje także utratępraw użytkownika do gwarancji i rękojmi.
WYPOSAŻENIE
Nożyce dostarczane sąw stanie kompletnym i nie wymagająmontażu.
DANE TECHNICZNE
Parametr Jednostka miary Wartość
Numer katalogowy YT-85021
Waga (bez paliwa) [kg] 5,8
Pojemność zbiornika paliwa [l] 0,6
Długość cięcia [mm] 550
Długość prowadnicy [mm] 610
Maksymalna grubość cięcia [mm] 34
Szybkość cięcia [min-1] 1850
Silnik
ilość cylindrów 1
ilość taktów 2
chłodzenie Powietrzem
Typ świecy zapłonowej L8RTF
Pojemność skokowa silnika [cm3] 25,4
Moc silnika [kW] 0,70
Maksymalna prędkość silnika [min-1] 9500
Maksymalna zalecana prędkość obrotowa silnika z układem tnącym [min-1] 7000
Zalecana prędkość obrotowa na biegu jałowym [min-1] 3400
Zużycie paliwa przy maks. mocy silnika [kg/h] 0,367
Hałas - ciśnienie LpA [dB (A)] 96 ± 3
Hałas - moc LwA [dB (A)] 105,3 ± 0,48
Poziom drgań[m/s2] 6,9 ± 1,5
INSTRUKCJE BEZPIECZEŃSTWA
WAŻNE. Uważnie przeczytaćprzed przystąpieniem do użytkowania. Zachowaćdo przyszłego użytku.
Za każdym razem kiedy w opisie pojawia siętermin: „urządzenie” należy go traktowaćjako „przycinarka do żywopłotu”.
PRZYGOTOWANIE
URZĄDZENIE MOŻE BYĆPRZYCZYNA POWAŻNYCH OBRAŻEŃ. Przeczytaćuważnie instrukcjęobsługi. Zapoznaćsięz po-
prawnym trzymaniem, obsługą, konserwacją, uruchamianiem i zatrzymywaniem urządzenia. Zapoznaćsięz poprawnąobsługą
wszelkich elementów sterujących.
Nigdy nie pozwalaćdzieciom na obsługęurządzenia.
Podczas cięcia uważaćna przewody znajdujące siępod napięciem elektrycznym. Zarówno naziemne jak i napowietrzne.
Nie pracowaćnożycami, jeśli w pobliżu znajdująsięosoby postronne, zwłaszcza dzieci. Przed praca wyznaczyćstrefębezpie-
czeństwa o promieniu, co najmniej 5 metrów od miejsca pracy.
Zawsze zakładaćosłony oczu i twarzy, ochroni to oczy, twarz i drogi oddechowe przed pyłem, spalinami i kawałkami drewna
powstającymi podczas cięcia. Zawsze zakładaćodpowiednie, przylegające do ciała ubranie ochronne. Nie nosićluźnej odzieży
ani biżuterii, które mogązostaćpochwycone przez poruszające sięczęści maszyny. Zakładaćrękawice ochronne i ochronniki
słuchu. Zakładaćobuwie ochronne z antypoślizgowąpodeszwą.
Zachowaćszczególnąostrożność podczas obchodzenia sięz paliwem. Jest łatwopalne, a jego opary wybuchowe. Należy prze-

INSTRUKCJA ORYGINALNA 9
PL
strzegaćponiższych punktów.
- Używaćkanistrów przeznaczonych do paliwa.
- Nigdy nie zdejmowaćkorka wlewu paliwa ani nie dolewaćpaliwa, gdy silnik pracuje. Przed rozpoczęciem tankowania odczekać
ażsilnik i elementy układu wydechowego ostygną.
- Nie palić.
- Nigdy nie tankowaćwewnątrz pomieszczeń.
- Nigdy nie przechowywaćurządzenia lub kanistra na paliwo w pomieszczeniach z otwartym ogniem, np. w pobliżu podgrzewacza
wody.
- Nie próbowaćuruchamiaćsilnika, jeżeli rozleje siępaliwo, lecz przed uruchomieniem przenieść urządzenie z dala od miejsca
rozlania.
- Po zatankowaniu zawsze zamykaći dokładnie dokręcaćkorek wlewu paliwa.
- Ewentualne opróżnienie zbiornika paliwa należy wykonywaćna zewnątrz pomieszczenia.
Jeżeli mechanizm tnący uderzy w jakikolwiek obcy przedmiot lub przycinarka do żywopłotów zacznie hałasowaćlub drgaćw nie-
typowy sposób, wyłączyćsilnik i odczekać, ażelementy przycinarki do żywopłotów zatrzymająsię. Odłączyćprzewód od świecy
zapłonowej i podjąć następujące kroki:
- skontrolowaćuszkodzenie,
- sprawdzićczy nie ma poluzowanych elementów i dokręcićje,
- wymienićlub naprawićwszelkie uszkodzone części na części zgodne ze specyfikacjami.
Podczas pracy należy stosowaćochronniki słuchu. Narażenie na nadmierny hałas może doprowadzićdo trwałego uszkodzenia
słuchu.
Należy stosowaćokulary ochronne. Powstające podczas pracy odpadki mogąstworzyćzagrożenie uszkodzenia oczu.
Należy sięzapoznaćz instrukcjami wyłączania urządzenia w nagłych przypadkach,
PRACA
Urządzenie należy używaćzgodnie z zaleceniami zawartymi w instrukcji obsługi. Zabronione jest użytkowanie urządzenia w
innych sposób i do innych celów niżopisane w instrukcji.
Zatrzymaćsilnik i odłączyćświecęzapłonowąw każdym przypadku:
- czyszczeniem lub usuwaniem zapchania,
- sprawdzaniem, przeprowadzaniem konserwacji lub innych prac przy urządzeniem,
- regulacjąpozycji roboczej zespołu tnącego,
- pozostawieniem urządzenia bez nadzoru.
Przed uruchomieniem silnika upewnićsię, że urządzanie jest prawidłowo ustawione w wyznaczonej pozycji roboczej.
Podczas pracy urządzeniem zawsze należy sięupewnić, że pozycja robocza jest bezpieczna i prawidłowo zabezpieczona, szcze-
gólnie gdy używa sięstopni lub drabiny.
Nie pracowaćurządzeniem z uszkodzonym lub nadmiernie zużytym zespołem tnącym.
Aby ograniczyćryzyko pożaru należy utrzymywaćsilnik i układ wydechowy w czystości. W szczególności powinny byćwolne od
pozostałości po pracy, odpadków i wycieków olejów i nadmiaru smarów.
Przed rozpoczęciem pracy należy sięupewnić, że wszystkie osłony ochronne i uchwyty zostały poprawnie zamontowane. Nigdy
nie pracowaćnarzędziem niekompletnym lub przerobionym bez zgody producenta.
Pracując urządzeniem wyposażonym w dwa uchwyty, zawsze trzymaćje obiema rękami.
Zawsze uważaćna swoje otoczenie i zachowywaćczujność wobec możliwych zagrożeń, z których można nie zdawaćsobie
sprawy z powodu hałasu urządzenia.
Narzędzie wytwarza pole elektromagnetyczne o niewielkim natężeniu. Pole elektromagnetyczne może miećwpływ na prace
urządzeńelektrycznych znajdujących sięw pobliżu narzędzie w tym i rozruszników serca. Przed rozpoczęciem pracy zaleca się
konsultacjęz lekarzem i/lub producentem rozrusznika.
KONSERWACJA I PRZECHOWYWANIE
Gdy wyłącza sięurządzenie aby przeprowadzićobsługę, oględziny lub przechować, należy wyłączyćsilnik, odłączyćprzewód
świecy zapłonowej i upewnićsię, że wszystkie ruchome części sięzatrzymały. Przed przystąpieniem do jakichkolwiek oględzin,
regulacji itp. odczekać, ażurządzenie ostygnie.
Urządzenie przechowywaćw miejscach oddalonych od otwartego ognia lub iskier, ze względu na opary paliwa. Przed odstawie-
niem w miejsce przechowywania zawsze odczekać, ażurządzenie ostygnie.
Na czas transportu lub przechowywania urządzenia, zakładaćzawsze osłonętransportowąna zespółtnący.
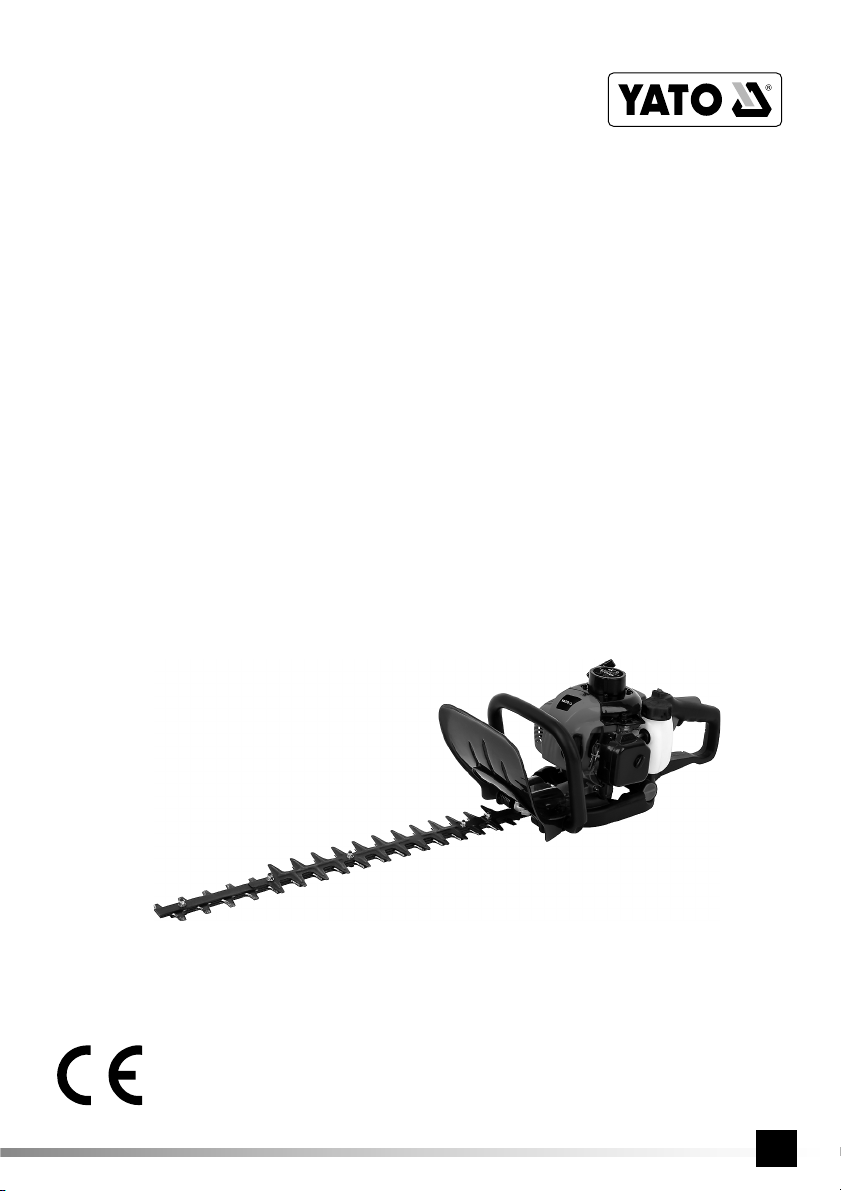
OBSŁUGA NOŻYC
Przygotowanie nożyc do pracy (II)
Przed rozpoczęciem pracy należy upewnićsię, że ostrza sąprawidłowo nasmarowane. W tym celu należy ściągnąć osłonęostrzy
i wpuścićkilka kropli oleju maszynowego pomiędzy ostrza nożyc. Odczekaćkilkanaście minut, a następnie starannie usunąć

INSTRUKCJA ORYGINALNA
10
PL
nadmiar oleju.
Ustawienie uchwytu tylnego (III)
Uchwyt tylny ma możliwość obrotu wokółosi, co umożliwia wygodniejsząi bezpieczniejsza pracę. W celu obrotu uchwytu należy
nacisnąć przycisk blokady uchwytu i obrócićuchwyt w lewo lub prawo o 90 stopni, tak żeby blokada sama powróciła do
przedniego położenia i zablokowała dalszy, przypadkowy obrót uchwytu. Przed rozpoczęciem pracy należy sięupewnić, że
uchwyt nie przemieści sięsamoistnie podczas pracy. Podczas ustawiania położenia uchwytu nie należy naciskaćdolnego przy-
cisku przepustnicy.
Uzupełnianie paliwa
Nożyce sązasilane mieszankąbenzyny bezołowiowej o liczbie oktanowej powyżej 95 i oleju przeznaczonego do silników dwu-
suwowych.
Zabronione jest stosowanie czystego paliwa. Benzynęnależy zamieszaćz olejem w proporcjach benzyna:olej 40:1.
Mieszankęnależy wymieszaćprzed wlaniem do zbiornika paliwa. Mieszanie i nalewanie paliwa należy przeprowadzaćz dala od
źródełognia. Nie wolno palićw trakcie uzupełniania i przygotowywania paliwa. Uzupełnianie paliwa należy przeprowadzaćna
zewnątrz pomieszczeń, w odległości, co najmniej 3 metrów od miejsca uruchamiania i pracy nożycami.
W celu ochrony silnika należy stosowaćdobrej jakości benzynębezołowiowąoraz dobrej jakości olej przeznaczony do dwusuwo-
wych silników, chłodzonych powietrzem. Nie wolno stosowaćoleju przeznaczonego do silników czterosuwowych. Oraz mieszanki
przeznaczonej do silników chłodzonych cieczą.
W przypadku rozlania paliwa należy dokładnie powycieraćjego resztki, przed uruchomieniem nożyc.
Przed uruchomieniem nożyc upewnićsię, że pokrywa wlewu paliwa została mocno i pewnie dokręcona.
Nie stosowaćmieszanki starszej niż90 dni.
Uruchamianie silnika
Przed uruchomieniem uzupełnićpaliwo w zbiorniku.
Zdjąć osłonęostrzy.
Położyćnożyce na twardym i równym podłożu.
Dźwigniędławika pchnąć do przodu (IV).
Nacisnąć 10 razy pompępaliwową(V).
Włącznik ustawićw pozycji „I - włączony” (VI).
Upewnićsię, że ostrza nożyc nie dotykająniczego, jednąrękąprzytrzymaćnożyce za uchwyt przedni, a drugąrękąpociągnąć
za linkęstartową. Na początku ciągnąć za linkępowoli, ażdo wyczucia oporu, następnie energicznie pociągnąć linkę4 razy (VII).
Powinien sięwłączyćsilnik. Pozwolićlince wrócićdo położenia spoczynkowego. Dźwigniędławika pchnąć do tyłu i pozwolić
urządzeniu sięrozgrzaćna jałowych obrotach przez około 10 sekund.
Zabrania sięuruchamiania nożyc trzymając je w rękach. Pracujące ostrza mogązetknąć sięz częściami ciała i spowo-
dowaćobrażenia.
Należy zwrócićuwagę, aby linkęstartowąwyciągaćwzdłużosi otworu, wyciąganie linki pod kątem doprowadzi to przedwczesne-
go zużycia linki startowej.
W przypadku uruchamiania ciepłego silnika w przypadku gdy przerwa w pracy wynosi 15 – 20 minut. Dźwigniędławika można
pozostawićw tylnym położeniu, resztęprocedury startowej przeprowadzić, tak jak opisano to powyżej. Jeżeli silnik nie będzie się
chciałuruchomićprzeprowadzićproceduręstartowąjak dla silnika zimnego.
Zatrzymywanie silnika
Zwolnićdźwignięprzepustnicy i poczekać, ażsilnik osiągnie jałowe obroty. Przełączyćwłącznik w pozycję„O - wyłączony”.
W przypadku potrzeby awaryjnego wyłączenia silnika należy przełącznik przestawićw pozycję„O - wyłączony”.
Silnik należy natychmiast zatrzymaćw poniższych przypadkach:
- obroty silnika ulegająsamoistnej zmianie,
- występuje iskrzenie,
- w przypadku uszkodzenia ostrzy,
- w przypadku pojawiania siępłomieni lub dymu,
- w przypadku pojawienia sięwysokich drgań,
- w przypadku deszczu lub burzy.
Użytkowanie
Nie należy pozwalaćna pracęurządzenia na niskich obrotach lub podczas uruchamiania.
Najbardziej efektywna praca jest, jeśli ścinanie odbywa siępełnymi szerokimi ruchami. Dla uzyskania większej efektywności
można przechylićnożyce pod kątem 5-10Ow kierunku cięcia (XVI).
Aby osiągnąć równąjednąwysokość żywopłotu, można posłużyćsiężyłka rozciągniętąwzdłużlinii cięcia. Należy ścinaćczęść
żywopłotu znajdującąsiępowyżej żyłki.
Możliwe jest pionowe cięcie żywopłotu. Zaleca sięciąć ruchami po łuku od dołu do góry, a następnie od góry do dołu aby wykorzy-

INSTRUKCJA ORYGINALNA 11
PL
staćobie strony ostrzy (XVII). W związku z konstrukcjąnożyc w przypadku niepełnego zbiornika paliwa, po dłuższym czasie cięcia
bocznego może zgasnąć silnik. Aby temu zapobiec należy okresowo przechylaćnożyce do położenia poziomego.
Porady przydatne podczas pracy
Uwaga! W nagłych przypadkach należy zatrzymaćsilnik przez przełączenie włącznika w pozycję„O – wyłączony”.
Należy sięzadbaćo równowagęi właściwąpostawępodczas pracy. Zachowaćszczególnąuwagępodczas pracy na śliskim,
nachylonym lub nierównym podłożu.
Podczas pracy należy stale obserwowaćostrza. Nie należy przeprowadzaćcięcia w miejscach pozostających poza zasięgiem
wzroku.
Przed rozpoczęciem pracy należy dokładnie obejrzećmiejsce pracy, usunąć wszystkie luźne gałęzie oraz pozostałości po po-
przednim ścinaniu. Należy zachowaćszczególna ostrożność podczas obróbki wysokich żywopłotów. Przed rozpoczęciem pracy
należy sprawdzićtakże druga stronężywopłotu.
Osłona przekładni nożyc nagrzewa siępodczas pracy. W celu uniknięcia oparzenia należy unikaćkontaktu z osłonąprzekładni.
Podczas pracy należy stosowaćregularne przerwy. Urządzenie podczas pracy emituje hałas oraz drgania, które mająwpływ na
operatora sprzętu. Stosowanie regularnych przerw oraz środków ochrony osobistej takich jak rękawice, ochronniki słuchu oraz
ochrona oczu pozwala zredukowaćwpływ pracy urządzenia na kondycjęoperatora.
Należy przystępowaćdo pracy będąc zdrowym i w dobrej kondycji. W przypadku wystąpienia nudności, bólu głowy, zaburzenia
widzenia (np. zmniejszone pole widzenia) problemów ze słuchem, zawrotów głowy należy natychmiast zaprzestaćpracy urządze-
niem. Oprócz innych możliwości objawy te mogąbyćzwiązane ze zbyt wysokim stężeniem spalin w obszarze roboczym.
W przypadku zacięcia nożyc w trakcie pracy należy nożyce natychmiast wyłączyćza pomocąwłącznika, przełączając jąw pozy-
cję„O – wyłączony”, odłączyćprzewód świecy zapłonowej, poczekaćdo całkowitego ostygnięcia elementów nożyc, a następnie
przystąpićdo usunięcia przyczyny zacięcia.
Jeżeli w trakcie zacięcia jakikolwiek element ostrzy lub osłon ulegnie uszkodzeniu lub odkształceniu należy go wymienićbądź
naprawić, przed rozpoczęciem pracy.
KONSERWACJA NOŻYC
Przed rozpoczęciem jakiejkolwiek czynności opisanej poniżej należy wyłączyćnożyce. Upewnićsię, że silnik jest chłodny. Należy
wykręcićświecęzapłonowądla uniknięcia przypadkowego uruchomienia nożyc.
Podczas jakichkolwiek prac wykonywanych przy ostrzach wymagane jest wkładanie rękawic ochronnych.
Konserwacja filtru powietrza
Konserwacjęfiltru powietrza należy przeprowadzićpo każdorazowym użyciu nożyc.
Należy odkręcićpokrywęfiltru powietrza i wyjąć filtr (VIII).
Większe zanieczyszczenia można usunąć przez otrzepanie filtra, mniejsze należy wydmuchaćstrumieniem sprężonego powie-
trza.
Zabranie sięczyszczenia filtra w benzynie lub rozpuszczalnikach.
Zamontowaćfiltr na miejsce i przykręcićosłonę.
Wymiana i konserwacja świecy zapłonowej
W celu wymiany świecy zapłonowej należy zdemontowaćpokrywęfiltru powietrza i wyciągnąć filtr powietrza.
Zdjąć gumowa osłonęstyku świecy i świecęwykręcićdostarczonym kluczem (IX).
Należy sprawdzićstan elektrod świecy zapłonowej. Jeżeli zostanązaobserwowane zanieczyszczenia, należy spróbowaćoczysz-
czaćelektrody świecy za pomocąszczotki drucianej. W przypadku, gdy czyszczenie nie przynosi spodziewanych efektów należy
wymienićświecęna nową.
Odstęp między elektrodami świecy zapłonowej powinien wynosićmiędzy 0,6 a 0,7 mm (X).
Należy sprawdzaćstan świecy, co najmniej raz w miesiącu.
Konserwacja mechanizmu (XI)
Mechanizm nożyc smaruje sięprzez smarownicę, w tym celu należy na smarownice nałożyćkońcówkętowotnicy i wtłoczyć
około 3 razy olej maszynowy. Smarowanie mechanizmu przeprowadzaćraz do roku przed rozpoczęciem sezonu. W przypadku
intensywnej pracy smarowanie przeprowadzaćczęściej.
Konserwacja nożyc
Należy dbać, aby noże były zawsze nasmarowane. Zapobiegnie to pojawianiu sięrdzy, która obniża wydajność narzędzia, a
także może zwiększyćryzyko wystąpienia urazów. Luz pomiędzy ostrzami powinien wynosićpomiędzy 0,2, a 0,4 mm, mierzone
w miejscu skręcenia ostrzy śrubą.
Fabrycznie ostrza sąnaostrzone w celu osiągania optymalnej wydajności pracy, ale w wyniku pracy ulegająstępieniu. Przed
rozpoczęciem każdej pracy należy ocenićstan ostrzy. Jeżeli zostanązaobserwowane zaokrąglenie górnej krawędzi ostrzy lub
zniknięcie zaokrąglenia dolnej części ostrza, należy ostrza naostrzyć(XV). Ostrzenia należy dokonaćw autoryzowanym serwisie

INSTRUKCJA ORYGINALNA
12
PL
producenta.
Przed rozpoczęciem przechowywania nożyc przez dłuższy czas należy ostrza spryskaćza pomocąśrodka konserwującego lub
rozprowadzićgo po ostrzach za pomocąpędzla. Nadmiar środka konserwującego należy usunąć dopiero bezpośrednio przed
przystąpieniem do pracy. Taka konserwacja zmniejszy ryzyko rdzewienia ostrzy.
Regulacja gaźnika
Regulacja gaźnika jest możliwa do przeprowadzenia w wyspecjalizowanym zakładzie naprawczym.
Regulacjęnależy przeprowadzać, kiedy silnik nie będzie osiągałmaksymalnych obrotów.
Przed regulacjąnależy zdemontowaćosłonęfiltru powietrza.
Należy najpierw sprawdzićdziałanie przepustnicy gazu.
Przy maksymalnie wciśniętym przycisku przepustnicy dźwignia powinna dochodzićdo oporu (XII). Jeżeli jest inaczej należy
przystąpićdo regulacji.
W tym celu należy poluzowaćnakrętkęzabezpieczającąi wyregulowaćuciąg linki nakrętkątak (XIII), aby przepustnica osiągała
maksymalne wychylenie przy maksymalnie wciśniętym przycisku przepustnicy.
Po regulacji przykręcićnakrętkęzabezpieczającą.
Regulacja biegu jałowego (XIV)
Regulacja biegu jałowego jest możliwa do przeprowadzenia w wyspecjalizowanym zakładzie naprawczym.
Regulacjębiegu jałowego należy przeprowadzać, gdy silnik jest ciepły.
Jeżeli silnik wyłącza siępodczas biegu jałowego należy przeprowadzićregulacjębiegu jałowego. W tym celu należy wyregulować
położenie śruby regulacji biegu jałowego tak, aby silnik pracowałrówno i bez przerw na biegu jałowym, a noże zatrzymywały się
po zwolnieniu nacisku na przyciski przepustnicy.
Przechowywanie nożyc
Właściwa konserwacja przed rozpoczęciem przechowywania pozwoli na dłuższąbezawaryjnąeksploatacjęnożyc.
Przeprowadzićczynności konserwacyjne noży.
Opróżnićzbiornik z paliwa, na przykład za pomocąpompki z do paliwa z tworzywa sztucznego, dostępnej w handlu.
Uruchomićsilnik i pozwolićmu pracowaćna biegu jałowym do momentu ażsięwyłączy. Pozwoli to oczyścićgaźnik z resztek
paliwa.
Pozwolićsięschłodzićsilnikowi.
Wyjąć świecęzapłonową. Przez otwór wlaćjednąłyżeczkęoleju do silników dwusuwowych. Kilka razy pociągnąć ostrożnie za
linkęstartową, pozwoli to rozprowadzićolej po komorze spalania. Zamontowaćświecęzapłonową.
Oczyścićobudowę.
Nożyce przechowywaćw miejscu chłodnym i suchym z dobrąwentylacją. Z daleka od źródełzapłonu.
Ponowne uruchomienie nożyc
Wykręcićświecęzapłonową, kilka razy pociągnąć ostrożnie za linkęstartową, pozwoli to oczyścićkomoręspalania z resztek
oleju. Uzupełnićpaliwo w zbiorniku. Przystąpićdo procedury uruchamiania silnika.
Usterka Możliwa przyczyna Postępowanie
Silnik nie uruchamia sięNieprawidłowo przeprowadzona procedura startowa Przestrzegaćprocedury startowej
Świeca zapłonowa jest wilgotna lub zardzewiała Oczyścićlub wymienićświecęzapłonową
Niepoprawnie wyregulowany gaźnik Oddaćnarzędzie do wyspecjalizowanego serwisu
Silnik uruchamia się, ale brakuje
mocy
Niepoprawne ustawienie dźwigni dławika Dźwigniędławika pchnąć do tyłu
Zanieczyszczony filtr powietrza Wyczyścićfiltr powietrza
Niepoprawnie wyregulowany gaźnik Oddaćnarzędzie do wyspecjalizowanego serwisu
Nierównomierna praca silnika Zły odstęp pomiędzy elektrodami świecy zapłonowej Oczyścićlub wymienićświecęzapłonową
Niepoprawnie wyregulowany gaźnik Oddaćnarzędzie do wyspecjalizowanego serwisu
Z układu wydechowego wydobywa
siędym zamiast spalin
Mieszanka paliwowa o niepoprawnych proporcjach Przestrzegaćwłaściwych proporcji mieszanki paliwowej
Niepoprawnie wyregulowany gaźnik Oddaćnarzędzie do wyspecjalizowanego serwisu

13
ORIGINAL INSTRUCTIONS
GB
CHARACTERISTICS OF TOOL
Petrol hedge shear is intended only for trimming and forming shrub crowns and trimming of thin twigs. Thanks for the petrol drive
it retain greater mobility than electric shear. Correct, reliable, and safe operation of the device is dependent on its proper use,
therefore:
Prior to working with the device, you should read all the instruction and keep it around.
For any damage or injuries caused by the tool misuse, failure to comply with safety regulations and instructions of this manual, the
supplier is not responsible. The tool misuse causes also the loss of user rights to the guarantee and warranty.
EQUIPMENT
The shear is supplied in a complete state and requires no assembly.
TECHNICAL DATA
Parameter Unit Value
Catalog number YT-85021
Weight (without fuel) [kg] 5.8
Fuel tank capacity [l] 0.6
The length of cutting [mm] 550
The length of guide bar [mm] 610
Maximum cutting thickness [mm] 34
Cutting speed [min-1] 1850
Engine
the number of cylinders 1
the number of strokes 2
cooling air
Spark plug type L8RTF
Engine displacement [cm3] 25.4
Engine power [kW] 0.70
Maximum rotation speed of the engine [min-1] 9500
The maximum recommended engine speed with the cutting unit [min-1] 7000
Recommended idling speed [min-1] 3400
Fuel consumption at max. engine power [kg/h] 0.367
Noise - pressure LpA [dB (A)] 96 ± 3
Noise - power LpA [dB (A)] 105,3 ± 0,48
Level of vibration [m/s2] 6.9 ± 1.5
SAFETY INSTRUCTIONS
IMPORTANT. Read carefully before starting the shear operation. Keep for future use.
Every time when in the description appears the term: “device” it should be treated as a “hedge shear”.
PREPARATION
THE DEVICE MAY BE THE CAUSE OF SERIOUS INJURY. Carefully read the instructions manual. Become familiar with the cor-
rect handling, operation, maintenance, starting and stopping the device. Become familiar with the correct handling of all controls.
Never allow children to operate the device.
Be careful during cutting the live wires, both above-ground and overhead.
Do not work with scissors, if there are bystanders, especially children. Before starting thework you should assign a safety zone
with a radius of at least 5 metres away from the place of work.
Always wear eye and face shields, it protects your eyes, face and respiratory tract against dust, exhaust, and pieces of wood
arising while cutting. Always wear the appropriate, fitting to the body, protective clothing. Do not wear loose clothing or jewelry,
because it can be caught by moving parts of the tool. Wear protective gloves and hearing protection. Wear safety shoes with
non-slip soles.
Take special care when handling fuel. It is flammable, and its vapors are explosive. Please observe the following recommenda-
tions.
- Only use canisters, which are designed for the fuel.
- Never remove the fuel filler cap nor add fuel when the engine is running. Before tanking wait until the engine and the exhaust

14
GB
ORIGINAL INSTRUCTIONS
system components cool down.
- Do not smoke.
- Never refuel indoors.
- Never store the device or fuel canister in rooms with open fire, for example near the water heater.
- Do not attempt to start the engine, if the fuel is spilled out, before you start device move it away from spilling.
- After refueling always shut and carefully tighten the fuel tank cap.
- Possible emptying the fuel tank must be done outside of the room.
If the cutting mechanism strikes any foreign object or hedge shear starts to vibrate or make noise in an unusual way, turn off
the engine and wait until the elements of hedge shear will stop. Disconnect the wire from the spark plug and take the following
steps:
- inspect the damage,
- check whether there are any loose parts and tighten them,
- repair or replace any damaged parts for parts in accordance with the specifications.
When you work you should use hearing protectors. Exposure to excessive noise can lead to permanent hearing damage.
Use protective glasses. During the work the garbage can create risk of eye injury.
You must be familiar with the instructions to switch off the device in case of emergency,
OPERATION
The device should be used in accordance with the recommendations of the instruction manual. It is forbidden to use the device in
any other manner or for any purpose other than described in the manual.
Stop the engine and disconnect the spark plug in each case:
- cleaning or removal of a clogging,
- checking, carrying out maintenance or other work on the device
- adjusting the operating position of cutting unit,
- leaving equipment unattended.
Before starting the engine, make sure that the device is properly positioned in the assigned operating position.
When operating the device you should always make sure that the working position is safe and properly secured, particularly when
using steps or ladder.
Do not operate the device with damaged or excessively worn out cutting unit.
To reduce the risk of fire, keep clean the engine and exhaust system. In particular it should be free of the remnants of work, waste
and leakage of oil and excess grease.
Before starting work, make sure that all protective covers and handles are correctly fitted. Never operate the incomplete tool or,
which has been converted without the consent of the manufacturer.
When you are working device equipped with two handles, always hold it with both hands.
Always observe your surroundings and keep alert to possible threats, which may not be realized due to the noise of the device.
The tool produces a low-intensity electromagnetic field. The electromagnetic field may affect the work of electrical equipment
located near this tool and cardiac pacemakers. Before you start the work it is recommended to consultat your doctor and / or
manufacturer of the cardiac pacemaker.
MAINTENANCE AND STORAGE
When you turn off the device to perform a service, inspection, or store it, turn off the engine, disconnect the spark plug wire and
make sure that all moving parts has been stopped. Prior to any inspections, adjustments, etc. wait until the machine has cooled
down.
Because of fuel vapours keep the device in places, which are distant from open flames or sparks. Before storing it in a storage
always wait until the machine has cooled down.
For transport or storage of thedevice, install always the transport cover on cutting unit.
SERVICING THE SHEAR
Preparation of shear to work (II)
Before starting the work, make sure that the blades are properly lubricated. To do this, remove the cover of blades and let a few
drops of machine oil between the blades of the shear. Wait several minutes, and then carefully remove the excess oil.
Setting the rear handle (III)
Rear handle has the ability to rotate around its axis, which enables more convenient and safer work. In order to rotate the handle
you should press the lock of handle button and rotate the handle to the left or right by 90 degrees, so that the lock itself is returned
to its former position and blocked further, random rotation of the handle. Before starting work, make sure that the handle does not
move spontaneously during its operation. When setting the handle position you should not press the lower throttle button.

15
ORIGINAL INSTRUCTIONS
GB
Refuelling
Shear is powered by a mixture of unleaded petrol with octane above 95 and oil for two-stroke engines.
It is forbidden to use homogenous fuel. Gasoline should be mixed with oil in the ratio of 40:1.
The mix should be mixed before filling the fuel tank. Mixing and pouring the fuel must be carried out away from sources of ignition.
Do not smoke while refueling. tank filling should be made outside, at least 3 meters away from starting or operating the shear.
In order to protect the engine, you should use a good quality unleaded petrol and good-quality oil for two-stroke air-cooled en-
gines. Do not use the oil intended for four-stroke engines, and mixture, which is intended for liquid-cooled engines.
If fuel spills you should carefully rub the remains before starting the shear.
Before starting the shear make sure that the fuel tank lid is firmly and securely tightened.
Do not use mixes older than 90 days.
Starting the engine
Before running the tool you should add the fuel to the tank.
Remove the blades cover.
Put the shear on a hard and level ground.
Push the choke lever forward (IV).
Press 10 times the fuel pump (V).
Set the switch to position “I - switched on” (VI).
Make sure that the blades of the shear are not touching anything, with one hand hold the shear with its front handle and with the
other hand to pull the starting line. At the beginning you should pull the line slowly until you feel resistance, then pull briskly 4 times
(VII). The engine should turn on. Let the line return to resting position. Push back the choke lever and allow the device to warm
up idling for about 10 seconds.
It is forbidden to start the shear by holding it in your hands. Working blades may come into contact with parts of the
body and cause injury.
Attention should be paid to that the starting line be pulled up along the axis of hole, drawing angled link for will lead to premature
wear of it.
If you start a warm engine when has been switched off for 15 - 20 minutes. You can leave choke lever in the rear position, the rest
of the starting procedure should be carried out as it is described above. If the engine does not start, you should to carry out the
starting procedure as for a cold engine.
Stopping the engine
Release the throttle lever and wait until the engine starts its iddle rotation. Switch the power switch to “O - switched off”.
If you need an emergency engine shut-off the power switch must be switched in position “O - switched off”.
The engine must be stopped immediately in the following situations:
- engine revolutions spontaneously change,
- there is a scintillation,
- in the event of damage to the blades,
- in the case of the occurrence of flames or smoke,
- in case of high vibration,
- in case of rain or storm.
Usage
Do not allow operation of the device at low rev speeds or during startup.
The most effective work is if shearing takes place through full of broad movements. In order to achieve greater efficiency
you can tilt the scissors at an angle of 5-10Oin the cutting direction (XVI).
To achieve equal one hedge height, you can use the fishing line stretched along the cutting line. You should cut the part
of hedge which is located above the line.
A vertical cut of the hedge is also possible. It is advisable to cut through the moves along an arc from bottom to top and from top
to bottom in order to use both sides of the blades (XVII). Due to the shear design, in the event of incomplete fuel tank, after longer
time of the side cutting, the engine can be switched off. To prevent this, periodically tilt the shear to the horizontal position.
Tips useful when working
Attention! In an emergency situation you should stop the engine by switching the switch in position “O - switched off”.
You should ensure balance and proper posture while you work. Be extremely careful when working on slippery, sloping or uneven
ground.
During operation, the blade must be constantly monitored. Do not carry out the cut in places which are remaining out of sight.
Before starting the work, you should carefully inspect the work area, remove any loose branches and remnants of the previous
shearing. Take special precautions when processing high hedges. Before starting work, check also the other side of the hedge.
Front cover of the shear transmission heats up during operation. To avoid burns, avoid contact with the transmission cover.
When you work you should use regular breaks. During operation the device emits noise and vibrations, which affect the equipment

16
GB
ORIGINAL INSTRUCTIONS
operator. The use of regular breaks and personal protective equipment such as gloves, hearing protection and eye protection can
reduce the impact of operation on the condition of operator.
You should start the work being healthy and in good shape. In case of nausea, headache, visual disturbances (eg. reduced field
of vision), hearing problems, or dizziness immediately discontinue the operation. Among other possibilities, these symptoms may
be related to too high concentration of fumes in the work area.
If the shear jams during operation, immediately switch it off using the power switch, switching it to the “O - switched off”, disconnect
the spark plug wire, wait for the cooling down of shear components and then proceed to remove the cause of the jam.
If, during the jam any part of blade or covers is damaged or deformed, then it must be replaced or repaired before the start of
device operation.
SHEAR MAINTENANCE
Before starting any operation, which is described below, turn off the shear. Make sure that the engine is cold. Unscrew the spark
plug to prevent the accidental starting of shear.
During any works performed on blades it is required the wearing of protective gloves.
Maintenance of the air filter
Air filter maintenance should be performed after each use of the shear.
Unscrew the cover of air filter and remove the filter (VIII).
Larger contaminants can be removed by filter scutching, the smaller should be blown by a jet of compressed air.
It is forbidden to clean the filter in gasoline or solvents.
Install the filter in place and screw the cover.
Replacing the spark plug and its maintenance
To replace the spark plug, remove the cover of air filter and remove air filter.
Remove the rubber cover of plug contact and remove the plug with supplied wrench (IX).
Check the condition of the electrodes of spark plug. If you notice any contamination, you should try to clean the spark plug
electrodes with a wire brush. When cleaning does not provide the expected results you should exchange the spark plug for a
new one.
The spacing between the electrodes of spark plug should be between 0.6 and 0.7 mm (X).
You should check the condition of plug at least once a month.
Mechanism maintenance (XI)
Shear mechanism is lubricated by greaser, for that you should put the ending of screw-down grease cup on the greaser, and then
about three times force in the machine oil. Lubrication of mechanism should be carried out once a year before the start of the
season. In the case of intensive work the lubrication should be carried out more frequently.
Shear maintenance
Keep the blades are always lubricated. This will prevent the occurrence of rust, which reduces the efficiency of tool, and can also
increase the risk of injuries. The clearance between the blades should be between 0.2 and 0.4 mm, measured at the blade twist
screw.
Factory blades are sharpened in order to achieve optimum performance, but as a result of work they become dull. Before starting
any job you should evaluate the blades. If you notice any rounding of the upper edge of the blade or the disappearance of the
rounding of the bottom part of the blade, the blades should be sharpened (XV). Sharpening should be performed in the manufac-
turer’s authorized service center.
Before storing scissors for a long time, the blades should be sprayed with a preservative or spread it on the blades with a brush.
Excess of preservative should be removed just before starting the work. Such maintenance will reduce the rusting risk of blades.
Carburetor adjustment
Carburetor adjustment may be done in a specialized repair shop.
The adjustment should be carried out when the engine is not reached maximum revs speed.
Before adjusting, remove the air filter cover.
You shuld first test the throttle.
When the button is pressed up to the maximum, the throttle lever should be up to the resistance (XII). If it is different you should
proceed to adjustment.
For this purpose, you should loosen the protecting nut and adjust the line towing capacity (XIII) by the nut so to the throttle reaches
its maximum deflection at maximum pressing of throttle button.
After adjusting you should tighten the protecting nut.

17
ORIGINAL INSTRUCTIONS
GB
Adjustment of idling (XIV)
Carburetor adjustment may be done in a specialized repair shop.
Adjustment of the idle speed must be carried out when the engine is warm.
If the engine shuts off when idling you should adjust the idle. To do this, adjust the position of the idle adjustment screw so that
the engine ran smoothly and without interruption on the idle speed and the blades stop when you release the pressure on throttle
buttons.
Shear storage
Proper maintenance before storage will allow for long trouble-free operation of shear.
Perform maintenance of the blades.
Drain the tank with fuel, by means, for example, of a plastic fuel pump that is commercially available.
Start the engine and let it idle until it shuts down. This will clean the carburetor of remaining fuel.
Allow to cool down the engine.
Remove the spark plug. Through the opening pour one teaspoon of oil for two-stroke engines. Several times, carefully draw
starter line, it will distribute the oil in combustion chamber. Install the spark plug.
Clean the housing.
Shear should be stored in a cool, dry place with good ventilation, away from sources of ignition.
Shear restart
Remove the spark plug, several times carefully draw for the starter line, it will allow to clean the combustion chamber from oil
residues. Add fuel to the tank. Proceed to starting the engine procedure.
Failure Possible cause Action
The engine does not start An incorrect starting procedure Follow the starting procedure
The spark plug is wet or rusty Clean or replace the spark plug
The carburetor is incorrectly adjusted Return the tool to a specialized service
engine starts, but the power is missing.
Incorrect adjustment of the choke lever Push the choke lever back.
Contaminated air filter Clean the air filter
The carburetor is incorrectly adjusted Return the tool to a specialized service
The engine is running in an uneven manner Adjust the gap between the electrodes of the spark plug Clean or replace the spark plug
The carburetor is incorrectly adjusted Return the tool to a specialized service
The exhaust system produces smoke instead of
exhaust gas
Fuel mixture with incorrect proportions Observe proper proportions of the fuel mixture
The carburetor is incorrectly adjusted Return the tool to a specialized service

18 ORIGINALANLEITUNG
D
CHARAKTERISTIK DES WERKZEUGES
Die Heckenscheren mit Verbrennungsmotor sind ausschließlich zum Schneiden und Formen von Buschkronen sowie zum Durch-
schneiden von dünnen Zweigen vorgesehen. Auf Grund des Dieselantriebs haben sie eine höhere Mobilität als die Elektroscheren.
Der richtige, zuverlässige und sichere Funktionsbetrieb des Gerätes ist von der entsprechenden Nutzung abhängig, deshalb:
Vor Beginn der Arbeiten mit diesem Gerät ist die komplette Bedienanleitung durchzulesen und einzuhalten.
Für Schäden, die im Ergebnis der Nichteinhaltung der Sicherheitsvorschriften, nicht entsprechend dem Verwendungszweck und
der Anweisungen der vorliegenden Anleitung auftreten, haftet der Lieferant nicht. Wird das Werkzeug nicht entsprechend seinem
Verwendungszweck genutzt, dann verliert der Nutzer auch seinen Garantie- bzw. auch Haftungsanspruch.
AUSRÜSTUNG
Die Heckenschere wird im kompletten Zustand angeliefert und erfordert keine Montage.
TECHNISCHE DATEN
Parameter Maßeinheit Wert
Katalognummer YT-85021
Gewicht (ohne Kraftstoff) [kg] 5,8
Volumen des Kraftstoffbehälters [l] 0,6
Schnittlänge [mm] 550
Länge der Führung [mm] 610
Maximale Schnittdicke [mm] 34
Schnittgeschwindigkeit [min-1] 1850
Motor
Anzahl der Zylinder 1
Taktanzahl 2
Kühlung mit Luft
Typ der Zündkerze L8RTF
Hubraum des Motors [cm3] 25,4
Motorleistung [kW] 0,70
Maximale Motorgeschwindigkeit [min-1] 9500
Max. empfohlene Drehgeschwindigkeit des Motors mit dem Schneidsystem [min-1] 7000
Empfohlene Geschwindigkeit im Leerlauf [min-1] 3400
Kraftstoffverbrauch bei max. Motorleistung [kg/h] 0,367
Schalldruck LpA [dB (A)] 96 ± 3
Lärm - Leistung LwA [dB (A)] 105,3 ± 0,48
Schwingungspegel [m/s2] 6,9 ± 1,5
SICHERRHEITSANLEITUNGEN
WICHTIG! Vor Beginn der Nutzung genau durchlesen. Bis zum nächsten Gebrauch gut aufbewahren.
Jedesmal, wenn in der Beschreibung der Terminus: „Gerät” erscheint, muss man es als Werkzeug zum „Beschneiden
von Hecken” betrachten.
VORBEREITUNG
DAS GERÄT KANN DIE URSACHE FÜR ERNSTHAFTE VERLETZUNGEN SEIN. Die Bedienanleitung ist genau durchzulesen.
Machen Sie sich mit der richtigen Haltung, Bedienung, Wartung, Inbetriebnahme und Anhalten des Werkzeuges vertraut. Ebenso
muss man die richtige Bedienung der Steuerelemente kennenlernen.
Kindern ist die Bedienung des Gerätes nicht erlaubt.
Während des Schneidens muss man auf Elektroleitungen achten, die unter Spannung stehen, und zwar sowohl auf die oberir-
dischen als auch die Freiluftleitungen.
Arbeiten Sie nicht mit der Heckenschere, wenn sich in der Nähe unbeteiligte Personen , besonders Kinder, befinden. Kennzeich-
nen Sie vor Arbeitsbeginn eine Sicherheitszone mit einem Radius von mindestens 5 Metern vom Arbeitsort.
Schützen Sie Ihre Augen und das Gesicht, denn das schützt Augen und Gesicht sowie die Atemwege vor Staub, Abgasen und
Holzstückchen, die während des Schneidens entstehen können. Tragen Sie immer enganliegende Schutzkleidung. Es dürfen

19
ORIGINALANLEITUNG
D
weder lose Kleidung noch Schmuck getragen werden, die von den rotierenden Teilen des Werkzeuges erfasst werden können,
Tragen Sie Schutzhandschuhe und Gehörschutz bzw. Schutzschuhe mit rutschfester Sohle.
Während des Umgangs mit dem Kraftstoff muss man besonders vorsichtig sein. Er ist leicht brennbar und seine Dämpfe sind
explosiv. Nachfolgende Punkte sind zu beachten.
- Verwenden Sie richtige Kraftstoffbehälter bzw. Kanister.
- Niemals den Einlassstopfen für den Kraftstoff abnehmen, wenn der Motor läuft.Vor dem Betanken muss man abwarten, bis der
Motor und die Elemente der Abgaseinrichtung abgekühlt sind.
- Nicht rauchen.
- Das Betanken darf nicht in Räumen durchgeführt werden.
-Das Gerät und der Kraftstoffbehälter dürfen nicht in Räumen mit offenem Feuer, z.B. in der Nähe eines Vorwärmers für das
Wasser, gelagert werden.
- Nicht versuchen, den Motor zu starten, wenn der Kraftstoff ausläuft, sondern vor der Inbetriebnahme ist das Gerät weit entfernt
von der Leckstelle zu bringen.
- Nach dem Betanken ist der Einlassstutzen für den Kraftstoff zu schließen und den Deckel festanzuschrauben.
- Das eventuelle Entleeren des Kraftstoffbehälters darf nur außerhalb von Räumen ausgeführt werden.
Wenn der Schneidmechanismus auf irgendeinen fremden Gegenstand trifft die Heckenschere beginnt zu lärmen oder untypisch
zu schwingen, ist der Motor auszuschalten und abzuwarten, bis die Elemente der Heckenschere zum Stillstand gekommen sind.
Dann ist die Leitung von der Zündkerze zu trennen und folgende Schritte vorzunehmen:
- Beschädigungen kontrollieren,
- Es ist zu überprüfen, ob es lose Elemente gibt und sie ggfs. fest anschrauben.
- Sämtliche beschädigten Teile sind gegen Teile entsprechend der Spezifikation auszutasuchen oder zu reparieren.
Während des Betriebes ist Gehörschutz zu tragen. Übermäßiger Lärm kann zu einem Dauerschaden des Gehörs führen.
Ebenso sind Schutzbrillen zu tragen. Die während des Funktionsbetriebes entstehenden Abfälle können das Auge verletzen.
Man muss sich auch mit der Anleitung zum Ausschalten des Gerätes in einer Notfallsituation vertraut machen.
FUNKTIONSBETRIEB
Das Gerät ist entsprechend den in der Bedienanleitung enthaltenen Hinweisen zu verwenden. Verboten ist die Nutzung des
Gerätes auf andere Art und Weise bzw. für andere Zwecke, als in der Anleitung beschrieben.
Motor anhalten und in jedem Fall die Zündkerze zu entfernen:
- Reinigung oder Beseitigung einer Verstopfung,
- Prüfen und Durchführen von Wartungs- oder anderen Arbeiten am Gerät,
- Regelung der Arbeitsstellung der Schneidbaugruppe,
- niemals das Gerät ohne Aufsicht lassen.
Vor der Inbetriebnahme des Motors muss man sich davon überzeugen, dass das Gerät richtig und in der geplanten Arbeitsstellung
eingestellt ist.
Während der Arbeit mit dem Gerät muss man sich immer davon überzeugen, dass die Arbeitshaltung sicher und geschützt ist,
besonders wenn man Stufen oder Leitern benutzt.
Arbeiten Sie nicht mit einer beschädigten oder übermäßig verschlissenen Schneidbaugruppe.
Um das Risiko eines Feuers einzuschränken, muss man den Motor und das Abgassystem in einem sauberen Zustand halten.
Besonders muss es frei von Restern der Arbeit, Abfallstoffen , Leckstellen des Öles und übermäßigem Schmiermittel sein.
Vor Arbeitsbeginn muss man sich davon überzeugen, Dass alle Schutzabdeckungen und Handgriffe richtig montiert wurden.
Niemals mit einem unvollständigen oder ohne Zustimmung des des Herstellers umgearbeiteten Werkzeug arbeiten.
Wenn man mit einem Werkzeug arbeitet, das zwei Handgriffe hat, muss man es auch immer mit beiden Händen festhalten.
Dabei muss man auch immer auf seine Umgebung achten und gegenüber möglichen Gefahren wachsam sein, die man sich auf
Grund des Lärms vom Gerät gar nicht vorstellen kann.
Das Werkzeug erzeugt ein elektromagnetisches Feld mit geringer Stärke. Das elektromagnetische Feld kann den Betrieb der
elektrischen Anlagen beeinflussen, die sich in der Nähe des Werkzeuges befinden, wie z.B. auch von Herzschrittmachern. Vor
Arbeitsbeginn wird eine Konsultation bei einem Arzt und/oder Hersteller des Herzschrittmachers empfohlen.
WARTUNG UND LAGERUNG
Wenn das Gerät ausgeschaltet wird, um eine Bedienung, Sichtprüfung durchzuführen oder es zu lagern, muss man den Motor
ausschalten, die Leitung der Zündkerze abtrennen und sich davon überzeugen, dass alle beweglichen Teile angehalten haben.
Vor Beginn irgendwelcher Sichtprüfungen, Regelungen usw., muss man abwarten, bis sich das Gerät abgekühlt hat.
Das Gerät ist an Stellen zu lagern, die weit entfernt von offenem Feuer oder Funken liegen, und zwar auf Grund der Dämpfe des
Kraftstoffes. Vor dem Abstellen auf der Lagerfläche muss man abwarten, das das Gerät sich abgekühlt hat.
Während des Transports und der Lagerung des Gerätes ist eine Schutzabdeckung für die Schneidbaugruppe anzulegen.

20 ORIGINALANLEITUNG
D
BEDIENUNG DER HECKENSCHERE
Betriebsvorbereitung der Heckenschere (II)
Vor Arbeitsbeginn muss man sich davon überzeugen, dass die Schneiden richtig geschmiert sind. Zu diesem Zweck ziehnt man
die Abdeckung der Schneide ab und tröpfelt einige Tropfen des Maschinenölszwischen die Schneiden der Heckenschere. Dann
wartet man einige Minuten und beseitigt danach sorgfältig das überschüssige Öl.
Einstellen des hinteren Handgriffes (III)
Der hintere Handgriff hat die Möglichkeit der Drehung um die Achse, wodurch eine bequeme und sichere Arbeit ermöglicht wird.
Um den Handgriff zu drehen, muss man die Blockadetaste des Handgriffes drücken und den Handgriff nach rechts oder links um
90° drehen, und zwar so, dass die Blockade von selbst in die vorherige Stellung zurückkehrt und eine weitere zufällige Drehung
blockiert. Vor Arbeitsbeginn muss man sich auch überzeugen, das der Handgriff sichwährend der Arbei von selbst verlagert.
Währen der Einstellung des Handgriffes darf man nicht die untere Taste der Drosselklappe drücken.
Nachfüllen des Kraftstoffes
Die Heckenschere wird mit einem Gemisch aus bleifreien Benzin mit einer Oktanzahl von über 95 und einem Öl, das für Zwei-
taktmotoren vorgesehen ist, betrieben.
Die Verwendung von reinem Kraftstoff ist verboten. Das Öl ist mit dem Kraftstoff im Verhältnis Benzin : Öl 40: 1 zu mischen.
Das Gemisch muss man vor dem Einfüllen in den Kraftstoffbehälter herstellen. Das Mischen und Umgießen des Kraftstoffes ist
weit entfernt von Feuerquellen durchzuführen. Während des Nachfüllens und der Vorbereitung des Kraftstoffes darf nicht geraucht
werden.Das Nachfüllen des Kraftstoffes muss außerhalb der Räume durchgeführt werden, und zwar in einem Abstand von min-
destens 3 m vom Ort der Inbetriebnahme und dem Arbeitsort der Heckenschere.
Um den Motor zu schützen, muss man hochqualitatives bleifreies Benzin und Öl für Zweitaktmotoren, gekühlt mit Luft, von eben-
so guter Qualität verwenden. Das Öl für Viertakt-Motoren darf nicht verwendet werden sowie auch kein Gemisch für Motoren, die
mit einer Flüssigkeit gekühlt werden.
Beim Verschütten von Kraftstoff muss man die Reststellen genau trocken reiben, und zwar vor der Inbetriebnahme der Hecken-
schere. Vor der Inbetriebnahme der Heckenschere, muss man sich davon überzeugen, ob der Deckel vom Einlassstutzen für den
Kraftstoff sicher und fest zugeschraubt wurde.
Es darf kein Gemisch verwendet werden, das schon älter als 90 Tage ist.
Inbetriebnahme des Motors
Vor der Inbetriebnahme den Kraftstoff im Behälter nachfüllen.
Die Abdeckung der Schneide abnehmen.
Die Heckenschere auf einen harten und ebenen Untergrund ablegen.
Den Hebel der Drossel nach vorn stoßen (IV).
10 Mal die Kraftoffpumpe drücken. (V).
Den Schalter auf die Position „I - eingeschaltet” stellen(VI).
Überzeugen Sie sich, dass die Schneiden der Heckenschere nirgendwo anstoßen, mit einer Hand hält man die Heckenschere
am vorderen Handgriff und mit der anderen Hand zieht man am Starterseil. Am Anfang zieht man relativ langsam am Starterseil,
bis man einen Widerstand spürt, danach zieht man 4 Mal energisch am Seil (VII).Der Motor sollte starten. Das Seil muss in die
Ausgangslage zurückgehen. Den Hebel der Drossel nach vorn stoßen und dem Gerät ein Vorwärmen im Leerlauf über ungefähr
10 Sekunden erlauben.
Die Inbetriebnahme der Heckenschere ist verboten, wenn man sie schon in den Händen hält. Die arbeitende Schneide
kann mit Körperteilen in Berührung kommen und Verletzungen hervorrufen.
Man muss darauf achten, dass das Starterseil entlang der Öffnung herausgezogen wird; ein Herausziehen des Seiles unter einem
Winkel führt zu einem vorzeitigen Verschleiß des Starterseiles.
Bei der Inbetriebnahme eines warmen Motors in dem Fall, wenn die Betriebspause 15-20 Minuten beträgt. Den Hebel der Drossel
kann man in dieser Stellung belassen und der Rest der Startprozedur ist so durchzuführen wie oben beschrieben. Wenn der
Motor sich nicht starten lässt, ist die Startprozedur wie für einen Kaltstart des Motors durchzuführen.
Anhalten des Motors
Den Hebel der Drosselklappe freigeben und abwarten, ob der Motor die Umdrehungen im Leerlauf erreicht. Den Schalter auf die
Position „O - ausgeschaltet” stellen.
Bei einer Havarie des Ausschaltens vom Motor muss man den Schalter auf die Position „O - ausgeschaltet” stellen.
Den Motor muss man in folgenden Fällen sofort anhalten:
- die Drehungen des Motors unterliegen einer eigenständigen Änderung,
- es tritt Funkenbildung auf,
- bei einer Beschädigung der Schneiden,
- bei Flammen oder Rauch,
- wenn hohe Schwingungen auftreten,
- bei Regen oder Gewitter.
This manual suits for next models
1
Table of contents
Languages:
Other YATO Trimmer manuals