6
Initial Setup
To ensure quick, successful integration of the Model
800 series into your shop, please follow these set-up
procedures before the first use of the unit.
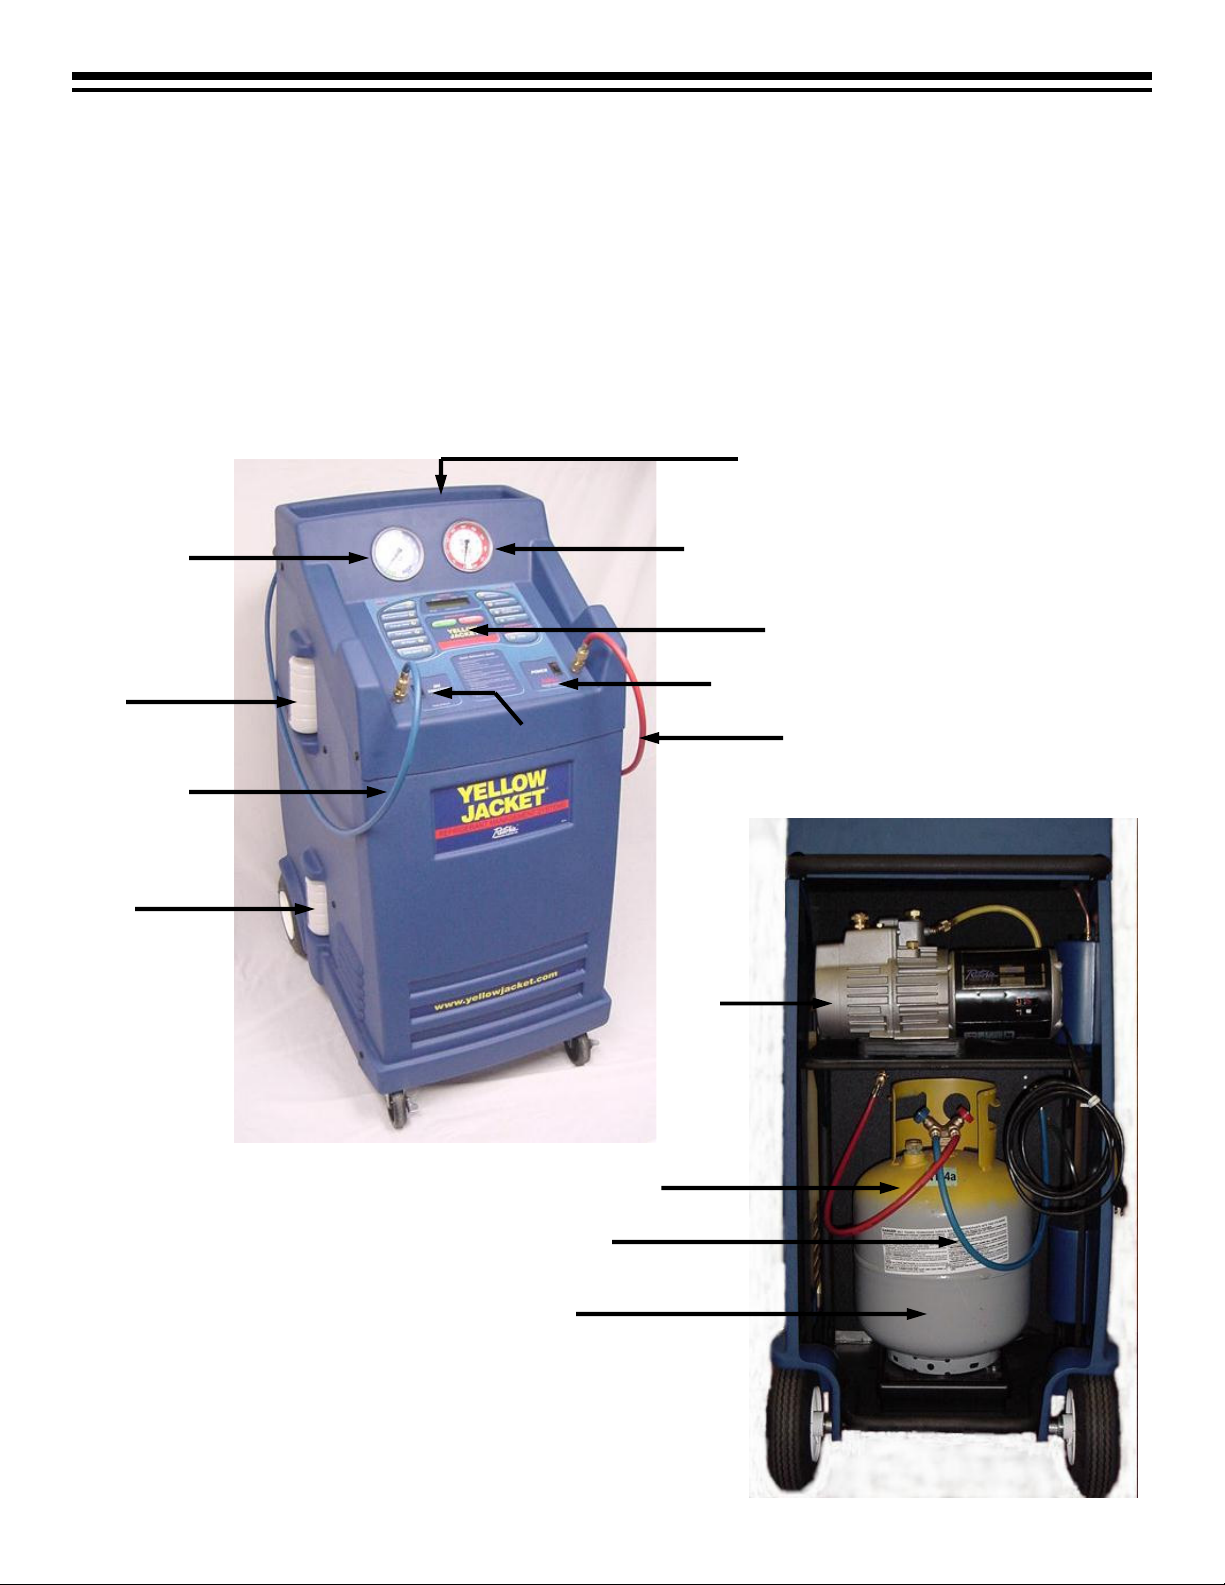
Step 1: FILL VACUUM PUMP WITH OIL
1. Remove thumbscrews located under the vacuum
pump shelf.
2. Rotate the front of the vacuum pump out to
expose the oil fill port.
3. Remove the red protective cap from the oil fill port
and discard it.
4. Remove the fill cap located on top of the vacuum
pump.
5. Using a funnel, insert oil to the oil level line using
the provided YELLOW JACKET vacuum pump oil.
6. Replace the oil fill cap.
7. Rotate the vacuum pump back into its original
position and replace the thumbscrews.
Step 2: FILL SOURCE TANK WITH REFRIGERANT
(also see page 11)
1. Attach the tank refill adapter (Part No. 19153) to
the R-134a virgin cylinder.
2. Plug unit into a grounded 110V outlet.
3. Turn on the main power switch.
4. When the display reads “SELECT MODE” press
the TANK REFILL key.
5. Follow the user prompts to complete the tank refill
process.
6. When the display reads “SUPPLY TANK EMPTY”
disconnect blue hose.
7. Remove the tank refill adapter from empty R134a
virgin cylinder and place it in the tool tray located
on top of the unit.
The unit is now ready for operation.
The Recovery Only mode should be used to fully
recovery and recycle all refrigerant from an air
conditioning system. For instance, if the system
needs to be opened to atmosphere to replace a part,
all refrigerant must be removed before opening the
system.
MODE 1 Operational Steps
1. Refer to Pre-Operation Check List.
2. Verify the automobile air conditioning system
is off.
3. Press MODE 1 for recovery operations. The
LCD should read “CONNECT HOSES ENTER
TO CONTINUE.”
NOTE: If desired, the gauges of the 800 SERIES
can now be used to aid investigation of an A/C
system problem. Ensure the automobile A/C
system is turned off prior to selecting a mode on
the 800 SERIES.
2. Connect the high and low side auto service
hoses to the respective high and low side
service ports on the automobile A/C system.
Open the service hose valves.
3. Press ENTER to begin recovery operations.
WARNING: DO NOT RECOVER
CONTAMINATED REFRIGERANT WITH THIS
UNIT. RECOVERING CONTAMINATED
REFRIGERANT WILL VOID ALL WARRANTIES
AND MAY CAUSE DAMAGE TO OTHER
AUTOMOBILES SERVICED IN THE FUTURE.
During the recovery operation, refrigerant is removed
from both the high and low side of the automobile air
conditioning system. The LCD will display the amount
of refrigerant being recovered and the status line will
read “RECOVERING REFRIG.”
Note: If “RECOVERY HOLD” Option is selected
The unit will stop at 6” of mercury and hold for five
min as required by EPA Per SAE J2211. If the
pressure rises to 0 psi the compressor will restart and
the unit will pull down to the required 6” of mercury
and hold for two minutes. The unit will repeat this
process until the system pressure remains stable at
vacuum for two minutes or until it fails this process
five times. If the process fails five times the status line
will read “ LEAK CHECK FAILED.” This may mean
that the automobile A/C system has a gross leak and
it will not hold a vacuum.
If this occurs take the appropriate steps to locate the
leak and properly repair it.
If the “RECOVERY HOLD” option is not selected the
unit will shut off at the required level of vacuum and
the operator must insure that the EPA standard (SAE
J2211) is met..
After the system turns off, the unit will beep to alert
the technician the job is complete. The oil removed
from the auto will drain into the oil drain bottle on the
side of the unit. Because a small amount of gas will
be released as the oil drains, a small hissing sound
may come from the bottle.
Mode 1– Recovery Only