manuals.online logo
Brands
  1. Home
  2. •
  3. Brands
  4. •
  5. YOODA
  6. •
  7. Remote Control
  8. •
  9. YOODA MAGNETIC PRO 1RT YSH User manual

YOODA MAGNETIC PRO 1RT YSH User manual

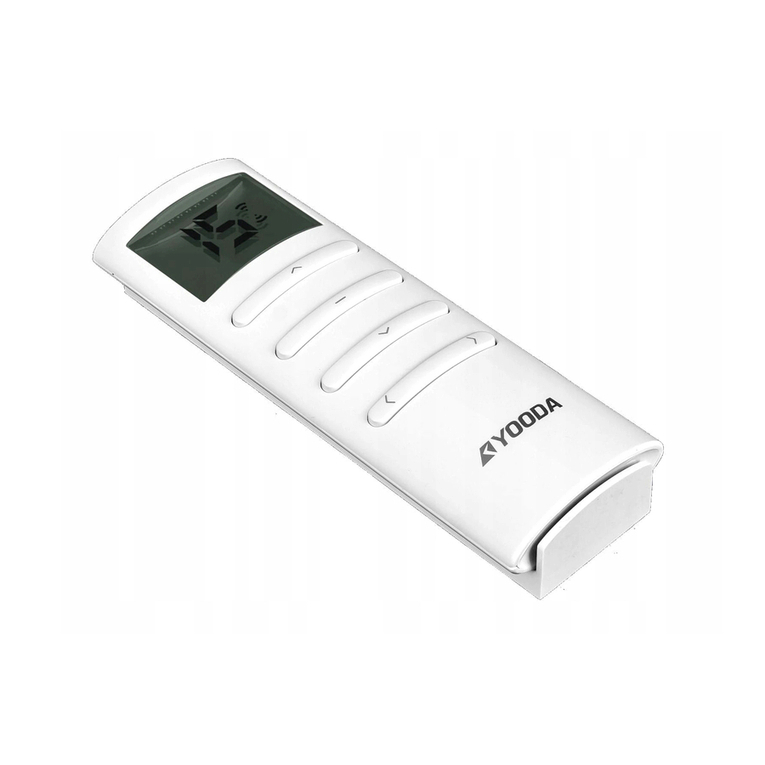
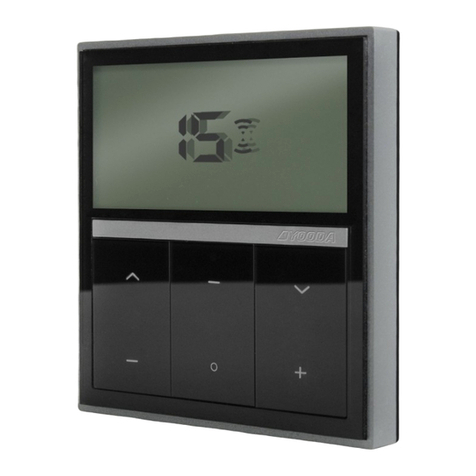
MAGNETIC PRO 5-channel remote control with a display and timer,
white (MAGNETIC PRO_5RT YSH)
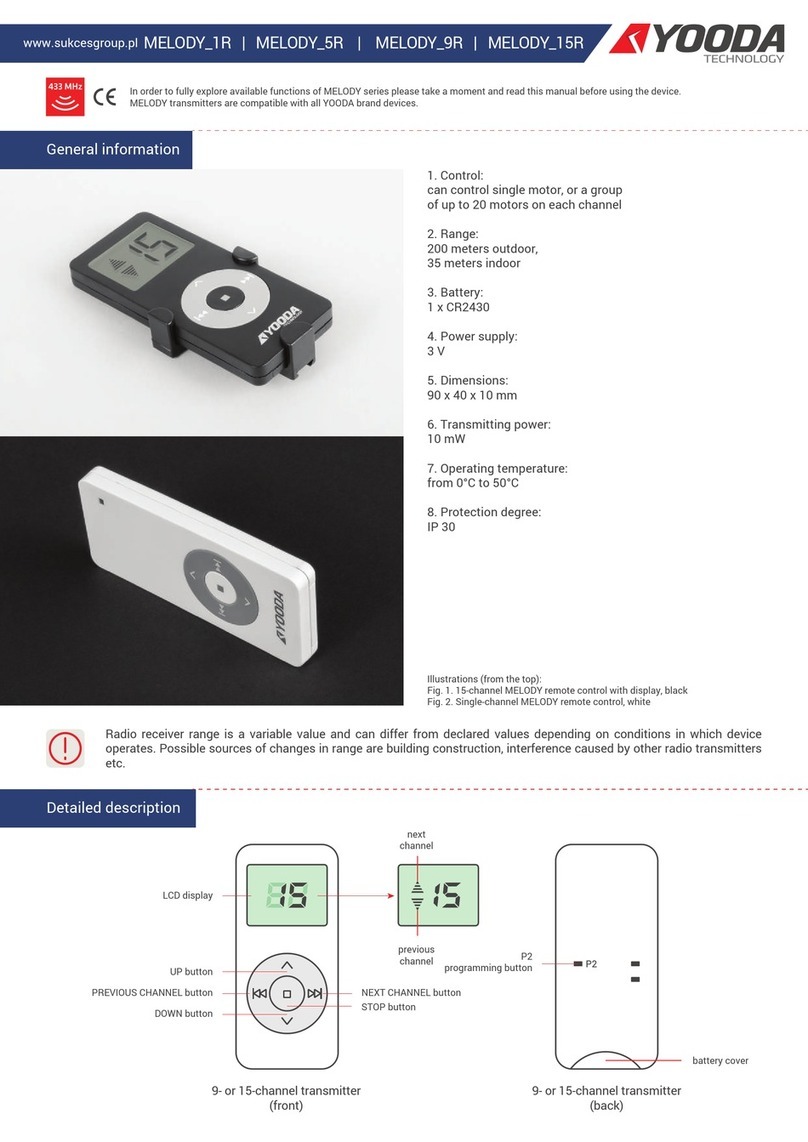
1. Control:
possibility to control 1 motor or a group of up to 20 motors
on each channel
2. Range:
up to 200 meters in open area,
up to 35 meters indoors
3. Battery:
CR2450
4. Power supply:
3 V
5. Dimensions:
130 x 45 x 12 mm
6. Signal power:
10 mW
7. Operation temperature:
from 0°C to 50°C
8. Safety degree:
IP 30
The range given by the manufacturer is a variable value, depending on the conditions in the environment in which the device works.
Factors such as building structure, signal interference from other devices, etc. affect range.
1
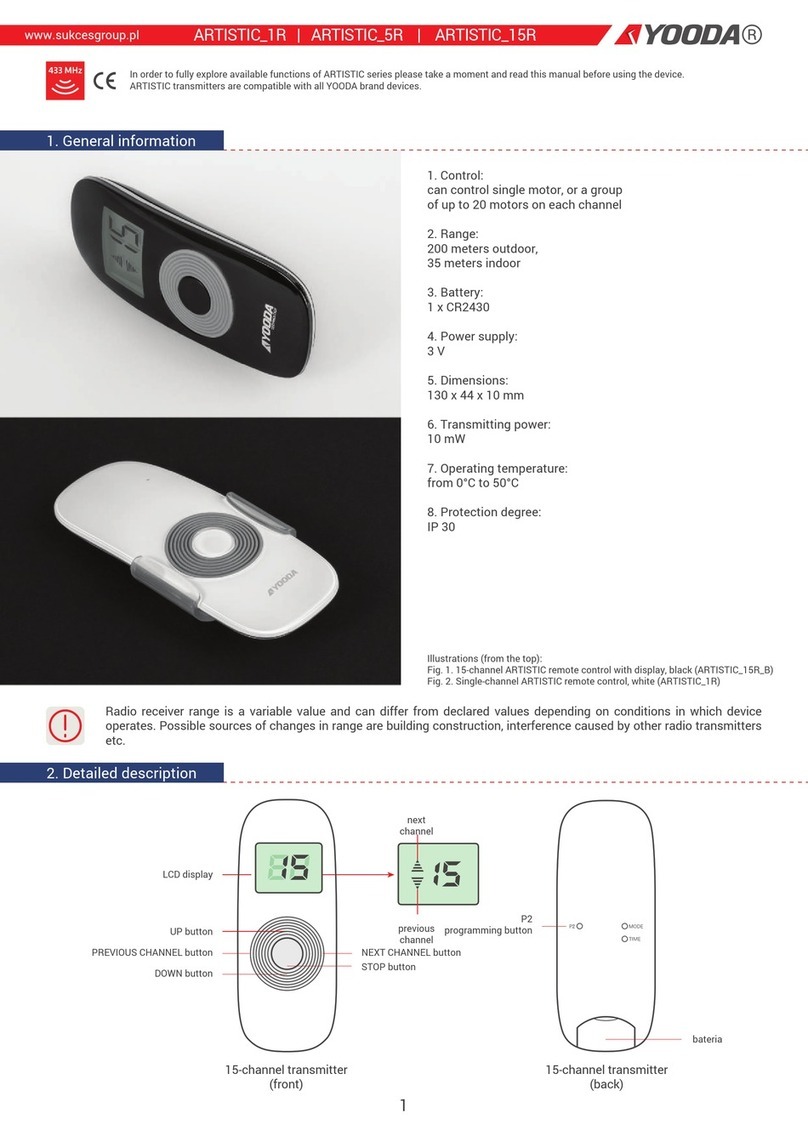
2. Description of the device
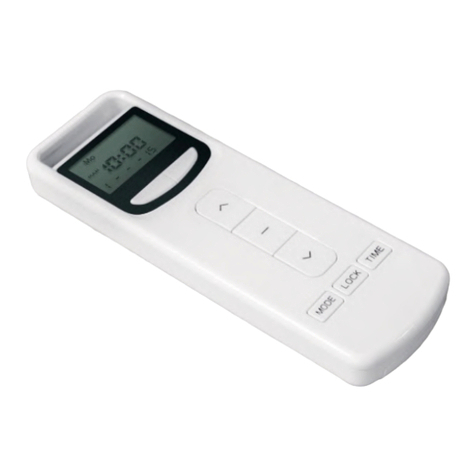
UP button
LCD display
STOP button
DOWN button
CHANNEL + button (P1 +)CHANNEL - button (P1 -)
Time adjusting
button
P2 programming button
Operation mode button
1-channel and 5-channel transmitter
with a timer (front)
Display
of 1-channel transmitter with timer
Display
of 5-channel transmitter
with timer
1-channel and 5-channel transmitter
with a timer (back)
To use the technical capability of MAGNETIC ECO YSH transmitters optimally, read the following instructions carefully.
MAGNETIC PRO YSH transmittersare compatible with all devices of YOODA SMART HOME system.
www.sukcesgroup.pl
MAGNETIC PRO YSH transmitters is control dedicated to bidirectional communication.
MAGNETIC_PRO 1RT, 5RT YSH
day of
the week
minutes
up
down
low battery message
selected channel
operation
mode
time
1. Technical data
1. Move the back housing of the remote control down to access the battery and the programming button.
2. Activate the group channel for the transmitter to control all of the receivers. The group channel is on, if all channels
are highlighted.
3. Choose the group channel and set the automatic mode on the transmitter for all programmed devices to operate
at the programmed time.
4. Battery life is ca. 1 year while executing approximately 4 commands per day.
5. The batteries need replacing when the receiver stops reacting while you press the buttons.
6. Pay attention to polarisation of the battery while replacing it.
Batteries contain substances that may present risk to health or serious environment degradation.
Used batteries must be disposed of in specially marked containers.
The product includes a battery. Swallowing a coin cell battery causes severe internal burns within 2 hours and can result
in death. Store new and used batteries away from children. If the battery compartment does not close safely, stop using
the product and keep it away from children. If you suspect that batteries might have been swallowed or placed in any body part,
seek medical care immediately.
1. Manual operation mode (symbol MAN appears on the display): regular operation mode, without timer function.
2. Automatic operation mode (symbol AUTO appears on the display): regular operation mode with timer function.
3. Random operation mode (symbol <auto> appears on the display): timer function with randomly selected time
± 15 minutes from the set automatic time.
4. Operation mode changes for all of the channels.
1. Any channel can be activated or deactivated in the automatic mode. If the channel is inactive, the transmitter will
not control this particular channel in this mode.
2. Channel is inactive, if the corresponding digit flashes.
3. The function is only available in a 5-channel transmitter.
3. Channel activation in the automatic mode
4. Changing the operation mode
Press the OPERATION MODE button
to set the automatic mode.
Set the channel with
P1- or P1+ buttons.
Press and hold P1+ button
for 3 seconds.
The digit of the channel starts flashing, which means
that the channel is inactive in automatic mode.
Performing the procedure again will activate the channel.
Press the button again to switch
between the operation modes.
Press OPERATION MODE
button to set manual
operation mode.
Press OPERATION MODE
button to set automatic
operation mode.
Press OPERATION MODE
button to set random
operation mode.
2
1. Ustawienie czasu należy przeprowadzić tylko w trybie ręcznym.
2. Dłuższa niż 60 sekund przerwa między kolejnymi wciśnięciami przycisku spowoduje automatyczne wyjście z trybu
programowania bez wprowadzonych zmian.
5. Setting current time
Press
OPERATION MODE
button to set manual
operation mode.
Press and hold TIME ADJUSTING
button for 3 seconds. The currently
set time flashes on the display.
Press P1+ button to choose
the option of changing hours,
minutes or days of the week.
Set the desirable value with
UP or DOWN buttons.
Press TIME ADJUSTING
button to start the clock.
Press and hold TIME ADJUSTING
button for 3 seconds to confirm
the changes (time will stop flashing
on the display).
1. Time adjusting for automatic lifting and lowering should be performed in automatic mode only.
2. Time setting of automatic lifting and lowering should be performed separately on each channel.
3. A break between succesive button presses longer than 60 seconds, will automatically cause the exit from changing mode.
4. Turn on group channel for the transmitter to control all of the blinds. It applies to all operating modes of the transmitter.
5. During time setting for automatic lifting and lowering, the symbol "- -: - -" means that the time is not active in automatic mode.
6. Time setting for automatic lifting and lowering is possible in one of three options:
a) different time for each day of the week,
b) different time from Monday to Friday and a different time on Saturday and Sunday,
c) one time for the whole week.
-
1. Blockage of function keys prevents accidental pressing of two buttons used while programming motors or radio receivers.
2. This function is disabled due to factory settings. To turn it on/off you need to perform the following procedure.
6. Time setting for automatic lifting and lowering
7. Blockage of function keys
Press OPERATION MODE
buton to set automatic
operation mode.
Press and hold
TIME ADJUSTING
button for 3 seconds.
Day of the week flashes
on the display.
Change the option of automatic
time programming with
P1+ or P1- buttons.
Confirm the choice by pressing
STOP button.
If symbol "L" appears on the display,
the blockage function is on.
If symbol "U" appears on the display,
the blockage function is off.
Press and hold STOP button
for 15 seconds.
Press P2 programming button
to confirm your choice.
Symbol "o" will appear on the display.
Press P1+ button to choose
an option to change hours
or minutes of the automatic
time of lifting or lowering on
selected days.
Confirm the changes
by pressing and holding
TIME ADJUSTING button
for 3 seconds (the time will stop
flashing on the display).
Set a desirable value
with UP or DOWN buttons.
AUTO
1. Transmitter can operate in one of two modes:
a) bidirectional
b) unidirectional
2. The transmitter operates in bidirectional mode due to factory settings.
8. Transmitter operation mode selection
Take the battery
out of the transmitter.
Press P2
programming button.
If digit 1 appears on the display,the transmitter
operates in unidirectional mode.
If digit 2 appears on the display, the transmitter
operates in bidirectional mode.
Put the battery in while holding P2
programming button.
3
1. Programming of a transmitter depends on the type of receiver. While programming you should abide by the manual
of the device, that the transmitter is supposed to control.
2. A break between succesive button presses longer than 6 seconds, will automatically cause the exit from programming mode
without saving the changes.
3. If limit positions have not been set, programming of the first transmitter will delete transmitters that were programmed earlier.
4. If all channels are marked on the display, the group channel is on. It allows to simultaneously control all blinds
that are programmed on particular channels. Do not perform any programming procedures on this channel.
The group channel is created automatically.
9. Programming the first transmitter for motors of EV/S type
Turn on power supply
or press the programming button
on the cylinder head (for 2 sec.)
if the power supply is on.
Motor will make a sound.
Blind will make short
up/down moves.
Transmitter has been
programmed.
Press and hold STOP button
on the remote control
for 2 seconds.
Blind will make two
short up/down moves.
Motor will make a few
short sound signals.
4

This manual suits for next models

1

Other YOODA Remote Control manuals

YOODA UNO Series User manual

YOODA

YOODA UNO Series User manual

YOODA VITO Series User manual

YOODA

YOODA VITO Series User manual

YOODA ARTISTIC 5R User manual

YOODA

YOODA ARTISTIC 5R User manual

YOODA SMART TOUCH 2 User manual

YOODA

YOODA SMART TOUCH 2 User manual

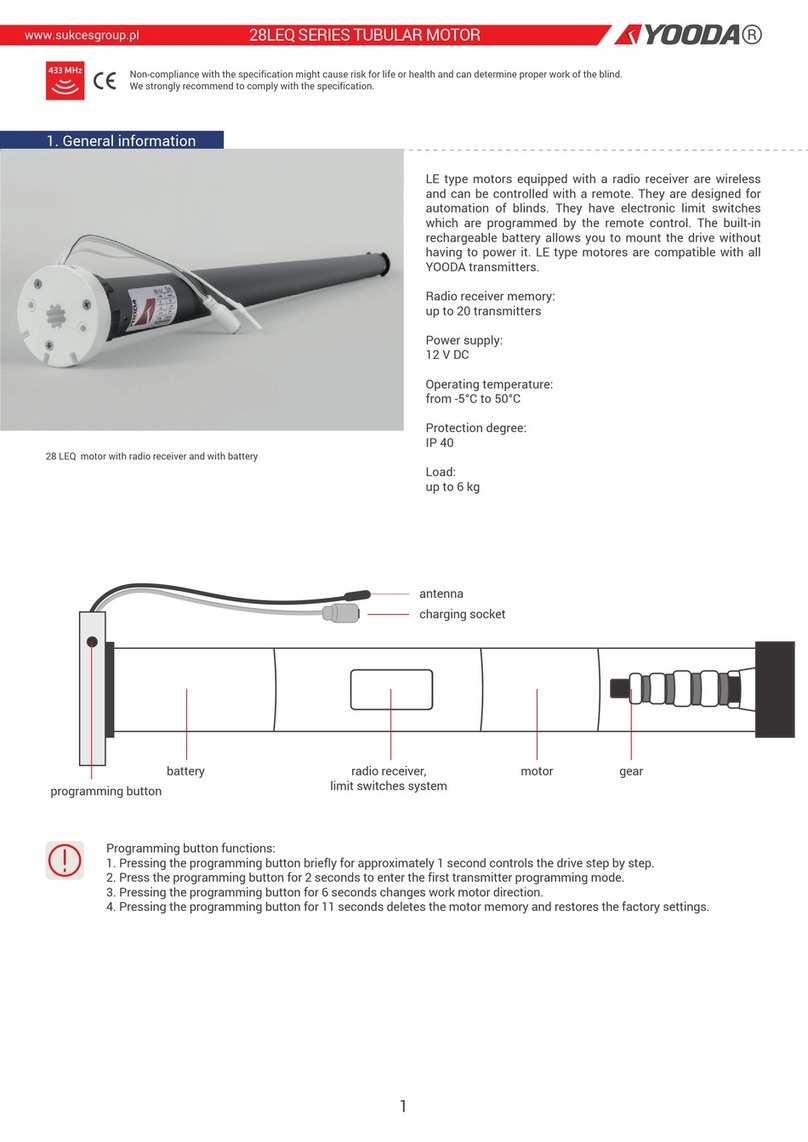
YOODA 28LEQ Series User manual

YOODA

YOODA 28LEQ Series User manual

YOODA ARTISTIC-1R User manual

YOODA

YOODA ARTISTIC-1R User manual

YOODA LINEO Series User manual

YOODA

YOODA LINEO Series User manual

YOODA MELODY 1R User manual

YOODA

YOODA MELODY 1R User manual

YOODA ARTISTIC 1R User manual

YOODA

YOODA ARTISTIC 1R User manual

YOODA MAGNETIC Deluxe Series User manual

YOODA

YOODA MAGNETIC Deluxe Series User manual

YOODA NUXO Series User manual

YOODA

YOODA NUXO Series User manual

YOODA 1711190 User manual

YOODA

YOODA 1711190 User manual

YOODA VETRO 5RT User manual

YOODA

YOODA VETRO 5RT User manual

YOODA SVERO Series User manual

YOODA

YOODA SVERO Series User manual

YOODA MELODY Series User manual

YOODA

YOODA MELODY Series User manual

Popular Remote Control manuals by other brands

Actuall DoorLIFT DL-6 owner's manual

Actuall

Actuall DoorLIFT DL-6 owner's manual

EVE BUTTON Get started guide

EVE

EVE BUTTON Get started guide

Lifebreath 99-129 installation instructions

Lifebreath

Lifebreath 99-129 installation instructions

Universal Electronics Apple TV Remote for Video Service Providers user manual

Universal Electronics

Universal Electronics Apple TV Remote for Video Service Providers user manual

FUTABA 14MZ quick guide

FUTABA

FUTABA 14MZ quick guide

Catalyst The Catalyst 34 user guide

Catalyst

Catalyst The Catalyst 34 user guide

Lennox VRF V0STAT52P-1 manual

Lennox

Lennox VRF V0STAT52P-1 manual

Hi-Tec OPTIC 6 Sport instruction manual

Hi-Tec

Hi-Tec OPTIC 6 Sport instruction manual

Contec RT-M1000 Plus TV-33 Programming and operating instructions

Contec

Contec RT-M1000 Plus TV-33 Programming and operating instructions

One Forall URC-7140 instruction manual

One Forall

One Forall URC-7140 instruction manual

One Forall SAMSUNG URC-1310 manual

One Forall

One Forall SAMSUNG URC-1310 manual

Fly Sky Noble NB4 user manual

Fly Sky

Fly Sky Noble NB4 user manual

Resolution RE100-5 manual

Resolution

Resolution RE100-5 manual

Hi-Tec ECLIPSE 7 System instruction manual

Hi-Tec

Hi-Tec ECLIPSE 7 System instruction manual

Light Symphony LS30050WRC quick start guide

Light Symphony

Light Symphony LS30050WRC quick start guide

FOR-A FA-95RU Quick setup guide

FOR-A

FOR-A FA-95RU Quick setup guide

Perfect Aire RG51F/EU1 owner's manual

Perfect Aire

Perfect Aire RG51F/EU1 owner's manual

Resolution CryptiX-Compatible KeyFob RE600 quick start guide

Resolution

Resolution CryptiX-Compatible KeyFob RE600 quick start guide

manuals.online logo
manuals.online logoBrands
  • About & Mission
  • Contact us
  • Privacy Policy
  • Terms and Conditions

Copyright 2025 Manuals.Online. All Rights Reserved.