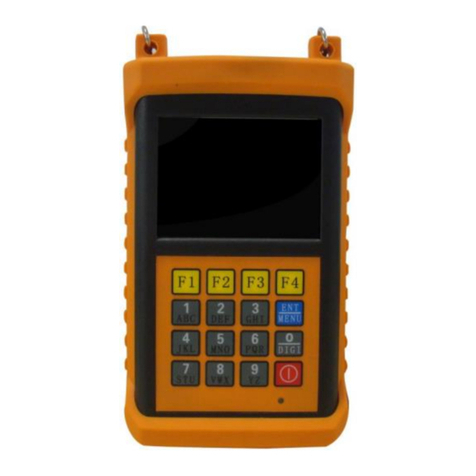
zatech ZMCBR-H65 User manual

ZMCBR-H65
1
General introduction
Preface
Please read this manual carefully before using your Digital Satmeter for the first time.
This operating manual will help you in the
• Appropriate,
• Safe
• Favorable
The technical specifications and operating methods included in this manual are
subject to changes without notice. In case of any inquires after a period of usage,
please contact the manufacturer.
+Safety Precaution
Please read the safety instructions carefully before operating the device.
Please follow all warnings and instructions on the equipment and in the operating
manual.
4 Safety of persons
Ensure that nobody can be hurt by falling tools or parts of the sate antenna during
the adjustment and installation of the antenna. For own security, use a rope on
sloping roofs.
4 Attention for adapter
The devise should only be operated with the supplied AC adapter at the mains. Do
not open the meter or the included AC adapter. There is danger of life through
electric shock! Wrong usage of the ports can lead to the destruction of the
measuring device.
4 Proceed carefully with the measuring device:
• Avoid low temperatures (below 0 °C) or to high humidity.
• The TFT display can be damaged by mechanical impacts.
• Avoid excessive input voltages. Please refer to the technical data
4 Do not operate with the device:
• If it has visible damage,
• If there are loose parts in the device,
• If the device was located outdoors or in damp rooms a extended period of time.
4 Main Supply:
Before operating, please check the units operating voltage is 90~240V AC 50/60Hz.

ZMCBR-H65
2
4 Overload:
Do not overload a wall outlet, extension cord or adapter, neither use damaged
power cord or touch it with wet hand as this may result in electric shock.
4 Liquid:
The receiver shall not be exposed to dripping or splashing water, and that no objects
filled with liquids, such as base, shall be placed on the apparatus.
4 Ventilation:
Keep the slots on top of the receiver uncover to allow sufficient airflow to the unit. Do
not put the receiver on soft furnishings or carpets. Do not expose there receiver to
direct light or do not place it near a heater or in humid conditions. Do not stack
other electronic equipments on top of the receiver.
4 Cleaning:
Plug out the receiver from the wall outlet before cleaning. Clean the receiver by a
soft cloth or mild solution of washing-up liquid (no solvents).
4 Location:
Put the receiver indoor in order to avoid lightening, raining or sunlight.
4 Uncover:
Do not remove the cover, to reduce the risk of electric shock. Contact qualified and
licensed service personnel to repair the receiver, or contact your dealer.
1. Reference
1.1 General Features
- DVB-S2 Compliant (MPEG-4), ISDB-T Complian
- MPEG-4 MPEG-2 Video (MP@ML), MPEG-1 Audio Layer1, Layer2
1.2 Brilliant on Screen Graphic
- User Friendly OSD Menu with Full Function
- Storing 8000 Channels
- USB 2.0 Host Controller
- Software Upgrade via USB
- Satellite Identify
- DiSEqC Search
- Spectrum
- Constellation

ZMCBR-H65
3
2. Product Overview
DVB S2/ ISDB-T
4. LOCK light:
This light will be on when signal is locked
5. 13V/18V light:
Indicate the 13V/18V
6. Function key:
Made of 4 keys, F1 - F4
7. Arrow key and OK key:
Press the Arrow key to select the right item then
press OK key to confirm
8. SYSTEM key:
Enter the settings menu, you can set all system
parameters products
9. AV IN key:
Use this product as a television
10. FIND key:
Enter the menu of measurement signal, you can
measure the signal about transponder quickly.
11. MENU key:
Enter the main menu
12. EXIT key:
Exit from the present menu and back to the
previous menu
13. SCAN key:
In the S2 model, it is blind scan, in the ISDBT
model ,it is auto search
14. USB Port:
One USB Host Port
15.HDMI Port:
Use HDMI line connect to TV
15.ON/OFF:
Switch the battery on/off
1. POWER key:
Turn the product on/off
2. LCD Screen:
Shows Menus and Programs clearly
3. Power light:
Indicates the power status
Red: the product is power on
Green: the product is power off

ZMCBR-H65
4
3. Connection with Other Device
The following chapter shows you the connections among product, ANT and
other equipment, please read this first if you are not sure about the connection,
and it will guide you to the correct connection.
You can connect one receiver directly to the ANT IN.
4. Detailed operation Guide
You should installation the receiver when powering on your product for the first
time after purchase.
4.2 Satellite
Main Menu-> satellite
Press OK enter the satellite model
4.1 Powering On
1. Connect the power cord of the product to
a wall outlet.
2.Power on by pressing the POWER button on
the panel.

ZMCBR-H65
5
4.2.1 TP Search
Main Menu-> Satellite -> TP Search
Press OK enter the TP search, first, you should select satellite, in this picture, you also
can delete, move, and rename the satellite.
When you fixed on a satellite, then press OK the following window will appear. Use
[p/q] button to move cursor, it’ll show the satellite name, transponder, LNB, 22 KHz,
DiSEqC port. When all parameters confirm, press F2 button search the channels. You
also can press F1 to delete the sat, or press F3 to view the constellation, or press F4 to
explorer the signal information.
You can display constellation by F3 button.
4.2.2 Satellite IDE.
Main Menu-> Satellite ->Satellite IDE.
If you don’t know the signal information of some usual sat, in this menu, please wait a
moment, it will find the satellite identify.
4.2.3 Packet Control
Main Menu-> Satellite -> Packet Control
In this menu, you can know the strength and
quality of each transponder under the
satellite.

ZMCBR-H65
6
4.2.4 DiSEqC Search
Main Menu-> Satellite -> DiSEqC Search
Press OK enter the DiSEqC search, in this menu, connect the DiSEqC port, the view
will be display the sat which can connect, then you can search the channel by
DiSEqC. Press F4 button to switch LNB Type.
4.2.5 Motor Search
Main Menu-> satellite -> Motor
Press OK enter the Motor search, select
satellite and any transponder, if signal and
quality OK press F3 button to start search, press
F1 button turning Motor to west. Press F2 button
turning Motor to east. Press the F4 button you
can search by Motor; however, you should set
up the Angle about the sat use the Angle
button first of all.
4.2.6 Spectrum
Main Menu-> satellite -> Spectrum
In this menu, you can know the strength of all transponders.
Press the F1 button to keep the spectrum , and press the F2 button to analyze
spectrum , and press the F3 button to mark spectrum , and press F4 button to next
page.
Press the F1 button to change Polarization control Hor / Ver, and press F2 button to
switch 22khz signal on or off, and Press the F3 button to switch DiSEqC , and press F4
button to previous page .

ZMCBR-H65
7
4.3 TERRESTRIAL
Main Menu-> TERRESTRIAL
Press OK enter the terrestrial model
4.3.1 TP Search
Main Menu-> TERRESTRIAL-> TP Search
In this menu, you can Delete, Add, Manual Search,
Auto Search transponders.
- Delete
In this menu, when you highlight the channel item,
you can press the t/u key to choose the transponder
which you want to delete, then press the F1 key to
delete.
- Add
You can add the transponder which you want with the F2 key. Here you can input
new Frequency, Bandwidth. Press the OK key to confirm the setting, then this new
transponder will be added to the Transponder list.
- Search
You can Manual Search the transponder which you want with the F3 key. You will
be asked to confirm whether only search FTA channels or not. If you select “Yes”,
you will only search FTA channels.
- Auto Search
You can search all transponders with the F4 key.

ZMCBR-H65
8
4.3.2 TP IDE
Main Menu-> TERRESTRIAL-> TP IDE.
In this menu, you can know the exact
information about the transponder and you
can also Delete, Add, Manual Search, Auto
Search transponders .
1. SNR: It will show you the Carrier to Noise Ratio of the transponder you selected.
3. BER:Error Correction
5. Power: It will show you the strength of the transponder you selected.
6. Modulate: Modulation efficiency.
4.3.3 Packet Control
Main Menu-> TERRESTRIAL-> Packet Control
In this menu, you can know the strength
and quality of each transponder
4.3.4 Spectrum
Main Menu-> TERRESTRIAL->Spectrum
In this menu, you can know the strength of
all transponders.
1. t/u : Press the t/ukey to change the
transponder.
2. p/q : Press the p/qkey to change the
range of the Y-axis.
3. Span: Press the F3 key to set transponder
of span.
4. Save Spectrum: Press the F4 key to save
the picture of spectrum.

ZMCBR-H65
9
4.4 Watch TV
Main Menu-> Watch TV
Press OK enter the Watch TV menu, in this menu, you can press the F1 button to
select any satellite or press the F2 button to enter the Channel/Radio menu,
press the up/down key jump to next/previous channel.
Press the F3 button to watch Full Screen.
Press the F4 button to analyze program.
4.5 Settings
4.5.1 System
Main Menu-> Settings-> System
In this menu, you can set all the settings
here by pressing the t/ukey.
1. Menu Language: Set the menu
language.
2. Audio1: Set the preferred audio
language.
3. Audio2: Set the sub-prime audio
language.
4. Digital Audio: Select PCM / RAW as default output.
5. Power Out 12V: If you set it on, it will support 12V voltage.
6. DVBT Power: If you set it on, it will provide voltage for T tuner.
7. Signal Audio: If you set “ON”, in the TP Search interface when you highlight a
transponder with signal, it will sound automatically. If you set “OFF”, in the TP Search
interface when you highlight a transponder with signal, it will not sound.
8. Power Unit: Change the power unit.

ZMCBR-H65
10
4.5.2 OSD Setup
Menu->Settings>OSD Setup
1. Display Mode: Set the HD format between 1080p, 1080i, 720p, 480i, 480p.
2. TV Type: Set the TV Type on PAL/NTSC/Auto state.
3. Screen Mode: Set the display format according to the screen ratio. Select TV
screen mode either 4:3 or 16:9 according to the TV type, or press the MODE button of
RCU directly.
4.5.3 Times
Menu->Settings>Times
1. Time Settings
In this menu, you will set the time mode,
time zone and summer time
2. Sleep Timer
Set the time to make receiver sleep
automatically.
4.5.4 Factory Default
Main Menu-> Settings-> Factory Default
In this menu, you can restore the product to the factory default and also setup it
according to the wizard.
1. All: All data and settings will be deleted.
Tip: If you select “Yes” all data and setting will be lost. Then wait a moment, you will
enter the wizard menu where you can set the parameter according your mind.
2. Channel List Only: All channels data will be deleted.
3. Radio Channel Only: All radio channels data will be deleted.
4. Scramble Channel Only: All scramble channels data will be deleted.
4.5.5 Color Settings
Main Menu-> Settings-> Color Settings
You can set the Brightness/Contrast/Saturation in this menu.
4.5.6 Screen
Main Menu-> Settings-> Screen
In this menu, you can set up Sharpness/Brightness /Contrast/Saturation/LCD
Backlight/LED Backlight.

ZMCBR-H65
11
4.5.7 System Info
Main Menu-> Settings-> System Info
In this menu, you can get the information about the STB, such as Model ID, Hardware
& Software version, Load version and Date. When you need service from the dealer
you need to submit this information in order to get the correct and fast after sales
service.
4.6 Expansion
4.6.1 USB
Main Menu-> Expansion -> USB
In this menu, you can press the t/u key to
select the category that you like to play.
The media files are partitioned into all,
Stream, Movie, Music, Picture, Software and
other.
1. Upload
You can upload software or database.
2. PVR Setting
ØRecord Partition
Select the Partition where save your record or other result of your operation.
ØRecord Mode
Set the Record Mode Channel or Transponder.
ØRecord Type
Set the Record Type TS or PS.
ØRecord Time
Set the Record Default Time off, 30, 60, 90, 120 minute or input number directly.
ØTimeshift Buffer Size (MB)
Set the Timeshift Buffer Size off, 100, 200, 400, 800, 1600, 3200, 6400MB.
ØTimeshift Need Save
Set the Timeshift if need to Save.
ØPlay Start Pos
When playing the PVR file, set the Play Start Pos whether head of the file or last pos
(Stop play by manual last time) of the file.
3. Tool
You can do various operations when using USB HDD or USB disk. In this menu, you can
Rename, Delete, Move, Copy, Create Folder, Sort and Format Disk.
files.

ZMCBR-H65
12
4. Play mode
ØLoop
Set the Loop state on Normal, Reverse, Random, Single or Off.
ØSlideshow Interval
Set the Slide Show Interval from 2S-10S.
ØPhoto View Mode
Set the Photo View Mode state on Full Screen, 2x2 Thumbnail or 2x3 Thumbnail.
5. Play Files
1. Go to Main Menu ->Expansion->USB to enter the USB menu.
2. Press the t/u key to select the file type.
3. Press the p/q key to change the folder or file and press the OK key to open the
folder or play the file.
6. Music
It supports *.mp3,*.flac,*.mp2,*.wav,*.ogg format music files.
OK: Play the selected file.
p/q: Change the highlighted item.
t/u: Adjust volume.
EXIT: Exit the current menu.
ØPlay/Pause
Pause or play the selected file in play list.
ØForward
Fast forward.
ØBackward
Fast backward.
7. Picture
It supports *.bmp, *.jpg ,*.gif format photos.
8. Movie
It supports *.3GP,*.AVI,*.DAT,*.DIVX,*.FLV,*.MKV,*.MOV,*.MP4,*.MPG,*.TS,*.VOB format
movie files.
9. Software Upgrade
Ø.Insert USB to your PC, copy the update file to the USB.
Ø.Restart the STB, when it is starting up, insert the USB.
Ø.In main Menu>Expansion>USB, find and select the update file, then press ok button
, it will upgrade the file.
Ø.After upgrade, the STB will restart automatically. After restart you can search
channel and test it.
Note: During the process of upgrading the S/W, please don’t power off.

ZMCBR-H65
13
4.6.2 Wi-Fi
Enter Menu->Expansion->WIFI
1. Select the network name of your Wi-Fi access point from the list.
2. Press the OK button, then input the right password.
If the Network is connected, it should get the correct IP address and display the
“Connected”.
4.6.3 IP Setting
Menu->Expansion>IP Setting
If the Network is connected fine, it will display “Connected”. In this menu, you can
set IP address manually, also you can get IP address automatically.
F3: Get IP address automatically.
F4: Test the network if connect correctly.
4.6.4 FTP Download
Menu->Expansion>FTP Download
If the Network is connected, you can
download S/W, music, photo and other
media files from the FTP.
4.6.5 PING
Menu->Expansion>PING
You can through Ping Test function to test the connection to the network.
4.7 Basic Operation
4.7.1 PVR
When you watch a program, you can press the F4 key and select PVR item to begin
PVR.

ZMCBR-H65
14
ØStart Recording
1) You can press the F4 button then highlight
the PVR item and press the OK button to start
recording while watching program.
Ø Stop Recording
1) You can press the EXIT button or F4 button
to stop recording .
2) If the free space on the USB HDD or USB disk
is insufficient, recording will stop.
3) Watch the Other program while recording.
4.7.2 TP PVR
When you watch a program, you can press the F4 key and select TP PVR item to
begin TP PVR. It allows record all program under the same TP. At the same time, you
can only watch the program from the same TP.
4.7.3 Auto Timeshift
When you watch a program, you can press
the F4 key and select Auto Timeshift item to
begin Timeshift.
Auto Timeshift allows you to pause a live
broadcast and return to it later and
continue where you left off.
While it is in timeshift mode, press the F1
button to display the playing menu, press F2
button to stop Timeshift
In this menu you can press F1 button to fast
backward the program, press F2 button to
play or pause the program, press F3 button
to display recording information, and press
F4 button to stop playing recording.

ZMCBR-H65
15
4.7.4 System
Press the system directly jump to setting of main menu.
4.7.5 FIND
Press the FIND button to display the signal finding menu, jump to Satellite/Terrestrial
identify menu, rest operation same as above
4.8.6 Scan
In the S2 model, it is blind scan and fast scan, in the ISDBT model, it is auto search
5. Additional Information
5.1 Technical Specification
Satellite Tuner & Demodulator
Frequency Range
950MHz
-2150MHz
Input Connector
Female
Signal level
-
65dBm~-25dBm
LNB supply
13/18V,max400mA
LNB switch control
22KHz
DiSEqC
DiSEqC
1.0 /1.1 / 1.2
Symbol rate
2Mbps~45Mbps
Spectral inversion
Auto conversion
Frequency Range
950MHz
-2150MHz
Input Connector
Female
Signal level
-
65dBm~-25dBm
LNB supply
13/18V,max400mA
LNB switch control
22KHz
DiSEqC
DiSEqC
1.0 /1.1 / 1.2
Symbol rate
2Mbps~45Mbps
Spectral inversion
Auto conversion

ZMCBR-H65
16
Frequency Range
177.143 MHZ
to 803.143 MHZ
Input Connector
F type, female
(With embedded F
connector
)
RF Impedance
75
Ωunbalanced
IF Band width
6M, 7M, 8M
Demodulation
64QAM,16QAM,QPSK
FFT Mode
2
K/8K
Constellation
Auto
Guard Interval
1/4, 1/8, 1/16, 1/32
Inner Coding Rate
1/ 2, 2/3, 3/4, 5/6. 7/8
ISDBT Tuner & Demodulator
Table of contents
Other zatech Measuring Instrument manuals
Popular Measuring Instrument manuals by other brands

Extech Instruments
Extech Instruments lcr200 user guide

UniData Communication Systems
UniData Communication Systems Starflow QSD manual

Sony
Sony MAV-555A Maintenance manual

Pfeiffer Vacuum
Pfeiffer Vacuum IKR 261 operating instructions

Anyload
Anyload 805BS Series manual

Labgear
Labgear DAT103 operating manual