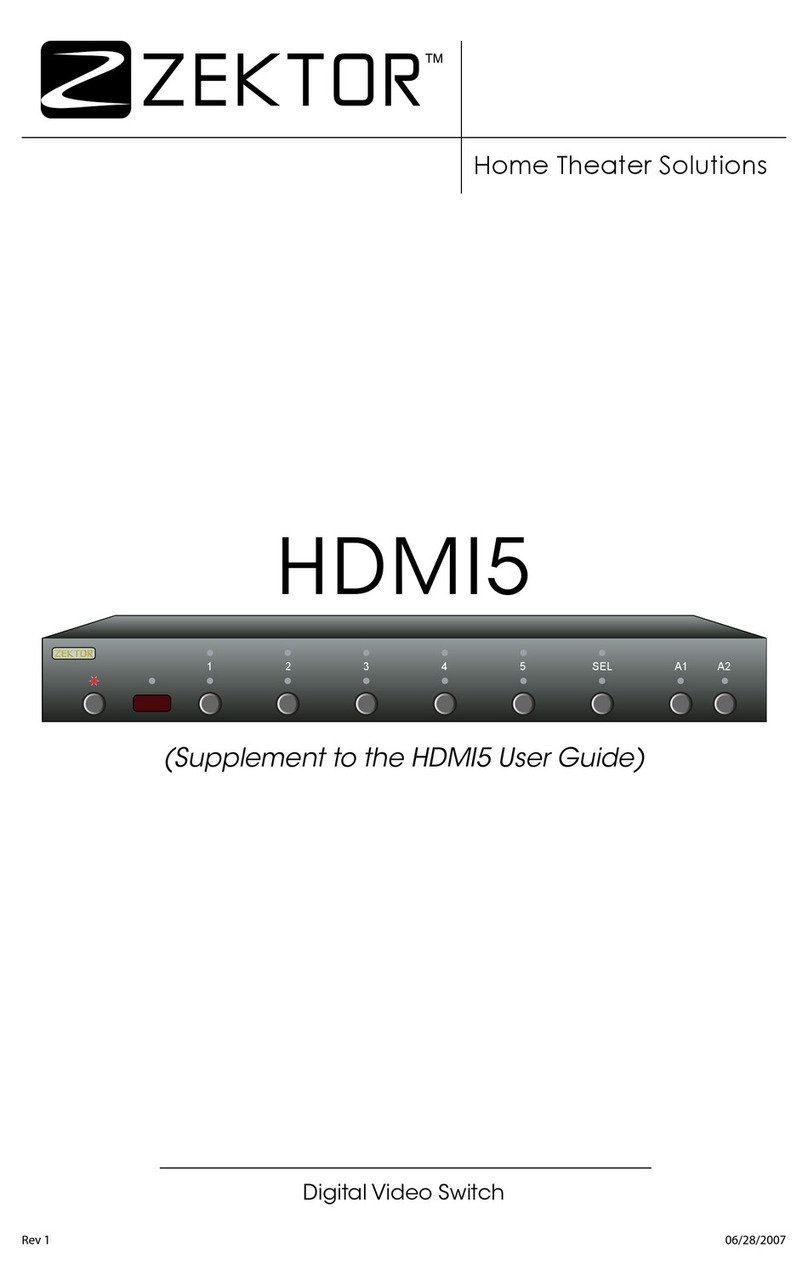
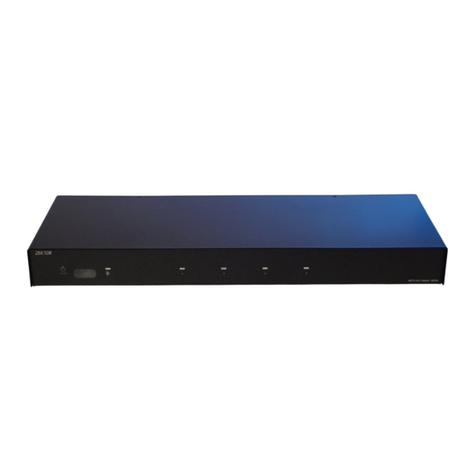
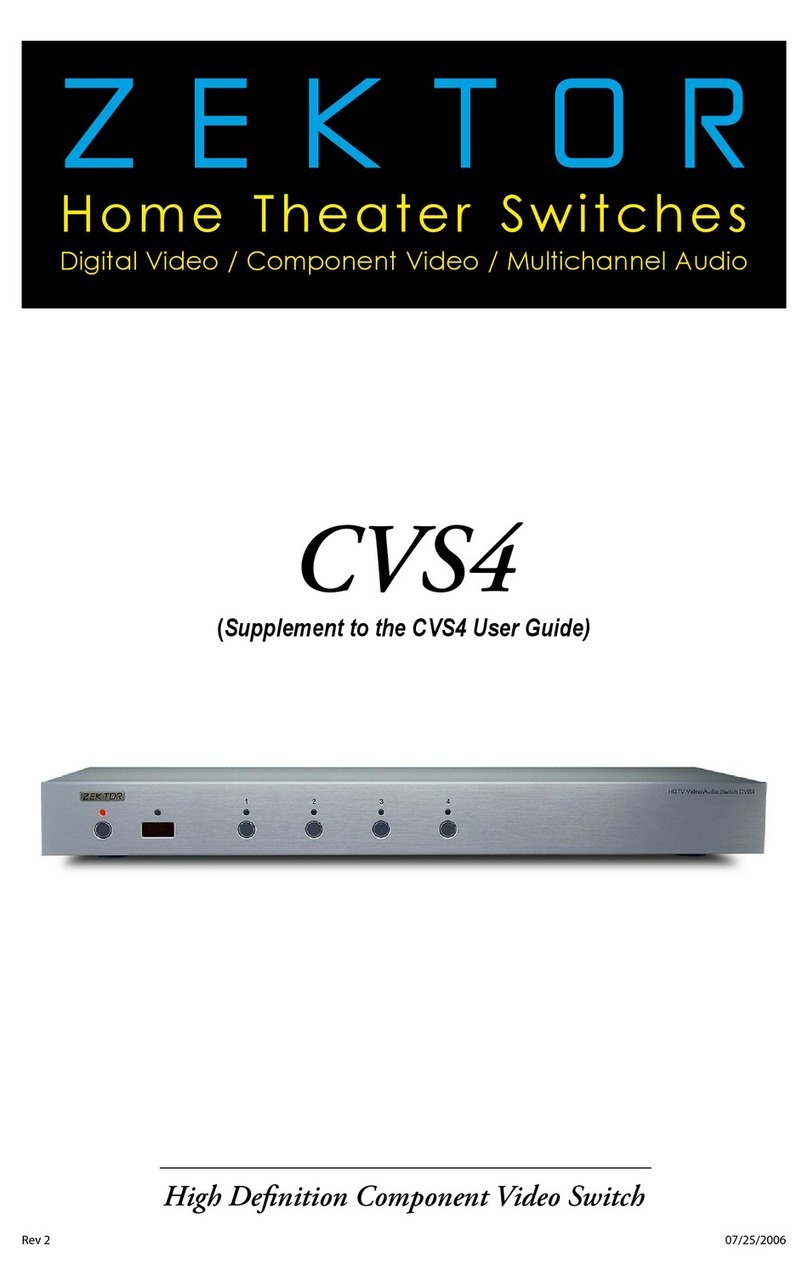
Zektor HDVI5 User manual

1 2 3 4 5 SEL A1 A2
ZEKTOR
Home Theater Switches
Digital Video / Component Video / Multichannel Audio
Rev 3 08/08/2006
Digital Video Switch
HDVI5

ii HDVI5 Component Video Switch
1HDVI5 Component Video Switch
Thank you for your purchase of the HDVI5 High Definition Component
Video Switch.
Every care has been taken to assure you of a successful installation
and subsequent operation of your new HDVI5 video switch, however
sho uld s om eth ing g o wro ng, an d war ran ty re pa i r wor k is n eed ed, we
requ es t tha t you ho ld o n t o the o ri gin al pa ck ag ing m ate r ia ls.
Ple ase t ake t hi s tim e to ver if y the c o nte nts o f the H DV I5 box .
The following should be included:
HDVI5
Remote Control (ZRM1)
Power Supply Module
Thi s U ser ’s M an ual
If anything is missing please get in touch with us as soon as possible
so th at we ca n cor rec t th e si tua tio n.
1.
2.
3.
4.
What’s Inside
Contents
What’s Inside ..................................... 1
An Overview of the HDVI5.................. 3
Easy, Simple, Instructions! ................. 5
Using a Different Remote ................... 9
More Remote Options ...................... 11
Learning New Discrete IR Codes ....... 13
Controlling the Front Panel Lights ... 15
Adjusting the Front Panel Intensity .. 17
Setting the Initial Power On State .... 19
Control Functions ............................ 21
Changing Switching Delays.............. 23
Input Cable Length Tuning ............... 25
Bandwidth & Sync Settings............... 27
Auxiliary Relay Options ................... 29
Resetting to Factory Defaults........... 35
RS-232 Port ..................................... 36
K.I.S.S.™ (Keep It Simple Serial!™) .... 37
+12V On / Off Control ...................... 38
Rear Panel IR Control....................... 39
IR Code Format ................................ 40
IR Codes .......................................... 41
Features .......................................... 42
Specifications.................................. 43
Warranty Policy ............................... 44
Contact Information ........................ 45

2HDVI5 Component Video Switch
3HDVI5 Component Video Switch
DIGITAL VIDEO
1 2 3 4 5
IR / Z-IN Z-OUT
RS232
1 2 3
4 5 OUT
DIGITAL
AUDIO 1 2 3 4 5 OUT
AUX1 AUX2
9VDC
N/O
COM
COM
N/C
N/O
COM
COM
N/C
1
2
3
4
5
6
7
8
Front Panel Controls:
Po wer I nd i ca t or. L igh ts up i n sta nd b y mod e.
Selection LEDs. Indicate currently selected inputs.
Select between Normal/Audio/Video Breakaway.
To gg le Aux ili ar y R el a ys.
Input Selection Buttons.
In fra red R ece i ved I nd ica tor. Fl ash es w h en I R is rec eive d.
In fra red R emo te Se ns or Win dow.
Po wer Togg le Butto n.
Rear Panel Connections:
DVI Inputs. DVI, or HDMI when using conversion cable,
compatible digital inputs. All inputs are fully HDCP compat-
ible with both DVI and HDMI formats. All inputs are fully
HDMI audio compatible.
IR I npu t or + 1 2V Trig ger I np ut . A c cep ts mo du l ate d or un -
modulated IR signals, or +12V Trigger On/Off voltage.
DVI Output (or HDMI Output when using conversion cable).
Z- O UT cu rre ntl y unu se d , rese r ved fo r fut ure u se.
Digital Audio Inputs. Each video input has an associated
digital audio channel with both a Coax and an Optical con-
nec ti on . Onl y one o f th e two t yp es of i np u ts c an be a c t ive
at any t ime. The HDV I5 w ill a uto -s el ec t bet we en th e two
ty pes o f sig nal s. I f a s ign al i s sup pli ed to b ot h t he Co ax an d
Optical inputs, the Coax signal is given priority.
R S- 23 2 Po r t .
DC Power J ack Co nn ec tor.
Auxiliary Relay Connections.
Digital Audio Outputs. All digital audio inputs are automat-
ically converted to both Coax and Optical outputs. Both the
Coax and Optical outputs are available simultaneously.
1.
2.
3.
4.
5.
6.
7.
8.
1.
2.
3.
4.
5.
6.
7.
8.
9.
1 2 3 4 5 SEL A1 A2
Front Panel
Rear Panel
An Overview of the HDVI5
1
2
3
4
5
6
7
8
9

4HDVI5 Component Video Switch
5HDVI5 Component Video Switch
Initial Setup...
Use the DVI connections to switch DVI (and HDMI signals
using the proper conversion cables). Use the digital audio
connectors to switch digital audio signals, with automatic
conversion between the optical and coax digital audio
form ats .
If u sin g a ha r dwi red I R c ont rol ler t o o pe rate t he HD VI 5,
connect the controller IR cable to the IR/Z-IN jack.
If u sin g a PC ( o r ot her s er ial c ont roll er ) , con ne ct i t to th e
RS-232 port using a standard serial cable.
Plug the power module into the HDVI5, and plug the mod-
ule i nto a s tan dar d A .C . wal l rece pta cl e . The s t an dby L ED
wil l lig ht up.
Selecting an Input...
To s wi tch b e t w een a ny of th e fi ve inp ut s , sim ply p res s the
button for the desired input. If the HDVI5 is in the standby
mod e, it w i ll t urn o n. Th e HD VI5 w ill t he n swi tch to t he s e -
lected input, and the associated LEDs will light to indicate
this.
To p la ce th e H DV I5 ba ck in to th e sta nd by mod e, pre ss an d
release the Power Toggle button. The channel LEDs will all
go bl ank , a nd th e sta nd by LE D w il l lig ht up. Pres s th e Po wer
Toggle button again to re-select the previously selected
input.
Audio / Video Breakaway...
To b rea k a way th e au dio o r vid eo, to li ste n to th e aud io
from one input while viewing video from another, press
the S EL ke y. When b oth t he R E D an d BLUE LED s ab ove th e
SEL button are lit, then the audio and video inputs will be
switched simultaneously. When only the RED LED is lit, then
only the Audio will be switched. Similarly, when only the
BLUE LED is lit, only the video will be switched when press-
ing an input button.
Note: Audio breakaway only applies to the digital audio con-
nections on the back of the HDVI5. You cannot break-
away th e HDM I aud io c han nel t hat i s sen t over th e HD MI
cable. HDMI audio will always follow the video signal.
•
•
•
•
•
•
•
Selecting an Input: Press numbered buttons to select an input.
1 2 3 4 5 SEL A1 A2
Easy, Simple, Instructions!
1 2 3 4 5 SEL A1 A2
Audio / Video Breakaway: Press SEL to toggle breakaway options.
Only red LED, above
the SEL button is lit,
so only Audio is
switched when
'4' is pressed.

6HDVI5 Component Video Switch
7HDVI5 Component Video Switch
Instructions (Cont'd)
Auxiliary Relay Connections
The a u xi lia r y rel ay con tac t s a re rat ed for 3 0vo lts @ 5 amp s,
A.C . or D.C. , and c an be u se d to sw i tch o n an d off a nyth in g
you can think of within those limits.
Each relay has a Normally Open connection, two Common
connections, and a Normally Closed connection.
The d i agr am to t he le ft d em ons tra tes th e in t er nal c o nn ec -
tio ns to t he re l ays.
By using the supplied adapter, the relays connections can
be made before rack mounting the HDVI5.
Auxiliary Relay Operation
The A 1 a nd A 2 but ton s are u s ed to t ogg le o n and o ff th e
rela ys.
The re lays c an al so b e set up to t urn o ff a fte r a giv e n
amount of time. Or to turn on whenever specified channels
are se le ct e d. S e e th e sec ti on "Auxiliary Relay Options" fo r
relay setup information.
Using the supplied Remote Control
Use the section of the remote controlled labeled: HDVI5/
HDMI5 for controlling the HDVI5. (The other sections are
used to control other Zektor products).
Each button on the remote functions the same as the front
panel switch with the same name.
•
•
•
•
•
•
•
•
1 2 3 4 5 SEL A1 A2
1
5
2 3 4
1 2 3
1 2 3
1 2 3
S1 S2 S3
A1 A2
SYN
SEL
4
HDVI5/HDMI5
MAS7
CVS4
SAS6x2
Using the supplied Remote Control
Use the remote controller buttons in the section
labeled: HDVI5 / HDMI5. (The other sections control
other Zektor products)
Each button on the remote corresponds to the
same button on the HDVI5's front panel.
Auxiliary Relay Connections
1 2 3 4 5 SEL A1 A2
Auxiliary Relay Operation: Use A1 and A2 buttons to toggle relays.
N/O
COM
COM
N/C
N/O
COM
COM
N/C
Relay 1’s
Contacts
Relay 2’s
Contacts
N/O = Normally Open Contacts. These contacts
are open when the relay's LED is not lit.
COM = Common
N/C = Normally Closed Contacts. These contacts
are closed when the relay's LED is not lit.
Make connections to the adapter which plugs into the HDVI5.

8HDVI5 Component Video Switch
9HDVI5 Component Video Switch
Using a Different Remote
The H D VI 5 feat ures Z e kto r ’s Excl usi ve I n tel lig ent -IR ™, a nd wi th ve r y
few exc e pt ion s can b e se tup t o u se a ny remo te yo u c an p oin t at it !
Thi s i s us efu l if yo u have m ore th an o n e HD VI5 i n th e s am e room .
Pick a new remote
Sta r t by pi ck in g a new r e mo te you’d lik e t o use w it h the
HDVI5. (Or use the unused buttons on the HDVI5's remote.)
If yo u pla n on u sin g a uni ver sal re mo te, st ar t by s ett ing
it up a s a rem ote fo r a T V or VCR th at you d on' t o w n. ( Fo r
ins tan ce if y o u do n’t o w n a So ny T V, s et u p you r uni ver sal
remo te to co ntr o l a So ny T V. )
Step 1: Put the HDVI5 into the Setup Mode
The H D VI 5 is pl ace d int o t he s etu p mo d e by pr e ss ing a nd
holding the Power button for about 4 seconds.
Step 2: Select the Intelligent-IR™ Learn Mode
Select the Intelligent-IR™ Learn Mode pressing ‘1’.
Once the ‘1’ button is pressed, the standby LED will flash
slo w er an d all t he o the r LED s wi ll tu rn o ff. The HD VI5 i s
now wa it i ng fo r new I R cod es to b e sen t from y our re mo t e
cont rol.
Step 3: Teach the HDVI5 your new remote control codes
On you r rem ote co ntr o l, pre ss t h e fol low ing b utt ons, i n th e
following order:
Power 1 2 3 4 5 0 8 9
The front panel LED's will sequence as each button is
pressed, and the IR LED will flash for each button -- if not,
see the following section on "More Remote Options".
That ’s it ! The H DVI 5 wi l l ret ur n to th e s ta t e it wa s in be fore
set up, an d w il l now wo rk w i th yo ur ne w rem ote !
e new control buttons on your remote are...
Po wer Toggles the HDVI5’s power.
1 - 5 Selects inputs 1 through 5.
0Se q ue nce s the S EL bu tto n (A/ V brea k away ).
8To gg les Au xil ia r y Re l ay 1.
9To gg les Au xil ia r y Re l ay 2.
Not e: All re mot e cont rol co des a re save d in no n-vo lat ile
memory and will not be lost during a power failure.
•
•
•
•
•
•
•
•
1 2 3 4 5 SEL A1 A2
Step 1: Put the HDVI5 into the Setup Mode
Press and hold the Power Button for 4 secs.
The front panel LEDs will start to blink
wildly... (You’ll know it when it happens!)
Step 2: Press the ‘1’ button for Intelligent-IR™ learning
1 2 3 4 5 SEL A1 A2
Step 3: Teach the HDVI5 its new IR codes
1 2 3 4 5 SEL A1 A2
1 2 3
4 5 6
7 8 9
0
+ +
_ _
POWER
VOL CH
Press the following sequence of buttons on
your remote control:
Power 1 2 3 4 5 0 8 9
That’s it! The HDVI5 now operates with
your new remote control!
Once the 1 button is pressed, the
standby LED will flash slower, and
all the other LEDs will turn off.

10 HDVI5 Component Video Switch
11HDVI5 Component Video Switch
1 2 3 4 5 SEL A1 A2
1 2 3
4 5 6
7 8 9
0
+ +
_ _
POWER
VOL CH
More Remote Options
Front panel LED sequencing while learning
During the learning process, as each button of the remote is
pres se d, the f ront p an el LE Ds wi ll s equ enc e. At any gi ven t i me, t he
LED that is slowly flashing, indicates the function the HDVI5 is cur-
rently waiting to learn. The sequence is:
Standby LED Wait ing fo r Power Togg le IR c ode.
'1' - R ed LE D Wai tin g for th e '1 ' I R cod e.
'2' - R ed LE D Wai tin g for th e '2 ' I R cod e.
'3' - R ed LE D Wai tin g for th e '3 ' I R cod e.
'4' - R ed LE D Wai tin g for th e '4 ' I R cod e.
'5' - R ed LE D Wai tin g for th e '5 ' I R cod e.
'SEL' Red LED Wa iti ng fo r ' SE L' IR co de.
'A1 ' LED Wa iti ng fo r 'A 1' IR c ode.
'A2 ' LED Wa iti ng fo r 'A 2' IR c ode.
If the LEDs do not sequence, and the IR LED does not flash, when a
button is pressed on the remote, then the HDVI5 does not recognize
the I R cod e bei ng s e nt . M ak e su re the re mo te' s bat ter ies a re fre sh.
The H D VI 5 wil l wor k wit h mo st rem ote s, howe ver t here a re a few
exceptions. Some technical reasons for not working with some re-
mot es are : The re mo te may b e usi ng a c a rr ie r freq ue nc y ou tsi de th e
ran ge of t he HD VI 5 (34 KH z to 42 KH z) , o r it m ay be u s in g one o f the
few protocols the HDVI5 does not understand, like the Philip's RC5
and R C6 pr oto c ols .
If t he HD VI 5 d oe s not l ear n th e rem ote co des y o u are u sin g, you
wil l have t o u se a not he r r emo te, or i n the c as e of us ing a u ni v ers al
remo te, yo u 'l l have to p ic k a d if feren t man uf ac tur er' s cod e.
Skipping or Deleting IR codes
Dur in g the I R lea rn ing p roce ss yo u can c ho o se to d el ete t h e cu rre nt
cod e (di sab le I R f o r th at fu nc ti o n) o r sk ip t he cu rre nt co d e (l eave i t
unchanged) by pressing the 'A1' or 'A2 buttons:
'A1 ' Disable IR for current function.
'A2 ' Sk ip c urr ent co de, l e ave i t u nc han ged .
The IR LED will flash...
...and the LEDs will sequence each time a
remote control button is pressed if the IR
code is compatible with the HDVI5.
1 2 3 4 5 SEL A1 A2
1 2 3
4 5 6
7 8 9
0
+ +
_ _
POWER
VOL CH
Disable current IR code
Skip current code
(Leave IR unchanged)
Front panel LED sequencing while learning
Skipping or Deleting IR codes

12 HDVI5 Component Video Switch
13HDVI5 Component Video Switch
Learning New Discrete IR Codes
The H D VI 5 all ows d i sc rete I R cont rol ov er al l of it 's f unc ti on s . The se
codes can also be reprogrammed as described here.
Pick a remote
Sta r t by pi ck in g the r e mo te you’d lik e t o use w it h the
HDVI5. (Unused buttons on the supplied remote work fine.)
Step 1: Put the HDVI5 into the Setup Mode
The H D VI 5 is pl ace d int o t he s etu p mo d e by pr e ss ing a nd
holding the Power button for about 4 seconds.
Step 2: Select the Intelligent-IR™ Learn Mode
Discrete IR learning is selected by pressing the '2' button.
Once the '2' button is pressed, the standby LED will flash
slo w er an d all t he o the r LED s wi ll tu rn o ff. The HD VI5 i s
now wa it i ng fo r new I R cod es to b e sen t from y our re mo t e
cont rol.
Step 3: Teach the HDVI5 your new discrete IR control codes
On you r rem ote co ntr o l, pre ss t h e bu tto ns you 'd li ke to u se
as di scr ete I R c ode s, in t he fol low ing o rde r:
Po wer On - Tur ns O n Po wer
Po wer Of f - Tur ns O ff Powe r
Sequence Inputs - Sequence through inputs
No Bre ak aw ay - Resets audio/video breakaway
Bre a kaway Au dio - Se t s au dio b rea ka way mo de
Bre a kaway Vid e o - S ets v id e o bre ak awa y m od e
Aux Re lay 1 On - Tur ns o n Aux R e lay 1
Aux Re lay 1 O ff - Tur ns o ff Aux R el ay 1
Aux Re lay 2 On - Tur ns o n Aux R e lay 2
Aux Re lay 2 O ff - Tur ns o ff Aux R el ay 2
The n e w cod es a re lea rn ed in t he a b ove o r der, fo r in s ta nce
the f irs t bu tto n y ou pre ss, o n the re mo te, wi l l be u se as t he
new d isc ret e " Power O n ", the se con d bu t ton p res sed w il l b e
use d as th e ne w "Power O ff ", et c .
The 'A1 ' ca n b e pre sse d to di sa b le t he cu rre nt IR c o de.
The 'A2 ' ca n b e pre sse d to sk i p the c ur rent I R cod e, lea v in g
it unchanged.
Not e: All re mot e cont rol co des a re save d in no n-vo lat ile
memory and will not be lost during a power failure.
•
•
•
•
•
•
•
•
1 2 3 4 5 SEL A1 A2
Step 1: Put the HDVI5 into the Setup Mode
Press and hold the Power Button for 4 secs.
The front panel LEDs will start to blink wildly.
Step 2: Press the '2' button for Intelligent-IR™ learning
1 2 3 4 5 SEL A1 A2
Step 3: Teach the HDVI5 its new IR codes
1 2 3 4 5 SEL A1 A2
1 2 3
4 5 6
7 8 9
0
+ +
_ _
POWER
VOL CH
Press the buttons on your
remote, that you want to
use as the new discrete IR
codes, in the order given
in "Step 3" of the text.
Once the 2 button is pressed, the
HDVI5 will be ready to learn new
discrete IR codes starting with
"Discrete Power On".
Disable current
IR code and
skip to next
Skip current IR
code (leave it
unchanged)

14 HDVI5 Component Video Switch
15HDVI5 Component Video Switch
Controlling the Front Panel Lights
There are four different front panel lighting modes available on the
HDVI5. They are:
Front panel lights automatically fade from bright to dim
af ter 4 s eco nds o f ina c tiv it y.
Fr ont p ane l lig hts a re al ways at t he b rig ht le vel.
Fr ont p ane l lig hts a re al ways at t he d im le vel.
Fr ont p ane l lig hts a re tu rne d of f.
Note: The intensities of the both the bright and dim levels can be
adjusted as well. This is explained on the next page.
To change the front panel lighting mode...
Step 1: Enter the Setup Mode
The H D VI 5 is pl ace d int o t he s etu p mo d e by pr e ss ing a nd
holding the Power button for about 4 seconds.
Step 2: Select the Lighting Mode option
Press the ‘3’ button to select the “Lighting Mode” option.
The front panel selection LEDs now indicate the currently
selected light mode as follows:
If ‘1’s blu e L ED i s lit , th e n fro nt pa nel l ig hts a re alw ays of f.
If ‘2’s blu e L ED i s lit , th e n fro nt pa nel i s al ways d i m.
If ‘3’s blu e L ED i s lit , th e n fro nt pa nel i s al ways b r ig ht.
If ‘4’s blu e L ED i s lit , th e n fro nt pa nel l ig hts a uto -f ade f rom
bri ght t o dim a ft er 4 se con ds of i na ct ivi ty.
Step 3: Choose a new lighting mode
Choose a new light control mode by pressing the associ-
ated selection button.
Press t he Power B ut t on to s ave th e new m ode a nd re tur n to
normal operations.
Note: The lighting mode setting is saved in non-volatile mem-
or y an d is no t aff ec ted by a p ower f ail ure.
•
•
•
•
•
•
•
•
•
1 2 3 4 5 SEL A1 A2
Step 1: Place the HDVI5 into the Setup Mode
Press and hold the Power Button until the
display goes wild. (About 4 seconds.)
Step 2: Select “Lighting Mode”option
1 2 3 4 5 SEL A1 A2
After ‘3’ is pressed, the standby
LED continues to flash, and the
front panel will display the cur-
rent Light Mode settings.
Step 3: Choose a new lighting mode
1 2 3 4 5 SEL A1 A2
Auto-Fade
Always Bright
Always Dim
Always Off
Exit Setup Mode

16 HDVI5 Component Video Switch
17HDVI5 Component Video Switch
1 2 3 4 5 SEL A1 A2
Step 4: Select between Bright and Dim settings: Use SEL button.
Step 5: Adjust Front Intensities.
1 2 3 4 5 SEL A1 A2
Use A1 and A2 to dim and brighten LEDs
A1 = Dim LEDs.
A2 = Brighten LEDs.
Adjusting the Front Panel Intensity
Continued from previous page...
If yo u have n ot al rea dy do ne s o, p er fo rm St eps 1 a nd 2 on t he p revi -
ous page.
Step 4: Toggle between Bright and Dim Settings
The 'SEL' LED indicates the front panel intensity settings:
If BLUE LED is lit, then the BRIGHT level is being adjusted.
If RED LED is lit, then the DIM level is being adjusted.
Use t he 'S EL' bu tto n to to ggl e bet we e n br ig h t an d d im
settings.
Step 5: Adjust Front Panel Intensities
Use t he ‘A1’ butt o n to de cre ase t he i nten si t y o f t he f ront
panel lights.
Use t he ‘A2’ butt o n to in cre ase t he i nten si t y o f t he f ront
panel lights.
You cannot make the DIM level brighter than the BRIGHT
level, and you cannot make the BRIGHT level dimmer than
the D IM le vel.
Step 6: Use the Power Button to Exit
Once the front panel intensities are acceptable, press the
Po wer b u tto n to sa v e the n ew se tt ing s and e xi t the s etu p
mode.
Note: The new intensity settings are saved in non-volatile
mem or y an d are n ot af fec te d by a powe r fai lur e.
•
•
•
•
•
•
Use the SEL button to toggle between
the BRIGHT and DIM settings.
1 2 3 4 5 SEL A1 A2
Step 6: Use the Power Button to Exit.
When things look good, press the
power button to exit the setup mode.

18 HDVI5 Component Video Switch
19HDVI5 Component Video Switch
1 2 3 4 5 SEL A1 A2
Step 1: Set the HDVI5 to the preferred initial power on state
Setup the HDVI5 to the initial power on
state you’d prefer. In this case we want the
HDVI5 to turn on and switch to Input 5
when first plugged in.
Step 2: Save the new initial power on state
1 2 3 4 5 SEL A1 A2
Start by pressing and
holding the Power
button...
Setting the Initial Power On State
As long as the HDVI5 is plugged in, it will remember the previously
sel ec ted i np u t in s tan dby m ode. When p owere d up by p res sin g the
Power button, it will return to that previously selected channel.
Howe ver, i f p owe r i s rem oved ( for in st anc e a p lu g str ip u sed t o pow-
er the HDVI5 is turned off), and then re-applied, the HDVI5’s default
beh avi or is t o ente r int o the s tan dby m ode .
It is possible to change the power on behavior of the HDVI5.
To change the power on defaults...
Step 1: Setup the HDVI5 to your preferred power on state
.
Use t he fro nt pa ne l b ut ton s to se t up t he HD VI 5 t o the o pe r-
ati ng se tti ng s you’d l ik e at in iti al po wer up.
Step 2: Save the new initial power on state.
Fi rs t pres s an d h ol d the Powe r but ton .
Whi le co n ti n ui ng to h old t he Power b utt on, p res s and h ol d
the ‘1’ button.
After holding both buttons for about ‘4’ seconds, the dis-
play will blink indicating the new power on defaults have
bee n acc e pte d.
Test the new initial power on state
You can test the new defaults by either disconnecting the
power supply from the back of the HDVI5 or by unplugging
the p ower s upp ly f rom th e wal l.
Rec onn ec t pow e r. Th e HDV I5 wi ll p ower u p into yo ur n ew
powe r on de fau lt s tate.
•
1.
2.
3.
•
•
12...while continuing to hold the Power
button, press and hold the‘1’ button.
After about 4 seconds, the display will
flash indicating the new power on state
has been accepted.
3

20 HDVI5 Component Video Switch
21HDVI5 Component Video Switch
Control Functions
If yo u are u sin g the r e ar p ane l IR ja ck , you m ig ht wan t to di sab le t h e
IR se nso rs to p reve nt us e of th e rem ote co ntr o l.
Or if you have a household with young curious fingers that likes
playing with buttons, you also have the capability of disabling the
front panel switches and only operating the HDVI5 with a remote.
To enable / disable the front panel switches, and other control
functions...
Step 1: Enter the Setup Mode
The H D VI 5 is pl ace d int o t he s etu p mo d e by pr e ss ing a nd
holding the Power button for about 4 seconds.
Step 2: Enter the Enable / Disable control state
While in the setup mode, press '4' to enter the Enable/Dis-
abl e con trol s tat e. The c urr e nt s tat us wi ll be d is p lay e d us -
ing the front panel LEDs.
A Blue LED indicates an option is enabled, and Red LED
indicates disabled.
Step 3: Enable or Disable control functions
Use '1' to enable/disable the IR Sensor hardware.
Use '2' to enable/disable the IR Jack hardware.
Use '3' to enable/disable the front panel buttons.
Use '4' to enable/disable IR control.
Use '5' to enable/disable +12V On/Off control.
Not e 1: Th e IR Ja c k an d +12 V On /O ff con tro l fun c t io ns ar e m ut u-
ally exclusive. Enabling +12V On/Off control will disable
the I R Jac k har dwa r e. Ena bli ng I R J ac k h ard ware w il l dis -
abl e +12 V On /O ff co n tro l.
Not e 2: Wh en di sa b li ng th e IR Ja ck an d IR S en sor, th e ha r d-
ware is disabled. Whereas 'IR Control' enables/disables
whether the HDVI5 responds to IR signals received. If
the I R Se nso r or I R J ac k a re en ab l ed, a nd 'I R Cont rol '
disabled, IR signals can still be read through the RS-232
port, while being ignored by the HDVI5.
Note 3: Disabling the front panel buttons does not disable the
abi lit y to e nter t he S etu p Mo des.
•
•
•
•
•
•
•
•
Step 3: Enable or Disable control functions
1 2 3 4 5 SEL A1 A2
Enable/Disable +12V Ctrl.
Enable/Disable IR Control
Enable/Disable Buttons
Enable/Disable IR Jack
Enable/Disable IR Sensor
Exit Setup Mode
1 2 3 4 5 SEL A1 A2
Step 1: Place the HDVI5 into the Setup Mode
Press and hold the Power Button until the
display goes wild. (About 4 seconds.)
Step 2: Enter the Enable / Disable control state
1 2 3 4 5 SEL A1 A2
After ‘4’ is pressed, the standby
LED continues to flash, and the
front panel will display the cur-
rent settings.

22 HDVI5 Component Video Switch
23HDVI5 Component Video Switch
Changing Switching Delays
The HDVI5 allows adjusting the switching delay times, for Video and
Audio, independently. By default the HDVI5 uses a 200ms video and
audio delay when switching between channels. The HDMI specifi-
cations calls for a minimum of 100ms, some monitors may require
much larger delay times to switch reliably.
To adjust the Audio/Video switching delays...
Step 1: Place the HDVI5 into the Setup Mode
The H D VI 5 is pl ace d int o t he s etu p mo d e by pr e ss ing a nd
holding the Power button for about 4 seconds.
Step 2: Enter the Switching Delay Setup Mode
Press t he '5 ' bu tto n t o ent er th e Swi tch i ng D ela y Se tup
Mo d e.
The b l ue L EDs i nd i ca t e the Video m ute d el a y, i f t he re are n o
blue LEDs lit, then there is no video delay.
The te d LED s in dic ate t h e Aud io mu te de lay, if th ere ar e n o
ted LEDs lit, then there is no audio delay.
No LE Ds li t = 0 sec d ela y.
• One left justified LED = 50ms delay.
•• Two left justified LEDs = 100ms delay.
••• Three left justified LEDs = 200ms delay.
•••• Four left justified LEDs = 300ms delay.
••• •• Five LE Ds = 500 ms de lay.
•• •• Fo ur r igh t jus tif ie d L ED s = 1 sec d ela y.
• • • Thre e ri ght j ust if ied L EDs = 2 se c de l ay.
•• Two rig ht ju st ifi ed LE Ds = 3 sec d ela y.
• O ne r igh t jus tif ie d LED = 4 sec de lay.
Step 3: Adjust Switching Delay Times
The 'SEL' button toggles between the Video delay setting
and the Audio delay setting.
The 'A1 ' an d 'A 2' bu tto ns a r e use d to se t the d el a y tim es
'A1' decreases the delay time.
'A2' increases the delay time.
Press t he Power b ut t on to s ave ne w set tin gs a nd ex it.
Note: The new settings are saved in non-volatile memory and
are n o t af fec te d b y a power f ai l ure.
•
•
•
•
•
•
1 2 3 4 5 SEL A1 A2
Step 1: Place the HDVI5 into the Setup Mode
Press and hold the Power Button until the
display goes wild. (About 4 seconds.)
Step 2: Enter the Switching Delay Setup Mode.
1 2 3 4 5 SEL A1 A2
After pressing '5', the standby
LED continues to flash, and the
front panel will display the cur-
rent delay settings.
Step 3: Adjust Switching Delay Times
1 2 3 4 5 SEL A1 A2
Toggle between audio
and video delays
Decrease delay
Increase delay
Exit setup mode

24 HDVI5 Component Video Switch
25HDVI5 Component Video Switch
Input Cable Length Tuning
The H D VI 5 feat ures r ece i ver e qua li zat ion t hat c an be u se d to com -
pensate for the losses that occur in varying length, and varying
quality, cables.
The HDVI5 allows for 15 levels of equalization. Using high quality
DVI o r DVI t o HDM I conve rs ion c abl es, t he HD VI5 c an co mp e ns ate for
cables of up to 65 feet (20 meters), on all its inputs and still reliably
receive a stable, sparkle free image at 1080p. Longer cable lengths
can be acheived at lower resolutions.
To tune an HDVI5's input to a specific cable length...
Step 1: Place the HDVI5 into the Cable Length Adj. Mode
Press the desired input and hold the button for 4 seconds,
unt il th e HDV I5 e nter s th e C abl e Len gth Ad j. Mo de.
Step 2: Enter the Cable Length Adj. Mode
Use the 'A1' and 'A2' buttons to tune cable length.
'A1' adjusts for shorter cables.
'A2' adjusts for longer cables.
'SEL' switches to Bandwidth settings (See next page).
Short cables are indicate by only Red LEDs being lit.
Medium length cables are indicated by only Blue LEDs lit.
Long cables are indicated by Blue & Red LEDs being lit.
Use t he Power Tog gle b utt on to e xit t he se tu p mod e.
When a cable's tuning is too short, the display will begin to sparkle,
eventually going blank. For best results, start long, and use a length
a ste p or t wo abo ve any no ti c eab le a r tif ac ts o n the s cre en.
Tuning a short cable too long increases its susceptibility to noise,
causing possible drop outs and sparkles.
Note: Output cable lengths depend on the display's receiver's
capabilities, and the quality of cabling used. The HDVI5
uses source termination to compensate for all lengths of
out put c ab les , a nd t o h el p in ca se s whe re th e rece iver
may not have followed the specifications properly.
Note: Each input can be tuned individually and all settings are
saved i n non -vo l ati le m e mo r y a nd a re no t a ffe c ted by a
power f ai l ure.
•
•
•
•
•
•
1 2 3 4 5 SEL A1 A2
Step 1: Place the HDVI5 into the Cable Length Tuning Mode
Step 2: Adjust cable length settings
1 2 3 4 5 SEL A1 A2
Toggle between cable length
and bandwidth settings.
(Blue = Length, Red = Bandwidth)
Decrease Cable Length
Increase Cable Length
Exit Setup Mode
Press and hold the desired channel until
the HDVI5 enters the cable length tuning
mode.
This example demonstrates entering the
cable length setup mode for input '5'.

26 HDVI5 Component Video Switch
27HDVI5 Component Video Switch
Bandwidth & Sync Settings
The HDVI5 is a fully digital switch, unlike many similar products,
the HDVI5 decodes the DVI/HDMI signal and re-encodes it on the
out put . Thi s al lows i t to cor rec t fo r m any n on- co mp lia nt de vic es at -
tached to its inputs, and always generate fully compliant HDMI/DVI
data on its output.
The following parameters are usually best left alone and will have
no affect on a fully compliant DVI/HDMI source, but may be useful
when connecting to a non-compliant source.
Bandwidth: Thi s s et tin g al l ows t he HD VI5 t o syn c to so urce s wi t h
clocks that are unstable and are outside the DVI/HDMI specifica-
tions. The larger the bandwidth, the better the HDVI5 can to lock on
to non-standard sources at the expense of being more susceptible
to no ise. S om e PC ca rds, a nd ol der D VD p laye rs, ma y r equ ire t his
val ue to b e set h igh ( 6M H z ) to wor k rel iab ly.
HSJitter: Some non-compliant sources can generate horizontal jit-
ter, causing the screen to jump back and forth horizontally. Enabling
this setting (blue LED is lit) will eliminate this problem on all resolu-
tions where the horizontal pixel size is evenly divisible by four.
HSyn c a nd VSyn c: When set to their default values, these settings
have n o effe ct o n th e HSyn c a VS y nc s ign als. I f a s ourc e and m oni tor
will not work with each other, using the HDVI5 and enabling one or
both of these settings (blue LEDs are lit) may fix the incompatibility.
Step 1: Place the HDVI5 into the Cable Length Adj. Mode
Press the desired input and hold the button for 4 seconds,
unt il th e HDV I5 e nter s th e C abl e Len gth Ad j. Mo de.
Step 2: Switch to the Bandwidth & Sync settings
Press the 'SEL' to toggle to the Bandwidth Settings mode.
Use '1' and '2' set the HDVI5's receiver's bandwidth.
3MH z = LE D '1 ' R ed & L ED ' 2 ' Bl ue.
4MH z = LE D '1 ' R ed, L ED ' 2' Re d (D efa ul t, HD MI Sp ec ) .
5MH z = LE D '1 ' B lu e, LED ' 2' B lue.
6MH z = LE D '1 ' B lu e, LED ' 2' R ed.
Use '3' to set HSJitter (RED=Default, BLUE=Enabled).
Use '4' to set HSync (RED=Default, BLUE=Sync always 0).
Use '5' to set VSync (RED=Default, BLUE=Sync always 0).
•
•
•
•
•
•
1 2 3 4 5 SEL A1 A2
Step 1: Place the HDVI5 into the Cable Length Tuning Mode
Step 2: Adjust Bandwidth and Sync Settings
1 2 3 4 5 SEL A1 A2
Press and hold the desired channel until
the HDVI5 enters the cable length tuning
mode.
Toggle between Length &
Bandwidth Settings.
(Blue=Length, Red=B.W.)
HSync & VSync
(Red = Default)
HSJitter (Red=Default)
Bandwidth Settings:
3MHz = Red,Blue
4MHz = Red,Red (Default)
5MHz = Blue,Blue
6MHz = Blue,Red
Exit Setup Mode

28 HDVI5 Component Video Switch
29HDVI5 Component Video Switch
Auxiliary Relay Options
The t wo ge ner al pu rp ose a uxi li ar y rel ays a re rate d at 30 vo lt s A .C .
or D.C. @ 5 a m ps, a nd ca n be u s ed to c ont rol a n y th ing w ith in t hos e
limits.
The r e are 4 di ffe rent o per ati ng mo des o f th e Rel ays :
Mode 1 - Toggle
The re lay to ggl es e ach t ime t he re lay ' s bu tto n is pre ss e d. Th is is t he
simplest, and factory default, mode of operation.
Mode 2 - Momentary
Eac h rel ay can b e se tup t o s tay o n a pro gram me d a mo unt o f tim e,
and then turn off, each time the relay's button is pressed.
Mode 3 - Channel Controlled - Steady State
The relays can be setup to turn on each time specified channels are
selected. By selecting all channels, the relay will turn on each time
the HDVI5 is power on, and turn off when the HDVI5 is turned off.
Mode 4 - Channel Controlled - Momentary
The re lays c an be s et up to t u rn o n for a pr ogra mme d am oun t tim e
each time specified channels are selected, and then turn off.
Entering the Relay Setup Mode:
Place the HDVI5 into the Setup Mode
Press a nd ho ld t he Power to e nte r Se tup M od e.
Select Relay to Setup (A1 or A2)
Cho se th e rel ay to se tu p b y pre s si ng A1 o r A2.
Relay Setup Overview
Se e i ll ust rat ion fo r an ove r vi ew of t he R elay S et up M ode.
The following pages describe the settings for each of the dif-
ferent relay modes...
1 2 3 4 5 SEL A1 A2
Place the HDVI5 into the Setup Mode
Press and hold the Power Button until the
display goes wild. (About 4 seconds.)
1 2 3 4 5 SEL A1 A2
Select Relay to Setup (A1 or A2)
Select a relay to setup by pressing either A1 or A2
Relay Setup Overview
1 2 3 4 5 SEL A1 A2
If the red LED is lit, then the relay activates when
channel is selected. Use buttons to toggle LEDs.
The blue LED indicates Steady-State, the red LED
indicates Momentary. Use button to toggle LEDs.
The blue LEDs indicate delay times.
A1 = Decrease delay
A2 = Increase delay
Press Pwr Button to
exit setup mode.

30 HDVI5 Component Video Switch
31HDVI5 Component Video Switch
Relay Options (Cont'd)
Toggle and Momentary Relay Modes
If a ll ch an n el L EDs a re of f, t hen t he re lay wi ll n ot be a ffec te d by
changing channels. The 'SEL' button is used to switch between the
To gg le Mo de a nd th e Mo men tar y M od e.
Toggle Mode
In t he Togg le M ode ( th e blu e 'SE L' LE D is li t) th e rel ay wi ll to g gl e
bet wee n On a nd O ff e a ch t ime t he re lay bu tto n is p r ess ed. A ll rel ay
del ay ti mes a re ign ore d in th e Toggl e Mo de.
Use t he 'S EL' bu tto n to sw itc h to th e To gg le M ode ( Blu e
'SEL' LED lit).
Momentary Mode
In t he M ome nta r y Mo de (t he re d 'SE L' LE D is li t) th e rel ay wi l l ac -
tiv ate wh en i t's b utt on is p res sed, a nd t h en t ur n i ts elf o ff af te r a
prog ram med a mou nt of t im e. Use t he 'S EL' bu tto n to sw itc h to th e
Mo m en t ar y M od e (th e red ' SEL' L ED i s l it ).
Use t he 'A1 ' a nd 'A2 ' bu tto ns to a d ju st th e amo unt o f ti me
the re lay i s ac ti ve befo re tu rni ng i tse lf of f. The de lay ti me s
are in di cate d by th e top ro w o f bl ue LE Ds an d cor res po n d
to the following times:
No LE Ds li t = Sam e as Tog g le M od e
• One left justified LED = 1/4 seconds
•• Two left justified LEDs = 1/2 seconds
••• Three left justified LEDs = 1 seconds
•••• Four left justified LEDs = 5 seconds
••• •• Five LE Ds = 10 se con ds
•••• Four right justified LEDs = 30 seconds
• • • Thre e ri ght j ust if ied L EDs = 1 mi nu t e
•• Two rig ht ju st ifi ed LE Ds = 5 min ute s
• O ne r igh t jus tif ie d LED = 10 min ute s
•
•
1 2 3 4 5 SEL A1 A2
Toggle Mode
1 2 3 4 5 SEL A1 A2
Momentary Mode
All channel LEDs are turned off.
The b l ue ' SEL' L ED i s lit .
Del ay Tim es a re ign ored .
Blue LEDs indicate delay times.
A1 = Decrease delay
A2 = Increase delay
All channel LEDs are turned off.
The re d 'SE L' LE D i s li t.
Press Pwr Button to
exit setup mode.
Press Pwr Button to
exit setup mode.

32 HDVI5 Component Video Switch
33HDVI5 Component Video Switch
Relay Options (Cont'd)
1 2 3 4 5 SEL A1 A2
Channel Control - Steady State
1 2 3 4 5 SEL A1 A2
Channel Control - Momentary
Red LEDs indicate inputs that
ac tiv ate re lay.
Blue 'SEL' LED is lit.
Del ay ti mes i nd ica te how l ong
a rela y tak es to t ur n o ff a ft e r
swi tch ing a way fro m an a c t ive
input.
A1 = Decrease delay
A2 = Increase delay
Delay times indicate how long a
relay stays on when switching to
an active input.
A1 = Decrease delay
A2 = Increase delay
Red ' SE L' LED i s li t .
Press Pwr Button to
exit setup mode.
Press Pwr Button to
exit setup mode.
Red LEDs indicate inputs that
ac tiv ate re lay.
Channel Control Modes
If a ny cha nn e l LE D is li t, th en t he rel ay wi ll tu rn o n whe n th a t ch a n-
nel i s sel ec te d d ur in g n or ma l o pe rati on s. The ' SEL' b ut ton i s u se d to
swi tch b et wee n t he S tea dy St ate M ode, a nd t he M o me nta r y Mo de.
Channel Control - Steady State
In t he St ead y Sta te Mo de ( whe n blu e 'S EL' LE D is li t) t he rel ay wi ll
rema in o n for as l ong a s th e H DV I5 is s wi t che d to an i np u t th at ha s
bee n set up to a c t iv a te th e rel ay. When t h e HD VI5 i s swi tch t o an
non-active channel, the relay will turn off after the delay time indi-
cated by the Blue input selection LEDs.
Use t he 'S EL' bu tto n to sw itc h to th e Ste ady S tat e M od e
(the blue 'SEL' LED is lit).
Use the Input Select buttons to chose which inputs will
ac tiv ate t he rel ay.
Use t he 'A1 ' a nd 'A2 ' bu tto ns to a d ju st th e amo unt o f ti me
the re lay re ma i ns a ct ive b efore t ur nin g it s el f off. The d el a y
tim es ar e ind ica ted by t he to p row of b lue L ED s and c orr e -
spond to the delay times given on the previous page.
Channel Control - Momentary
In t he M ome nta r y Mo de (t he b lue ' SEL' L ED l it) t he re l ay wi ll t urn o n
for the amount of time indicated by the Blue input selection LEDs,
whenever the HDVI5 is switched to an input that has been setup to
ac tiv ate t he rel ay.
Use t he 'S EL' bu tto n to sw itc h to th e Mo men tar y M od e (th e
red 'S EL' L ED is l it) .
Use the Input Select buttons to chose which inputs will
ac tiv ate t he rel ay.
Use t he 'A1 ' a nd 'A2 ' bu tto ns to a d ju st th e amo unt o f ti me
the re lay i s ac ti ve befo re tu rni ng i tse lf of f. The de lay ti me s
are in di cate d by th e top ro w o f bl ue LE Ds an d cor res po n d
to th e foll owi ng ti mes . ( Se e th e p rev iou s pa ge for re lay
times.)
•
•
•
•
•
•

34 HDVI5 Component Video Switch
35HDVI5 Component Video Switch
Step 1: Reset All Parameters to Factory Defaults
1 2 3 4 5 SEL A1 A2
Start by pressing and
holding the Power
button...
12...while continuing to hold the Power
button, press and hold both the‘2’
and the ‘3’ buttons.
After about 4 seconds, the display will flash
indicating all parameters have been restored
to their factory programmed values.
3
Resetting to Factory Defaults
If, for wh ate ver re aso n, yo u’d lik e to res et yo ur HD VI5 b ac k to it s f ac -
tory default condition, this is easily done...
Step 1: Reset All Parameters to Factory Defaults
Fi rs t pres s an d h ol d the Powe r but ton
Whi le co n ti n ui ng to h old t he Power B utt on, p res s and h ol d
both the ‘2’ and ‘3’ buttons.
After holding all buttons for about 4 seconds, the display
will flash indicating all parameters have been restored to
their factory programmed values.
Note: Reseting the HDVI5 to its default value, resets every-
thi ng to t he sa me s tate i t was w hen i t lef t t he fa c tor y!
This includes any learned IR codes, all timing informa-
tion, cable length tuning, etc.
Please be aware of this before issuing this command!
1.
2.
3.

36 HDVI5 Component Video Switch
37HDVI5 Component Video Switch
K.I.S.S.™ (Keep It Simple Serial!™)
Zektor’s exclusive K.I.S.S.™ (Keep It Simple Serial™) protocol was de-
signed by engineers who have been controlling RS-232 devices for
most of their careers and understand the pitfalls of a badly designed
prot oco l.
A few features of the K.I.S.S.™ protocol are:
A simple and logically consistent command structure.
Fully bi-directional operations and can be operated in both
a Master/Slave mode (only responds when spoken to), or
in an Asynchronous mode (state changes are sent as they
occur).
All commands and responses can optionally use a checksum
or a CRC-8 checkcode to insure reliable communications.
A com man d wil l al w ays g e ne rate a re sp o ns e! Th ere ar e n o
“t i me out ” state s as pa r t of t he pro toc ol. A ti me o ut w ill a l-
ways i ndi cat e s om e ty pe of p hysi cal c onn ec ti on er ror ( loo se
cable, extreme noise, etc.).
Commands and responses have been designed for simple
parsing in any language.
Eas y to te s t us ing a t erm in a l, or t erm in al em ula tio n so f t-
ware. ( Hy per t er m, S e cu reCR T, et c.)
A few features of the HDVI5 command set are:
A full featured command set that goes far beyond simple
fron t pan el co ntro l op erat io ns! A llo ws fu ll co n tro l over all
features of the HDVI5.
All front panel functions supported.
Full notification of state changes.
The a b il it y to di sab le th e fro nt pa nel, a nd s til l have f ront
panel button presses sent to the serial port.
High resolution control over all timing settings.
The a b il it y to rea d all I R cod es se nt to t he HD VI 5 by any re -
mot e, even t ho s e no t use d by th e HDV I5 . Use th e HD VI5 t o
add I R con trol t o any pro je c t !
Man y mor e f ea tur es, to o num ero us to l ist h ere. ..
For a full description of K.I.S.S.™ and a list of the commands sup-
ported by the HDVI5, download the HDVI5 supplemental manual at:
www.zektor.com/HDVI5/downloads.htm
•
•
•
•
•
•
•
•
•
•
•
•
•
The R S -2 32 o n t he H DVI 5 is t h e sa me for ma t a s a PC -mo dem , an d
uses the same type cable as a serial modem would, which is a stan-
dard s tra ig h t th r oug h cab le. D o not u se a c abl e tha t is ma rk ed as a
“Null Modem” cable.
The H D VI 5 can a ls o b e us ed wi th any U SB to R S- 232 c onver si on
cable, these are all typically straight through cables.
The RS-232 port is a female type DE-9 connector (sometimes mistak-
enl y refe rre d t o as a DB -9 c o nn ec tor ) wit h th e foll owi ng pi nou t:
5 4 3 2 1
9 8 7 6
Pin definitions:
1 - No Co nne ct 6 - No Co nne ct
2 - TX 7 - No Co nne ct
3 - RX 8 - No Co nne ct
4 - No Co nne ct 9 - No Co nne ct
5 - GND
The port settings used by the HDVI5 are:
Bau dra te: 9 600
Dat a Bit s: 8
Sto p Bit s: 1
Par ity : NON E
The communications protocol used is Zektor’s exclusive K.I.S.S.™
(Keep It Simple Serial™) protocol.
RS-232 Port
Other manuals for HDVI5
3
Table of contents
Other Zektor Switch manuals

Zektor
Zektor CVS4 User manual

Zektor
Zektor HDS4.2 User manual

Zektor
Zektor HDA604 User manual

Zektor
Zektor MAS7.1 User manual

Zektor
Zektor ZEKTOR MAS3 User manual

Zektor
Zektor Clarity Elite User manual

Zektor
Zektor HDMI5 User manual

Zektor
Zektor HDS4.1 User manual

Zektor
Zektor HDVI5 User manual

Zektor
Zektor HDS4 User manual
Popular Switch manuals by other brands

Brocade Communications Systems
Brocade Communications Systems FastIron SuperX Hardware installation guide

Moxa Technologies
Moxa Technologies EtherDevice EDS-208A series Hardware installation guide

Leviton
Leviton W5601 manual

Avaya
Avaya M770 user guide

CYP
CYP AU-D41 Operation manual

TRENDnet
TRENDnet TEG-S16Dg Specifications