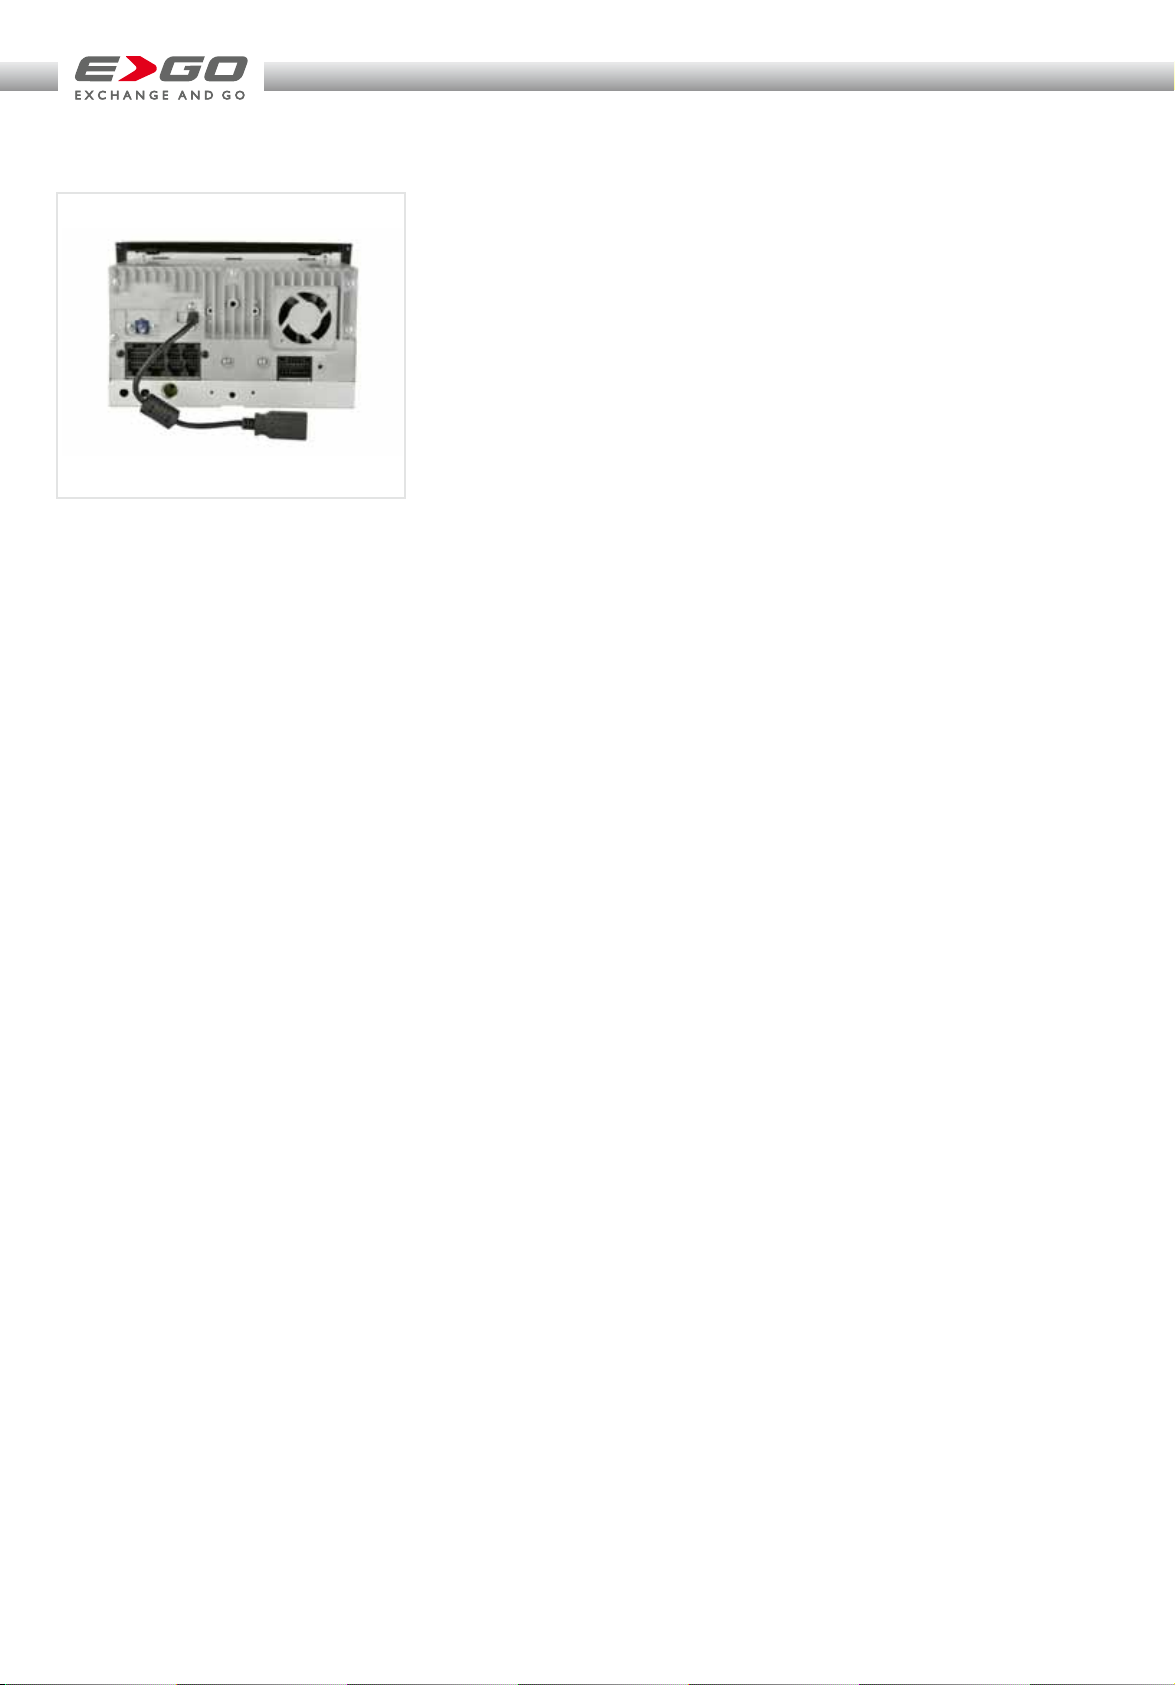
Stellen Sie sicher, dass dort wo
der Fakra Antennenstecker hinter
dem Gerät zu liegen kommt, ein
Durchbruch existiert. Bruchgefahr
der Fakrabuchse am Gerät!
Falls keine Aussparung vorhanden
ist (modellabhängig!) muss mit
einem Dremel eine Aussparung
geschnitten werden.
Check for clearance back in
the mounting slot, where Fakra
connector on the backside of
device is located. Without opening
in the plastic rear wall, chances
for the Fakra plug to be damaged
are high. If no cut out is present
(depends on Ducato model), use a
Dremel tool to make room.
6
6
7
7
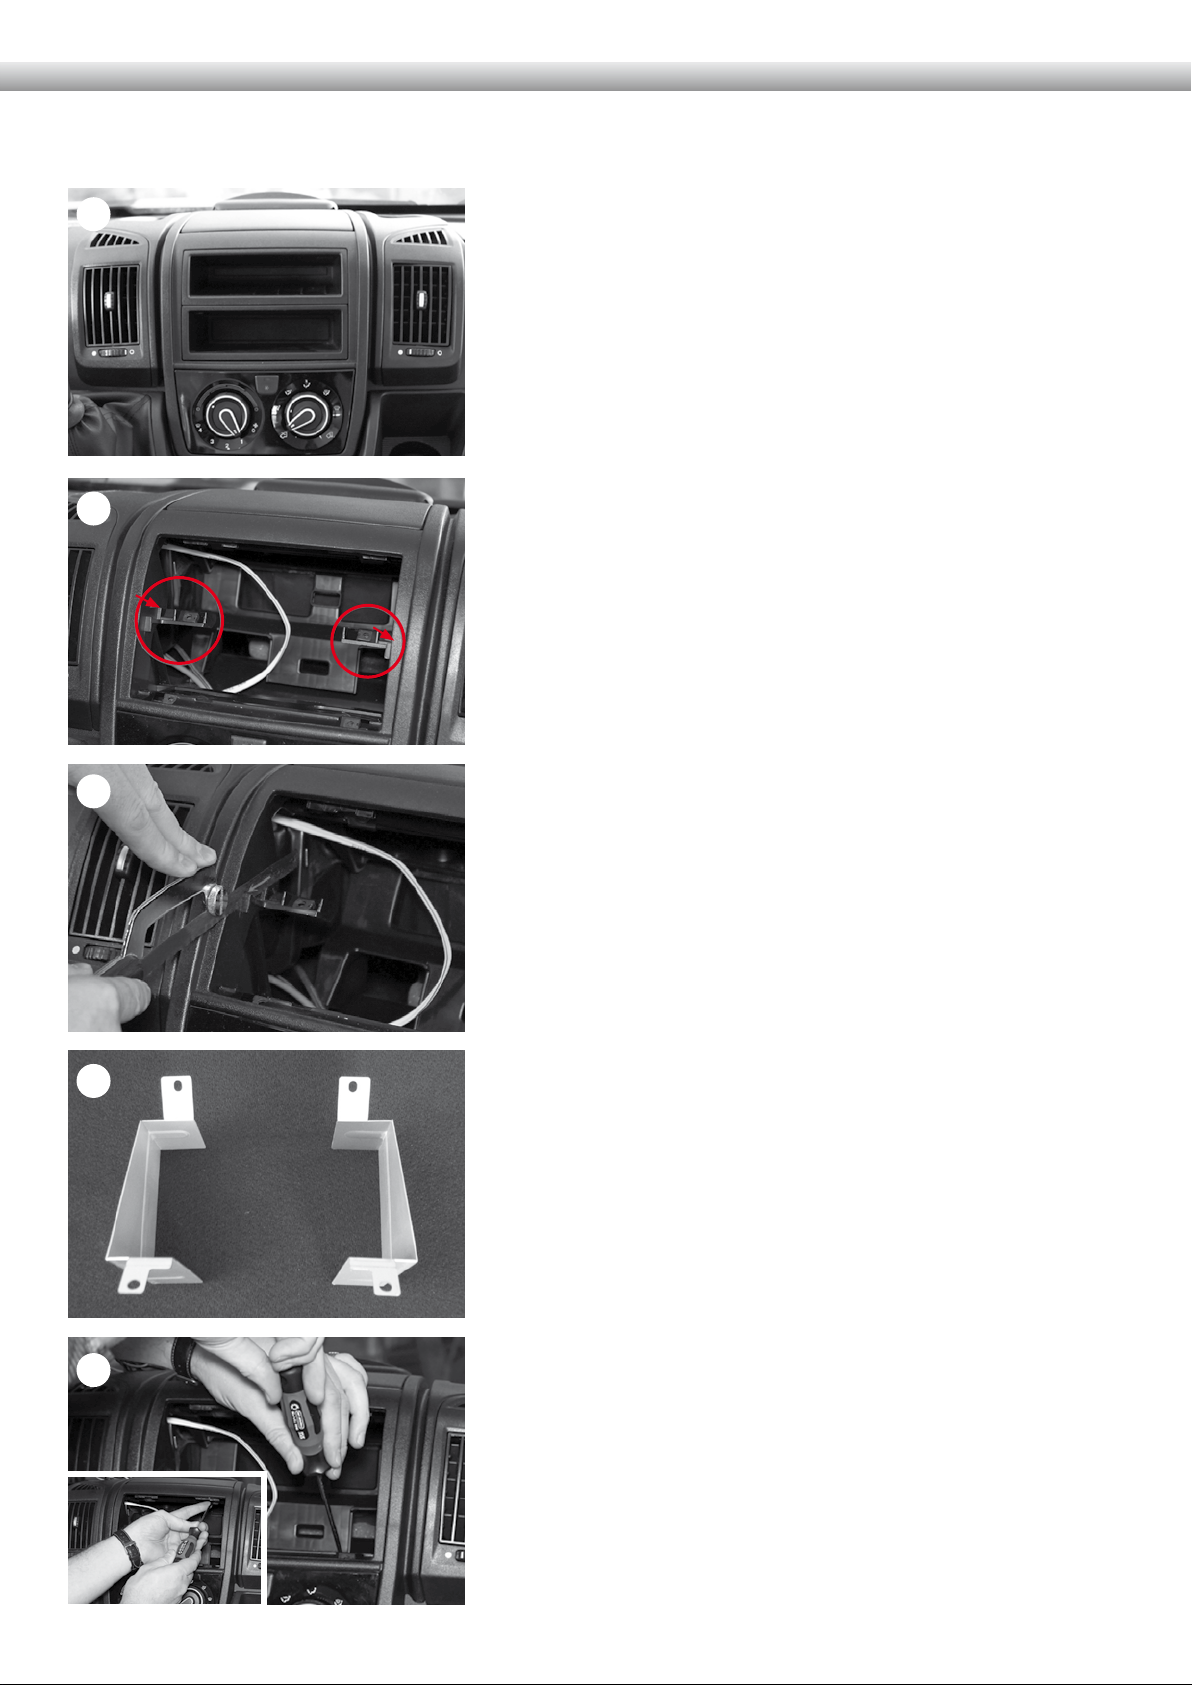
Montieren Sie die GPS Antenne
an geeigneter Stelle. Sie darf auch
unter einer Plastikabdeckung
montiert werden. Montieren
Sie nun bei Bedarf das externe
BT Mikrofon. Beachten Sie bei
Verwendung vom geräteinternen
Mikrofon, dass die Mikrofonquelle
im Menü umgestellt wird.
Install the GPS antenna in a
suitable place. It may be under a
plastic cover. Install, if deemed
necessary, the external BT
microphone. When you use the
device‘s internal microphone, the
microphone source must be chosen
accordingly, in the device setup
menu.
8Montieren Sie die Medialink
Box im Handschuhfach. Die
Handschuhfachklappe sollte sich
auch mit USB Stick oder iPhone
Adapterkabel noch schliessen
lassen.
Install the Media Link box in the
glove compartment. The glove
compartment hatch must still close,
with a USB flash drive or iPhone
adapter cable connected.
8
To unmount the device, a plastic
panel removal tool is required. Insert
the lever tool on the bottom side of
the front panel – gently press on the
dash board surface directly above
the device to unlock the plastic
retaining tabs.
bl
Connect the cables of the ISO
power and speaker harness, GPS
antenna and Media-Link box to
the unit. Neatly arrange the cables
to be out of the way and slide the
device into the bay. The plastic
latches will lock with a click on a
gentle pressure applied to the front
panel. The installation is completed.
9Stecken Sie die Kabel von der ISO
Stromversorgung, GPS Antenne
und Media-Link Box am Gerät
an. Verstauen Sie alle Kabel und
schieben Sie das Gerät in den
Schacht. Die Rastnasen klicken bei
sanftem Druck auf die Gerätefront
ein. Der Einbau ist damit beendet.
Für die Demontage des
Gerätes muss ein Lösehebel für
Kunststoffpaneele verwendet
werden. Den Lösehebel unten
an der Bedienfront ansetzen –
durch leichten Druck auf das
Armaturenbrett direkt oberhalb des
Geräts lösen sich die Rastnasen.
9
bl