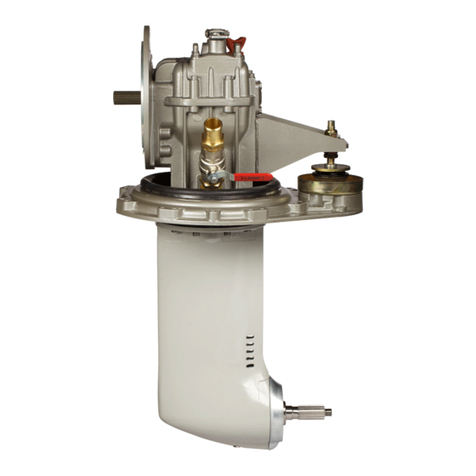
ZF GK20 User manual

ZF Gotha GmbH • Karl-Liebknecht-Straße 26 • D-99867 Gotha
Maintenance and Installation Instructions GK20 GK40
Edition: 11.07.2006
For possible technical modifications of the product described in this manual ZF Gotha GmbH reserve the
right to change the product documentations, if necessary. Technical modifications are to be considered as
modifications in production, processing and appearance of the product.
Copyright ZF Gotha GmbH 2006

Maintenance and Installation Instructions Edition 11.07.2006 1 of 30
Introduction
This manual describes the maintenance and
installation for the transmissions type GK 20, 25, 30
and 40. The herein described work is only allowed to
be made by specialists who were trained by ZF
Gotha GmbH for maintenance and repair work on
ZF units. It is absolutely required that design and
function of the mentioned transmission types are
known.
Prior to start work read this manual carefully. Carry
out the single working steps as described and do not
change them without permission. Observe the safety
instructions. If you do not understand a procedure or
cannot follow it doubtlessly, do not act on your own
without permission, but consult the Technical
Service at ZF Gotha GmbH.
For the work described in this manual only original
spare parts from ZF Gotha GmbH or spare parts
approved by ZF Gotha GmbH are allowed to be
used. If no original parts are used the optimum
function of the transmission can be negatively
affected and the warranty claim will lapse.
ZF Gotha GmbH do not accept any liability for
damages and operational failures caused by
•imperfect mounting of attached components
•faulty installation
•modifications on the transmission or the drive
unit without permission
•inadequate use of the transmission or the drive
unit
•insufficient maintenance
•improperly and incompetently performed work
and the resulting consequential damages
•faulty operation
ZF Gotha GmbH reserve further technical
development of their products. It is possible that
procedures can become necessary which differ
from those described in the original version of
this manual. In this case the customers are
informed by ZF Gotha GmbH and the changed
pages of this manual will be made available to
them.
The customer is responsible to replace the
changed pages and thus to keep this manual
updated. The respective version is indicated on
the bottom of every page for information. If you
are not sure, whether you have the current
version of your manual, please consult the
Technical Service of the ZF Gotha GmbH and
request the respective current version.
Keep this manual in such a way that it can
always be found by persons concerned with the
product.
A requirement is the availability of corresponding
presses and the appropriate bolting technology.
Contact:
ZF GOTHA GMBH
Karl-Liebknecht-Straße 26
D-99867 Gotha
Tel.: +49 (0)3621 311 - 0
Fax.: +49 (0)3621 311 - 4419
E-Mail: Aftermarket.zfgotha@zf.com
Transmittal of this manual, reproduction and copying –
even partially –, making use and disclosure of its
contents are forbidden without permission of the ZF
Gotha GmbH. Infringements are liable for damages. All
rights reserved for the grant of a patent or registration
of a utility model.

Maintenance and Installation Instructions Edition 11.07.2006 2 of 30
Table of Contents
TABLE OF CONTENTS..................................................................................................2
DESCRIPTION ................................................................................................................4
Preface ............................................................................................................................4
SAFETY INSTRUCTIONS...............................................................................................5
Components and Accessories of a GK Transmission......................................................6
Transmission Identification ..............................................................................................7
INSTALLATION ..............................................................................................................8
General Instructions ........................................................................................................8
Torque limits in Nm for screws to ZF Standard 148 ................................................................ 8
Condition as supplied ............................................................................................................... 9
Storage...................................................................................................................................... 9
Transport .................................................................................................................................. 9
Removal of the corrosion protection ........................................................................................ 9
Attachment of the Electric Motor....................................................................................10
Attachment of the electric motor to the transmission ............................................................. 10
Pivoted Connection-Steering ......................................................................................... 12
Mounting of the gear ring with pivoted bogie bearing GK 20, GK 25 & GK 30................... 12
Mounting of the pivoted bogie bearing with holding ring GK 40 .......................................... 13
Mounting of the transmission top section GK 40 ................................................................... 14
Mounting of the gear ring GK 40 ........................................................................................... 15
Demounting of the pivoted connection ................................................................................... 15
Checking of fixing bolts of the pivoted connection................................................................. 15
Lubrication and maintenance of the pivoted connection........................................................ 16

Maintenance and Installation Instructions Edition 11.07.2006 3 of 30
Pivoted Connection – Roller Chain Steering..................................................................17
Transmission Attachment to the Mounting Construction in the Vehicle .........................22
Drive wheel mounting............................................................................................................. 23
INITIAL OPERATION / MAINTENANCE ......................................................................25
Oil grade for transmission types GK 20, GK 25, GK 30........................................................ 25
Oil grade for transmission type GK 40 .................................................................................. 25
Oil capacity............................................................................................................................. 25
Maintenance intervals Transmission...................................................................................... 26
Oil Change.....................................................................................................................26
Drain the transmission oil at GK 20, GK 25 & GK 30 .......................................................... 26
Drain the transmission oil at GK 40 ...................................................................................... 27
Fill in the transmission oil at GK 20, GK 25 & GK 30.......................................................... 28
Fill in the transmission oil at GK 40 (Possibility 1)............................................................... 28
Fill in the transmission oil at GK 40 (Possibility 2)............................................................... 29
Technical Data of the GK – Product Range................................................................... 29
MAINTENANCE SCHEME............................................................................................30

Maintenance and Installation Instructions Edition 11.07.2006 4 of 30
Description
Preface
This documentation has been developed for the skilled Serviceman, trained by ZF for the Repair and
Maintenance operations on ZF-Units.
Treated is a ZF-Serial product according to the design stage of the date of Edition.
However, due to further technical developments of the product, the repair of the unit at your disposal could
require different steps as well as other adjustment and testing specifications.
Therefore, we recommend to commit your ZF-Product to Masters and to Servicemen, whose practical and
theoretical training is constantly completed to the actual situation in our Training School.
The Service Stations, established by the ZF Friedrichshafen all over the world, offer you:
1. Constantly trained personnel
2. Prescribed installations, e.g. Special Tools
3. Genuine ZF-Spare Parts according to the latest phase of development
Here, all operations are carried out for you with utmost care and reliability.
Repair operations carried out by ZF-Service Stations, are covered additionally within the terms of the
actual contractual conditions, by the ZF-Warranty.
Damages caused by inappropriate or inexpert work, carried out by personnel foreign to ZF, and after-
expenditures eventually arising from it, are excluded from this contractual responsibility.
This applies also in case of a renouncement of Genuine ZF-Spare Parts.
We did not go into detail for disassembly, reassembly and repair of accessory parts.
Please observe the respective instructions and manuals of the vehicle manufacturer.
Basically all pictures are without any obligation and only serve as illustrative material and for better
understanding purposes.
Important information on industrial safety:
Generally, the persons repairing ZF-units are responsible on their own for the industrial safety.
The observation of all valid safety regulations and legal impositions is the pre-condition for avoiding
damage to persons and to the product during maintenance and repair works.
Persons performing repair works must familiarize themselves with these regulations.
The proper repair of these ZF-products requires the employment of suitably trained and skilled staff.
The repairer is obliged to perform the training.
Important information with reference to technical reliability and operational safety are outlined by the
following symbols:
DANGER
This symbol refers to situations where lacking care can lead to personal
injury or damage on the product.
CAUTION
This symbol in these operating instructions serves as a reference to special
working procedures, methods, information, the use of auxiliaries, etc.

Maintenance and Installation Instructions Edition 11.07.2006 5 of 30
Safety Instructions
•The use as directed requires the strict observance with the manufacturer’s specifications for
installation, dis- and reassembly, initial operation and maintenance.
•Every person concerned with installation, disassembly and reassembly, initial operation and
maintenance of the transmission in the user plant must have read and understood the whole
instructions and in particular the safety instructions.
•Any working method which endangers the safety of the transmission is prohibited.
•Modifications and changes without the proper permission are affecting the safety of the
transmission and are not allowed.
•Only original spare parts from ZF or spare parts approved by ZF are allowed to be used. It is
explicitly pointed out to the fact that spare parts and accessories, which were not supplied
by ZF are not checked and approved by us either. We do not accept any liability or admit any
warranty for damages caused by the use of spare parts and accessories which are no
original parts from ZF.
•The described work is only allowed to be made by authorized, skilled and instructed staff.
•The proper repair of these ZF-products requires adequately trained specialists. The repairer
is responsible for the training!
•Keep away aggressive cleaners from your skin, do not drink it or inhale its vapours! Always
wear safety gloves and goggles. If by mistake cleaner was swallowed, call medical aid
immediately! Strictly observe manufacturer instructions.
•Do not drain cleaners or transmission oil into the sewerage system or into the soil.
•Prior to start working on the installed or mounted transmission, the wheels must be blocked.
•Prior to any work on the installed transmission (e.g. oil change) or its mounted-on parts the
voltage source feeding the motor must always be disconnected resp. switched off.
•The local regulations for safety and prevention of accidents must be observed!

Maintenance and Installation Instructions Edition 11.07.2006 6 of 30
Components and Accessories of a GK Transmission
Item 01 one-piece transmission housing
Item 02 Venthole for electric motor ventilation
Item 03 optional steering: Gear ring with steering pinion (is shown) or
steering chain as alternative
Item 04 Mounting holes (optional)
Item 05 one-piece pivoted bogie bearing (optional)
Item 06 Wheel shaft with centering and locating face for drive wheel
Item 07 fully integrated drive pinion with motor connection profile
Item 08 Housing cover
Item 09 Oil filler plug and oil level check
Item 10 Oil drain plug
Other customer-specific accessories are possible!
Figure 01
03
03
05
09
10
07
04
04
08
01
02
06

Maintenance and Installation Instructions Edition 11.07.2006 7 of 30
Transmission Identification
The transmission type is cast in the transmission
housing on the bearing cover side.
Figure 02
The model identification plate is fixed to the transmission housing side.
Technical data of the transmission is indicated on the model identification plate.
Figure 03
GK 20
4699 801 017
14,50
200001
ZF Parts List No.
Transmission type Serial Number
Total ratio
Transmission type of
the product range GK

Maintenance and Installation Instructions Edition 11.07.2006 8 of 30
Installation
General Instructions
Torque limits in Nm for screws to ZF Standard 148
Torque limits, if not especially indicated, can be taken from the following list:
Metric ISO-Standard thread DIN 13,
Sheet 13
Metric ISO-Fine thread DIN 13,
Sheet 13
Size 8.8 10.9 12.9 Size 8.8 10.9 12.9
M 4 2.8 4.1 4.8 M 8x1 24 36 43
M 5 5.5 8.1 9.5 M 9x1 36 53 62
M 6 9.5 14 16.5 M 10x1 52 76 89
M 7 15 23 28 M 10x1.25 49 72 84
M 8 23 34 40 M 12x1.25 87 125 150
M 10 46 68 79 M 12x1.5 83 120 145
M 12 79 115 135 M 14x1.5 135 200 235
M 14 125 185 215 M 16x1.5 205 300 360
M 16 195 280 330 M 18x1.5 310 440 520
M 18 280 390 460 M 18x2 290 420 490
M 20 390 560 650 M 20x1.5 430 620 720
M 22 530 750 880 M 22x1.5 580 820 960
M 24 670 960 1100 M 24x1.5 760 1100 1250
M 27 1000 1400 1650 M 24x2 730 1050 1200
M 30 1350 1900 2250 M 27x1.5 1100 1600 1850
M 33 1850 2600 3000 M 27x2 1050 1500 1800
M 36 2350 3300 3900 M 30x1.5 1550 2200 2550
M 39 3000 4300 5100 M 30x2 1500 2100 2500
M 33x1.5 2050 2900 3400
M 33x2 2000 2800 3300
M 36x1.5 2700 3800 4450
M 36x3 2500 3500 4100
M 39x1.5 3450 4900 5700
M 39x3 3200 4600 5300
Friction value: µtot. 0.12 for screws and nuts without after-treatment, as well as phosphatized nuts.
Tightened by hand!

Maintenance and Installation Instructions Edition 11.07.2006 9 of 30
Condition as supplied
The basic transmission is supplied as follows:
•ready assembled
•without oil filling (customer-specific agreement possible)
•painted with prime coating (ZF Standard 902) and coating varnish (RAL 9005), colour: jet black
•The wheel shaft sealing, the centering- and locating face for the drive wheel on the wheel shaft,
the wheel bolt threads, the connecting faces and boreholes for motor and vehicle connection are
provided with a short term corrosion protection.
•Metallic bright sections (like e.g. fits or guides) are also provided with a short term corrosion
protection.
•With internal preservation for short-term storage in a dry ambience.
Storage
The supplied GK-transmissions are provided with an internal preservation, ensuring a corrosion protection
for approx. 1 year at an adequate storage in closed and dry rooms.
If a transmission is to be stored for a longer time, the transmission has to be filled with the specified
transmission oil (see Chapter “Initial Operation / Maintenance” “Oil Grade”).
At an input speed of 1000 to 1500 min-¹ the transmission is to be driven for approx. 2 minutes, so that all
transmission internal parts are wetted with oil.
If this is ensured, the oil can be drained off again.
We recommend repeating this procedure yearly!
Transport
The unit is only allowed to be lifted with soft ropes or belts, never with steel ropes or chains. During
transportation care must be taken to avoid shocks.
Removal of the corrosion protection
Only with a suitable cleaner the corrosion protection is to be removed from the connecting points before
installation into the vehicle. Never use benzene, solvents or other combustible substances for cleaning.
Only use non-toxic, non-combustible and commercially permissible cleaning agents.
Do not drain cleaners into the soil. Overflown cleaner is to be disposed of
adequately. Do not abrade with emery or scrape off! Avoid that cleaners get
in contact with rubber parts, the electrical connections of the accessories or
the motor ventilation!
Keep away cleaning agent from your skin, do not drink it or inhale its
vapours! Wear safety gloves and goggles! In case of skin contact rinse
immediately with a lot of water! If by mistake the cleaning agent was
swallowed, call medical aid immediately! Observe the regulations for the
prevention of accidents!

Maintenance and Installation Instructions Edition 11.07.2006 10 of 30
Attachment of the Electric Motor
If the unit is supplied with an already attached electric motor this chapter is not applicable.
The centering- and locating faces for connection of the electric motor must be perfectly clean and
undamaged. Check face run-out of the motor connecting face to the motor shaft. The maximum run-out
must not exceed 0.05 mm. (see Figure 04)
An excessive face runout will have a negative effect on the noise behaviour
and results in premature wear of the spur gear stage.
Assembly instructions for the splined shaft-hub connection
An assembly paste has to be used as assembling aid and later long-term lubricant for the splined shaft-
hub connection.
Approved special lubrication grease: Klüberplex BEM 34- 132 (KLÜBER LUBRICATION)
Attachment of the electric motor to the transmission
Apply a thin and even coat of the special lubrication grease BEM 34-132 onto the splined shaft-hub
connection. Assemble the electric motor (Item 1) into the centering seat of the pivot bogie bearing (Item 2)
and join it cautiously with the splined hub connection of the drive pinion (Item 3).
Turn the hole pattern of the pivoted bogie bearing to be accurately aligned with that of the electric motor.
Fasten the electric motor by means of six (6) cap screws M8 and locking pieces with the pivoted bogie
bearing. Pay attention to the minimum screw-in depth (see Fig. 04, Item 4).
Please observe the specified mounting dimensions of the corresponding
installation drawing!
For connecting cautiously rotate the wheel shaft of the transmission or the
input shaft of the electric motor (depending on the mounting position) until
the input shaft engages into the splined hub connection of the drive pinion.
When locating the electric motor take care that the splined shaft-hub
connection (Fig. 4; Item 5) of the drive pinion and the electric motor shaft
will not be damaged.
Damages cause louder running noises and premature failure of the splined
shaft-hub connection!

Maintenance and Installation Instructions Edition 11.07.2006 11 of 30
Example for the electric motor attachment without centering ring connection directly to the pivoted bogie
bearing.
Figure 04
05
03
01
04
02

Maintenance and Installation Instructions Edition 11.07.2006 12 of 30
Pivoted Connection-Steering
Mounting of the gear ring with pivoted bogie bearing GK 20, GK 25 & GK 30
1. The centering and supporting face
for the gear ring has to be clean.
2. Pay attention that no foreign
substances or cleaning agents get
through the threaded holes (Item
01) of the mounting construction
(hole pattern of the housing) inside
the transmission.
3. Place the gear ring (Item 02) and
rotate it, so that the boltholes in the
gear ring are aligned with the
threaded holes of the mounting
construction.
4. By means of a plastic tip hammer
install the gear ring.
5. Put on the pivoted bogie bearing
(Item 03) with the correct side and
rotate it so that the boltholes in the
pivoted bogie bearing are aligned
with the hole pattern of the gear
ring and the housing.
6. Fasten the pivoted bogie bearing
and the gear ring on the mounting
construction by means hexagon
screws M8x40 (Item 04).
Figure 05
Attention
In order to avoid inadmissible leakage problems on the screws, it is mandatory to observe the
following procedure for thread sealing:
•Always seal the screws (Item 01) located in the oil sump of the transmission! For this purpose
these are to be wetted with LOCTITE 243 around the thread contact face and only then to be
attached.
•In order to avoid inadmissible variations among the screw clamping forces, always pretension the
screws carefully crosswise to the specified value. Tightening torque: 34 Nm Cl.3 ZF Standard
148
•After a possible disassembly the LOCTITE residues in the threaded holes must be removed. It is
necessary to use new screws.
03
02
01
01
04

Maintenance and Installation Instructions Edition 11.07.2006 13 of 30
Mounting of the pivoted bogie bearing with holding ring GK 40
a) Press the pivoted bogie bearing (Item 01)
evenly into the transmission top section
until contact is obtained.
b) Determine the Dim. A and B.
Prior to bolting Figure 06
c) Calculate the thickness of the shim rings
(Item 02) to be inserted, so that the bearing
preload is reached.
d) Dim. A – Dim. B – 0.05 to 0.25 mm =
bearing preload
e) Prepare the required shim ring thickness
and insert it.
Figure 07
In order to obtain the bearing preload a gap of 0.05 – 0.25 mm must exist
before between the holding ring (Item 03) and the inserted shim rings (Item
02) before bolting. Bearing play and an excessive preload have a negative
effect on the service life of the pivoted bogie bearing.
After bolting
f) Put on one drop each of LOCTITE 242
onto the threads of the Allen screws M10
(Item 02) and fasten the holding ring (Item
03) with screws.
g) Tighten the screws crosswise.
h) Tightening torque: 46 Nm
Figure 08
02
03
01
02

Maintenance and Installation Instructions Edition 11.07.2006 14 of 30
Mounting of the transmission top section GK 40
i) Apply a thin layer of LOCTITE 574 onto the
transmission plane face.
j) Place the transmission top section onto the
transmission housing that the cyl. pin (Item
01) in the transmission housing is
positioned into the fitting bore in the
transmission top section.
k) Bolt together the transmission top section
and the transmission by means of Allen
screws (Item 02).
l) The transmission top section is additionally
bolted with the transmission housing by
means of 2 Allen screws (Item 03) and
hexagon nuts (Item 04).
m) Tightening torque: 46 Nm
n) Put on the centering ring (Item 05) and
fasten it tightly with screws to the pivoted
bogie bearing.
Figure 10
Figure 09
01
02
02
05
03
04

Maintenance and Installation Instructions Edition 11.07.2006 15 of 30
Mounting of the gear ring GK 40
1. Place the steering turntable (Item 01) and rotate it so that the boltholes in the steering turntable
align with the threaded holes of the transmission top section (Item 02).
2. By means of a plastic tip hammer install the steering turntable until contact and position it with
the cyl. pins 8m6x20 (Item 03).
3. By means of the cap screws M8x20 (Item 04) fasten the steering turntable onto the transmission
top section.
Figure 11
Demounting of the pivoted connection
Demounting of the pivoted connection is basically made in reverse order of the mounting.
Checking of fixing bolts of the pivoted connection
The fixing bolts of the pivoted connection (see Fig.05 Item 04) have to be checked at regular intervals,
especially in case of:
•high breakdown torque load or
•hanging axial load
After the first 100 operating hours the fixing bolts have to be checked and in
case of deviation tightening to the specified value is required! (34 Nm)
Check the fixing bolts always after 600 operating hours, however, half-yearly
at least! In case of special operating conditions or device-dependent
inspection specifications the intervals can be reduced accordingly.
Disregard might cause personal injury or damage on the product!
03
04
02
01

Maintenance and Installation Instructions Edition 11.07.2006 16 of 30
Lubrication and maintenance of the pivoted connection
First lubrication of the teeth is to be made immediately after mounting. Spray grease is to be sprayed or to
be applied evenly onto the teeth. For this purpose and any later relubrication only use acid-free, non-
resinous, waterproof and non-ageing greases!
Without lubrication and relubrication respectively there will be a direct
metallic contact of the teeth resulting in damages.
Relubrication intervals
The relubrication intervals depend essentially of:
•the existing operating conditions
•the environmental influences like e.g. dirt, water, etc.
•the mounting type of the pivoted connection
Prior to every relubrication procedure it is necessary to clean the teeth, in
particular the tooth root.
Exact relubrication intervals can only be determined by tests under application conditions. If no
comparable results are available, Table 01 serves as orientation.
Operating condition Relubrication interval
dry and clean rooms after 250 h
heavier dirt accumulation, outdoor
operation after 100 to 150 h
extreme dirt accumulation continuously
Table 01 „Approximate values for the relubrication interval“
The indicated values are based on the following conditions:
•Operating temperature <70°C
•Circumferential speed <0,5m/s
•Low to medium load
If longer relubrication intervals are determined by tests, the relubrication interval can be determined by the
ageing resistance of the lubricant, if necessary.

Maintenance and Installation Instructions Edition 11.07.2006 17 of 30
Lubricants
Description Temperature range
Manufacturer
Aralup LFZ 1 -25°C to +250°C
ARAL
Energol WRL 0°C to +80 °C
BP
CARDREXA DC 1 -20°C to +120°C
ELF
SURRET FLUID 4k -20°C to +100°C
ESSO
CRAFLOSCON CG 901 Manual lubrication
CRAFLOSCON C-SG-0 Plus Spray lubrication -20°C to +150°C
Klüber
Mobiltac A Manual lubrication
Mobiltac D Spray lubrication
1)
-30°C to +120°C
Mobil
Cardium Fluid C -30°C to 60 °C
SHELL
Crater 2 X Fluid -20°C to +120°C
TEXACO
Grippa 33 S -20°C to +80°C
Castrol
Table 02 „Lubricants for teeth“
The sequence of the indicated lubricants is no reference to their quality. Lubricant-specific questions have
to be clarified with the respective lubricant manufacturer.
Pivoted Connection – Roller Chain Steering
Components of the pivoted connection
(see Fig.13, Page 18)
Fixing of the roller chain (Item 01) on the chain flange (Item 02) is made by a chain tensioner (Item 03)
with an adjustable element (Item 04).
Sixteen (16) holes (Item 05) on the plane face of the chain guideway allow fixing of the chain tensioner at
the most suitable mounting position, which is opposite to the chain pinion.
Chain tensioner
The chain tensioner is designed for mounting of the following DIN – Simplex-Roller Chains:
•Single roller chain 5/8“ x 3/8“ DIN 8187 (European Design),
•Single roller chain 3/4“ x 7/16“ DIN 8187 (European Design)
Tensioning of the roller chain is made via the tensioning bolt and the adjustable element of the chain
tensioner.
With the chain tensioner an overall length of the chain of approx. 25 mm can be adjusted.
Approx. 12 mm of it can be compensated via the adjustable element and the tensioning bolt, the rest by
means of the two holes in the chain tensioner.
We recommend that the roller chain in new condition is attached on the first bore of the chain tensioner
and to use connecting elements (chain joints, Item 06 and Item 07) in accordance with DIN 8187 / 8181.
(Fig. 07)

Maintenance and Installation Instructions Edition 11.07.2006 18 of 30
Figure 13
Within an area of approx. 135°around the chain tensioner only riveted
connecting elements (chain joints) are allowed to be used.
Drive wheel and wheel
shaft respectively must
be aligned in direction of
motion.
The chain tensioner
should be mounted
opposite of the steering
pinion. This ensures that
there is an equal steering
angle towards both sides.
Figure 14
Mounting of the pivoted connection
(see Fig.05, Page 12)
1. The centering and supporting face for the chain flange has to be clean.
2. Pay attention that no foreign substances or cleaning agents get through the threaded holes (Item
01) of the mounting construction (hole pattern of the housing) inside the transmission.
3. Place the chain flange (Item 02) and rotate it, so that the boltholes in the chain flange are aligned
with the threaded holes of the mounting construction.
4. By means of a plastic tip hammer install the chain flange until contact is obtained.
5. Put on the pivoted bogie bearing (Item 03) with the correct side and rotate it so that the boltholes
in the pivoted bogie bearing are aligned with the hole pattern of the flange and the housing.
6. Fasten the pivoted bogie bearing and the chain flange on the mounting construction by means
hexagon screws M8x40 (Item 04).
02
Plane face
Chain
guideway
07
04
06
03
01
05

Maintenance and Installation Instructions Edition 11.07.2006 19 of 30
Attention
In order to avoid inadmissible leakage problems on the screws, it is mandatory to observe the
following procedure for thread sealing:
•Always seal the screws (Item 01) located in the oil sump of the transmission! For this purpose
these are to be wetted with LOCTITE 243 around the thread contact face and only then to be
attached.
•In order to avoid inadmissible variations among the screw clamping forces, always pretension the
screws carefully crosswise to the specified value. Tightening torque: 34 Nm Cl.3 ZF Standard
148
•After a possible disassembly the LOCTITE residues in the threaded holes must be removed. It is
necessary to use new screws.
Mounting of the chain tensioner
1. Hang the chain tensioner (Item 03) into the requested position on the chain guideway and swivel it so
that the tensional pin (Item 09) can be hit in.
2. Fasten the tensioning bolt (Item 10) with the hexagon nut (Item 11) on the chain tensioner.
3. Attach the adjustable element (Item 04) into the tensioning bolt.
4. With the connecting elements (Item 06 and Item 07) hang in the roller chain (Item 01) and lock it. Pay
attention that the roller chain is mounted on the adjustable element (Item 04) in the correct position
and in accordance with the mounting dimensions.
5. Tension the roller chain by tightening the tensioning bolt. At a tightening torque of: 6
+1
Nm the roller
chain is tensioned correctly and the adjustment of the chain drive is correct.
6. Then fix the hexagon nut to the adjustable element and lock it respectively.
Figure 15
09
03
11
06
10
04
01
07
This manual suits for next models
3
Table of contents
Other ZF Microphone System manuals