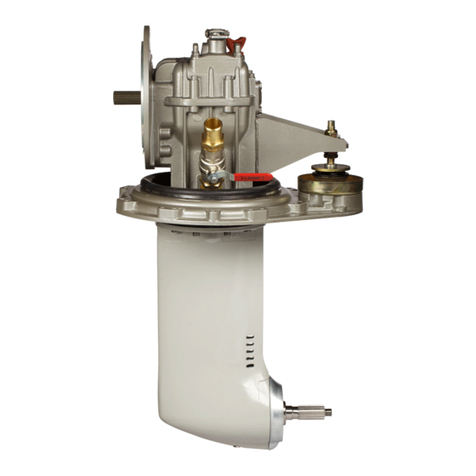
ZF ZF 63 IV User manual

ZF 63 IV
ZF 80 IV
ZF 80-1 IV
ZF 85 IV
FEBRUARY 2006
cod.
310.01.0009h
Repair Manual
and
Spare Parts List


TABLE OF CONTENTS
INTRODUCTION. . ................................... 3
1. MAJOR COMPONENTS. . .......................... 5
1.1 MAJOR TRANSMISSIONS COMPONENTS . . . .....5
1.2 CLEANERS AND SEALANTS . . . ..................6
1.3. MEASURING TOOLS ...........................6
1.4. STANDARD TOOLS AND FIXTURE. ..............6
2. SPECIAL TOOLS . . ............................... 7
3. DISASSEMBLY ................................... 9
INTRODUCTION....................................9
3.1. FLUID FILTER. . ................................9
3.1.1 Remove f uid fi ter . . .......................9
3.1.2 Suction of transmission f uid . . ..............9
3.1.3 Suction of transmission f uid on
ZF 63 IV, ZF 80 IV, ZF 80-1 IV and ZF 85 IV . . . . 9
3.2 REMOVAL DIPSTICK . ......................... 10
3.3 REMOVAL BREATHER VALVE . ................ 10
3.4 OUTPUT FLANGE............................. 10
3.5 REMOVAL CONTROL BLOCK . . ................ 11
3.5.1 Neutra Safety Switch ..................... 11
3.5.2 Neutra Safety Switch Check. . . ............ 11
3.6 HOUSING . . .................................. 12
3.6.1 Disassemb e the transmission housing
haves................................... 12
3.6.2 Remova of shafts and gears. . . ............ 12
3.6.3 Remova of radia shaft sea s . . ............ 12
3.6.4 Remova of f uid in et pipe . ................ 13
3.7 TAPERED ROLLER BEARINGS. ................ 14
3.7.1 Disassemb ing the outer races of
taper ro er bearing . ..................... 14
3.7.2 Remova of inner races of
taper ro er bearings ..................... 14
3.8 REVERSING CLUTCH PACK . . . ................ 15
3.8.1 Remova of the c utch discs................ 15
4. ASSEMBLY...................................... 17
INTRODUCTION.................................. 17
4.1 INPUT SHAFT . . .............................. 17
4.1.1 Mount discs into reversing c utch........... 17
4.1.2 Insta need e bearings and gear ........... 18
4.1.3 Assemb e butting rings .................... 18
4.1.4 Mounting inner races of tapered
ro er bearings. . . ......................... 19
4.1.5 Assemb e piston rings..................... 19
4.2 INTERMEDIATE AND REVERSAL SHAFT ....... 20
4.2.1 Mounting inner races of tapered
ro er bearings. . ......................... 20
4.3 OUTPUT SHAFT ...............................20
4.3.1 Preparations for assemb y ..................20
4.3.2 Mounting inner race of
tapered ro er bearing . . . ...................20
4.3.3 Pressing the gear on . . . ...................20
4.4 PREASSEMBLY OF HOUSING ..................21
4.4.1 Assemb y of outer races
(tapered ro er bearings) . ...................21
4.4.2 Insta ation of f uid suction pipe . . . ..........21
4.4.3 Assemb ing input shaft sea . . ..............22
4.4.4 Mounting the breather fi ter . . . ..............22
4.5 MEASURING THE BEARING CLEARANCE/
ADJUSTING THE PRETENSION OF BEARINGS . 23
4.5.1 Genera . . ................................23
4.5.2 Mounting outer races of tapered ro er
bearings into housing . . ...................23
4.5.3 Inserting gear set into housing . . . ..........23
4.5.4 Measuring bearing c earance
on input shaft . ...........................24
4.5.5 Measuring bearing c earance at
intermediate and reversa shafts . ..........24
4.5.6 Measuring the bearing c earance
on the output shaft .......................25
4.5.7 Adjusting the pretension c earance
of bearings . . . ...........................25
4.5.8 Fina assemb y of the housing . . . ..........26
4.6 CONTROL BLOCK . ...........................27
4.6.1 Mounting the contro b ock . . ..............27
4.7 FLUID FILTER ................................27
4.7.1 Mounting the f uid fi ter . ...................27
4.8 MAKING THE TRANSMISSION
READY FOR OPERATION . . ...................27
4.8.1 Fi ing up with Transmission F uid .........27
4.8.2 Inserting f uid fi ter into housing . ..........27
4.8.3 Check f uid eve . . .......................28
5. ADJUSTMENT DATA . ...........................29
5.1 SHIFTING PRESSURE . .......................29
5.1.1 ZF 80-1 IV VERSION - ZF 85 IV . . . ..........29
5.1.2 ZF 63 IV - ZF 80 IV VERSION . ..............29
5.1.3 ZF 63 IV INDMAR VERSION . ..............30
5.2 LUBE OIL DELIVERY RATE. ...................30
5.2.1 ZF 80-1 IV VERSION - ZF 85 IV . . . ..........30
5.2.2 ZF 63 IV - ZF 80 IV VERSION . ..............31
5.2.3 ZF 63 IV INDMAR VERSION . ..............31
6. HYDRAULIC DIAGRAM...........................32
7. TIGHTENING TORQUES. . . .......................33
8. FUNCTION TEST ................................34
1
Repair Manua and Spare Parts List Tab e of contents

9. TROUBLESHOOTING. ........................... 35
1 . AUTOMATIC TRANSMISSION FLUID ............. 4
11. SPARE PARTS LIST ZF63 IV - ZF8 IV - ZF8 -1 IV . 43
Preface . ........................................ 43
Name p ate . . .................................... 43
FIG. 1 ZF 63 IV . . ................................ 44
FIG. 1 ZF 80 IV - ZF 80-1 IV ...................... 46
FIG. 2 ZF 63 IV . . ................................ 48
FIG. 2 ZF 80 IV - ZF 80-1 IV ...................... 50
FIG. 3 Mechanica se ector va ve
ZF 63 IV - ZF 80 IV - ZF 80-1 IV ............. 54
FIG. 4 O d e ectric se ector va ve with
proportiona va ves
ZF 63 IV - ZF 80 IV - ZF 80-1 IV ............. 56
FIG. 5 ZF 63 IV - ZF 80 IV - ZF 80-1 IV ............. 58
FIG. 6 O d e ectric se ector va ve
ON/OFF 12V, 26 BAR
ZF 63 IV - ZF 80 IV - ZF 80-1 IV ............. 60
FIG. 7 New e ectric se ector va ve ON/OFF 12V - 26 bar
New e ectric se ector va ve ON/OFF 24V - 26 bar
ZF 63 IV - ZF 80 IV - ZF 80-1 IV ............. 62
FIG. 8 New e ectric se ector va ve on/off 12v - 26 bar
with tro ing va ve
New e ectric se ector va ve on/off 24v - 26 bar
with tro ing va ve
ZF 63 IV - ZF 80 IV - ZF 80-1 IV ............. 64
KIT COMPONENTS ZF 63 IV ...................... 66
KIT COMPONENTS ZF 80 IV - ZF 80-1 IV . ......... 67
12. SPARE PARTS LIST
ZF 8 IV ( 29 - 3 - 31 - 32 - 33 VERSION)
ZF 8 - 1 IV ( 34 - 35 - 36 - 37 - 38 VERSION)
.. 69
Preface ........................................ 69
Name p ate . .................................... 69
FIG. 1 ZF 80 IV, ZF 80 - 1 IV ....................... 70
FIG. 2 ZF 80 IV, ZF 80 - 1 IV ....................... 72
FIG. 3 Mechanica se ector va ve
ZF80IV, ZF80-1IV....................... 76
FIG. 4 O d e ectric se ector va ve
ON/OFF 12V, 26 bar ZF 80 IV, ZF 80 - 1 IV . . . 78
FIG. 5 New e ectric se ector va ve ON/OFF 12V - 26 bar
New e ectric se ector va ve ON/OFF 24V - 26 bar
ZF80IV, ZF80-1IV....................... 80
FIG. 6 New e ectric se ector va ve on/off 12v - 26 bar
with tro ing va ve
New e ectric se ector va ve on/off 24v - 26 bar
with tro ing va ve
ZF80IV, ZF80-1IV....................... 82
KIT COMPONENTS
ZF80IV, ZF80-1IV ............................. 84
13. SPARE PARTS LIST ZF 85 IV . ................... 85
Preface . . . ..................................... 85
Name p ate..................................... 85
FIG. 1 ZF 85 IV ................................. 86
FIG. 2 ZF 85 IV ................................. 88
FIG. 3 Mechanica se ector va ve ZF 85 IV . . . ...... 90
FIG. 4 E ectric se ector va ve ON/OFF 12V - 26 bar
E ectric se ector va ve ON/OFF 24V - 26 bar
ZF85IV ................................. 92
FIG. 5 E ectric se ector va ve ON/OFF 12V - 26 bar
with tro ing va ve
E ectric se ector va ve ON/OFF 24V - 26 bar
with tro ing va ve
ZF85IV ................................. 94
KIT COMPONENTS ZF 85 IV . . ................... 96
14. SPARE PARTS LIST ZF 8 IV
(ZF 85 IV DERIVATE VERSION) . . . ............... 97
Preface .......................................... 97
Name p ate. . ..................................... 97
FIG. 1 ZF 80 IV (ZF 85 IV DERIVATE VERSION) ...... 98
FIG. 2 ZF 80 IV (ZF 85 IV DERIVATE VERSION) ..... 100
FIG. 3 Mechanica se ector va ve
ZF 80 IV (ZF 85 IV DERIVATE VERSION) ..... 102
FIG. 4 E ectric se ector va ve ON/OFF 12V - 26 bar
E ectric se ector va ve ON/OFF 24V - 26 bar
ZF 80 IV (ZF 85 IV DERIVATE VERSION) ..... 104
FIG. 5 E ectric se ector va ve ON/OFF 12V - 26 bar
with tro ing va ve
E ectric se ector va ve ON/OFF 24V - 26 bar
with tro ing va ve
ZF 80 IV (ZF 85 IV DERIVATE VERSION) ..... 106
KIT COMPONENTS ZF 80 IV
(ZF 85 IV DERIVATE VERSION). . .................. 108
2
Repair Manua and Spare Parts List Tab e of contents

INTRODUCTION
This manua gives specific instructions for the proper repair on
ZF 63 IV - ZF 80 IV - ZF 80-1 IV - ZF 85 IV mode transmissions.
P ease fo ow the procedures carefu y to insure qua ity service.
ZF-HURTH MARINE recommends to read the manua comp ete y
before starting with repairs, as some of the procedures described
are rather comp ex.
A ong with standard too s, ZF-HURTH MARINE recommends the
use of specia too s, necessary to perform repairs correct y. The
specia too s are avai ab e through your oca ZF-HURTH MARINE
dea er.
This manua is based on the technica information at the time of
printing. The manua has been checked carefu y in order to avoid
errors. However ZF-HURTH MARINE is not iab e, for any misre-
presentations, errors of description or omissions.
Modifications on future manua s may be introduced without prior
notice.
3
Repair Manua and Spare Parts List Introduction

4

1. MAJOR COMPONENTS
1.1 MAJOR TRANSMISSIONS COMPONENTS
The main components of the ZF Marine Transmissions are:
ITEM DESCRIPTION ITEM DESCRIPTION
1
Two-piece a uminum die cast
2
Gears
1.1
Oi fi ter
2.1
Input shaft with reversing c utch pack assemb y
1.2
Oi dipstick
2.2
Intermediate shafts
1.3
Oi drain p ug
2.3
Reversa shaft
1.4
Breather va ve
3
Contro b ock
5
Repair Manua and Spare Parts List Section 1
1
3
1.1
1.4
1.3
1.2
2.1
2
2.3 2.2
2.4

1.2 CLEANERS AND SEALANTS
6
Repair Manua and Spare Parts List Section 1
For c eaning:
Co d c eaner such as benzine, trich oroethane or Loc-
tite fast c eaner No. 7063.
|
WARNING
|
Keep detergents away from your skin, do not drink
and do not inhale their vapors!
Always wear protective gloves and safety glasses!
Note accident prevention rules!
For assemb y:
.
Loctite 243 for securing screws, medium-hard
.
Loctite 245 for securing output f ange on sp ine
.
.
Loctite 518 for housing surfaces.
.
Loctite 574 for outer diameter sea ing rings.
.
Grease: Staburags NBU 30, K u
Èber Co. for radia
shaft sea s
.
ATF F uid:
4.4 iters (1.1 US ga ons) for ZF 63 IV
7.0 iters (1.85 US ga ons) for ZF 80 IV - ZF 80-1 IV.
7.0 iters (1.85 US ga ons) for ZF 85 IV.
1.3. MEASURING TOOLS
MICROMETER
Measuring gauge from 0-25 mm (0-1.0 in.)
Accurancy of reading 1/100 mm (0.0004 in.)
DIAL INDICATOR GAUGE WITH ARM-TYPE
SUPPORT
DIAL GAUGE INCREMENTS
DIAL FACE CAN BE TURNED
TO ZERO POSITION
ACCURACY OF READING:
SMALL HAND 1 mm (.03937 in)
LARGE HAND
1/100 mm (.0004 in)
MEASURING DEPTH
APPROX. 11 mm (.433 in)
FEELER GAUGE
1.4. STANDARD TOOLS AND FIXTURE
WRENCH for hexagon bo ts (8 - 17 - 19 - 22 mm) (7/8")
ALLEN WRENCH (6 mm)
HEXAGON SOCKET WRENCH (6 - 8 - 17 - 19 mm)
TORQUE WRENCH
adjustab e up to 180 Nm (152 ft. b.)
PLASTIC HAMMER (1000 g) and sturdy screwdriver
EXTRACTOR minimum diameter 130 m
PLIER

2. SPECIAL TOOLS
It is assumed that a standard too s, such as, torque
wrenches, open-end wrenches, a en keys and extrac-
tors, are avai ab e.
A fixtures for pressing parts in or out shou d be used in
conjunction with a hydrau ic or manua press.
EXTRACTOR
Tapered ro er bearing inner races
Basic Unit P/N 978.25.0017.0 (454421)
ADAPTER for basic unit 978.25.0017.0 (454421).
For bearing input shaft - sp ine side.
- P/N 978.25.0018.0 (469686) ZF 63 IV
- P/N 978.35.0019.0 (500465) ZF 80 IV - ZF 80-1 IV -
ZF 85 IV
D
EXTRACTOR SPLIT RING
Input shaft.
Taper ro er bearing inner race - contro b ock side.
P/N 224.836.009 (456170)
EXTRACTOR Tapered ro er bearing outer races basic
unit P/N 978.25.0021.0 (454422)
ADAPTER FOR
BASIC UNIT 454422
50
AB
BASIC UNIT
LEGS KIT (composed of three legs)
P/N 978.25.0006.0 (477776)
ZF 63 IV ZF 8 IV - ZF 8 -1 IV - ZF 85 IV
Ð 978.25.0009.0 (477853)
Ð 978.25.0011.0 (477854)
978.25.0013.0 (477857)
Ð
978.30.0014.0 (477858) 978.30.0014.0 (477858)
Ð 978.35.0016.0 (477895)
CLAMPING RING for measuring the bearing c earance
input shaft P/N 219.354.3 (618582)
LEVER
CLAMPING SCREW
INPUT SHAFT
DIAL INDICATOR
MANDREL
For disassemb y and assemb y
Shaft sea - input side : P/N 224.836.005 (454425)
Shaft sea output prope er side:
- P/N 978.30.0001.0 (500445) ZF 63 IV
- P/N 20.1040.01 ZF 80 IV - ZF 80-1 IV - ZF 85 IV
Output shaft sea contro b ock side:
- P/N 978.30.0003.0 (500447) ZF 63 IV
- P/N 20.1040.02 ZF 80 IV - ZF 80-1 IV - ZF 85 IV
For assemb ing input shaft sea on the input sp ine side
Bushing P/N 20.0012.01 to insert input shaft sea
On y for mode s: ZF 63 IV - ZF 80 IV - ZF 80-1 IV
Mandre P/N 20.0012.02 to assemb e input shaft sea
On y for mode s: ZF 63 IV - ZF 80 IV - ZF 80-1 IV
Mandre P/N 20.1072.01 to assemb e input shaft sea
On y for mode : ZF 85 IV - ZF 80 IV (ZF 85 IV DERIVATE
VERSION)
7
Repair Manua and Spare Parts List Section 2

SHIM
To determinate the correct pre oad of the tapered ro er
bearings.
- P/N 20.1017.00 ZF 63 IV
- P/N 20.1019.00 ZF 80 IV - ZF 80-1 IV - ZF 85 IV
SPECIAL HEX HEAD BOLT WITH BEARING
for measuring the bearing c earance intermediate shaft
P/N. 224.836.008 (458105)
PUNCH
for assemb y Sea - suction pipe
ZF 80 IV - ZF 80-1 IV - ZF 85 IV P/N 20.1021.00
ZF 63 IV: P/N 20.1029.00
CENTRE SQUARE PUNCH To position the oi suction
pipe into housing P/N 20.1041.00
8
Repair Manua and Spare Parts List Section 2

3. DISASSEMBLY
9
Repair Manua and Spare Parts List Section 3
3
4
2
1
FIG. 1 - 1
1
2
3
FIG. 1 - 2
INTRODUCTION
C ean the transmission thorough y on the outside be-
fore disassemb y.
The repair area shou d be c ean and we ighted.
ZF HURTH MARINE recommends using a swive ing
stand for aiding in assemb y and disassemb y.
3.1 FLUID FILTER
3.1.1 Remove fluid filter
Turn the screw that fixes the oi fi ter cover in a counter-
c ockwise direction and remove the fi ter from its hous-
ing (item 1, fig. 1-1). Use a 6 mm A en wrench.
Pu fi ter e ement off (item 2, fig.1-1).
Check O-rings (item 3 and 4, fig. 1-1) for wear, rep ace if
necessary.
3.1.2 Suction of transmission fluid
Push hose of suction pump (item 1, Fig. 1-2) through
the suction pipe (item 2, Fig. 1-2) down to the bottom
of the housing and suck the f uid off.
3.1.3 Suction of transmission fluid on
ZF 63 IV, ZF 8 IV, ZF 8 -1 IV and
ZF 85 IV
Remove the p ug (item 3, Fig. 1-2) and et the oi f ow
from the proper ho e.
+|
IMPORTANT
|
The used oil and the oil filter are to be handled as
special waste that pollute the environment.
For the safe disposal of used oil and filter, take all
the measures required by the relevant local rules
and legislation.
Swiveling stand ZF
Output - half side up Swiveling stand ZF
Input - half side up

3.2 REMOVAL DIPSTICK
Unscrew dipstick (item 1, Fig. 2-1) (counterc ockwise)
and pu out of housing.
Rep ace O-Ring if present (check parts ist section 11).
3.3 REMOVAL BREATHER VALVE
Unscrew breather va ve (item 1, Fig. 3-1). Wash va ve
in a detergent, et dry and dip in oi , then et oi drip off.
3.4 OUTPUT FLANGE
Unscrew socket head bo ts (item 1, Fig. 4-1) up to four
opposite ones.
App y forcing p ate and position screw heads with re-
gard to forcing p ate boreho es by means of A en key
( item 1, Fig. 4-2). Using an A en key, turn screws posi-
tioned in the output f ange against forcing p ate.
This wi press the output f ange off the output shaft
(Fig. 4-2).
10
Repair Manua and Spare Parts List Section 3
1
FIG. 2 - 1
1
FIG. 3 - 1
1
FIG. 4 - 1
1
FIG. 4 - 2

3.5 REMOVAL CONTROL BLOCK
Unscrew a en head bo ts (item 1, Fig. 5-1).
Pu contro b ock (item 2, Fig. 5-1) together with sea
(item 3, Fig. 5-1) off the input shaft.
Remove key (item 4, Fig. 5-1) from input shaft (item 5,
Fig. 5-1).
3.5.1 Neutral Safety Switch
Unscrew neutra safety switch (item 1, Fig. 5-2).
Note: Use 7/8 inch wrench for hex bo ts.
To reassemb e neutra safety switch:
tightening torque: 25 Nm (18.5 ft. b.)
3.5.2 Neutral Safety Switch Check
To check for proper operation of the switch perform one
of the fo owing tests:
A: Ohm meter
Connect the ohm meter eads to the termina connec-
tion of the switch.
With the pin (item 1a Fig. 5-3) extended you shou d get
a reading, indicating a good switch.
Compressing the pin (item 1b Fig. 5-3) you shou d have
"O" reading,
B: 12 volt light
Connect the neutra safety switch with a ight in series
to a 12 vo t battery. The switch is good when the ight
goes out when the center pin (item 1b Fig. 5-3) is com-
pressed.
11
Repair Manua and Spare Parts List Section 3
1
2
3
5
4
FIG. 5 - 1
1
FIG. 5 - 2
1a
1b
FIG. 5 - 3
Battery 12 V DC Lamp 8.4 A
Neutral
position
Battery 12 V DC Lamp 8.4 A
AorB
position

3.6 HOUSING
3.6.1 Disassemble the transmission housing
halves
Using a adequate drift punch, top the ocating pins
(item 1, Fig. 6-1a and 6-1b) out of the housing.
Loosen and remove a hex head bo ts and ock
washers (item 2 and 3, Fig. 6-1b). Using a p astic ham-
mer s ight y top the sp it ine of the case ha ves to break
the sea . Then remove the input side of the housing.
+|
IMPORTANT
|
Only transmission type ZF 63 IV, i=2. and i=2.5.
First remove radial shaft seal ring (item 4, Fig. 6-1b)
to remove the housing half.
3.6.2 Removal of shafts and gears
Take the gear set out of the housing
.
intermediate shaft (item 1, Fig. 6-2)
.
input shaft (item 2, Fig. 6-2)
.
output shaft (item 4, Fig. 6-2)
.
reversa shaft (item 3 Fig. 6-2).
Check a gears, bearings and three piston rings on the
input shaft (item 2, Fig. 6-2) for signs of wear or fai ure.
If any of the gears are damaged or showing signs of ex-
cessive wear ZF-HURTH MARINE recommends rep a-
cing the comp ete gear set.
When taper ro er bearings need rep acing on the input
shaft, the butting rings and need e bearings shou d
a so be rep aced. When rep acing inner ro er bearings
use the same manufacturer.
To check for correct c utch operation, rotate the gears
on the input shaft. If it is hard to turn the gears, the
c utch is probab y damaged.
3.6.3 Removal of radial shaft seals
Input shaft seal
Using a sea mandre inside the housing top the input
shaft sea out. Discard sea and rep ace with a new
sea . (item 2, Fig. 6-3a).
NOTE
For transmission types ZF63 IV, i=2. and i=2.5
(item 2, Fig. 6-3a) the radial shaft seal ring has al-
ready been removed before dismounting the hous-
ing half.
12
Repair Manua and Spare Parts List Section 3
1
FIG. 6 - 1a
1
2
3
4
FIG. 6 - 1b
1
23
4
2
FIG. 6 - 2
12
FIG. 6 - 3a

Output shaft seal
Using a mandre punch top the output sea s out from
the housing. Discard sea s and rep ace with a new sea
(Fig. 6-3b and Fig. 6-3a item 1).
3.6.4 Removal of fluid inlet pipe
For rep acing the sea (item 3, Fig. 6-4):
.
Remove p ate screws (1)
.
Remove suction pipe (2)
.
Drive out sea (3) after removing dipstick and fi ter.
13
Repair Manua and Spare Parts List Section 3
1
FIG. 6 - 3b
3
2
1
FIG. 6 - 4

3.7 TAPERED ROLLER BEARINGS
Check for fai ed bearings or excessive bearing wear.
3.7.1 Disassembling the outer races of taper
roller bearing
Remove the outer races out of the housing ha ves by
means of the specia too (Fig. 7-1) or by heating the
housing ha ves in an oven to approx. 120ëC (248ëF).
Put the housing in the oven upside down, so the outter
races wi fa out.
|
WARNING
|
Use protective gloves when handling the heated
housing and outer races.
+|
IMPORTANT
|
Regard location of shims under each outer race for
correct position during reassembling. Shims are lo-
cated under outer races of the cover only.
3.7.2 Removal of inner races of taper roller
bearings
Input shaft - spline side
The extractor (Fig. 7-2a) is required for pu ing the inner
races off.
For extracting the inner races proceed as follows:
.
insert co et
.
p ace co et onto the ro er cage
.
tighten co et to ro ers by means of cap nut
.
screw spind e against shaft and pu bearing even y
and carefu y off.
Input shaft - Control block side
The Inner race and the gear on the contro b ock side
can be removed by using the sp it ring and a standard
hydrau ik press (Fig. 7-2b).
Input shaft - Control block side ZF 85 IV - ZF 8 IV
(ZF 85 IV DERIVATE VERSION)
.
Remove the retaining ring (item 1, Fig. 7-2c) using
a p ier.
.
Scrap the retaining ring.
.
Remove the washer (item 2, Fig. 7-2c).
.
Remove the shims (item 3, Fig. 7-2c).
Intermediate and reversal shaft
The inner race of bearings can be drawn off with a com-
mercia extracting unit.
|
WARNING
|
Improper use of the extractor when removing the
races, could cause damage to the races or slipp off.
Output shaft
For extracting the inner races (item 1 and 2, Fig. 7-2d)
proceed as fo ows:
.
cut bearing cage (item 3, Fig. 7-2d) open and re-
move ro ers
.
p ace gear on a s eeve
.
press output shaft off the gear. Pay attention for
pressing-out direction of output shaft Fig. 7-2d.
The bearing inner race (item 1, Fig. 7-2d) wi be ex-
tracted at the same time.
Extracting force required: approx. 400kN
14
Repair Manua and Spare Parts List Section 3
FIG. 7 - 1
INPUT SPLINE SIDE CONTROL BLOCK SIDE
FIG. 7 - 2a FIG. 7 - 2b
12
3
FIG. 7 - 2c
3
2
1
FIG. 7 - 2d

3.8 REVERSING CLUTCH PACK
3.8.1 Removal of the clutch discs
.
Remove the tapered ro er bearing inner races
(item 1 and 2, Fig. 8-1a) and the gear (item 3,
Fig. 8-1a) using the too s described in section 2.
.
Lift butting rings (item 1, Fig. 8-1b) off using two
screwdrivers.
.
Pu gear (item 2, Fig. 8-1b) and need e bearings
off.
.
Remova of pressure p ate: Pressing snap ring
against periphery of pressure p ate (item 1, Fig.
8-1c) by means of screwdrivers. Extract it together
with end disc (item 1, Fig. 8-1c). The c utch discs
can now be removed from the coup ing housing.
Repeat same procedure to remove pressure p ate
on the opposite side.
15
Repair Manua and Spare Parts List Section 3
1
3
2
FIG. 8 - 1a
1
2
FIG. 8 - 1b
1
FIG. 8 - 1c

16

4. ASSEMBLY
17
Repair Manua and Spare Parts List Section 4
1
2
FIG. 1 - 1a
FIG. 1 - 1b
1
2
FIG. 1 - 1d
2
1
FIG. 1 - 1c
INTRODUCTION
A we - ighted work area that is free from dirt and chips,
wi faci itate the work considerab y.
ZF-HURTH MARINE recommends to use a swive ing
stand, described in the disassemb y section to aid in
the assemb y.
Thorough y c ean a mating surfaces from any octite or
gasket materia .
|
WARNING
|
Cleaners and solvents can be toxic and potentially
harmful without proper ventilation.
Use caution when using such cleaners.
Always wear protective gloves and glasses!
The next assemb y procedure requires the fo owing:
.
An e ectric oven or heating amp for heating the
housing ha ves wi be required when mounting
the bearings.
.
A hydrau ic or mechanica press
4.1 INPUT SHAFT
4.1.1 Mount discs into reversing clutch
Equip both sides coup ing with new outer disc (item 1,
Fig. 1-1a) and new inner disc (item 2, Fig. 1-1a).
NOTE
.
For exact quantity of inner (item 2, Fig. 1-1a) and
outer discs (item 1, Fig. 1-1a), please refer to the
spare parts list at the end of this manual.
.
Stagger the position of the notches on the outer
discs as shown in Fig. 1-1b.
Starting with one of the outer discs, bi d up the c utch.
The ugs on the outer discs have to be positioned in ine
with each other as shown in Fig. 1-1b.
Insta snap ring into groove of c utch housing securing
the pressure p ate.
P ace end disc (item 1, Fig. 1-1c) and snap ring (item 2,
Fig. 1-1c) engaging it into c utch housing groove.
Check correct position of end disc (item 1, Fig. 1-1c).
Repeat same procedure on opposite side of c utch
(Fig. 1-1d).

4.1.2 Install needle bearings and gear
Input spline side
.
Insta need e bearing (item 1, fig. 1-2) onto shaft.
.
S ide spacer (item 3, fig. 1-2) where required.
.
A ign sp ines on c utch discs previous y insta ed
and insta gear (item 2, fig. 1-2).
Make sure c utch gear is fu y insta ed, engaging a
c utch discs.
Control block side
.
Repeat same procedure of input s ine.
Spacer is on y in ZF 80 IV and ZF 80-1 IV.
4.1.3 Assemble butting rings
Press on new thrust washers (item 1, Fig. 1-3a) onto in-
put shaft.
Make sure thrust washers are fu y pressed on and
have even contact with gears.
Thrust washers must not be bent. For easier mounting
use a tube with a bore dia. of 35 mm (1.38 in).
Repeat same procedure on apposite side (item 1,
Fig. 1-3b)
18
Repair Manua and Spare Parts List Section 4
1
2
2
1
3
FIG. 1 - 2
ZF 8 IV - ZF 8 -1IV
ZF 85IV ZF 63IV
1
FIG. 1 - 3a
D
1
FIG. 1 - 3b
Other manuals for ZF 63 IV
1
This manual suits for next models
3
Table of contents
Other ZF Microphone System manuals