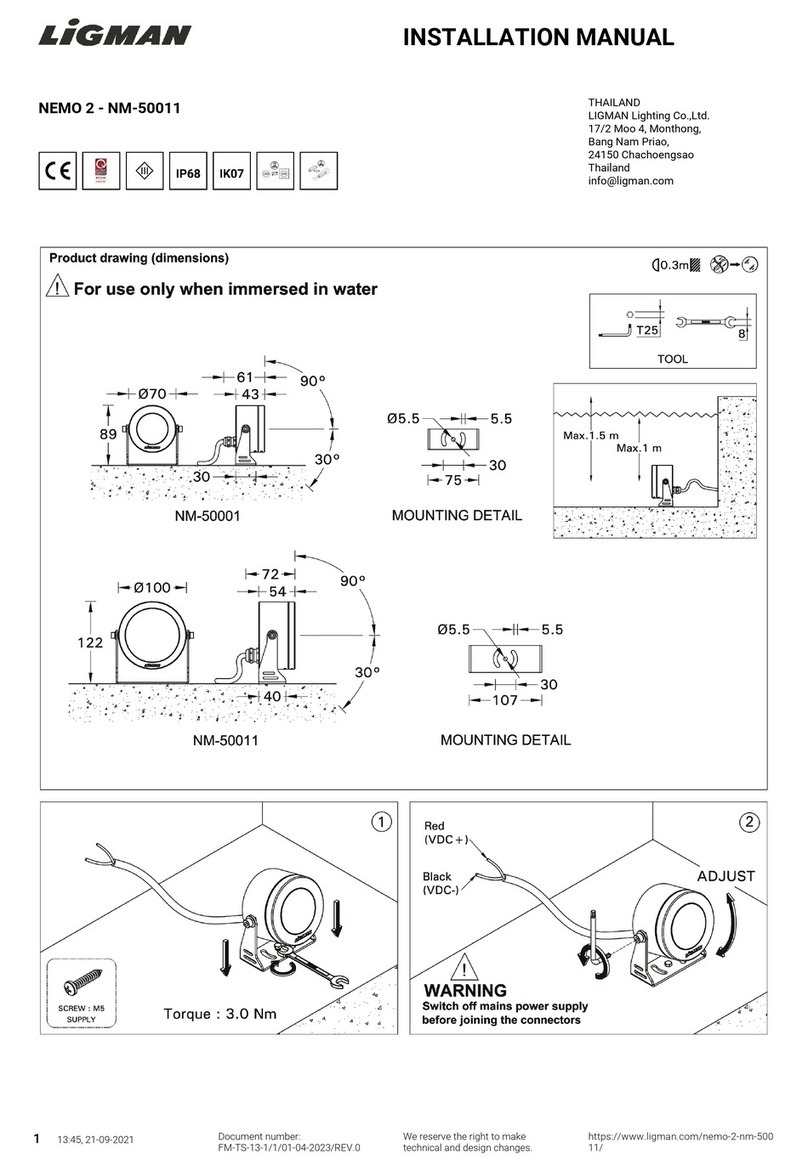
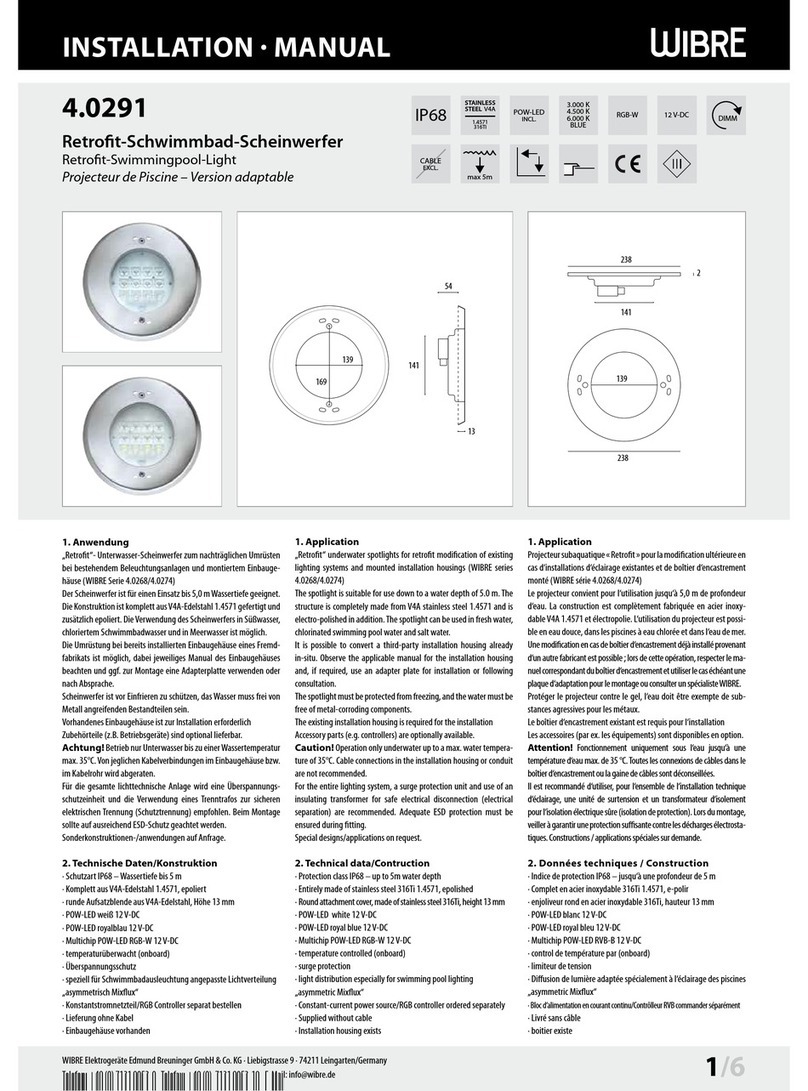
Zodiac Led NL User manual

H0544400_REVB - 2018/10
More documents on:
www.zodiac-poolcare.com
Led NL
Instrucons for installaon and use - English
Lighng
Translaon of the original instrucons in French EN

1
WARNINGS
GENERAL WARNINGS
• Failure to respect the warnings may cause serious damage to the pool equipment or cause serious injury, even death.
• Only a person qualied in the technical elds concerned (electricity, hydraulics or refrigeraon) is authorised to
perform any servicing or repairs to the appliance. The qualied technician working on the appliance must use/
wear personal protecve equipment (such as safety goggles and protecve gloves, etc.) in order to reduce the
risk of injury occurring when working on the appliance.
• Before handling the appliance, check that it is switched o and isolated.
• The appliance is intended to be used for pools and spas for a specic purpose; it must not be used for any purpose other
than that for which it was designed.
• This appliance is not intended for use by persons (including children) having a physical, sensory or mental disability, or by
persons lacking experience or knowledge of the appliance, unless they are rst instructed or are supervised during the use
of the appliance by a person responsible for their safety.
• Keep the appliance out of the reach of children.
• The appliance must be installed according to the manufacturer’s instrucons and in compliance with local and naonal
standards. The installer is responsible for installing the appliance and for compliance with naonal installaon regulaons.
Under no circumstances may the manufacturer be held liable in the event of failure to comply with applicable local
installaon standards.
• For any work other than the simple user maintenance described in this manual, the product should be referred to a qualied
professional.
• Incorrect installaon and/or use may cause serious damage to property or serious injuries (possibly causing death).
• All equipment, even postage and packing paid, travels at the risks and perils of the recipient. The laer shall issue reserves
in wring on the carrier's delivery slip if damage is detected, caused during transport (conrmaon to be sent to the carrier
within 48 hours by registered leer). In the event that an appliance containing coolant has been turned on its side, menon
your reservaons in wring to the carrier.
• If the appliance suers a malfuncon, do not try to repair it yourself; instead contact a qualied technician.
• Refer to the warranty condions for details of the permied water balance values for operang the appliance.
• Deacvang, eliminang or by-passing any of the safety mechanisms integrated into the appliance shall automacally void
the warranty, in addion to the use of spare parts manufactured by unauthorised third-party manufacturers.
• Do not spray inseccide or any other chemical (ammable or non-ammable) in the direcon of the appliance, as this may
damage the body and cause a re.
• Zodiac® heat pump, lter pump and lter appliances are compable with the most commonly used types of pool water
treatment systems.
• Do not touch the fan or moving parts and do not place objects or your ngers in the vicinity of the moving parts when the
appliance is in operaon. Moving parts can cause serious injury or even death.
WARNINGS ASSOCIATED WITH ELECTRICAL APPLIANCES
• The power supply to the appliance must be protected by a dedicated 30 mA residual current device, complying with the
standards and regulaons in force in the country in which it is installed.
• Do not use any extension lead when connecng the appliance; connect the appliance directly to a suitable power supply.
• Before carrying out any operaons, check that:
- The voltage indicated on the appliance informaon plate corresponds to the mains voltage.
- The power grid is adapted to the power requirements of the appliance, and is grounded.
- The plug (where applicable) is suitable for the socket.
• In the event of abnormal operaon or the release of odours from the appliance, turn it o immediately, unplug it from its
power supply and contact a professional.
• Before servicing or performing maintenance on the appliance, check that it is powered o and completely disconnected
from the power supply. Moreover, check that the heang priority (where applicable) is deacvated and that any other
device or accessory connected to the appliance is also disconnected from the power supply.
• Do not disconnect and reconnect the appliance to the power supply when in operaon.
• Do not pull on the power cord to disconnect it from the power supply.
• If the power cord is damaged, it must be replaced by the manufacturer, its technician or a qualied person to guarantee
safety.
• Do not perform maintenance or servicing operaons on the appliance with wet hands or if the appliance is wet.
• Before connecng the appliance to the power supply, check that the connecon unit or socket to which the appliance will
be connected is in good condion and shows no signs of damage or rust.
• For any component or sub-assembly containing a baery: do not recharge or dismantle the baery, or throw it into a re.
Do not expose it to high temperatures or direct sunlight.
• In stormy weather, disconnect the appliance from the power supply to prevent it from suering lightning damage.
• Do not immerse the appliance in water (with the excepon of cleaners) or mud.
WARNINGS ASSOCIATED WITH LIGHTING SYSTEMS
• For operaon only with safety isolang transformer properly cered as being in compliance with the requirements
of EN/IEC 61558-2-6 standard.
• In Australia, lights must be powered by an Australian approved SELV driver/power source.
• In Australia, ensure that the lighng system is installed by a suitably qualied person only (e.g. Registered pool builder and/
or qualied electrician), in accordance with AS/NZ 3000:2007 standards.
• Suitable for Maximum Depth of 4 meters.
• The external cable of this light cannot be replaced; if the cable is damaged, the light must be replaced.
• The light source contained in this light must only be replaced by the manufacturer or its service agent or a similarly qualied
person.
• Do not look directly at the light source when lit.
Recycling
This symbol means that your appliance must not be thrown into a normal bin. It will be selecvely collected for the
purpose of reuse, recycling or transformaon. If it contains any substances that may be harmful to the environment,
these will be eliminated or neutralised. Contact your retailer for recycling informaon.
2
EN
• Before handling the appliance, it is essenal that you read this installaon
and user manual, as well as the "Warranty" booklet delivered with the
appliance. Failure to do so may result in material damage or serious or fatal
injury and will void the warranty.
• Keep and pass on these documents for later viewing throughout the
appliance's service life.
• The distribuon or modicaon of this document in any way is prohibited,
without prior authorisaon from Zodiac®.
• Zodiac® is constantly developing its products to improve their quality. The
informaon contained herein may therefore be modied without noce.
CONTENTS
❶ Specifications 3
1.1 I Descripon 3
1.2 I Technical specicaons 3
1.3 I Dimensions and marking 4
❷ Installation 5
2.1 I Layout 5
2.2 I Power connecons 6
❸ Use 8
3.1 I Operang principle 8
3.2 I Operaon 8
❹ Maintenance 10
4.1 I Winterizing 10
❺ Troubleshooting 10
5.1 I Appliance behaviour 10
Tip: to make it easier to contact your retailer
• Write down your retailer's contact details to help you nd them more easily
and ll in the "product" informaon on the back of the manual; your retailer
will ask you for this informaon.

3
❶ Specicaons
1.1 I Descripon
RGBW colour Pure white
6RGBW 12RGBW 24RGBW 6BW 12BW 24BW
ANL spotlight +
protecve cover
BWrench
CWhite & grey
cosmec trims
DColour chart
1.2 I Technical specicaons
NL Spotlight 6RGBW 12RGBW 24RGBW 6BW 12BW 24BW
Type Colour & white (RGBW) Pure white
Power supply 12VAC - 50/60Hz
Min-max voltage tolerances 10 - 14 VAC
Length of power cord supplied 3 m
Maximum power (W) 6 12 24 6 12 24
Amperage (A) 0.52 0.92 1.25 0.62 1.09 1.84
Minimum transformer
capacity (per spotlight) 6 VA 12 VA 24 VA 6 VA 12 VA 24 VA
Luminous ux (Lumen) 158 339 504 386 722 1,180
Thread Ø 1.5"
Protecon index IP68
Condions of use Fresh or salt water (6g/L - 6,000 ppm) < 40 °C

4
EN
1.3 I Dimensions and marking
D
F
G
E
HI
: Lens
: Body
: Power cord
NL Spotlight 6RGBW 12RGBW 24RGBW 6BW 12BW 24BW
DLength 118 mm 143 mm 118 mm 143 mm
E Gasket 9 mm
FThread 10.2 mm
GBody Ø 37 mm
H Gasket Ø 45 mm
IOuter Ø 49.5 mm

5
❷ Installaon
2.1 I Layout
: Pool
: Maximum water
level
: Wall ng Ø1.5’’
: Wall bushing
: Waterght duct
Ø2.5 cm minimum
: Juncon box
: Duct to
equipment room
transformer
: NL Spotlight
: Spotlight wire

6
EN
• Each spotlight must be installed at a minimum depth of 10 cm below the
water level.
• The lower cable gland(s) of the juncon box for each spotlight must be
posioned above the pool's maximum water level.
2.1.1 Preparing the pool before installaon
• Install each spotlight in a wall bushing ed with a "sucon port"-type thread of diameter
Ø1.5’’, provided for this purpose during pool construcon (see image ❶).
• The duct or conduit located between the back of the wall bushing and the juncon box
must be waterght because the spotlight is submerged.
• For a opmum pool lighng, each spotlight wall bushing should be posioned 30 to 50 cm
beneath the water level (distance between the top of the lens and the water level).
2.1.2 Installing the appliance
• Slide the power cord through the waterght duct to the juncon box (see image ❷).
• Wind any excess cord away inside the juncon box and conserve sucient length for any
operaons to be performed at a later me.
• Draw the cable and insert the spotlight unl it is ush with the wall bushing (see image ❸).
• If desired, install the white or grey cosmec trim.
• Using the wrench provided, screw the spotlight inside the wall bushing unl ght (see
image ❸). The spotlight's façade must be properly adjusted to the discharge nozzle.
Tip: for easier screwing
• Apply a silicone-based lubricant to the thread.
2.2 I Power supply connecons
• For operaon only with safety isolang transformer properly cered as
being in compliance with the requirements of EN/IEC 61558-2-6 standard.
• Before carrying out work on the appliance, you must rst disconnect the
appliance from the power supply due to the risk of electric shock, which may
cause material damage, serious injury or even death.
• Incorrectly ghtened terminals may cause the terminal unit to heat up and
invalidate the warranty.
• The cord and the juncon box connecon device for the spotlight must not
be completely removed from the duct or pool. There must be enough cord
length in the juncon box to allow the box's spotlight to be removed from
the wall bushing and lied out of the water in order to replace the spotlight's
cartridge.
• Only a qualied and experienced technician is authorised to carry out cabling
work or to replace the power cord.
• The spotlight's power supply must be provided through a 12 VAC transformer (not supplied)
complying with the standards and regulaons in force in the country in which it is installed.
• Electrical protecon: by circuit breaker (D curve) (for rang, see § « 1.2 I Caractérisques
techniques »), with a 30 mA dedicated residual-current protecon system (circuit breaker
or switch) at the head of the line.
• The power supply must correspond to the voltage indicated § « 1.2 I Caractérisques
techniques ».
• The power cord must be protected and insulated from any sharp edges, pressure or hot
elements which may crush, cause abrasion, cuts or other damage to it.
• The electrical wiring must be properly secured from being subjected to unnecessary
movement and strain on connecons.
• To connect the 12 VAC transformer to the juncon box for each spotlight, use the power
cord (RO2V type) adapted for outdoor or buried use (or run the cable into a protecon
duct).

7
2.2.1 Connecng to an external controller
The NL spotlight is compable with certain types of remote control systems for pools. It has
been in parcular specially designed to operate with the Zodiac® AquaLink® TRi, eXO® iQ (LS)
or Hydroxinator iQ systems using the iAquaLink™ app.
• Connect the transformer powering the NL spotlight(s) to one of the auxiliary relays of the
external controller (see image ❹).
2.2.2 Connecng to a switch
The NL spotlight can be connected to a switch for manual operaon.
• Connect the transformer powering the NL spotlight(s) to an auxiliary relay of the switch
(see image ❹).
❹
230V
12V
230V
12V
N
230V
12V
230V
12V
N
: 230 VAC / 12
VAC (50/60 Hz)
transformer
: Electrical
protecon*
: Auxiliary
relay for external
controller or switch
Example with 2 spotlights Example with 1 spotlight
*see " 1.2 I Technical specicaons" to dene the rang

8
EN
❸Use
3.1 I Operang principle
LED technology is a lot more powerful, has a much longer lifespan and consumes less energy
than incandescent or halogen spotlights.
RGBW LEDs provide luminous atmospheres created by combining white, blue, red and green
LEDs (9 unchanging colours and 5 coloured light shows).
The NL spotlight is compable with the iAquaLink™ app, allowing you to control it using your
smartphone when connected to the AquaLink® TRi, eXO® iQ (LS) or Hydroxinator iQ.
This spotlight is designed for cavity-free installaon for compability with cleaners able to
climb the pool's walls.
3.2 I Operaon
3.2.1 Synchronising the spotlights (for RGBW models only)
• All spotlights must be connected to the same transformer and to the same
switch (or auxiliary relay) for synchronisaon to be possible. If mulple
switches are used, these must be congured simultaneously.
To synchronise the spotlights to the same colour mode, the spotlights must be reset to the
rst default mode: "Alpine white".
• Switch the spotlights on (the colour modes may be dierent at this stage as they have not
yet been synchronised).
• Switch o the spotlights for 5 seconds, then switch back on.
All spotlights will become synchronised in the rst default colour mode.
Repeat this step if synchronisaon has not occurred, making sure you comply with the
required o me.
3.2.2 Using the spotlight(s)
White spotlights operate in a simple "on/o" mode.
They are switched on or o using the switch or auxiliary relay.
To change colour mode with RGBW colour spotlights:
• Switch the spotlight(s) o for 2 seconds at most, then switch back on.
• Repeat these "on/o" steps unl you reach the desired colour mode (see table 9 or the
"colour chart" provided with RGBW colour spotlights).
Example: Aer following the steps above, if the current colour is "Sky Blue", you must
successively switch the spotlight o and on again 7 mes to reach the colour "Violet".

9
Sequence Colour mode
1Alpine white
2 Sky blue
3 Cobalt blue
4Caribbean blue
5 Spring green
6 Emerald green
7 Emerald rose
8Magenta
9 Violet
10 Slow color splash
(all colours alternate for an electric atmosphere)
11 Fast color splash
(1,500 colours alternate for an electric atmosphere)
12 America (alternang blue, white and red)
13 Mardi gras
(all colours alternate for a lively atmosphere)
14 Disco Tech
(all colours alternate for a lively atmosphere)
The RGBW colour spotlights have a memory.
If they remain switched o for more than 8 seconds, they roll back to the last colour mode
used when next switched on.
This prevents you from having to repeat the "on/o" procedures to switch the spotlights back
on to your preferred colour mode.

10
EN
❹ Maintenance
4.1 I Winterizing
• In the event of the risk of freezing temperatures, the pool must be
winterised and the water level must be lowered to below the spotlight(s).
• Lower the water level to about 10 cm below the pool's spotlight(s).
• Check that the water is drained from the wall bushings and connected ducts.
Uncrews light(s) if needed.
• Check the juncon box(es) to make sure that they are protected from water and humidity.
❺ Troubleshooting
• Before you contact your retailer, please carry out these few simple checks
using the following tables if a problem occurs.
• If the problem connues, contact your retailer.
• : Acons to be performed by a qualied technician only.
5.1 I Appliance behaviour
None of the
spotlights can be
switched on
• The spotlight(s) are not receiving a power supply.
• Check the 230 VAC transformer power supply. Check the
12 VAC transformer output. Check the circuit breaker. Check that
the spotlight(s) have not been connected directly to a high-
voltage power supply. This will doubtlessly result in damage not
covered by the warranty.
One or more
spotlights have low
illuminaon, icker
or do not work
• Poor connecon or unsuitable cable size.
• Separate each spotlight and connect a single spotlight at
a me to the 12 V power supply. Repeat this process for each
spotlight. If a juncon box is used, check the connecon of the
wire from the spotlight. Check that the correct cable size is used
between the transformer and the juncon box(es).
The spotlights are
not synchronised
• Reset all spotlights to the "Alpine white" colour mode by
switching o all spotlights for 5 seconds, then switching them
back on.
The spotlight
ickers
• The spotlight is too hot.
• Check that the spotlight is submerged in the pool water, the
temperature whereof does not exceed 40 °C.

ZODIAC® is a registered trademark of Zodiac Internaonal, S.A.S.U., used under license.
Zodiac Pool Care Europe - Bd de la Romanerie - BP 90023 - 49180 St Barthélémy d’Anjou cedex - S.A.S.U. au capital de 1 267 140 € / SIREN 395 068 679 / RCS PARIS
Votre revendeur
Your retailer
Modèle appareil
Appliance model
Numéro de série
Serial number
Pour plus d’informaons, enregistrement produit et support client :
For more informaon, product registraon and customer support:
www.zodiac.com
Table of contents
Other Zodiac Underwater Lighting manuals
Popular Underwater Lighting manuals by other brands

EasyPro
EasyPro BFL9 Instructions for Operation, Safety, Warranty

EasyPro
EasyPro LED2K Instructions for Operation, Safety, Warranty

DEEP GLOW
DEEP GLOW Underwater Lighting System manual

Spectravision
Spectravision Moonlight PLS300 owner's manual

Aqua
Aqua STANDARD Series Installation and maintenance manual

AVID LABS
AVID LABS AVERE 3 Wash manual

Polarion
Polarion Abyss U Series manual

Astral Pool
Astral Pool LUMIPLUS S-LIM 1.11 Installation and maintenance manual

LIGMAN
LIGMAN NEMO 6 installation manual

Bluefin LED
Bluefin LED P24 installation manual

Oase
Oase LunAqua Power LED Series operating instructions

Sealife
Sealife DIGITAL FLASH instruction manual