manuals.online logo
Brands
  1. Home
  2. •
  3. Brands
  4. •
  5. Zonet
  6. •
  7. Wireless Router
  8. •
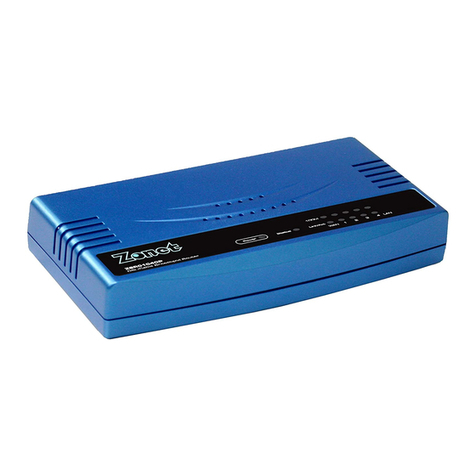
  9. Zonet ZSR0104CP User manual

Zonet ZSR0104CP User manual

Cable/DSL Broadband Router w/4-Port Switch
1
1. Introduction·············································································3
1.1 Features ·············································································3
1.2 Package Contents·································································4
2. Appearance Illustration····························································5
2.1 Panel ··················································································5
2.1.1 Front Panel ·································································5
2.1.2 Rear Panel ··································································5
2.2 Illustration ··········································································5
2.3 Illustration of router Indicators ··············································6
2.4 Working environ ent ···························································6
3. Setup your computer································································8
3.1 Connect the Router ······························································8
3.2 Windows 98/Me ···································································8
3.3 Windows 2000 ·····································································9
3.4 Windows XP ······································································ 12
3.5 Windows Vista/7 ································································ 15
4. Configuring the outer···························································19
4.1 Status ·············································································· 20
4.1.1 Statistics ·································································· 21
4.2 WAN Setup········································································ 21
4.2.1 For Dyna ic IP Setting··············································· 22
4.2.2 For PPPoE Setting ······················································ 22
4.2.3 For Static IP Setting ··················································· 23
4.2.4 For PPTP Setting ························································ 24
4.3 LAN Setup········································································· 25
4.4 Routing············································································· 27
4.5 NAT ·················································································· 27
4.5.1 DMZ Host Setup ························································ 28
4.5.2 FTP Private Port ························································· 28
4.5.3 Virtual Server Setup··················································· 28
4.5.4 Port Triggering··························································· 30
4.6 Fire Wall ··········································································· 31
4.6.1 MAC Filtering Configuration ········································· 31
4.6.2 Connection Filtering Configuration································ 32
4.6.3 URL Filtering Configuration·········································· 33
4.7 DDNS Setup ······································································ 34
4.8 MISC Configuration ···························································· 35
4.8.1 Login ID & Password Setup ········································· 35
4.8.2 Re ote Manage ent ················································· 35
Cable/DSL Broadband Router w/4-Port Switch
2
4.8.3 UPnP Setup······························································· 36
4.8.4 Syste Ti e Setup···················································· 36
4.8.5 WAN Link Status & Setup············································ 37
4.8.6 Restore Default / Restart Syste ································· 37
4.8.7 Fir ware Upgrade ····················································· 38
5. Troubleshooting ·····································································39
6. Technical Specifications ·························································45
Cable/DSL Broadband Router w/4-Port Switch
3
1. Introduction
This router is a Cable/DSL Broadband Router w/4-port switch. It provides
you an easy and stable way to share your Cable/DSL high speed Internet
connection. The built-in NAT technology can act as a firewall to protect your
internal network against outside hackers. The 4-port Broadband Router is
co patible with ost popular operating syste s, such as Windows, Linux,
Macintosh, etc. However, this anual is designed to help users to connect
their co puters with the Internet under Windows syste s. For other
operating syste s, please check the related aterials before you use this
Router.
The User Manual explains how to setup and use the router in details. It also
provides so e quick introductions to the related network technologies.
Please read it carefully before connecting the Router to the Internet and
always consult it first when you eet proble s with the Router.
1.1 Features
Co plies with the IEEE802.3 and IEEE802.3u standards
One 10M/100M auto-negotiation WAN port allows you to connect the
Router with Cable/DSL ode or other Ethernet devices, such as
router, switch, hub, etc
Built-in 4-port 10/100Mbps auto-negotiation Fast Ethernet switch
allows you to share the single Internet connection with up to 50
co puters or network devices
Supports different Internet connecting odes: PPPoE, DHCP Client and
Static IP
All ports support auto MDI/MDIX function which allows you to connect
the devices with the Router by either parallel or cross-over Ethernet
cables
Supports UPnP, Windows XP can find the Router in the network
auto atically
Built-in NAT (Network Address Transfer) technology acts as a firewall to
protect internal sources against outside hackers
Si ple, intelligent, web-based anage ent and configuration
interface
Supports Proxy DNS
Supports DHCP server, all networked co puters can retrieve TCP/IP
settings auto atically fro the Router
Supports virtual server which akes LAN services (such as FTP, WWW,
TELNET, DNS, etc) to be accessible to the Internet users
LED indicators for si ple diagnostics and anage ent
Cable/DSL Broadband Router w/4-Port Switch
4
1.2 Package Contents
4-port Cable/DSL Broadband Router 1pc
User Manual 1pc
Power Adapter 1pc
RJ-45 Cable 1pc
NOTE:
1 If any of the above items are missing, please contact your reseller
2 Please check the voltage of your power supply before using the power
adapter Different input voltage may damage the power adapter
Cable/DSL Broadband Router w/4-Port Switch
5
2. Appearance Illustration
2.1 Panel
2.1.1 Front Panel
Figure 2-1
2.1.2 ear Panel
Figure 2-2
2.2 Illustration
Figure No.
Name on outer Description emark
1 / 8 PWR Power Status
Indicator
9V/0.5A
Power
Connector
2 WAN WAN Interface
Status
Indicator
3 1x/2x/3x/4x LAN Interface
Status
Indicators
Cable/DSL Broadband Router w/4-Port Switch
6
4 Reset Reset default
button
Refer to 11.1
Forget Password
(Reset the Router
without Login)
5 WAN WAN Port Connect to
Cable/DSL ode
or other Ethernet
devices
6 1x/2x/3x/4x LAN Ports Connect to LAN
co puters and
devices
7 STATUS Syste Ready
Indicator
2.3 Illustration of router Indicators
Indicator Off Solid Flash
PWR Power source
not
connected
Power source
connected
N/A
LNK/ACT Not
connected
Connected Data
trans itting
2.4 Working environment
Figure 2-3
Cable/DSL Broadband Router w/4-Port Switch
7
As the above figure shows, Router could be connected with four LAN (local
area network) co puters directly. In addition, users can expand their
network by connecting other Ethernet devices (such as Hub, Switch, etc)
with the Router. In this way, users can connect as any as 50 co puters
with router.
This router supports three kinds of connection odes which allow the users
to hook up with the Internet through either Cable ode or DSL ode .
Cable/DSL Broadband Router w/4-Port Switch
8
3. Setup your computer
3.1 Connect the outer
Please follow the steps below to connect the ode and your co puters
with the Router:
1. Make sure that all network devices are powered off, including the
Router, PCs, switches, cable or DSL ode , and peripherals.
2. Connect the ode with the WAN port of the Router by one CAT 5
Ethernet cable.
3. Connect your co puters with the LAN ports (1x/2x/3x/4x) of the
Router by CAT 5 Ethernet cables. One co puter connects to one port by
one cable.
4. Power on the cable or DSL ode .
5. Plug in the power of the Router. The Power LED on the Router’s front
panel will light up as soon as the power adapter is connected properly.
6. Power on your PC(s).
NOTE:
Please refer to 4 APPEARANCE ILLUSTRATION for the port na e and
position.
Please setup your co puter according to the operating syste in your
co puter. In this chapter, we only introduce how to setup your co puter
for Windows 98/Me, Windows 2000 and Windows XP. We reco end
custo ers to setup their co puters to obtain IP address auto atically,
which we will introduce in this chapter. However, for so e advanced users,
or the users who cannot get the IP address through the following
configuration, please refer to 11.4 How to Setup Your Co puter to Get IP
Address Manually.
3.2 Windows 98/Me
Please follow the steps below to setup your co puter:
1.Go to Start  Settings  Control Panel.
2.Find and double-click the Network icon. The Network dialog box
appears.
3.Click the Configuration label and ensure that you have network card.
4.Select TCP/IP. If TCP/IP appears ore than once, please select the ite
that has an arrow “” pointing to the network card installed on your
co puter. DO NOT choose the instance of TCP/IP with the words “Dial
Up Adapter” beside it.
5.Click Properties. The TCP/IP Properties dialog box appears.
Cable/DSL Broadband Router w/4-Port Switch
9
6.Ensure the Obtain IP Address Auto atically is checked.
7.Fro the WINS Configuration dialog box, Ensure that Disable WINS
Resolution is checked.
8.Fro the Gateway dialog box, re ove all entries fro the Installed
gateways by selecting the and clicking Re ove.
9.Fro the DNS Configuration dialog box, re ove all entries fro the
DNS Server Search Order box by selecting the and clicking Re ove.
Re ove all entries fro the Do ain Suffix Search Order box by
selecting the and clicking Re ove. Click Disable DNS.
10. Click OK, back to Network Configuration dialog box.
11. Click OK, if pro pted to restart, click YES.
3.3 Windows 2000
Please follow the steps below to setup your co puter:
1. Go to Start  Settings  Control Panel
Figure 3-1
2. Double click the icon Network and Dial-up Connections
3. Highlight the icon Local Area Connection, right click your ouse,
click Properties
Cable/DSL Broadband Router w/4-Port Switch
10
Figure 3-2
4. Highlight Internet Protocol (TCP/IP), and then press Properties
button
Figure 3-3
Cable/DSL Broadband Router w/4-Port Switch
11
5. Choose Obtain an IP address auto atically and Obtain DNS server
address auto atically, and then press OK to close the Internet
Protocol (TCP/IP) Properties window
Figure 3-4
6. Press OK to close the Local Area Connection Properties window
Figure 3-5
Cable/DSL Broadband Router w/4-Port Switch
12
3.4 Windows XP
Please follow the steps below to setup your co puter:
1. Go to Start  Settings  Control Panel
2. Click Network and Internet Connections
Figure 3-6
3. Click Network Connections
Figure 3-7
Cable/DSL Broadband Router w/4-Port Switch
13
4. Highlight the icon Local Area Connection, right click your ouse,
click Properties
Figure 3-8
5. Highlight Internet Protocol (TCP/IP), and then press Properties
button
Figure 3-9
Cable/DSL Broadband Router w/4-Port Switch
14
6. Choose Obtain an IP address auto atically and Obtain DNS server
address auto atically, and then press OK to close the Internet
Protocol (TCP/IP) Properties window
Figure 3-10
7. Press OK to close the Local Area Connection Properties window
Figure 3-11
Cable/DSL Broadband Router w/4-Port Switch
15
3.5 Windows Vista / 7
Please follow the steps below to setup your co puter:
1. Go to Start  Settings  Control Panel
Figure 3-12
2. Click Network and Internet  Network and Sharing Center
Figure 3-13
Cable/DSL Broadband Router w/4-Port Switch
16
3. Click Change adapter settings
Figure 3-14
4. Highlight the icon Local Area Connection, right click your ouse,
click Properties
Figure 3-15
Cable/DSL Broadband Router w/4-Port Switch
17
5. Highlight Internet Protocol Version 4 (TCP/IPv4), and then press
Properties button
Figure 3-16
6. Choose Obtain an IP address auto atically and Obtain DNS server
address auto atically, and then press OK to close the Internet
Protocol Version 4 (TCP/IPv4) Properties window
Figure 3-17
Cable/DSL Broadband Router w/4-Port Switch
18
7. Back to Local Area Connection Properties window, highlight Internet
Protocol Version 6 (TCP/IPv6), and then press Properties button
Figure 3-18
8. Choose Obtain an IPv6 address auto atically and Obtain DNS
server address auto atically, and then press OK to close the
Internet Protocol Version 6 (TCP/IPv6) Properties window
Figure 3-19
Cable/DSL Broadband Router w/4-Port Switch
19
4. Configuring the outer
Before you configure this device, note that when the Broadband Router is
configured through an Ethernet connection, ake sure the host PC ust be
set on the IP subnetwork that can be accessed by the Broadband Router.
For exa ple, when the default network address of the Broadband Router
Ethernet interface is 192.168.10.x, then the host PC should be set at
192.168.10.xxx (where xxx is a nu ber between 2 and 254), and the
default subnet ask is 255.255.255.0.
1. Open an Internet Explorer (or other web browser), type
“192.168.10.1” in the address bar, and then press “Enter”.
2. Input “admin” for the User Name, and “admin” for the
Password, and then press OK.
Figure 4-1
NOTE:
By default the user na e is “ad in” and the password is “ad in”. For
security reasons it is reco ended that you change the password as
soon as possible (In Login ID & Password Setup).
This router provides web browser anage ent ode. Login the Router,
The HOME page screen below will appear. The Ho e Page is divided into
eight sections, Status WAN Setup, LAN Setup, Routing, NAT, Fire Wall,

Other manuals for ZSR0104CP

2

Other Zonet Wireless Router manuals

Zonet ZSR1134WE User manual

Zonet

Zonet ZSR1134WE User manual

Zonet ZSR4154WE Operation manual

Zonet

Zonet ZSR4154WE Operation manual

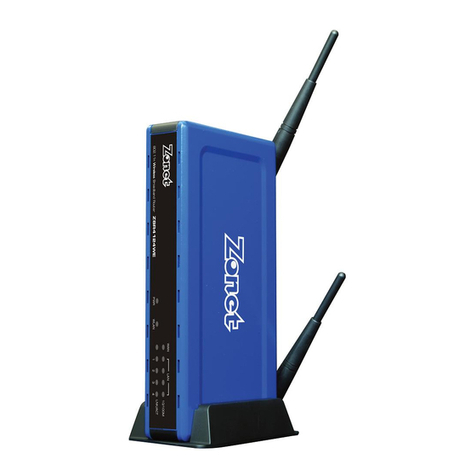
Zonet ZSR0104CP Operation manual

Zonet

Zonet ZSR0104CP Operation manual

Zonet ZSR4174WE Operation manual

Zonet

Zonet ZSR4174WE Operation manual

Zonet ZSR2104WE User manual

Zonet

Zonet ZSR2104WE User manual

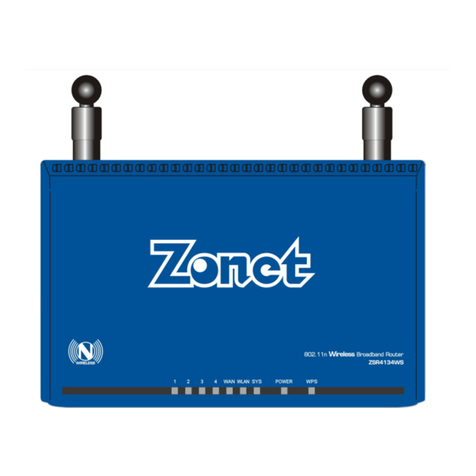
Zonet ZSR4134WE Operation manual

Zonet

Zonet ZSR4134WE Operation manual

Zonet ZSR0104CP User manual

Zonet

Zonet ZSR0104CP User manual

Zonet ZSR4134WE User manual

Zonet

Zonet ZSR4134WE User manual

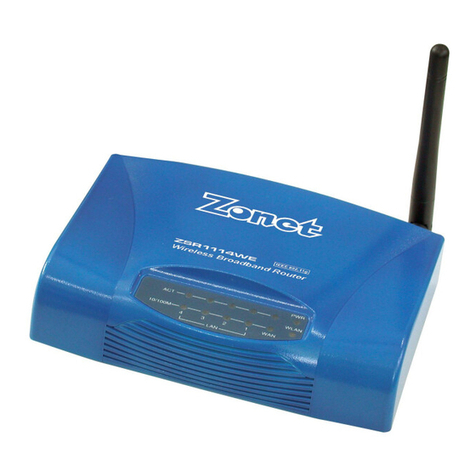
Zonet ZSR1114WE User manual

Zonet

Zonet ZSR1114WE User manual

Zonet ZSR4154WE User manual

Zonet

Zonet ZSR4154WE User manual

Zonet ZSR4124WE User manual

Zonet

Zonet ZSR4124WE User manual

Zonet ZSR1134WE Operation manual

Zonet

Zonet ZSR1134WE Operation manual

Zonet ZSR9104WE User manual

Zonet

Zonet ZSR9104WE User manual

Zonet ZSR4124WE Operation manual

Zonet

Zonet ZSR4124WE Operation manual

Zonet ZSR4154WE User manual

Zonet

Zonet ZSR4154WE User manual

Zonet ZSR4124WE User manual

Zonet

Zonet ZSR4124WE User manual

Zonet ZSR0104UP User manual

Zonet

Zonet ZSR0104UP User manual

Zonet ZSR4154WS User manual

Zonet

Zonet ZSR4154WS User manual

Zonet ZSR1114WE User manual

Zonet

Zonet ZSR1114WE User manual

Zonet ZSR1124WE Operation manual

Zonet

Zonet ZSR1124WE Operation manual

Zonet ZSR4174WE User manual

Zonet

Zonet ZSR4174WE User manual

Zonet ZSR0104DE User manual

Zonet

Zonet ZSR0104DE User manual

Zonet ZSR4134WS User manual

Zonet

Zonet ZSR4134WS User manual

Zonet ZSR9104WE Operation manual

Zonet

Zonet ZSR9104WE Operation manual

Popular Wireless Router manuals by other brands

More BYO Setup

More

More BYO Setup

Cisco Linksys EA2700 user guide

Cisco

Cisco Linksys EA2700 user guide

Intellinet 524872 Specifications

Intellinet

Intellinet 524872 Specifications

Huawei Mobile WiFi Pro2 user manual

Huawei

Huawei Mobile WiFi Pro2 user manual

NETGEAR RAX54S user manual

NETGEAR

NETGEAR RAX54S user manual

Aztech MWR647 Easy start guide

Aztech

Aztech MWR647 Easy start guide

QNAP QMiroPlus-201W user guide

QNAP

QNAP QMiroPlus-201W user guide

Belkin N450DB user manual

Belkin

Belkin N450DB user manual

Billion BiPAC 8500 user manual

Billion

Billion BiPAC 8500 user manual

Edge-Core WA2121 user guide

Edge-Core

Edge-Core WA2121 user guide

AT&T Plug&Share 6800G quick start guide

AT&T

AT&T Plug&Share 6800G quick start guide

SMC Networks SMC7904WBRAS-N2 V2 - QUICK user guide

SMC Networks

SMC Networks SMC7904WBRAS-N2 V2 - QUICK user guide

Asus RT-N10 - Wireless Router - 802.11b/g/n user manual

Asus

Asus RT-N10 - Wireless Router - 802.11b/g/n user manual

D-Link Q.NET-WLAN655 manual

D-Link

D-Link Q.NET-WLAN655 manual

Aruba AirMesh MST200 installation guide

Aruba

Aruba AirMesh MST200 installation guide

TP-Link TL-MR3020 user guide

TP-Link

TP-Link TL-MR3020 user guide

Ceragon FibeAir IP-20E installation guide

Ceragon

Ceragon FibeAir IP-20E installation guide

Linksys WRT55AG - Wireless A+G Broadband Router Product data

Linksys

Linksys WRT55AG - Wireless A+G Broadband Router Product data

manuals.online logo
manuals.online logoBrands
  • About & Mission
  • Contact us
  • Privacy Policy
  • Terms and Conditions

Copyright 2025 Manuals.Online. All Rights Reserved.