Conexión Ethernet de Cable
Si usted selecciono Configurar Manualmente su Conexión WAN o si la opción página de configuración
manual aparece después que usted ejecuto la Detección Automática, seleccione su conexión de las siguientes
opciones:
1Apague y encienda el computador que desea conectar al Enrutador Inalámbrico-N de 4 puertos. (Esto es
importante porque el computador debe localizar la dirección IP correcta para el Enrutador. Esto se hace
cuando el computador se vuelve a encender en el paso 2 a continuación).
•Dirección IP Dinámica: Seleccione esta opción si está utilizando un modem de cable o si su modem
ADSL no utiliza PPPoE. La mayoría de los usuarios seleccionan esta opción. (Si tiene un modem ADSL
que necesita un Nombre de Usuario y Contraseña entonces está utilizando PPPoE.)
GUIA DE INICIO RAPIDO DEL ENRUTADOR
INALAMBRICO-N DE 4 PUERTOS 2Conecte un cable Ethernet entre uno cualquiera de los puertos Ethernet (LAN) disponibles del Enrutador y
cualquiera de los puertos Ethernet disponibles del computador. Luego encienda el computador o la estación de
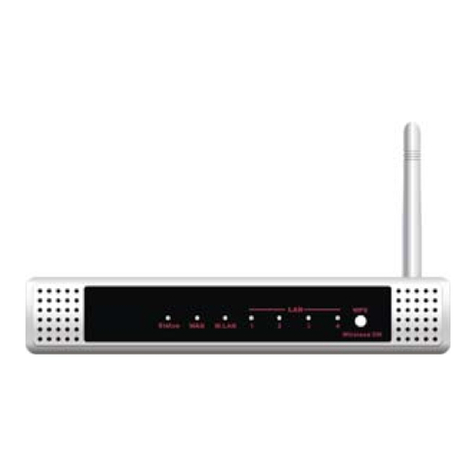
juegos. Una luz LED Ethernet (LAN) en el panel frontal de su Enrutador deberá encenderse, la que
corresponde al puerto Ethernet (LAN) que utilizo.
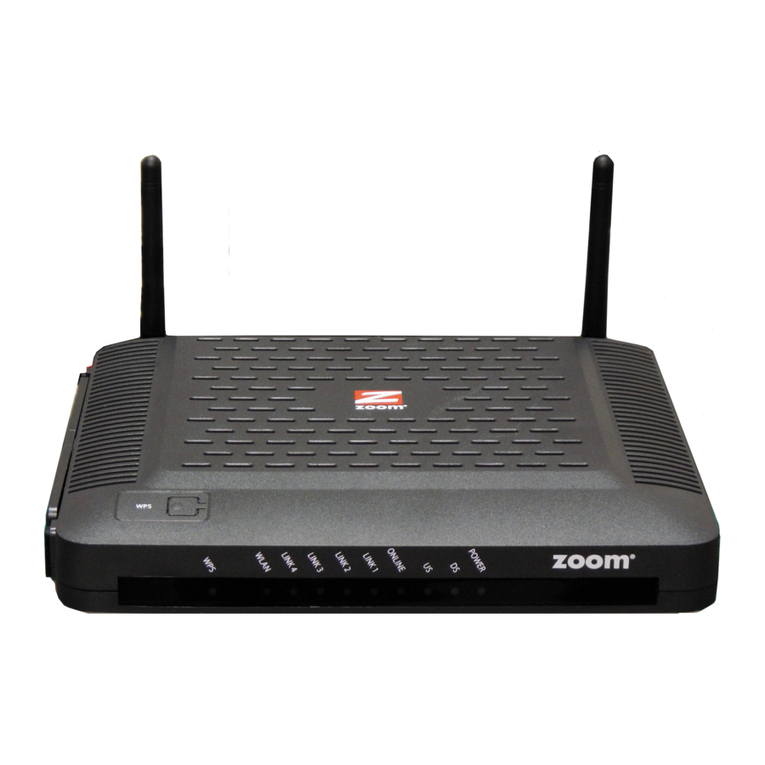
Esta Guía de Inicio Rápido describe como configurar el Enrutador Inalámbrico-N de 4 puertos. Primero el Enrutador
Inalámbrico-N de 4 puertos se configura utilizando un computador con Windows •PPPoE (ADSL): Seleccione esta opción si está utilizando un Enrutador ADSL con PPPoE.
®, o un Macintosh®Dirección IP Estática: Normalmente, usted debe solicitar y pagar extra por una IP Estática. En el evento
poco probable que haya hecho esto, seleccione Dirección IP Estática.
, o Linux;
enseguida el Enrutador Inalámbrico-N de 4 puertos, se conecta con los dispositivos que usted elija. Información más
detallada se encuentra en el Manual del Usuario en el CD. 3Asegúrese de que su conexión a Internet funciona para ese computador. Abra su navegador Web (por
ejemplo, Internet Explorer, Firefox, o Chrome) y trate de conectarse a una dirección Web conocida.
•L2TP: En el caso improbable que esté utilizando un VPN para acceder a una red que utiliza Layer 2
Tunneling Protocol, seleccione esta opción. 4Repita los pasos 1–3 para cada computador que desee agregar.
Contenido del Paquete •PPTP: En el caso improbable que esté utilizando una VPN que utiliza Point to Point Tunneling Conexión Inalámbrica
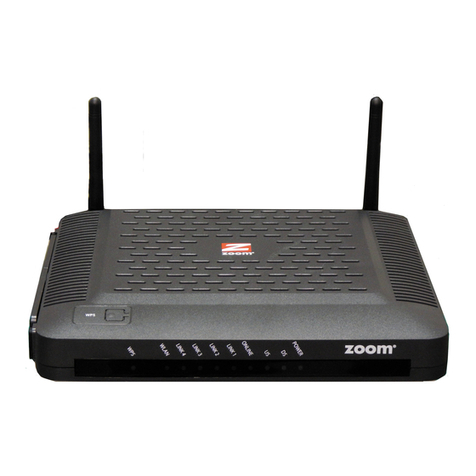
El paquete contiene el Enrutador Inalámbrico-N de 4 puertos de Zoom, un cable Ethernet RJ-45, un cargador 5V
1.0A, esta Guía de Inicio Rápido y un CD que contiene documentación adicional y la información de la garantía. Si
hay algo que falta o está dañado, por favor ponerse en contacto con el área de Soporte al Cliente de Zoom o de
quien le proporciono el Enrutador Inalámbrico-N de 4 puertos.
Protocol, seleccione esta opción. En primer lugar, determine si el computador u otro dispositivo tienen capacidad inalámbrica incorporada compatible
con WiFi. (Esto también se llama 802.11 o capacidad inalámbrica LAN).
Haga clic en Siguiente.
13 Si ha seleccionado IP Dinámica o si la Detección Automática detecto IP Dinámica: La mayoría de los notebooks y portátiles actuales la tienen; la mayoría de los escritorios no la tienen. Si su
computador u otro dispositivo no tienen capacidad inalámbrica compatible con WiFi, tendrá que agregar esa
capacidad. La manera de más bajo costo de hacer esto para un computador es por lo general con un adaptador
USB compatible con WiFi. Es posible que desee utilizar un cliente Ethernet compatible con WiFi en su lugar, si
desea dar a su computador más largo alcance, o si está utilizando un computador u otro dispositivo que no tenga un
sistema operativo Windows o Macintosh.
Ingrese el Nombre de Host si le han dado alguno (la mayoría de los usuarios no tendrán que hacerlo).
Si está utilizando un modem de cable haga clic en el botón Clonar Dirección MAC.
Primeros Pasos Haga clic en Siguiente para ir a la página Configuración Inalámbrica (WAN).
El Enrutador Inalámbrico-N de 4 puertos se puede utilizar de tres modos diferentes: Enrutador, Cliente Ethernet o
Repetidor.
Si ha seleccionado PPPoE o si la Detección Automática detecto PPPoE:
Ingrese el Nombre de Usuario y Contraseña de PPPoE que su ISP le ha proporcionado. Si no los
conoce, póngase en contacto con su ISP.
Modo Enrutador•: (Mayoría de usuarios) En el Modo de Enrutador, el Enrutador se conecta
normalmente a un módem de banda ancha como un módem de cable o un módem DSL, y ofrece acceso
a Internet alámbrico e inalámbrico a uno o más dispositivos. Para utilizar el Modo de enrutador, inicie con
Como Configurar el Enrutador utilizando un Computador.
Nota: Por favor, compruebe que la conexión inalámbrica esté también habilitada en los dispositivos que están
utilizando, ya que muchos dispositivos se han ajustado en OFF por defecto.
Nombre del Servicio: Ingrese el nombre de servicio de PPPoE si le proporcionaron uno. La mayoría de
los usuarios pueden dejarlo en blanco.
Una vez que tenga capacidad inalámbrica compatible con WiFi, conectarse a la red inalámbrica del Enrutador
Inalámbrico-N de 4 puertos. Muchos computadores desplegaran un mensaje como: “Red Inalámbrica detectada.
Haga clic aquí para redes disponibles”. La red del Enrutador Inalámbrico-N de 4 puertos se llama Zoom a menos
que usted le haya cambiado el nombre durante la instalación. Ingrese la Clave de Seguridad que ha seleccionado
al configurar la seguridad inalámbrica en ENCENDER (recomendado) utilizando el Asistente de Configuración.
Haga clic en Siguiente para ir a la página Configuración Inalámbrica (WAN).
Modo Cliente Ethernet•:Como Cliente Ethernet, el Enrutador permite a un dispositivo con Puerto
Ethernet, como un computador, consola de juegos o Televisión de Alta Definición (HDTV), conectarse
inalámbricamente a una red inalámbrica existente. Para utilizar el Enrutador como un Cliente Ethernet,
inicie con Como Configurar el Enrutador utilizando un Computador.
Si selecciono la Dirección IP Estática:
Ingrese la Dirección IP Estática, Puerta de Enlace por Defecto, dirección DNS Primaria y dirección DNS
Secundaria que le fueron proporcionadas por su ISP cuando usted se registró para la dirección IP
estática.
Nota: Si usted va a utilizar el Modo Cliente Ethernet con un dispositivo como un HDTV o estación de
juegos, en primer lugar configure el Enrutador utilizando un computador, a continuación, conecte el
Enrutador Inalámbrico-N de 4 puertos en el otro dispositivo.
Haga clic en Siguiente para ir a la página Configuración Inalámbrica (WAN). Como probar sus computadores inalámbricos y otros clientes inalámbricos
Abra el navegador y vaya a un sitio web para probar su configuración inalámbrica. Si funciona, ¡Felicitaciones! Si no
funciona, por favor consulte la sección Consejos para la Solución de Problemas en el Manual de Usuario en el
CD.
Si selecciono L2TP o PPTP:
Modo Repetidor•: En el Modo Repetidor, el Enrutador se utiliza para ampliar el alcance de una red
inalámbrica. Para utilizar el Enrutador como un Repetidor, por favor consulte el Manual de Usuario en el
CD. Por favor consultar el Manual del Usuario en el CD.
14 Configuración Inalámbrica (WAN):
Función Inalámbrica: Está habilitada por defecto. Usted puede optar por desactivar la Función
Inalámbrica si no está utilizando la funcionalidad inalámbrica. Funciones Avanzadas
Como Configurar el Enrutador utilizando un Computador Su Enrutador está configurado con los valores por defecto que satisfacen las necesidades de la mayoría de los
usuarios. Sin embargo, usted puede cambiar esta configuración utilizando el Administrador de Configuración
incorporado al Enrutador. Aquí están algunas razones por las que es posible que desee utilizar el Administrador de
Configuración:
SSID: Seleccione el nombre de su red inalámbrica. (Por defecto: Zoom)
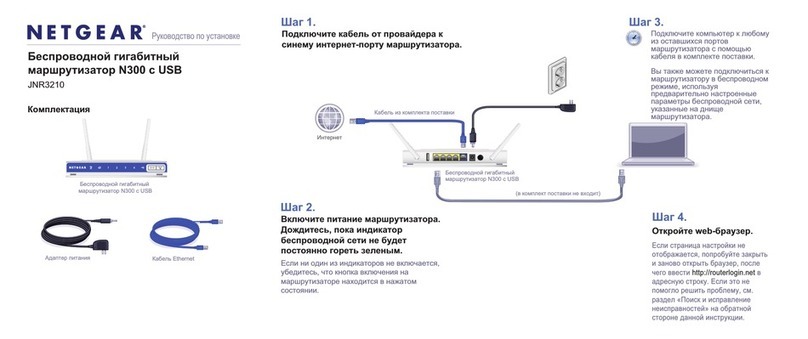
1Coloque el Enrutador Inalámbrico-N de 4 puertos cerca al computador que va a utilizar para la configuración.
Este computador necesita un puerto Ethernet (LAN). Canal: El canal por defecto es 10. Esto está bien para la mayoría de los usuarios. En el caso improbable
de que surjan problemas de rendimiento con su red inalámbrica, es posible que desee configurar su red
en un canal que sea diferente al canal establecido de fábrica, 10.
2Apague el computador. •Seguridad: Usted desea cambiar la configuración inalámbrica – por ejemplo, ocultar el nombre de su red
inalámbrica para mayor seguridad.
3Coloque la antena al Enrutador si la antena no está todavía conectada. (Retire la antena del paquete. Coloque
el extremo de la antena desmontable en el puerto de conexión de la antena abierta y gire la antena hacia la
derecha con la mano hasta que no resulte fácil girarla. Se puede tomar muchas vueltas antes de que la antena
este completamente conectada. Mueva la antena en una orientación vertical. La antena debe encajar en su
lugar).
Haga clic en Siguiente.
15 Modo de Seguridad: En el menú desplegable, puede seleccionar ninguno, WEP, o WPA2/WPA. Por defecto,
el Enrutador no tiene seguridad habilitada. Sin embargo, le recomendamos que configure la seguridad
inalámbrica para su red. Es necesario utilizar el mismo modo de seguridad que selecciono para su Enrutador
inalámbrico para cada dispositivo inalámbrico que utiliza el Enrutador. Si se utiliza una frase de Contraseña o
una clave WEP, es necesario que sea la misma para todos los dispositivos incluyendo el Enrutador.
•Juegos: Desea cambiar la configuración del Enrutador a, por ejemplo, cambiar la configuración del firewall
para permitir acceso a un dispositivo de juegos en su red. Esto se hace, ya sea creando una DMZ, un
servidor virtual, o mediante el uso de la activación de puertos. Por favor, consulte el Manual del Usuario en el
CD para decidir que opción elegir y para obtener instrucciones sobre cómo configurarlo.
4Conecte un extremo del cable Ethernet suministrado a cualquiera de los puertos Ethernet del computador y el
otro extremo a cualquiera de los puertos Ethernet (LAN) del Enrutador Inalámbrico-N de 4 puertos. •Copia de Seguridad de la Configuración del Enrutador: Usted desea hacer una copia de seguridad de la
configuración del Enrutador que usted ha hecho utilizando el Administrador de Configuración.
Seleccione de las siguientes opciones:
5Conecte el cargador suministrado al Enrutador Inalámbrico-N de 4 puertos y luego en un toma corriente. •WPA2/WPA (Recomendada): La mayoría de los usuarios debe seleccionar la opción WPA2/WPA.
Cuando selecciona esta opción, aparece el campo Clave de Seguridad. •Cambios a otras características: Usted desea hacer cambios a otras características avanzadas en el
Enrutador Inalámbrico-N de 4 puertos. Por favor consulte el Manual del Usuario en el CD para obtener
instrucciones.
Importante: Utilice únicamente el cargador suministrado con el Enrutador Inalámbrico-N de 4
puertos. Otros cargadores pueden dañar el dispositivo. Clave de Seguridad: Por favor digite de 8 a 63 caracteres como su Clave de Seguridad.
6Encienda el computador. La luz LED conectada del puerto Ethernet (LAN) debe empezar a titular. Si la luz LED
conectada del Ethernet (LAN) no comienza a titilar, por favor consulte la sección Consejos para la Solución
de Problemas en el Manual del Usuario en el CD.
•WEP: Debe seleccionar esta opción si tiene dispositivos en su red que solo soportan WEP. De lo
contrario, recomendamos WPA2/WPA. (Los dispositivos que solo soportan WEP incluyen las consolas
antiguas portátiles de juegos, los notebooks antiguos MAC, y los notebooks más antiguos de Windows. Si
necesita utilizar WEP, por favor consulte el Manual del Usuario en el CD).
Como Configurar un Cliente Ethernet
1En la página Tipo de WAN seleccione Configurar Modo Cliente Ethernet.
7En la barra de direcciones del navegador Web del computador digite http://192.168.2.1 y a continuación haga
clic en Entrar. 2En la página Modo Cliente Ethernet, establezca el Modo Cliente Ethernet en Habilitar.
•Ninguno (por defecto): Seleccione esta opción si no planea utilizar la seguridad inalámbrica o si todos los
dispositivos en red soportan WPS (WiFi 3Seleccione la casilla correspondiente a la SSID a la que desea conectarse.
8Cuando el MENU PRINCIPAL DEL USUARIO se abre, se muestra una página de Estado que muestra los
valores actuales de una variedad de opciones. Si la página de Estado no aparece, por favor consulte la sección
Consejos para la Solución de Problemas en el Manual del usuario, en el CD.
®Protected Setup) y usted desea utilizar WPS para configurar la
seguridad inalámbrica. Le recomendamos utilizar el Asistente de Configuración con las opciones por
encima para configurar la seguridad para su Enrutador Inalámbrico-N 4 puertos. Sin embargo, si elige
utilizar WPS, por favor consulte el Manual de Usuario para obtener información sobre como configurar
WPS.
4Si la Seguridad está habilitada en su red inalámbrica, el tipo de seguridad se mostrará en el menú
desplegable Seguridad. Ingrese la Clave de Seguridad que es utilizada por su red inalámbrica.
5Haga clic en Siguiente.
9En el campo de Contraseña del Sistema, digite admin y a continuación haga clic en Iniciar Sesión. 6En la Página Resumen, haga clic en Aplicar Configuración.
10 Desde el MENU PRINCIPAL DEL USUARIO seleccione el Asistente de Configuración. Haga clic en Iniciar.
Luego haga clic en Siguiente. Haga clic en Siguiente. 7Cierre todas las ventanas abiertas del navegador y reinicie el computador. Cuando el computador se inicie,
abra un navegador y visite una página web.
En la página de Resumen, haga clic en Aplicar Configuración para guardar su configuración. A continuación
haga clic en Finalizar en la página Prueba de Conexión WAN.
11 En la página Configuración de Contraseña de Acceso, puede cambiar la contraseña por defecto digitando
admin en la casilla de dialogo Contraseña Anterior. A continuación digite la nueva contraseña de su elección
en las casillas de dialogo Nueva Contraseña y Reconfirmar. Haga clic en Siguiente. Si no desea cambiar la
contraseña por defecto, deje todas las casillas de dialogo en blanco y haga clic en Siguiente.
Si funciona, ¡Felicitaciones!
Nota: Si aparece el mensaje “La conexión a Internet fallo” usted puede hacer clic en Conectar de Nuevo o
Volver a Configurar para ir a través del Asistente de Configuración de nuevo.
Si no puede conectarse a Internet, por favor consulte la sección Consejos para la Solución de Problemas en el
Manual del Usuario en el CD.
Abra el navegador de su computador y verifique que es capaz de conectarse a Internet. Si no puede conectarse, por
favor consulte la sección Consejos para la Solución de los Problemas en el Manual del Usuario en el CD.
12 En la página Configuración Tipo WAN, usted puede Detectar Automáticamente su conexión WAN, configurar
su conexión WAN manualmente, o configurar el Modo Cliente Ethernet. Si desea configurar el Modo Cliente
Ethernet, vaya a Como Configurar un Cliente Ethernet en la tercera columna de esta Guía de Inicio Rápido.
De lo contrario, continúe.
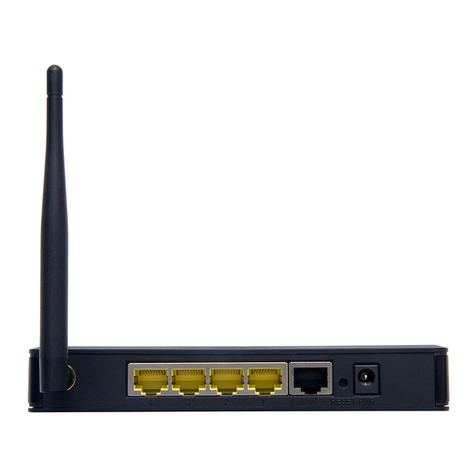
Ahora usted debe desconectar el cable Ethernet del puerto LAN del Enrutador y conectar ese cable al puerto WAN
del Enrutador. El otro extremo del cable debe conectarse en el dispositivo Ethernet que usted elija – el mismo
computador que utilizo para la configuración, un computador diferente, un Xbox
®, o algún otro dispositivo. Si desea
hacer cambios a la configuración, conecte el Enrutador a un PC e inicie sesión en el Administrador de Configuración
del Enrutador, siguiendo las instrucciones en Como Configurar el Enrutador utilizando un Computador.
Como Conectar computadores adicionales y/u otros dispositivos al Enrutador Inalámbrico-N de 4
puertos
Usted puede conectar computadores adicionales y/u otros dispositivos al Enrutador Inalámbrico-N de 4 puertos en
dos maneras. Puede utilizar una Conexión Ethernet Cableada (ver a continuación) conectando un cable Ethernet
entre el puerto Ethernet de su computador u otro dispositivo y uno cualquiera de los cuatro puertos Ethernet (LAN)
del Enrutador Inalámbrico-N de 4 puertos, o puede establecer una conexión inalámbrica (ver la siguiente
columna).
Si está utilizando el modem en Modo Enrutador, ya debe tener un modem de cable o DSL instalado y
conectado a un computador mediante un cable Ethernet. Desconecte ese cable Ethernet del computador y
conéctelo en el puerto WAN en la parte posterior del Enrutador. Ahora, ya debe tener un módem de cable o
DSL y un computador conectados al Enrutador.
Consejos para la Solución de los Problemas
Para ver los Consejos para la Solución de los Problemas, por favor, consulte el Manual del Usuario en el CD.
Para Registrar Su Producto o Recibir Asistencia
Si no está seguro de que tipo de conexión está utilizando, probablemente debería ejecutar Detección
Automática ya que solo toma un par de segundos en ejecutarse. El Asistente de Configuración mostrará
automáticamente la página de opción de configuración manual si falla la Detección Automática. (La opción de
Detección Automática solo detecta IP Dinámica y PPPoE). Si usted utiliza la Detección Automática para su
conexión y funciona, el Asistente de Configuración le mostrará la página adecuada para configurar su
conexión utilizando ya sea la página de IP Dinámica o la página de PPPoE como se muestra a continuación.
Incluso si usted no desea que el equipo que está ahora conectado a su Enrutador siga conectado a él, usted debe
mantenerlo conectado hasta que haya terminado de conectar los otros dispositivos a su Enrutador. Después de eso,
simplemente puede desconectarlo si lo desea.
Le podremos soportar de mejor manera si registra su producto en www.zoomtel.com/register
Tenemos muchas formas para asistirlo, y las puede ver todas en www.zoomtel.com/techsupport
US: (617) 753-0965
UK (London): +44 2033180660
UK (Manchester): +44 1618840074


