ZSK T8 User manual

022438V10 [GB] - 2018
User Manual
T8/T8-2 Control Unit
Writing

Subject to change!
Änderungen vorbehalten!
© ZSK Stickmaschinen GmbH
Printed in Germany
[ GB ] 02438V10

02417V10 • 07.08.2018/DC • 3
General
T8/T8-2 New Functions
General
Download Software-Updates:
https://www.zsk.de/t8-software.html
YouTube Video, Install Software Update:
https://www.youtube.com/watch?v=JNCRShq8pKk
All discribed functions of the control unit T8-/T8-2 will be started
at the Base Screen (BS).
The keys used in the function descriptions are shown in the above T8-/
T8-2-gure.

4 • 02417V10 • 07.08.2018/DC
Monogram Machine/Writing
Monogram Machine/Writing
The Writing tool of the T8 control unit can be used to generate simple single-line, multi-line and circular
monograms. There are seven font families with a total of 30 fonts in various sizes available, as well as
various options for arranging a lettering. The generated monograms are stored in the memory.
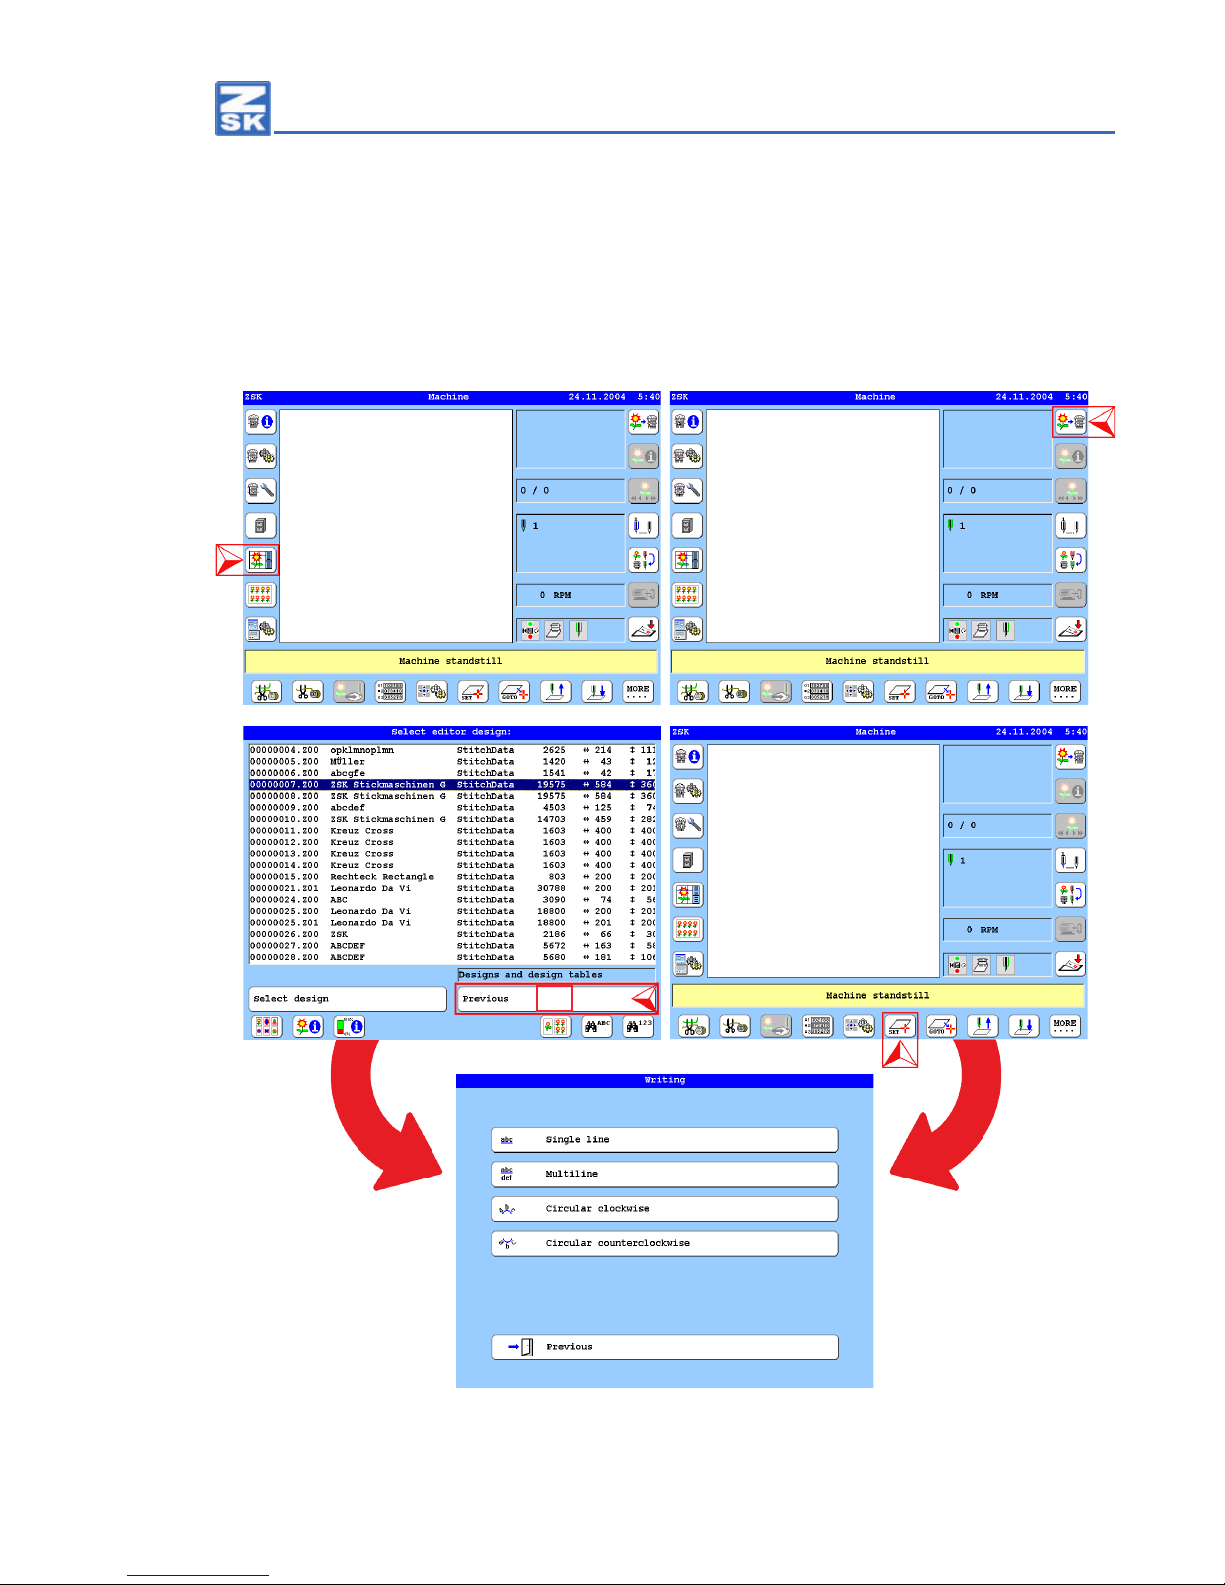
Activate Function
Switch on the function Writing. Starting from
the basic screen of the T8 control unit, press the
following buttons:
• [L7] Software-/hardware settings
• [R4] Software settings
• [R1] Internal writing
If the Internal monogram technology button is activated, the function Writing is activated and can also be
accessed via the function [R1] Select machine design (Start B). If the button is deactivated, the function
Writing is switched off and is only possible via the function Editor (Start A).
02417V10 • 07.08.2018/DC • 5
Monogram Machine/Writing
Start Writing
The function Writing can be started via the design editor (Start A) or via the function Select machine
design (Start B):
Start A Start B
2x
6 • 02417V10 • 07.08.2018/DC
Monogram Machine/Writing
Start A via function design editor
• Press the button [L5] Editor.
• Press the button [R8] Previous 2x.
ÖThe selection dialog Writing is displayed.
Start B via function Select Machine design
• Press the button [R1] Machine design.
• Press the button [U6] Activate operating mode Monogram Machine.
ÖThe selection dialog Writing is displayed.
Selection dialog Writing
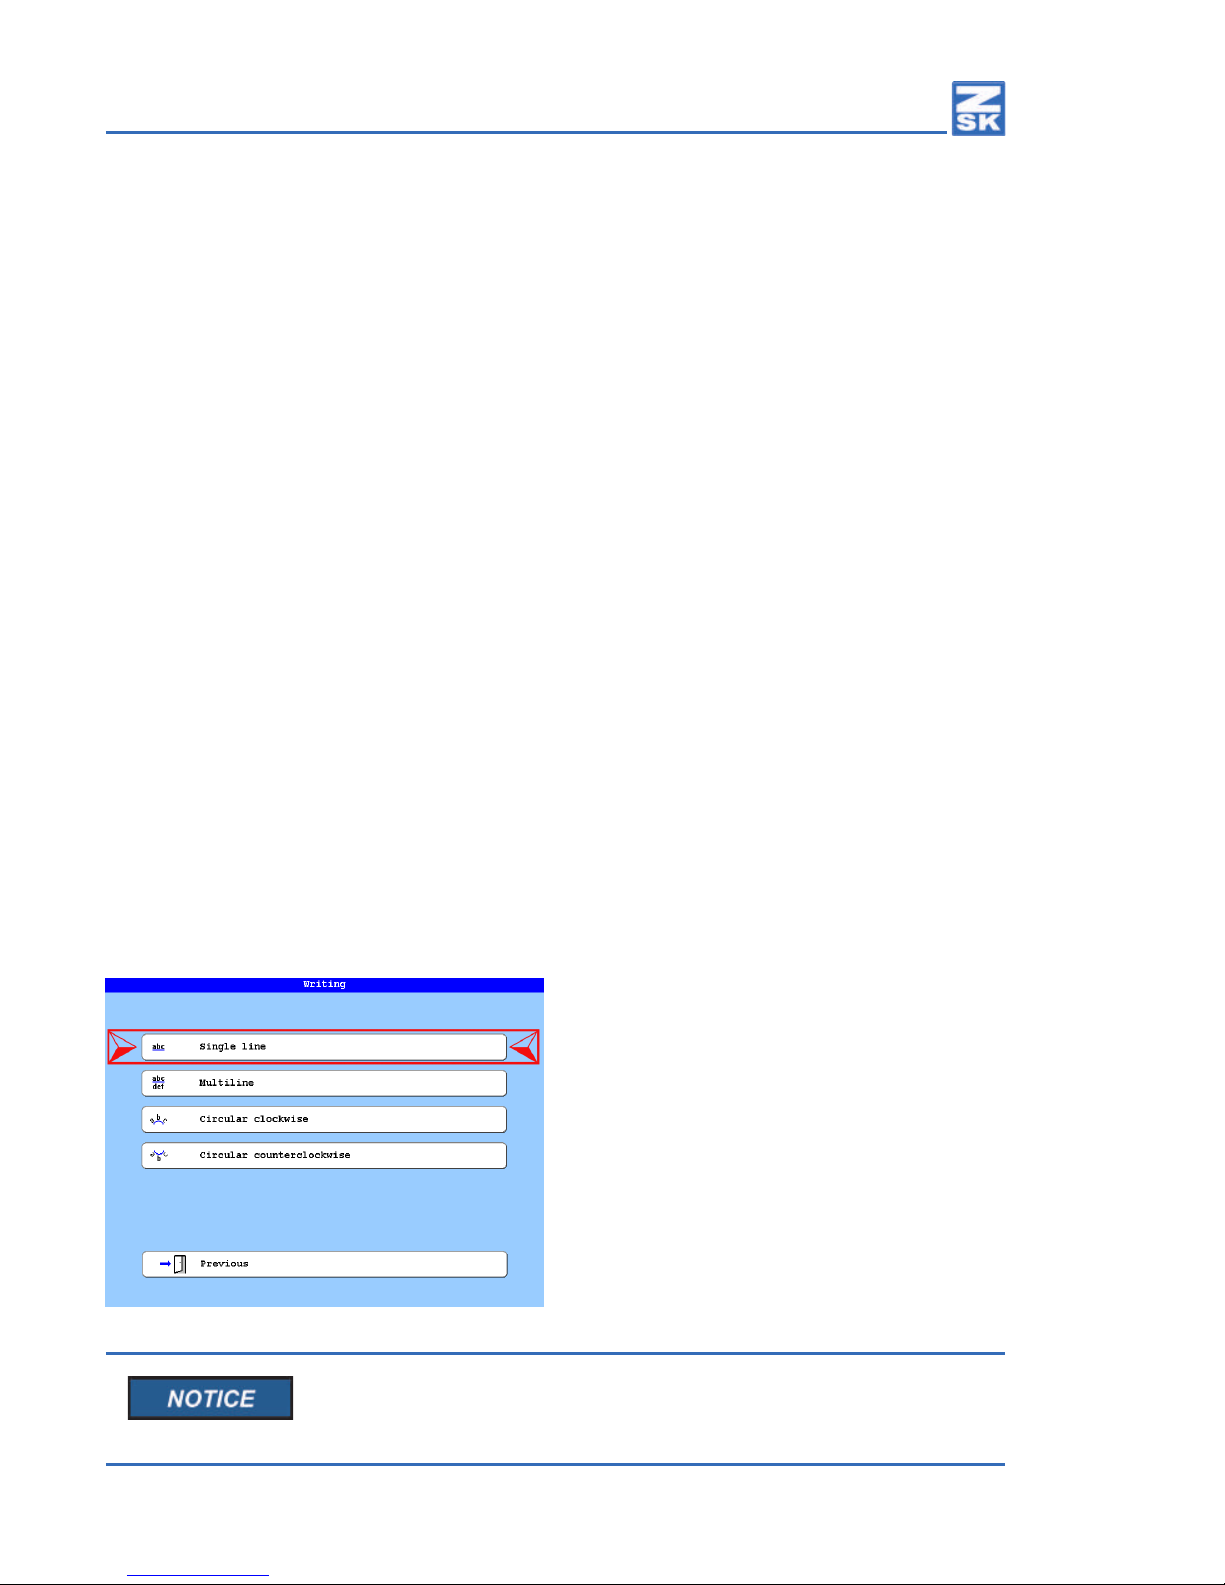
In the selection dialog Writing, you determine which monogram type should to be created with the function.
Here you can choose between single-line, multi-line and circular text. Circular text can be created in a
clockwise or counterclockwise direction.
Single-line Monogram
In the following example, the generation of a single-lined monogram is drescribed. The generation of the
other types of monograms is similar and differs only in appropriately adapted dialogs described in the
chapter Setting dialogs of monogram types.
• Press the button [L2/R2] Single line.
All selectable functions rst lead to the corresponding selection dialog Fonts.
02417V10 • 07.08.2018/DC • 7
Monogram Machine/Writing
• Use the arrow keys [p], [q] to select the desired
font from the list.
There is a choice of 30 fonts available. The available
characters are displayed in the upper right preview
window of the dialog.
The buttons [R4] - [R7] lead to a preview of the
selected font.
• Press the button [L8] Continue.
In the setting dialog Single line, the font settings can be made by entering values and switching ON or OFF
specic functions.
[L1] Trimming X mm
[L2] Baseline angle X DEG
[L3] Letter width X %
[L4] Letter spacing X mm
[R1] Italic angle X DEG
[R2] Letter angle X DEG
[R3] Letter height X %
• Press the button [L8] Conrm.

8 • 02417V10 • 07.08.2018/DC
Monogram Machine/Writing
• Enter the desired monogram text in the input dialog Text.
[L1 - L8] Letters a-h (with Key [SHIFT] A-H)
[U1 - U0] Letters i-r (with Key [SHIFT] I-R)
[R8 - R1] Letters s-z (with Key [SHIFT] S-Z)
Switching the button functions:
1x [TAB] Uppercase letter
2x [TAB] Digits & Special characters
3x [TAB] Digits & Additional special characters
[▲] [◄] Cursor 1 character to the left
[▼] [►] Cursor 1 character to the right
[DEL] Deletes the character to the left of the cursor.
[ESC] Back to the previous dialog.
[OK] conrms the dialog and shows the design head
as a preview.
Invisible buttons in the dialog Text:
[i] Clears the entire text.
[Shift] + [◄] Start of text
[Shift] + [►] End of text
[Shift] + [TAB] Text input via barcode reader.
• Press the key [OK] in the cursor block of the T8 controll unit.
ÖThe design head of the created monogram is displayed.
[U1] Mark starting point of design
[U2] Mark end point of design
[U3] Unmark design start- and end point
[L8] Accept loaded design
[R8] Cancel
• Press the button [L8] Accept loaded design.
ÖThe created monogram is transferred into the machine and can be embroidered now.

02417V10 • 07.08.2018/DC • 9
Monogram Machine/Writing
Setting dialogs of monogram types
With the function Writing can be generated simple
monograms. The different monogram types are
created in principle like a single-line monogram.
However, there are different setting dialogs for the
respective monogram types, which are explained
below.
Position and start coordinates
Straight monograms
Examples of position angles of the baseline for straight
monograms.
Circular monograms
Examples of baseline start and end points for circular
monograms.
10 • 02417V10 • 07.08.2018/DC
Monogram Machine/Writing
Single-line Monogram
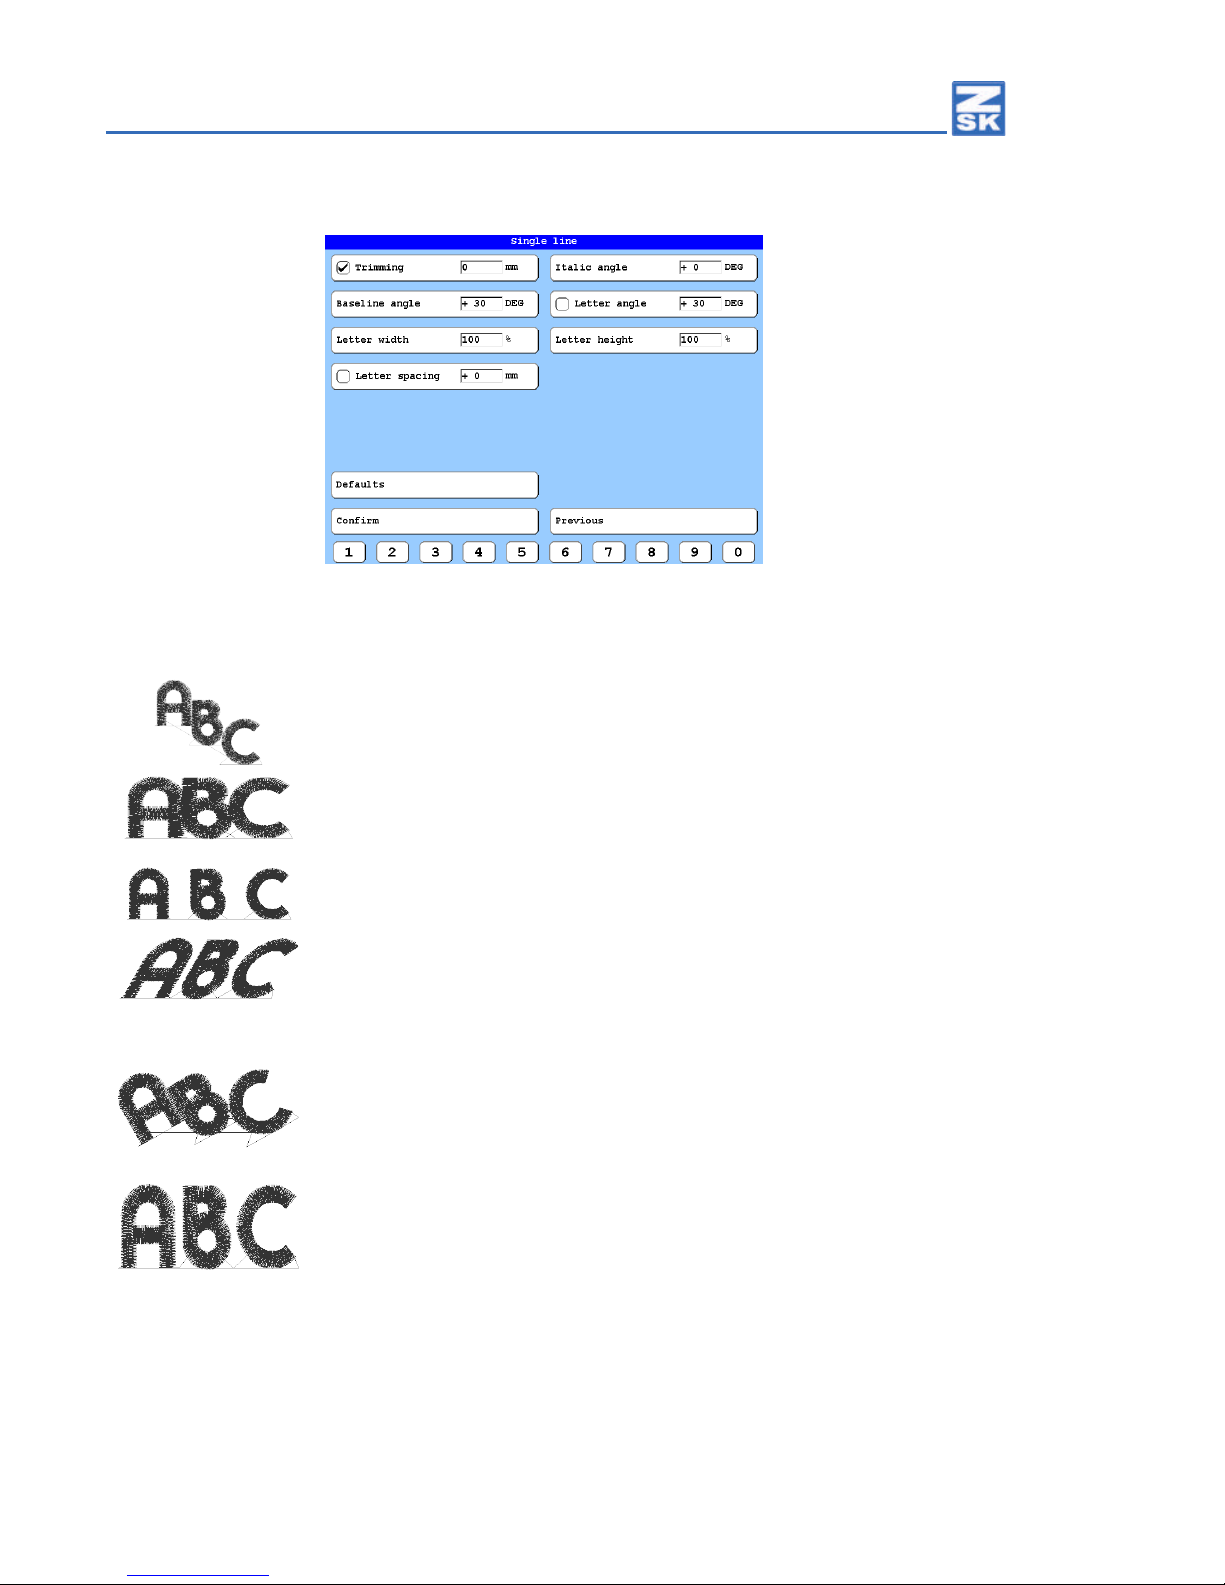
[L1] Trimming X mm
Distance in mm, from which the thread should be cut. The function can be
switched on or off.
[L2] Baseline angle X DEG
The baseline is tilted and the text is adjusted to the tilt.
[L3] Letter width X %
Setting the letter width in percent.
[L4] Letter spacing X mm
Setting the letter spacing in mm. The function can be switched on or off.
[R1] Italic angle X DEG
The individual letters are inclined.
[R2] Letter angle X DEG
The individual letters are rotated. The function can be switched on or off.
[R3] Letter height X %
Setting the letter height.
[L7] Defaults - Resets the dialog entries to the default settings.
[L8] Conrm - Leads to the corresponding input dialog Text.
[R8] Previous - Ends the dialog and returns to the previous dialog.
[U1]-[U0] Digits 1-0
[TAB] - Leads through the input elds.
Other manuals for T8
5
This manual suits for next models
1
Other ZSK Control Unit manuals


Popular Control Unit manuals by other brands

Festo
Festo Compact Performance CP-FB6-E Brief description

Elo TouchSystems
Elo TouchSystems DMS-SA19P-EXTME Quick installation guide

JS Automation
JS Automation MPC3034A user manual

JAUDT
JAUDT SW GII 6406 Series Translation of the original operating instructions

Spektrum
Spektrum Air Module System manual

BOC Edwards
BOC Edwards Q Series instruction manual

KHADAS
KHADAS BT Magic quick start

Etherma
Etherma eNEXHO-IL Assembly and operating instructions

PMFoundations
PMFoundations Attenuverter Assembly guide

GEA
GEA VARIVENT Operating instruction

Walther Systemtechnik
Walther Systemtechnik VMS-05 Assembly instructions

Altronix
Altronix LINQ8PD Installation and programming manual


