manuals.online logo
Brands
  1. Home
  2. •
  3. Brands
  4. •
  5. ZTechnik
  6. •
  7. Motorcycle Accessories
  8. •
  9. ZTechnik R1150 R User manual

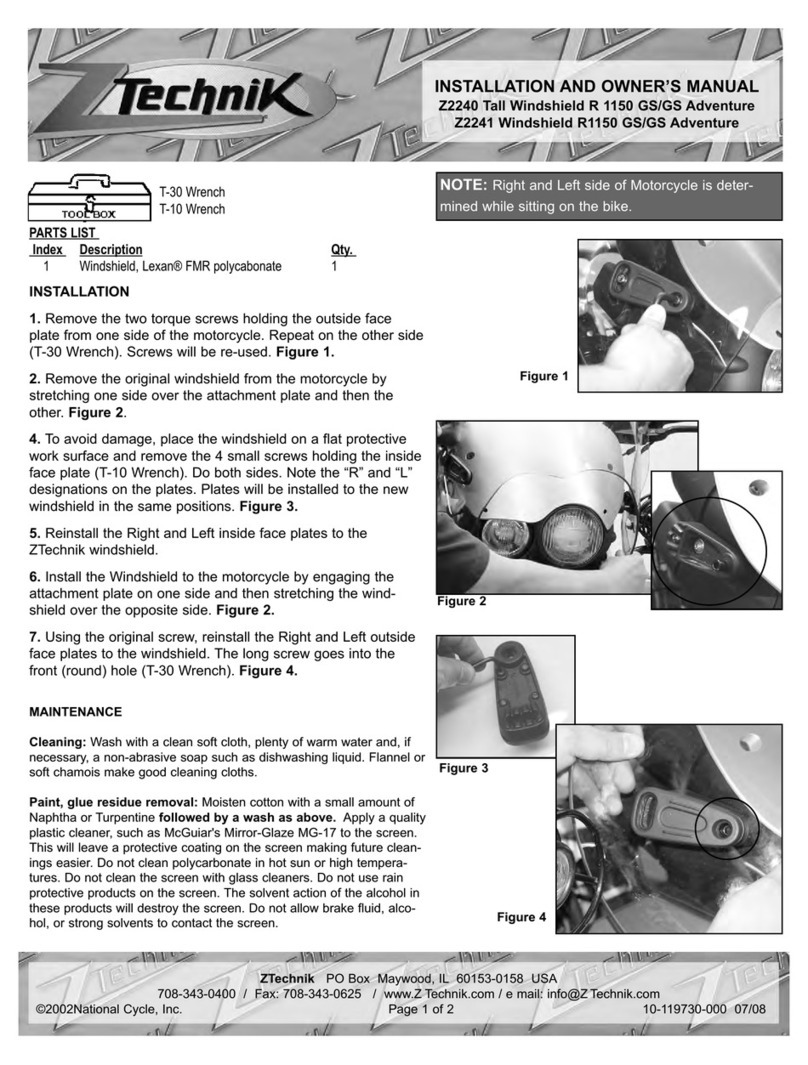
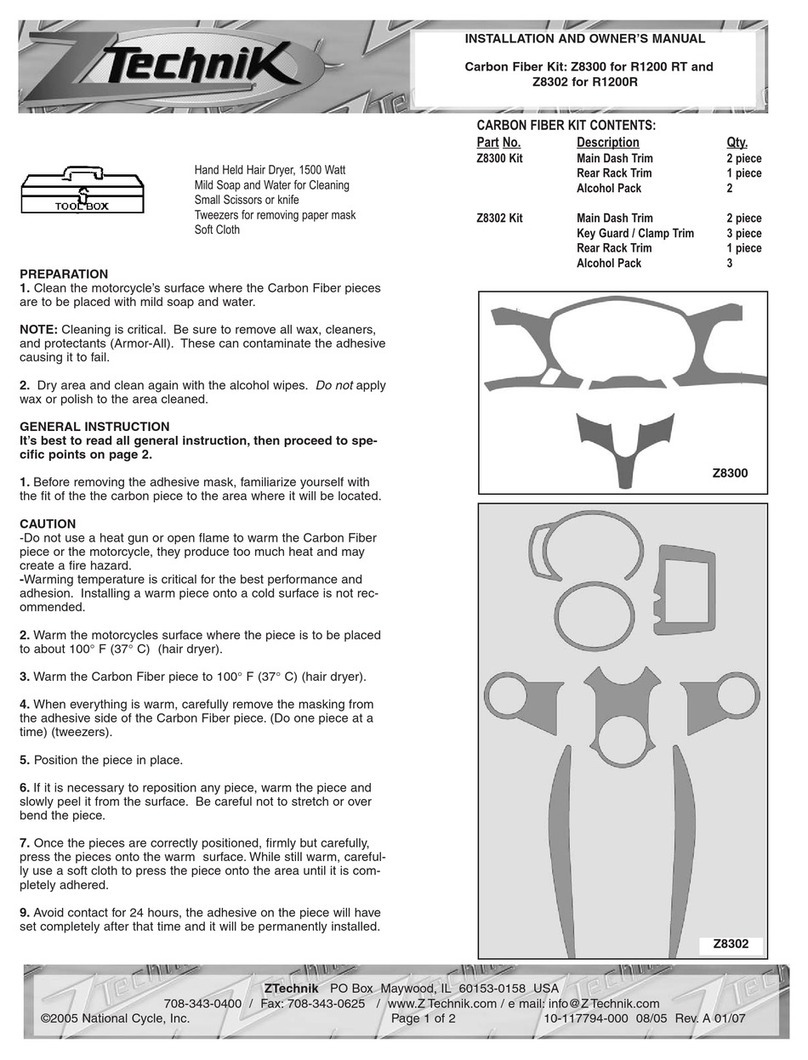
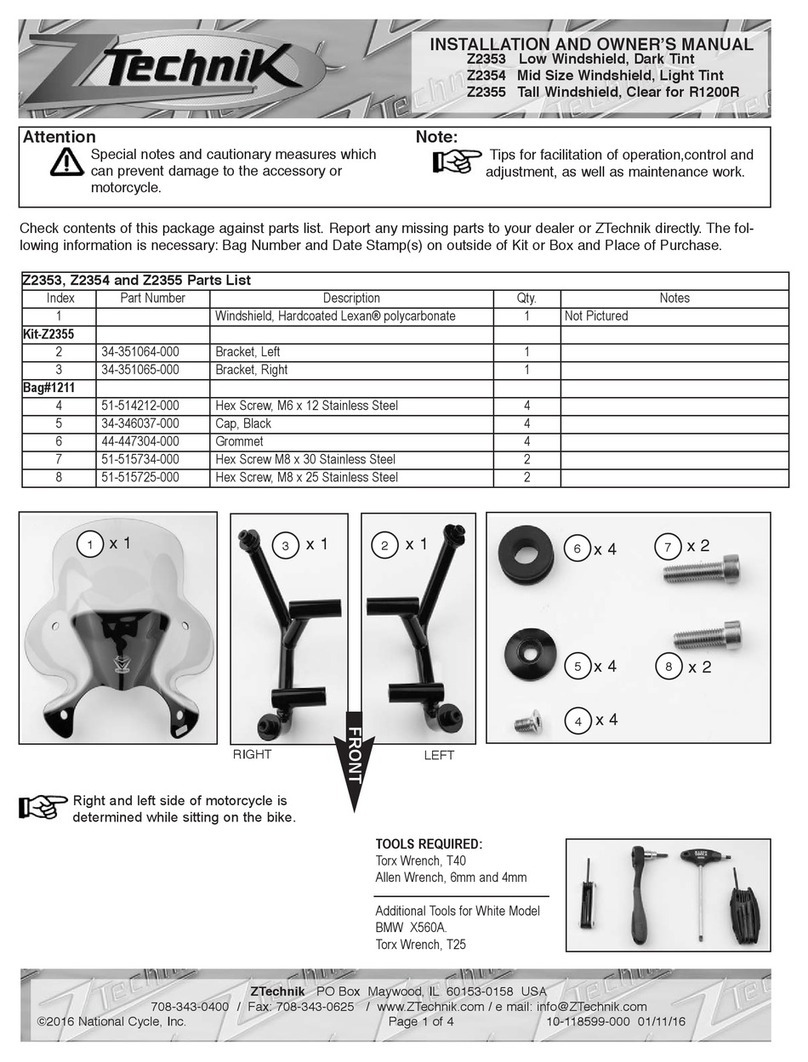
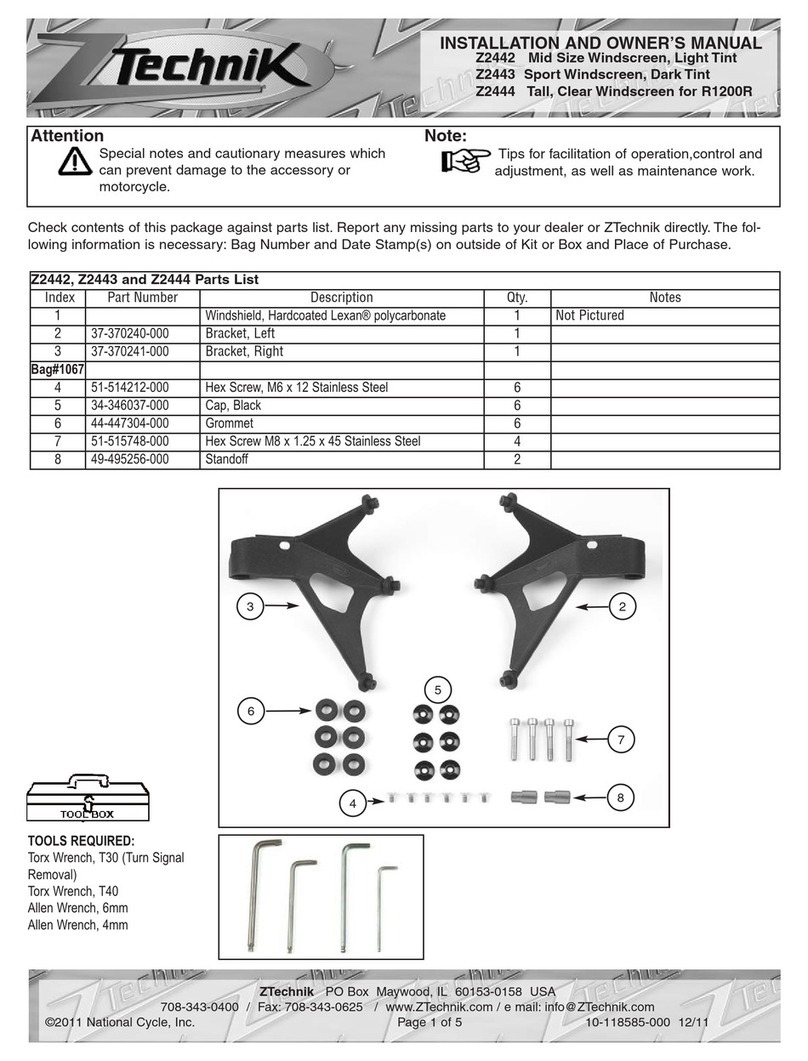
ZTechnik R1150 R User manual

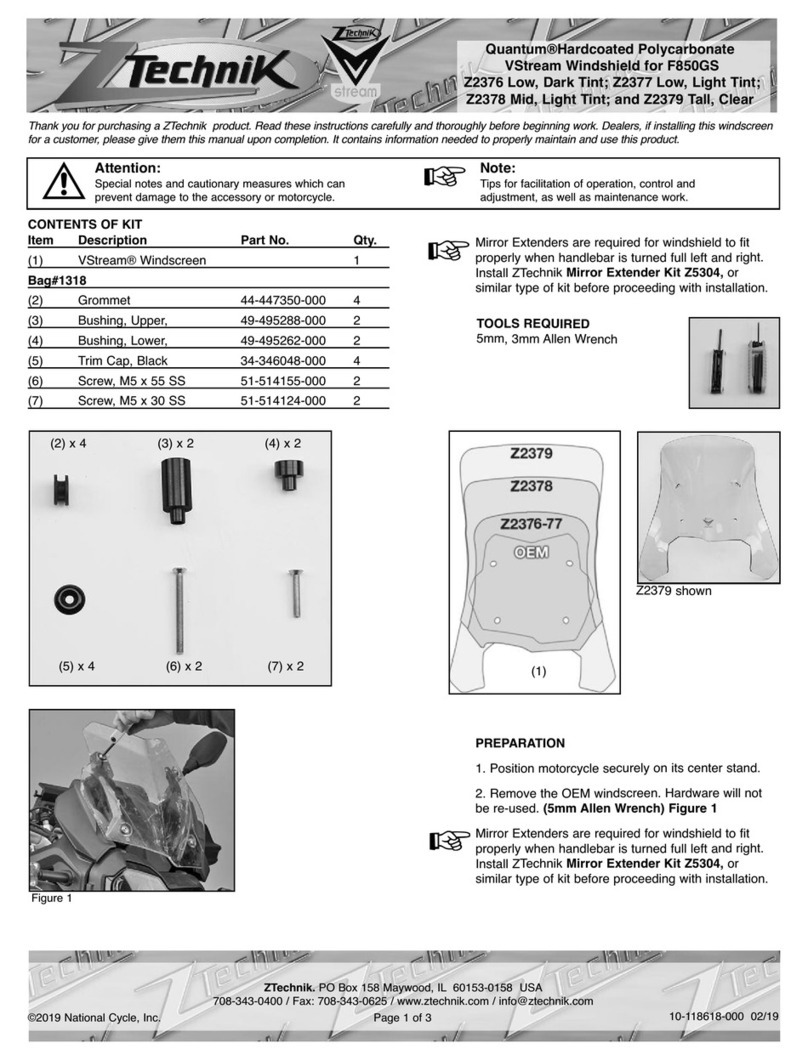
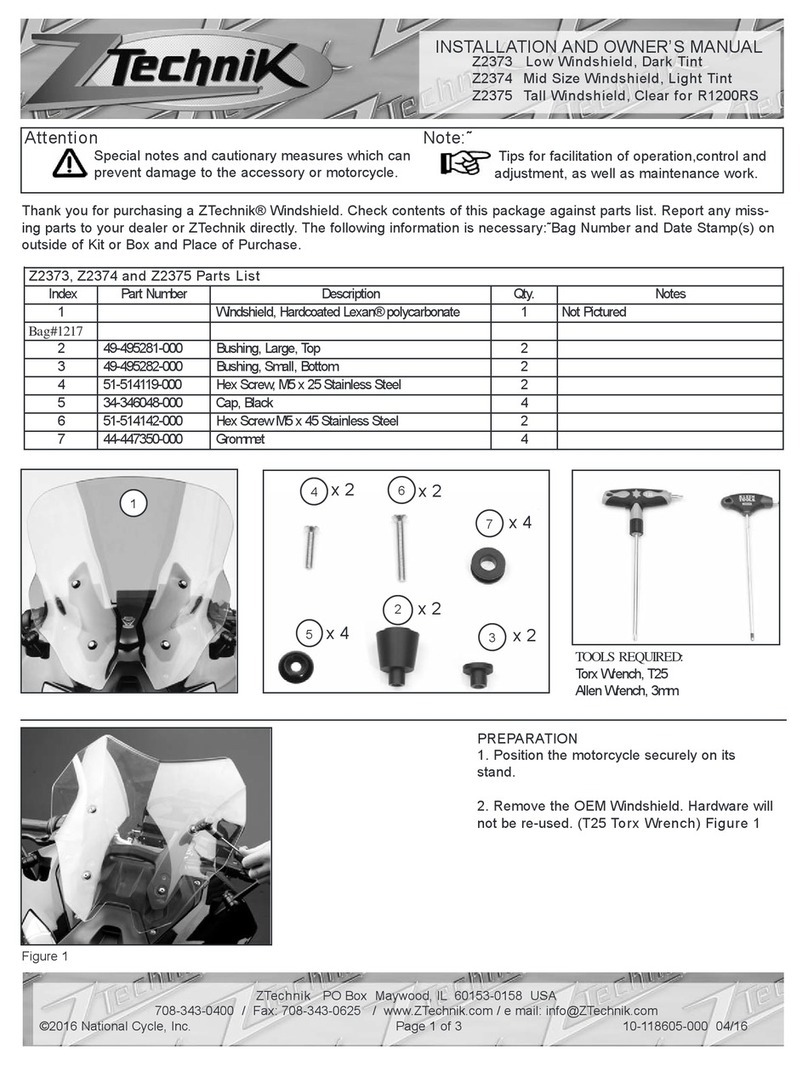
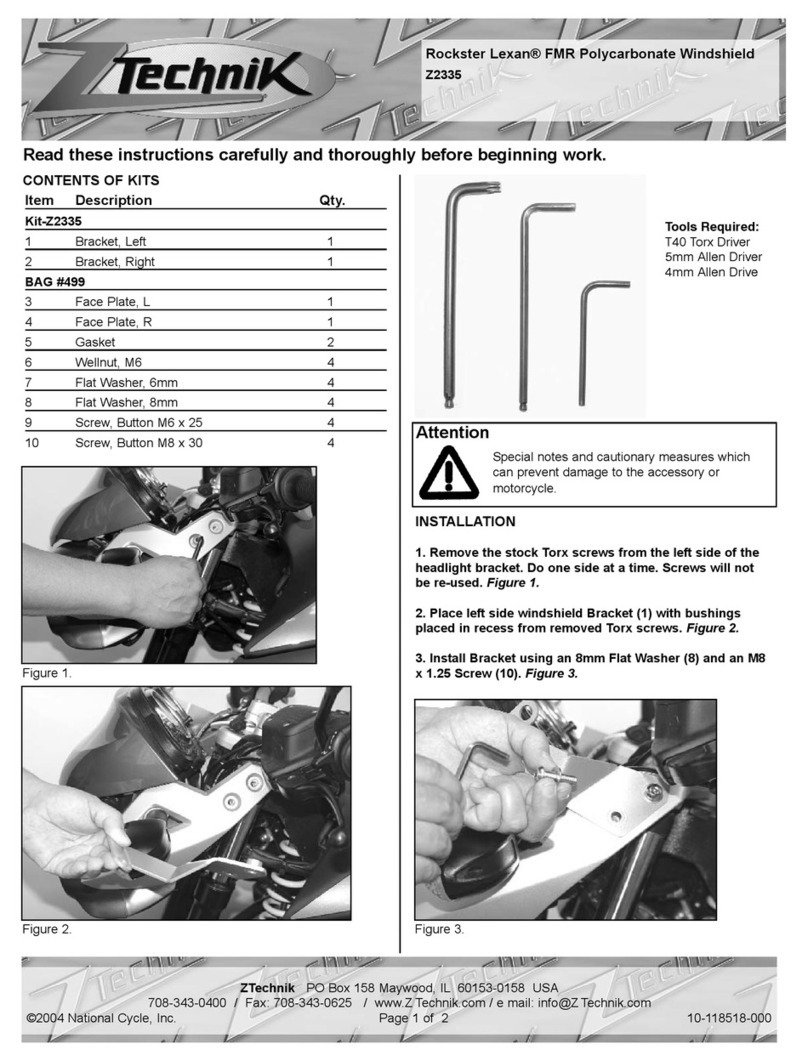
Kit-Z2330 Qty.
1 Mount, Windshield, Upper, Left 1
2Mount, Windshield, Upper, Right 1
3Mount, Windshield, Lower, Left 1
4Mount, Windshield, Lower, Right 1
Bag #377 Qty.
5Bracket Turn Signal Mount, Left 1
6 Bracket Turn Signal Mount, Right 1
7 Screw, M8 x 35 2
8 Screw, M6-1.0 x 12 4
9 Screw, Hex Socket, 10-32 x 1 1/4” 4
10 Wellnut, 10 SL 4
11 Finishing Washer, Screw Head 4
12 Washer, Rubber 8
Warning: Attention: Note:
Special notes and cautionary
measures which can prevent
damage to the motorcycle. Failure
to observe these can result in
nullification of the warranty.
Cautionary rules and measures
which can protect the driver or
other persons from injury or death.
Tips for facilitation of operation,
control and adjustment, as well as
maintenance work.
Read these instructions carefully and thoroughly before beginning work.
Before installing accessory, carefully consider whether one possesses the necessary technical skills
and workshop tools to complete the installation properly. Otherwise, any BMW Motorcycle Retailer
will be glad to install this accessory.
Tools Required:
Contents of Kit
Phillips Screw Driver 6mm Hex Key Wrench
19mm Box Wrench 5mm Hex Key Wrench
Masking Tape 3mm Hex Key Wrench
Torque Wrench
5
7
8
12
6
9
10
11
12 3 4
R1150 R Windshield
Part Numbers: Z2330 Dark, 15.5” Tall
Z2331 Clear, 15.5” Tall
Z2332 Clear, 20” Tall
ZTechnik PO Box 158 Maywood, IL 60153-0158 USA
708-343-0400 / Fax: 708-343-0625 / www.Z Technik.com / e mail: info@Z Technik.com
©2002 National Cycle, Inc. Page 1 of 4 10-118516-000 Rev. B 04/03
Make sure ignition is off.
Secure motorcycle on center stand and cover fender to
prevent paint scratching.
Do not use lubricants to facilitate installation of the
Wellnut assembly through the windshield (step 17). The
use of lubricants may cause damage to the windshield
material.
Left and right side of motorcycle is determined while sit-
ting on the bike.
Lower Left Mount
1. Remove left turn signal lens and pull light assembly
from housing. (Phillips Screw Driver)
2. Disconnect wires. Pull wires through turn signal stalk.
Note where brown wire (ground) is connected for
later reassembly.
3. Pull silver trim piece from the rubber grommets along
the length of the turn signal stalk to expose the 19mm
nut holding turn signal stalk to the motorcycle.
4. Cover plastic trim piece with a low tack adhesive tape
to prevent scratching finish during installation.
5. Remove nut on turn signal stalk and remove turn sig-
nal stalk from motorcycle headlight bracket. (19mm Box
Wrench)
Note locator tabs on turn signal stalk
Attention:
Note:
Note:
Note:
Tape trim
piece
Installation Instructions: R 1150 R Windshield Page 2
6. Locate the left “L” turn signal bracket from Bag 377.
Reassemble turn signal through plastic trim piece, head-
light bracket and left turn signal bracket (item 5) on turn
signal stalk as shown. (Box Wrench)
Make sure locator “ears” on supplied turn signal
bracket and turn signal stalk are installed correctly
into the motorcycle headlight bracket. The front “ear”
of the turn signal bracket will locate into the slot of
the turn signal holder.
Tighten the 19mm nut to 2 Nm (20 in-lb). (Torque
Wrench)
7. While being careful not to scratch plastic trim piece,
assemble lower left “L” mount to left turn signal bracket
using two supplied M6 x 12 socket head cap screws.
(5mm Hex Key Wrench) Ensure that the end of the
mount is facing forward in front of the turn signal as
shown.
8. Torque the M6 screw to 8 Nm (6 ft-lb). (Torque
Wrench)
9. Reassemble turn signal assembly and ensure that the
silver trim piece is firmly installed in rubber grommets.
Remove protective tape from trim piece.
10. Repeat steps 1 through 9 to assemble the lower right
mount.
Upper Left Mount
11. Remove M8 socket head cap screw from the under-
side of the top triple clamp. (6mm Hex Key Wrench)
12. Install upper left “L” mount using supplied M8 x 35
socket head cap screw. (6mm Hex Key Wrench) Ensure
that the mount passes between the fork leg and gauge
assembly and faces up and forward as shown. Do not
tighten Screw.
Do not fully tighten M8 x 35 screw until wind
shield has been installed.
13. Repeat steps 11 and 12 to assemble the upper right
mount.
Note:
Installation Instructions: R 1150 R Windshield Page 3
5
Windshield Mounting Hardware
14. Remove paper backing to expose adhesive of four
supplied rubber washers and apply adhesive side to sur-
face of mounts as shown. Rubber washer should not over-
hang edge of mount.
15. Remove paper backing to expose adhesive of remain-
ing four rubber washers and apply adhesive side to the flat
side of the four finishing washers. Make sure rubber wash-
ers do not overhang edge of finishing washers.
16. Pass 10-32 Hex Socket Screws through the finishing
washers and loosely assemble with supplied rubber well-
nuts.
The flange of wellnut (10), should seat into recess of
rubber washer (12).
Install Windshield
17. Hold windscreen up to mounts. Starting at the lower
mounts, insert a screw assembly through windshield plas-
tic. Ensure that the wellnut end passes through the plas-
tic into the lower mount and that the rubber washer in the
screw assembly firmly seats against the windshield sur-
face.
18. Assemble remaining mounting hardware in the upper
mounts.
19. Adjust the windshield so that the air gap around the
windshield and headlight is even and the turn signals are
not touching the windshield.
Final Adjustments
20. Once the windshield is located correctly, firmly tighten
the 10-32 Hex Socket Screws so that the wellnuts are not
able to be pulled from the mounts. Do not overtighten.
Make certain the M8 x 35 screws in Upper Mounts are
seated correctly before you fully tighten. (Screw may
bind during installation.) Final torque of M8 x 35
screw is 14 Nm (10 ft-lb).
21. Tighten the M8 x 35 socket head screws.
Check all remaining hardware for tightness.
22. Check that the turnsignals have been correctly installed
and are operating correctly before riding motorcycle. Remove
the cover protecting the fender.
Note:
Note:
Installation Instructions: R 1150 R Windshield Page 4
Rubber washer should not
overhang edge of mount.
Assembly of items 11 and 12.
Rubber washer(12) should not over-
hang edge of finishing washer (11).
Install screw assemblies at
the lower mount point first.
911
12 10
ZTechnik PO Box 158 Maywood, IL 60153-0158 USA
708-343-0400 / Fax: 708-343-0625 / www.Z Technik.com / e mail: info@Z Technik.com
©2002 National Cycle, Inc. Page 4 of 4 10-118516-000 Rev. B. 04/03
Fahren Sie Ihr Motorrad niemals mit losen Zubehörteilen. Überprüfen Sie die Halterungen regelmäßig auf festen Sitz.
Die heutigen Motorräder sind mit einer ausreichenden Rahmensteifigkeit gebaut, um den moderaten Belastungen standzuhalten, die durch die
absehbare Hinzufügung eines oder mehrerer Zubehörteile auf sie ausgeübt werden. Wenn ein oder mehrere Zubehörteile die Stabilität Ihres
Motorrads beeinträchtigen, entfernen Sie sofort das / die Zubehörteil (e). Nehmen Sie kein Motorrad in Betrieb, das unsichere Fahreigenschaften
aufweist.
Lassen Sie das Problem von erfahrenem Servicepersonal beheben, bevor Sie mit installiertem Zubehör fahren. Bei weiteren Fragen zu
Handhabungsproblemen im Zusammenhang mit einem oder mehreren Zubehörteilen wenden Sie sich bitte an Ihren Händler, Motorradhersteller
oder Zubehörhersteller.
Sonnenlicht, das von der inneren Krümmung der Windschutzscheibe reflektiert wird, kann zu bestimmten Tageszeiten zu einem extremen
Wärmestau auf den Instrumenten des Motorrads führen und diese möglicherweise sogar zum Schmelzen bringen. Gehen Sie beim Parken
vorsichtig vor, um dies zu vermeiden. Stellen Sie Ihr Motorrad in Richtung Sonne ab oder platzieren Sie einen undurchsichtigen Gegenstand über
diesem Bereich.

This manual suits for next models

3

Other ZTechnik Motorcycle Accessories manuals

ZTechnik Z2353 Installation instructions

ZTechnik

ZTechnik Z2353 Installation instructions

ZTechnik VStream Windscreen Z2450 Installation instructions

ZTechnik

ZTechnik VStream Windscreen Z2450 Installation instructions

ZTechnik Z8300 Installation instructions

ZTechnik

ZTechnik Z8300 Installation instructions

ZTechnik Z2442 Installation instructions

ZTechnik

ZTechnik Z2442 Installation instructions

ZTechnik VStream Windshield User manual

ZTechnik

ZTechnik VStream Windshield User manual

ZTechnik Z8305 Installation instructions

ZTechnik

ZTechnik Z8305 Installation instructions

ZTechnik Z2240 Installation instructions

ZTechnik

ZTechnik Z2240 Installation instructions

ZTechnik Quantum Z5402 Installation instructions

ZTechnik

ZTechnik Quantum Z5402 Installation instructions

ZTechnik Quantum Z2360 User manual

ZTechnik

ZTechnik Quantum Z2360 User manual

ZTechnik Quantum Z5403 Installation instructions

ZTechnik

ZTechnik Quantum Z5403 Installation instructions

ZTechnik Z2450 Installation instructions

ZTechnik

ZTechnik Z2450 Installation instructions

ZTechnik Z2335 User manual

ZTechnik

ZTechnik Z2335 User manual

ZTechnik VStream Quantum Z2376 User manual

ZTechnik

ZTechnik VStream Quantum Z2376 User manual

ZTechnik Z2373 Installation instructions

ZTechnik

ZTechnik Z2373 Installation instructions

Popular Motorcycle Accessories manuals by other brands

Saddlemen H23-20-All User's guide & installation instructions

Saddlemen

Saddlemen H23-20-All User's guide & installation instructions

IBEX 10008383 Mounting instructions

IBEX

IBEX 10008383 Mounting instructions

PVP Communications Motor-One user manual

PVP Communications

PVP Communications Motor-One user manual

Bagster BOOMERANG 7554CB Fitting instructions

Bagster

Bagster BOOMERANG 7554CB Fitting instructions

N-Com MCS II Safety and instructions for use

N-Com

N-Com MCS II Safety and instructions for use

Corbin HD-VRSCF-9 instructions

Corbin

Corbin HD-VRSCF-9 instructions

Poweroo UBPS-RK installation guide

Poweroo

Poweroo UBPS-RK installation guide

AGV Orbyt user manual

AGV

AGV Orbyt user manual

AFX FX-76 INTERNATIONAL OWNER’S MANUAL

AFX

AFX FX-76 INTERNATIONAL OWNER’S MANUAL

SHOEI RF-1400 Instructions for use

SHOEI

SHOEI RF-1400 Instructions for use

Cardo Systems PACKTALK SLIM manual

Cardo Systems

Cardo Systems PACKTALK SLIM manual

hepco & becker 6502502 00 01 manual

hepco & becker

hepco & becker 6502502 00 01 manual

Livall Helmetphone RS1 quick start guide

Livall

Livall Helmetphone RS1 quick start guide

hepco & becker 6307551 00 01 manual

hepco & becker

hepco & becker 6307551 00 01 manual

National Cycle N2594 Owner's manual and assembly instructions

National Cycle

National Cycle N2594 Owner's manual and assembly instructions

Sena R2 EVO quick start guide

Sena

Sena R2 EVO quick start guide

RDMOTO Y36S Instructions for assembly

RDMOTO

RDMOTO Y36S Instructions for assembly

Shark Explore-R manual

Shark

Shark Explore-R manual

manuals.online logo
manuals.online logoBrands
  • About & Mission
  • Contact us
  • Privacy Policy
  • Terms and Conditions

Copyright 2025 Manuals.Online. All Rights Reserved.