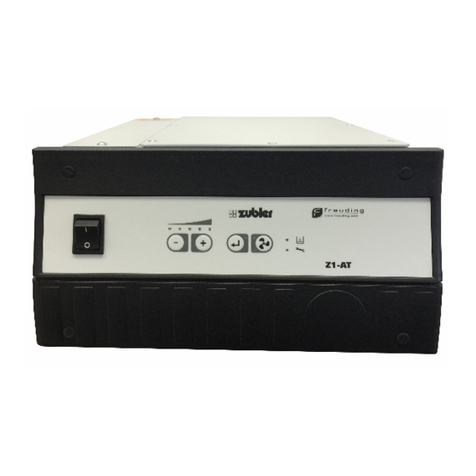
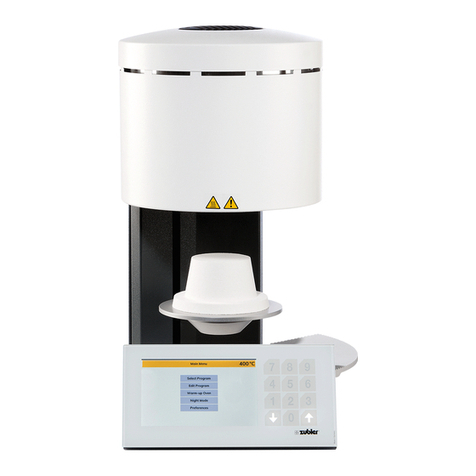
Zubler VARIO S 400 User manual

www.zubler.de
VARIO S 440000
dental & technik
Operating instructions 07-2019
en
Sintering Furnace


3
Content
0Introduction Page 4
0.1 Conformity declaration
0.2 General information
0.3 Use within specifications
0.4 Installing the appliance
0.5 Initial oven setup
1 Operation Page 8
1.0 Display functions
1.1 Run Programs
1.2 Start with timer
1.3 Edit programs
1.3.1 New/change program
1.3.2 Copy/change program
1.3.3 Move program
1.3.4 rase program
1.3.5 Look at program
1.3.6 New/change brand
1.3.7 rase brand
1.3.8 USB transfer
1.4 Setup Oven
1.4.1 Diagnostic tests
❶ Software version
❷ Update software
❸ Test lift
❹ Factory Tests
1.4.2 Customize country
1.4.3 Adjust display
1.4.4 Audio Beeps
1.4.5 Set preview mode
1.4.6 Regeneration program
1.4.7 Customized Calibration
2Maintenance Page 17
2.1 Fuse
2.2 Spare parts
2.3 Technical explanation
3 Data Page 19
3.1 Technical data
3.2 Included
4 Safety warnings! Page 20
5 Service Page 22
Dear Laboratory Professional,
We are delighted that you chose the Zubler
VARIO S 400 sintering furnace and hope that you
will find it pleasant to work with. The constant
further development of our technology is based on
cooperation with experienced dental technicians.
Our primary aim is to construct sintering furnaces
of maximum quality, flexibility and sustainability.
Performance and profitability are the basic prerequi-
sites for this.
To fully enjoy the advantages this unit offers and to
ensure trouble-free performance, please read these
instructions carefully.
Page

4Seite Seite
Seite
0 Introduction
We, Zubler Gerätebau GmbH
Buchbrunnenweg 26
89081 Ulm-Jungingen
www.zubler.de
hereby declare that the product named below
VARIO S400
conforms to the regulations of the following U
directives:
2014/30/ C MV-Directive
2014/35/ C Low-Voltage Directive
2006/42/ C Machines Directive
This declaration loses its validity if the product is
modified without our agreement.
Kurt Zubler
Managing Director
0.1 Conformity declaration
0.2 General information
The correct processing of different translucent zirco-
nium dioxides places ever increasing demands on
the dental technician. We help technicians by com-
bining state-of-the-art technology with future-orient-
ed processes in the VARIO S 400 sintering furnace.
The software installed in the VARIO S 400 allows an
individual firing process for all zirconium dioxides
available on the market. The use of top quality
materials prolongs the service life of the furnace
and offers you reproducible results at the highest
level over a period of many years. It is important to
us that you can manufacture top quality dental
prostheses for many years to come with the VARIO
S 400 sintering oven. That's why we inform you of
software updates or additional processing options.
We are sure that you will have much success and
will enjoy working with the sintering furnace, and
we congratulate you on your choice.
Page

5
SeiteSeiteSeiteSeite
Page
0 Introduction
■The VARIO S 400 furnace series was developed
exclusively for the sintering of zirconium dioxi-
des in their different forms (standard, translu-
cent, full contour or dyed) and is intended only
for these applications.
■All other uses require the written consent of
Zubler Gerätebau GmbH.
■The user is liable for any damage resulting from
use other than that intended.
■The manufacturer's warranty conditions apply.
■Use within specifications also includes following
all the instructions in this operating manual.
■The appliance may be operated only by technical
or trained personnel.
■Repairs may be carried out only by authorized
service personal.
■Do not touch the control panel with wet or
moist fingers.
■Please unpack the furnace carefully. It should be
lifted/carried by two people. Always lift at the
base of the unit; never lift the furnace using the
chamber or the table guide.
■Do not actuate the control panel with hard
and/or sharp objects.
■Never operate the furnace without the insulation
base installed on the table.
■Do not reach with your hand between the furna-
ce table and furnace chamber during operation.
There is a danger of being crushed or burned.
■During operation, never reach underneath the
furnace table and never place anything under the
furnace table. The furnace table must not be
blocked during the opening process.
■The cooling slits must not be covered or
obstructed, otherwise the circulation of air is not
guaranteed and the appliance could overheat.
■No liquids or objects may be allowed to enter the
appliance or the vent openings, as it may cause
a short-circuit.
■The furnace table has an electric drive and must
be operated using the buttons on the glass touch
control interface. Do not open or close the furna-
ce table by hand.
0.3 Use within specifications
Page

6SeiteSeiteSeite
C rcu ts breaker for the heat ng
Ma ns supply
Fuse holder
Ma n sw tch
USB
Page
0 Introduction
Preparation
■Keep the two firing bases at the ready for the
further procedure
Power connection:
■The sintering furnace requires 230 V/50 Hz or
220 V/60 Hz (USA)
1. Do not use extension cables
2. Make sure the unit is plugged into a fuse
protected circuit.
■The main switch should be in the "0" position.
■Circuit breaker for heating in the "ON" position.
■Connect the furnace to the power supply using
the mains cable provided.
■Switch the furnace on at the main switch.
■After the furnace self-test has finished, press the
yellow "Open" button.
0.4 Installing the appliance ■Place the furnace on a stable, even and fireproof
worktop.
■The area surrounding the sintering furnace
should be free 30 cm/12 inches to the right, to
the left, above and behind the appliance.
■Retain the original packaging in case you have to
return the appliance in warranty or for service.
■nsure that the room is well ventilated during
furnace operation.
■Maximum room temperature 30°C / 86°F
■ventilation and cooling vents must not be cover-
ed or obstructed.
Page

7
0 Introduction
0.5 Initial oven setup
After switching the furnace on for the first time and
inserting the two firing bases, execute the
Regeneration program.
Main menu ⇒Setup oven ⇒ Regeneration program
Once the lift is completely down, place the
two insulation bases (see picture) on the lift
plate.
Page

8SeiteSeiteSeiteSeiteSeite
S cherungshalter
F1, F2, F3
Hauptschalter
-+
Daler
Made in Germany
<250C VA IO S 400
Esc
Page
1 Operation
Enter Up Down
1.0 Display functions
MAIN - MENU
un Programs
Start with timer
Edit Programs
Setup oven
Sect on for select ng parameters:
Conf rm / Cancel – key
L ft movement Up / Down
Sect on for chang ng values
Rap d select on (c rcle d aler)
Step by step (yellow keys)
LCD color d splay
Current temperature
➋Select the desired menu item using the dial or
the +/- buttons.
➌Press the green “ nter” Button to continue.
Pressing the red " SC" button will take you one
step back.
Selection of the menu parameters
❶After you have switched on The S400 for the first
time, the main menu will appear on the display
with the following four selectable menu items:
1.1 un Programs
1.2 Start with timer
1.3 Edit Programs
1.4 Setup Oven
Page

9
SeiteSeiteSeiteSeiteSeiteSeite
1148 C 04:57:04
0
500
0
1000
1500
1650
1/4 1/2 3/4 1
1148 C 04:57:04
Abort Program
000-Test
1148C Start 008-Sinter-Test À23
Graph
Page
1 Operation
1.1 Run Programs
Run Program
■A program can be started between 250 °C and
400 °C. If muffle temperature is over 250 °C, the
oven automatically opens and waits until it rea-
ches 250 °C. After it reaches 250 °C it will conti-
nue with the program.
■The most recently run program will always be
highlighted after “Run Program” is selected
from the “Main Menu”. If you wish to select
another program, use the +/- buttons or dial to
select another program or press the red “ sc”
button to go to the “Brand” menu, where you
may select another brand that contains the desi-
red program to run.
■Once a program has been selected, Press the
green " nter" button to preview the selected
program.
■If Preview Mode is activated - The furnace will
show a preview of the program and ask if you
want to run this program. Press the green “Yes”
button to confirm and run the selected program.
Press the red “No” button to return to the pre-
vious menu.
■The default view is “Program” mode. This
mode displays the program parameters and
highlights each parameter as it is running.
■To view the running program in graph mode,
press the yellow “Graph” button.
■To abort the program, press the red “Abort” but-
ton.
■To activate/deactivate the Preview Mode
(see 1.4.5).
* While the program is running, you can switch between parameter view and
graph view by pressing the yellow button.
000-Test
1148C Start 008-Sinter-Test À23
- ate 1 (°/min) 15C
-Temp 1 1000C
-Hold 1 (min) 60:00
- ate 2 (°/min) 10C
-Temp 2 1300C
-Hold 2 (min) 60:00
- ate 3 (°/min) 5C
-Temp 3 1650C
-Hold 3 (min) 120:00
- ate 4 (°/min) 20C
-Temp 4 600C
-Cool ate (°/min) 20C
-Open temp 250C
Abort
Page

10 SeiteSeiteSeiteSeite
<
250C 04:12:25
Page
1 Operation
Page
Enter
Graph
1-DCS U M
450C Edit “ 27-SPEED “
1-DCS U M
450C Edit “ 27-SPEED “
Begin in 2:36
-Start Program
13:18 10.Aug.15
End at
14:54 10.Aug.15
- ate 1 (°/min) 50C
-Temp 1 1100C
-Hold 1 (min) 0
- ate 2 (°/min) 20C
-Temp 2 1500C
-Hold 2 (min) 30
-Cool ate (°/min) 30C
-Open temp 300C
Begin in 2:35:50
Esc
Abort
1.2 Start with timer
The most recently run program will always be high-
lighted after “Start with timer” is selected from the
“Main Menu”. If you wish to select another program,
use the +/- buttons or dial to select another program
or press the red “ sc” button to go to the “Brand”
menu, where you may select another brand that
contains the desired program to run.
Once a program has been selected, Press the green
" nter" button to preview the selected program.
If Preview Mode is activated - The furnace will show
a preview of the program and ask if you want to run
this program. Press the green “Yes” button to confirm
and run the selected program. Press the red “No”
button to return to the previous menu.
nter the desired delay time (in hours and minutes).
Once selected, the end time of the sintering process
will be displayed.
Press the green “ nter” button to continue. The
program will now start and finish at the desired time.

11Seite SeiteSeite
Seite Seite
SeiteSeiteSeite Page
1 Operation
MAIN-MENU
450C VA IO S400
un programs
Start with timer
Edit programs
Setup oven
Esc Up Down
Enter
Program entry
450C
New / change program
Copy / change program
Move program
Erase program
Look at program
New / change brand
Erase brand
USB Transfer
Esc
1.3 Edit Programs
1.3.1 New/change program
■After selecting “ dit Programs” from the “Main
Menu” the “ dit Programs” menu is displayed.
■Use the +/- button or the dial to select
“New/change program” and press the green
“ nter” button.
■Select a brand to place the program in by using
the +/- buttons or dial and press the green
“ nter” button to continue. Note: A total of 25
brands are available, pressing the yellow “Next”
button accesses 5 additional brands.
■Select the program address using the +/- but-
tons or dial and press the green “ nter” button
to continue.
■Name the program by entering the desired let-
ters and numbers using the +/- buttons or dial.
Pressing the yellow "Left" or "Right" buttons
moves the cursor one place to the left or right
respectively.
■The letter or number to be changed has a gray
background.
■Press the green " nter” button to advance and
begin editing the program parameters.
■(For more information on programming stages
see “Program Types”).
■Select the number of stages desired using the
+/- buttons or dial and press the green “ nter”
button to continue.
■The sintering parameters for each stage can
now be modified using the +/- buttons or the
dial.
■Press the green " nter” button to move to the
next parameter.
■The input field jumps one line backwards if the
yellow "Up Line" button is pressed.
■The yellow "Last line" button takes you to “ dit
done?” Where you can select yes or no.
■Save your entries with the +/- buttons or the dial
and the green " nter" button.
■Once entry is complete, you will be returned to
the “Select Brand” menu, where you may repe-
at the process and enter a new program or
press the red “ sc” button to return to the “ dit
Programs” Menu.
Enter

12 Seite
Seite
Seite
Page
Enter
003-PU SE MC CERAMAY
450C Edit “ 063-PULSE MC DENTIN 1 “
-Program stages
- ate 1 (°/min) 50C
-Temp 1 1100C
-Hold 1 (min) 0min
- ate 2 (°/min) 20C
-Temp 2 1500C
-Hold 2 (min) 30min
-Cool ate (°/min) 30C
-Open temp 300C
-Edit done ?
Esc
There are a total of six programmable stages. Five
individually programmable heat rates, holding tem-
peratures and holding times. The last stage is
always designated as the cooling stage. The cooling
stage is programmable and does feature an adjusta-
ble cool rate and open temperature.
Programming Stages: Select the number of sta-
ges needed for the program, (Remember the
last stage is always reserved for cooling parame-
ters.)
Example: A three stage program would have 2 sta-
ges of adjustable heat rates, hold temperatures
and hold times, while the 3rd and final stage
would be for the cool rate and open temperature.
The total allowable hold time for an individual
program is 420 minutes. The total individual hold
time allowable for any stage is 300 minutes.
Allowable remaining stage times are automatical-
ly modified as entries are made.
Stage 1 – Stage 1 has a maximum heat rate of
50°C/min, a minimum temperature of 250°C and
a maximum temperature of 1650°C.
Stages 2 to 5: Depending on the desired program,
you can program heat rates or cool rates
between 1 and 100°C/min.
Hold Temperature 2- 5: Depending on the desired
program, you can program temperatures bet-
ween 350°C and 1650°C.
Holding Time 2 to 5: The maximum combined hol-
ding time is 7 hours (420 Min.). Depending on
the desired program and prior hold time entries,
you can program holding times of between 0
and 300 minutes.
Cooling Rate: Cool rate is for cooling down to the
opening temperature. Allowable entry is bet-
ween 1-50°C/min Opening Temperature: The
temperature at which the furnace opens (bet-
ween 250°C and 400°C).
Edit Done?: To save the program use the +/- buttons
or dial to select “Y S” or “NO” and press the
green “ nter” button to continue.
Program types - 1: Sinter
1 Operation

13Seite SeiteSeite Page
1.3.2 Copy/Change program
■Select the brand containing the program to be
copied from the “Brand” menu using the +/-
buttons or the dial and press the green “ nter”
button to continue.
■Select the program to be copied using the +/-
buttons or the dial and press the green " nter”
button to continue.
■The display returns to the “Brand” menu where
you may select a new brand group using the +/-
buttons or dial. Press the green “ nter” button
to continue.
■Select the desired program address to paste the
copied program to, using the +/- button or dial
and press the green “ nter” button to continue.
■Name the program by entering the desired let-
ters and numbers using the +/- buttons or dial.
Pressing the yellow "Left" or "Right" buttons
moves the cursor one place to the left or right
respectively.
■The letter or number to be changed has a grey
background.
■Press the green " nter” button to advance and
begin editing the program parameters.
■For more information on entering parameters
see section 1.3.1 “Program Types”.
■Select the number of stages desired using the
+/- buttons or dial and press the green “ nter”
button to continue.
■The sintering parameters for each stage can now
be modified using the +/- buttons or the dial.
■Press the green " nter” button to move to the
next parameter.
■The input field jumps one line backwards if the
yellow "Up Line" button is pressed.
■The yellow "Last line" button takes you to “ dit
done?” Where you can select yes or no.
■Save your entries with the +/- buttons or the dial
and the green " nter" button.
■Once entry is complete, you will be returned to
the “Select Brand” menu. Where you may repe-
at the process and Copy/Change another pro-
gram or press the red “ sc” button to return to
the “ dit Programs” Menu.
1 Operation
Enter Esc
1-DCS U M
450C Edit “ 27-SPEED “
-Program Stages 3
- ate 1 (°/min) 50C
-Temp 1 1100C
-Hold 1 (min) 0min
- ate 2 (°/min) 20C
-Temp 2 1500C
-Hold 2 (min) 30min
-Cool ate (°/min) 30C
-Open temp 300C
-Edit done ? No

14 Seite
Seite
Seite
Seite
Seite
Seite
SeiteSeite
Seite Page
1.3.3 Move program
■Once “Move Program” has been selected from
the “ dit Programs” menu and the green
“nter” button pressed, you will be prompted to
select a brand from the “Brand” menu contai-
ning the program to be moved.
■Select the Brand using the +/- buttons or the dial
and press the green “ nter” button to continue.
■Select the program to be moved using the +/-
buttons or the dial and press the green “ nter”
button to continue.
■Select the desired Brand to move the program to
using the +/- buttons or the dial and press the
green “ nter” button to continue.
■Select the desired address to move the program
to using the +/- buttons or the dial and press the
green “ nter” button to continue.
■Once the initial move is ompleted, you will be
returned to the “Brand” menu where you repeat
the process and move another program or press
the red “ sc” button to return to the “ dit
Programs” menu.
NOT : Moving a program to an address that is cur-
rently populated, will overwrite and erase the exi-
sting program.
1.3.4 Erase program
■Once “ rase Program” has been selected from
the “ dit Programs” menu, followed with pres-
sing the green “ nter” button. You will be
prompted to select from the “Brand” menu a
brand containing the program to be erased.
■Select the Brand using the +/- buttons or the dial
and press the green “ nter” button to continue.
■Select the program to be erased using the +/-
buttons or the dial and press the green “ nter”
button to continue.
■The program with all parameters appears toget-
her with the question: " rase this program?”
■Confirm and erase the program by pressing the
green “Yes” button scape from deletion by
pressing the red “No” button.
■Once “Yes” or “No” is pressed you will be retur-
ned to the “Brand” menu, where you may select
a program to erase or press the red “ sc” but-
ton to return to the “ dit Programs” menu.
1 Operation
Page
1.3.5 ook at program
■Once “Look at Program” has been selected form
the “ dit Programs” menu and the green
“nter” button pressed, you will be prompted to
select the brand containing the program to be
viewed.
■Using the +/- buttons or dial, select the desired
brand and press the green “ nter” button to
continue.
■Using the +/- buttons or the dial, select the desi-
red program to be viewed and press the green
" nter" button to continue.
■The individual parameters appear on the display,
but cannot be changed.
■Pressing the "OK" button takes you back to the
“Brand” menu, where you may select another
program to view.
1.3.6 New/change brand
■There are 25 customizable “Brands” (program
groups) (indexed from 0 to 24), each with 20 pro-
gram addresses.
■In the " dit Programs" menu, use the +/- button
or the dial to select "New/Change Brand" and
press the green “ nter” button to continue.
■The first 20 nameable brands (program groups)
appear on the display. The yellow "Next" button
displays the remaining five groups. The yellow
“Last” button returns to the display to the first
20 brands.
■Using the +/- buttons or the dial, select the brand
(program group) to be named and press the
green " nter" button to continue.
■The letter or number to be changed will be high-
lighted in gray.
■Select the desired letter or number using the +/-
buttons or the dial.
■Pressing the yellow "Left" or "Right" button
moves the cursor one place to the left or right
respectively.
■Pressing the green " nter" button saves the entry
and takes you to the “Brand” menu to select
another brand to name. Press the red “ sc” to
return to the “ dit Programs” menu.

15SeitePage
1.3.7 Erase brand
■In " dit Programs” menu, select " rase Brand"
using the +/- buttons or the dial and confirm with
the green " nter" button.
■The first 20 nameable brands (program groups)
appear on the display. The yellow "Next" button
displays the remaining five groups. The yellow
“Last” button returns to the display to the first
20 brands.
■Using the +/- buttons or the dial, select the brand
(program group) to be erase and press the green
" nter" button to continue.
■A prompt will appear “ rase this Brand?” to
erase the brand; press the green “Yes” button.
To exit, press the red “ sc” button.
1.3.8 USB transfer
■In order to load programs from or save programs
to a USB device, you need a USB mass-storage
device with USB Microsoft protocol and a folder
called "VARIO".
■In " dit Programs” menu, select "USB transfer"
using the +/- buttons or the dial and press the
green " nter" button to continue.
■Follow the directions below for saving or loading
programs to and from the USB Storage device
respectively.
"Send progs to USB" - To save programs to the
USB Storage device for emailing or later use
■Make sure your USB Storage device is plugged
into the USB port on the side of the oven.
■Use the +/- button or dial to select “Send pro-
grams to USB” and press the green “ nter” but-
ton to continue.
■You will be prompted to name the file. Select the
desired letter or number using the +/- buttons or
the dial.
■Pressing the yellow "Left" or "Right" button
moves the cursor one place to the left or right
respectively.
■The Furnace will begin saving the programs to
the USB storage device during which symbols (*)
will be displayed across the screen indicating
progress. Once completed the display will return
to the “ dit Programs” menu.
" oad progs from USB"
NOT : All programs currently on the S400 will be
erased and replaced with the programs being loa-
ded.
■To load programs to the oven from the USB sto-
rage device, use the +/- button or dial to select
“Load programs from USB” and press the green
“ nter” button to continue.
■The available file list will be displayed.
■Using the +/- buttons or the dial, select the pro-
gram file that you wish to load from the USB
device and press the green " nter" button to con-
tinue.
1 Operation
Page

16 Seite
SeiteSeiteSeiteSeiteSeite Page
1 Operation
Page
Enter
Setup oven
< 250C
Diagnostics tests
Customize country
Adjust display
Audio Beeps
Set preview mode
egeneration program
Esc
In the “Setup Oven” menu, parameters are set that
define the basic functions of the furnace for daily
use and are therefore to be entered by the custo-
mer according to individual requirements.
From the “Main Menu”, use the +/- buttons or the
dial to select, "Setup Oven" and press the green
" nter" button to continue.
1.4.1 Diagnostic Tests
❶About version
Shows the currently installed software version.
❷Update Software
Requires the input of a password for updating the
software on the unit. For information about soft-
ware updates or to see if an update is available,
please contact your dealer.
❸Test ift
Use the yellow “Up” or “Down” buttons to move
the lift in the respective to direction. Once the lift
has come to the fully UP or fully DOWN position,
ensure the corresponding limit switch status is
displayed as “On” and the opposing is displayed
as “Off”. This test is utilized by service personnel
and for troubleshooting purposes.
❹Factory tests
Factory Tests require a password and are only for
the use of authorized personnel
1.4.2 Customize country
In this area the language, the date, time and the
units of measurement (metric/imperial) may be
selected.
1.4.3 Adjust display
The brightness of the display is subdivided into
steps. Use the yellow “Dark” / “Light” buttons to
adjust the brightness of the display.
1.4.4 Audio beeps
The "beep" sound can be switched off with yes/no.
The sound is then only emitted when the appliance
is switched on.
1.4.5 Activate preview
With this function you can view the parameters for
the selected program before starting the program.
1.4.6 Regeneration program
When run at monthly intervals; this program
increases the element’s protective layer for
resistance to oxidation and corrosion, increasing
the service life of the heating elements.
Follow the displayed prompts to run the program.
1.4.7 Customized Calibration
User can rise or lower the oven temperature. The
real max. end temperature of 1650 °C can not be
exceeded. Customized calibration is only active
between real 250 °C and 1650 °C.
1.4 Setup oven

17
SeiteSeiteSeiteSeite Page
2 Maintenance
Page
2.1 Fuse
The VARIO S 400 sintering furnace requires the fol-
lowing fuse:
Voltage 240V 230V 220V
Fuse 16 A slow-blow 16 A slow-blow 16 A slow-blow
2.2 Spare parts Description Item Number
Heating element 896-0402
Thermocouple type B 896-0401
Tray insulation, small 896-0408
Tray insulation, large 896-0407
40 g sintering Beads 896-0409
200 g sintering Beads 896-0410
Spacer ring 896-0406
multifunctional tray set, single 896-0419
consisting of:
- 1 sintering dish
- lid for sintering dish
multifunctional tray set, double 896-0418
consisting of:
- 2 sintering dishes
- lid for sintering dish

18 SeiteSeiteSeiteSeite
max. 40g
max. 40g
Page
2 Maintenance
2.3 Technical explanation
1 When working with sintering beads, gently agita-
te the objects into the sintering beads:
Use a maximum of 40g sintering beads per
sintering tray.
2. Two possibilities to work with the Sintering dish
set, double.
Page
Procedure
Heat Rate
Multifunctional tray
≤50°C/min

19
SeiteSeiteSeiteSeite Page
3 Data
3.1 Technical Data
VARIO S 400
330mm x 580mm x 830mm 13 x 22.8 x 32,7 inch
51kg 113 lbs
230V/50Hz 220V/60Hz
2000W
3300VA
20°C - 1650°C 68°F - 3002°F
120mm x 90mm 4,7 x 3,5 inch
320 x 240 dots
500
Technical Data:
Width x Depth x Height
Weight
Voltage
ffective Power
Apparent Power
Performance Data:
Temperature:
Color Display
Programs
Environmental conditions
Installation area closed
and dry rooms
Ambient temperature 18°C to 30°C
64°F to 86°F
Relative humidity up to 30° C 80%
No condensation
Page
3.2 Included
1 VARIO S400
1 power cable
1 USB flash drive
1 tray insulation, large
1 tray insulation, small
1 spare fuse
2 sintering trays
1 sintering lid
1 firing Insulation base tray ring
1 pair of tongs
1 warranty card
1 operating manual

20
4 Safety warning !
Never place highly combustible materials such as
paper or brushes or highly flammable substances
such as methylated spirits, insulation spray or paint
near the sintering furnace.
■Use this furnace only for its intended purpose as
described in this operating manual and carefully
remove all packaging materials and adhesive
tape during the installation.
■The appliance may be used indoors only.
■Materials that give off toxic gases must not be
sintered.
■Fan openings must not be covered over. Danger
of overheating or safety cut-off of the furnace.
■The appliance may be connected only to a separate
power socket protected by a 16 A slow-blow
fuse with an earth contact and a 30-mA earth
leakage circuit breaker.
■Any interruption in the protective earth conductor
inside and outside the appliance or loosening of
the protective earth connection can lead to the
appliance posing a threat to the operator in the
event of an error. Intentional interruption is not
permissible.
■Position the furnace in a free-standing position. A
free space of 200-300 mm must be maintained
around and above the furnace. Immediately
adjoining walls surrounding the appliance should
be made of a non-flammable material. The area
should be well ventilated.
■In accordance with fire protection regulations,
install a suitable, recommended, multipurpose,
dry-foam fire extinguisher near the furnace and
make sure that your employees have been
instructed how to use it properly.
■Never wear loosely-fitting clothes or clothes that
hang down when operating the furnace. Be
careful when grasping objects in the vicinity of
the furnace. Inflammable material can catch fire
if it comes into contact with a hot surface of the
appliance. The user can sustain severe burns as
a result.
■Do not place the furnace in the immediate vicinity
of sources of heat (e.g. burnout furnaces, ceramic
and press furnaces).
■Make sure that the furnace has been professio-
nally installed in accordance with our instructions
and that the selected electrical connection is
properly grounded.
■Use the grounded appliance power cable I C
C19 for 230/240 V.
■The electrical service must be carefully performed
and must guarantee that the oven is connected
to sufficient voltage. Assign a qualified electrician
to install the proper outlet and voltage supply, so
that you can be sure that the connection is ade-
quate and that no existing circuit is overloaded.
■Do not use an extension cable with the furnace.
Ask your electricity supply company about the
electrical connection values that apply to your
local grid.
■The temperature may rise more slowly if the
voltage is too low.
■Connections should be checked from time to
time to ensure that they are correctly seated and
that they are not worn or damaged. They should
be tightened again or replaced if necessary.
■All cables should be located outside of
passageways and corridors.
■High temperatures can be radiated during operation.
Page
Table of contents
Other Zubler Medical Equipment manuals
Popular Medical Equipment manuals by other brands

Albrecht
Albrecht CDS KNEE BRACE EXTENSION User instructions

Zeiss
Zeiss KS Instructions for use

Roth
Roth ROTIPHORESE PROfessional runVIEW Instructions for use

Otto Bock
Otto Bock 17K43 Instructions for use

Essilor
Essilor PSL classic Instructions for use

Otto Bock
Otto Bock Free Walk 170K1-80 Instructions for use