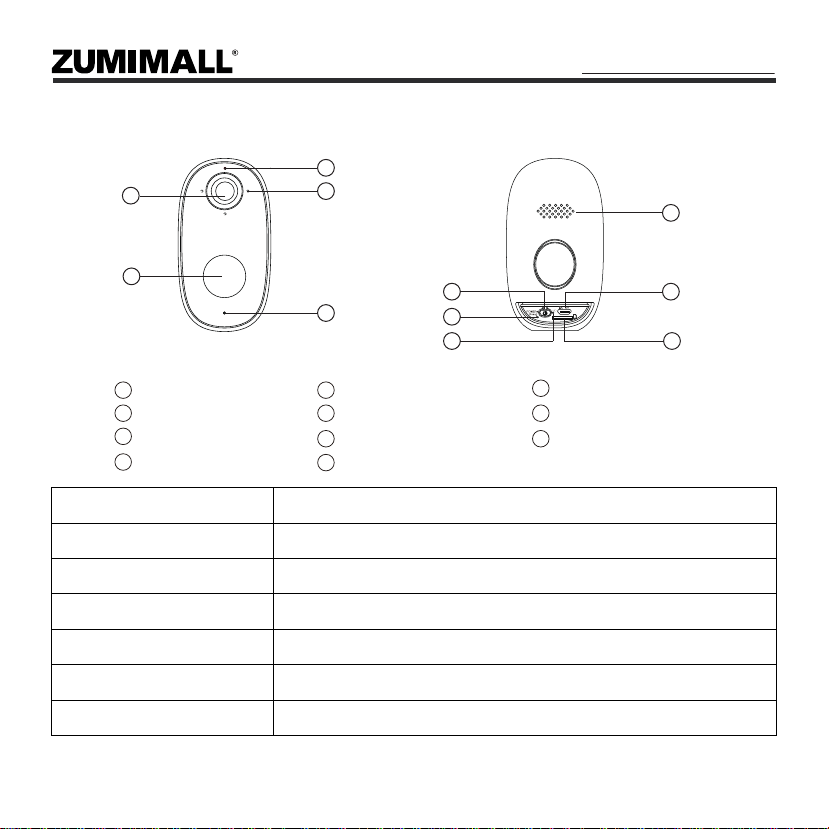
5
5.2 Connect Camera to App
5:48
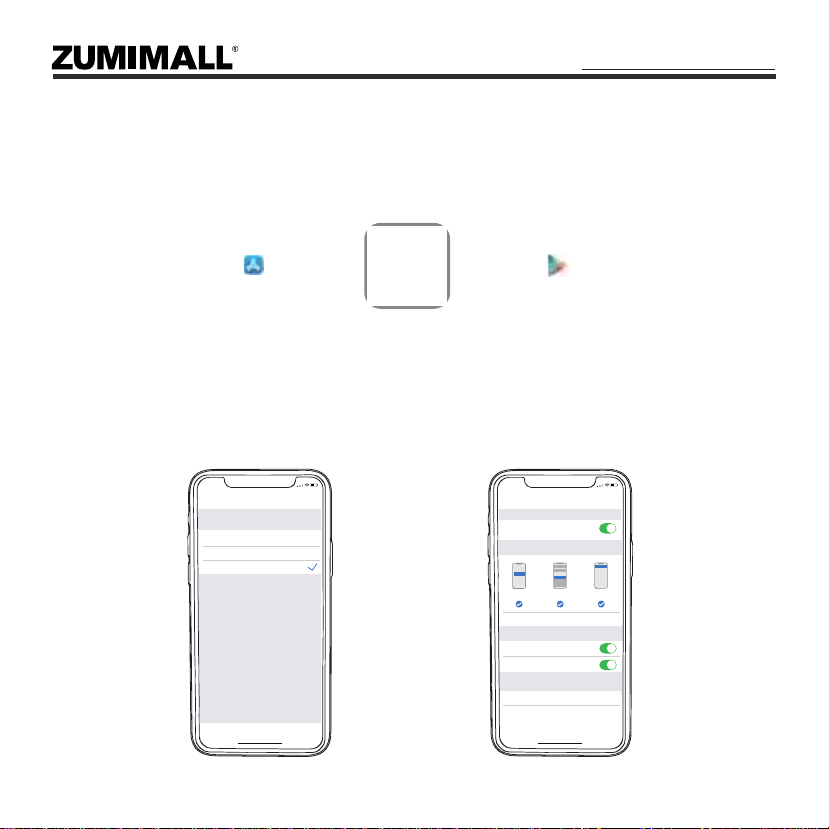
Devices
Devices Messages
Tap + to add a new device.
Me
5:48
Camera
Select Device
Get Smarter about your Smart Security
Battery Camera
Doorbell
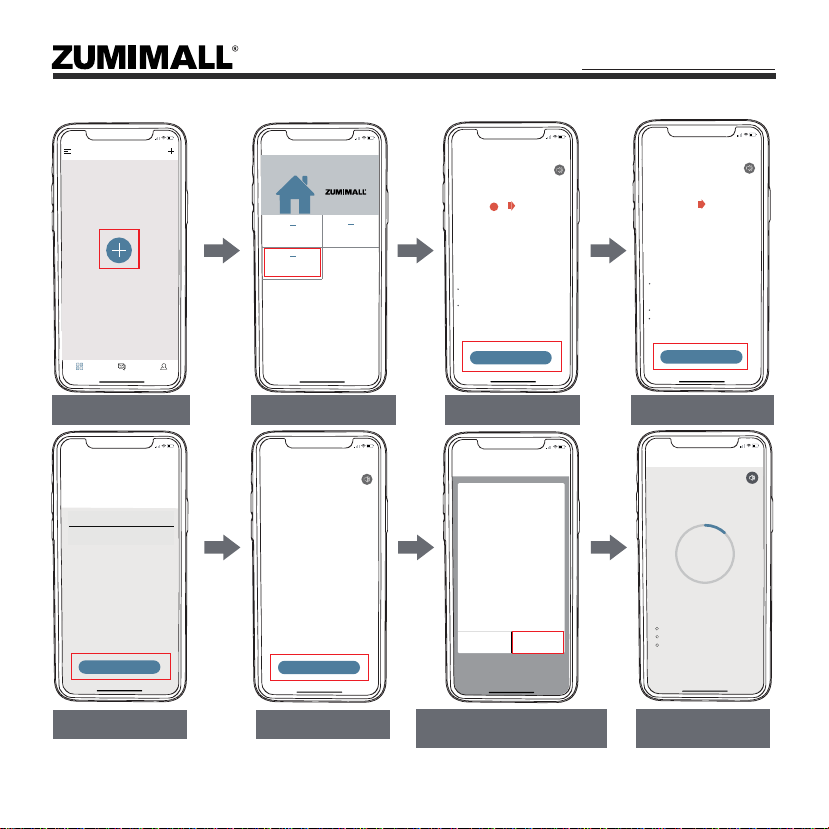
Tap ‘+’ to Add Device Select ‘Battery Camera’ Tap ‘Next’ Reset it and Tap ‘Next’
5:49
Add Battery Camera
Press the [battery camera] button to wake the
device if it is asleep.
Hold the device power button to start the
device.
<
4
Please stay near to your router foe the best
signal.
Next
Hole the RESET button on your device for 4-5
seconds(please refer to the usea manual for
more on this).
Wait for a flashing RED indicator light.
Tap Next
5:49
Add Battery Camera
Please reset the device.
<
Next
Input Wi-Fi Password Prepare the Scanning Scan QR Code When Indicator
Flashing Slowly in Red Finished Installation
When Reaches 100%
5:50
Wi-Fi Setup
Select your Wi-Fi network
(Please select a 2.4G network, this device will
not work with 5G Wi-Fi networks)
Junan
cam2019@
Change WiFi
Hide Password
<
Next
5:50
Scan QR Code
<
Scan the QR code below with the
device at a distance of 5-8 inches.
A tone will be heard when
successfully scanned.
Help Nctificati...ne heard.
5:50
Connect Network
<
Please place the camera & phone
close to your router for the best
signal.
Device Found!
Connecting the device to the network...
Registering device...
12%
connecting...
Please remove all film from the lens.Tap
Next to show a QR code, and let your
device scan the code. Keep your phone 5-8
inches from the lens.
5:50
Operation instructions
<
Next
— — — — — — — — — — — — — — — —
15~25cm
5~5 in