Energy-saving The LCD backlight will be dark during the specific period.
Background calibration
Calibrate the sensor while the reading deviates from the actual gas
concentration.
Change calibration and ABC setting
parameter.
Automatic background calibration
Operation Instructions
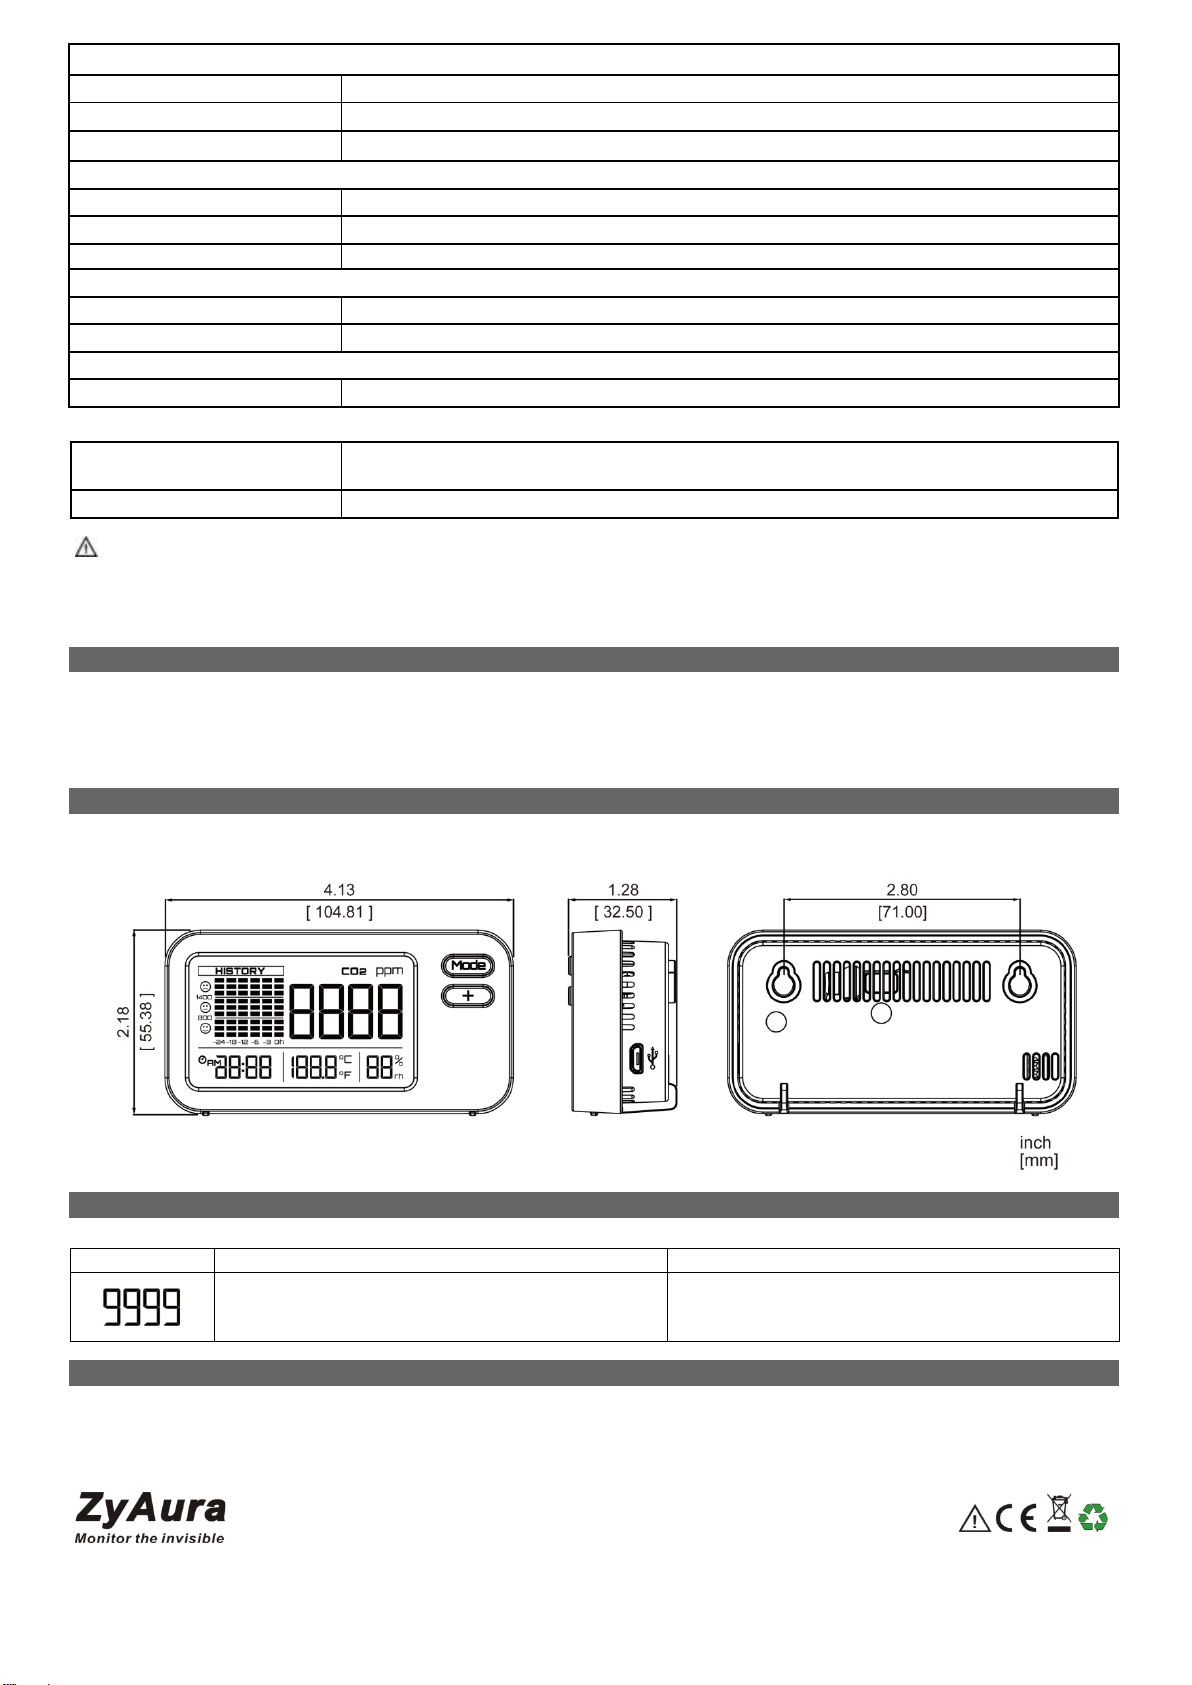
1. Power on and Measure:
Connect the USB cable to a PC or a USB to wall adapter to power on the device. After power on, the bars on the LCD are decreasing by
degrees during warm-up. The device will start to measure CO2 concentration, ambient temperature and relative humidity after warm-up.
2. Backlight Display Mode :
"Auto" auto backlight is the default mode. Press Mode key (○
2) to display the current backlight mode and then press Mode key (○
2) to select
setting modes in sequence: Auto àAL àon àOFF. After selecting the mode, it is the confirmation mode. You do not need to press any
key to confirm it.
2.1 Auto: The backlight color varies with the CO2concentration. <800ppm is green; 800ppm~1,400ppm is yellow; >1400ppm is red.
2.2 AL: The alarm level is exceeded and the backlight is displayed in red. The default alarm level is 1,400ppm. Please follow the alarm level
setting method to adjust the alarm level.
2.3 on: The LCD backlight is always on. It is only LCD backlight, without any prompt function. The backlight color depends on the color you
select. (please see the setting of COL).
2.4 OFF: Turn off all backlight functions.
3. °C/°F switch: Long press Select key (○
3) to switch °C/°F.
4. Real-time:Set“24 Hour /12 Hour(AM/PM)”, the default is “24 Hour”, please see the section 5.3 to learn how to switch “24 Hour /12
Hour(AM/PM)”.
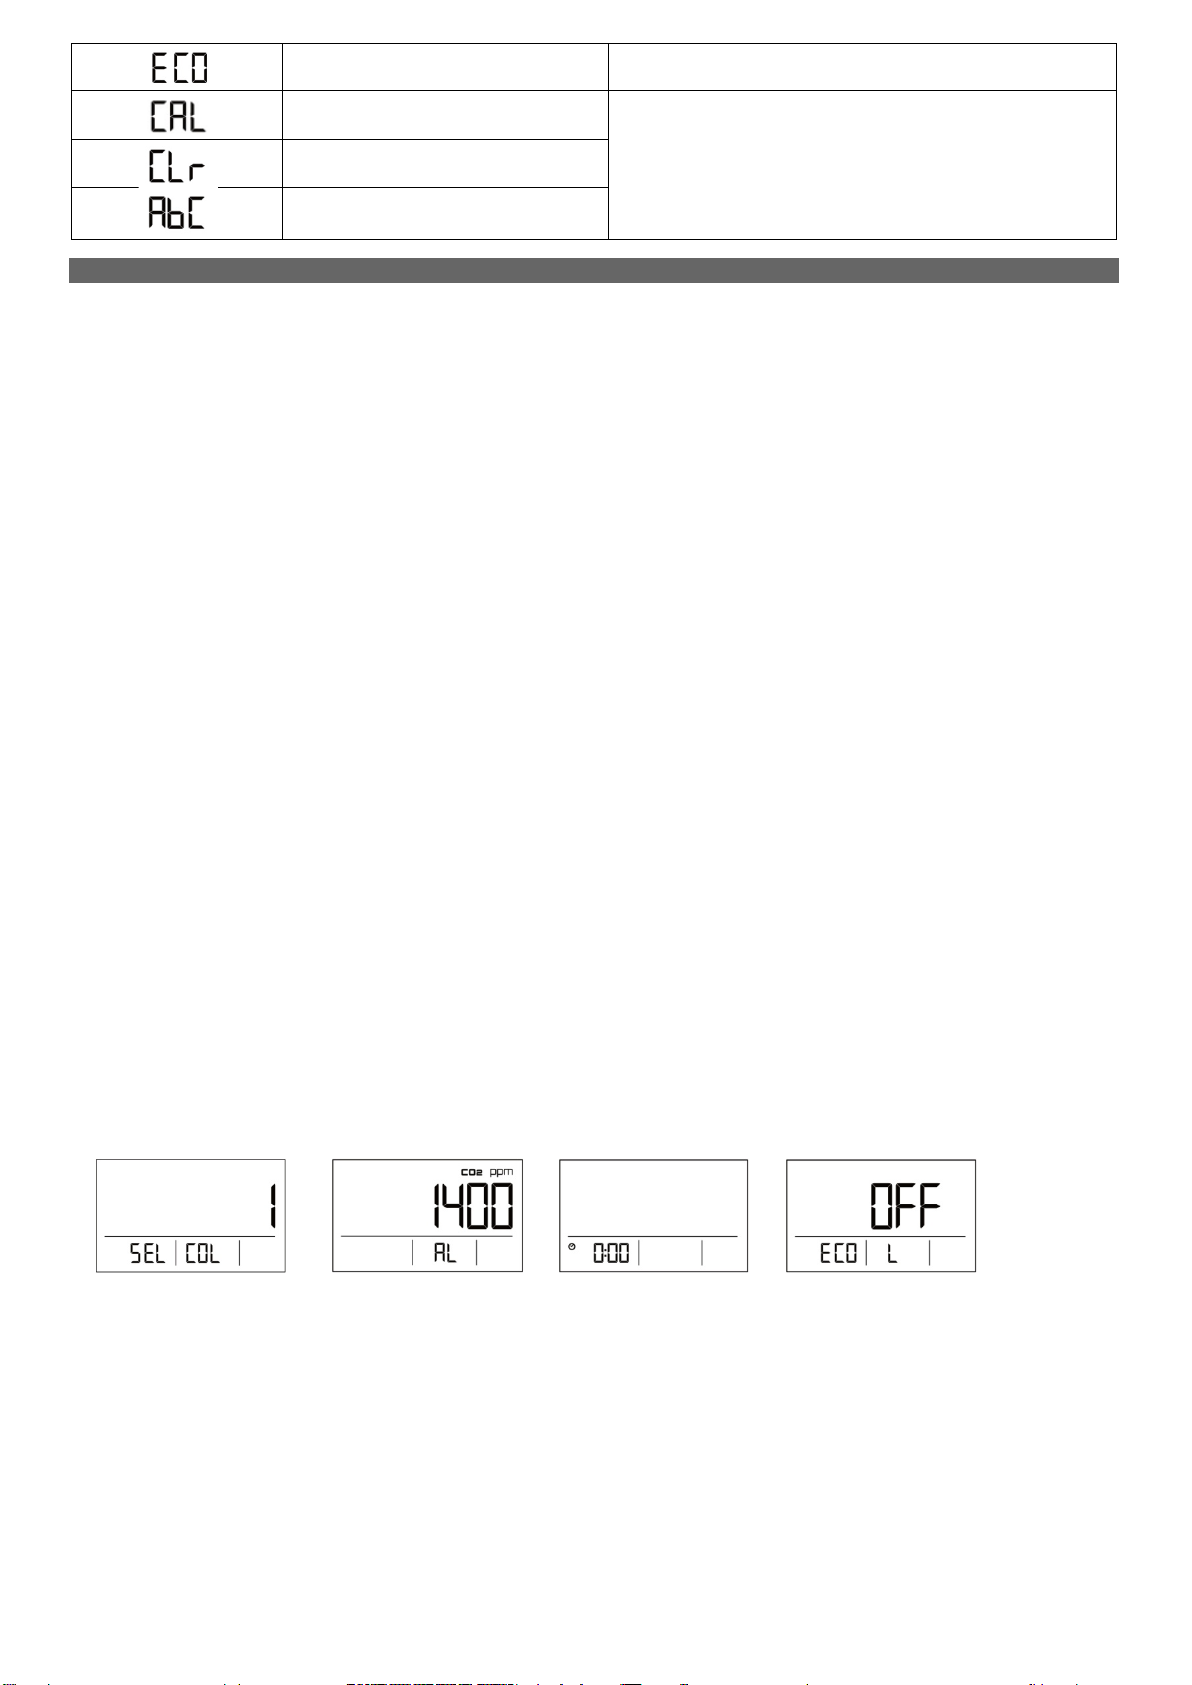
5. Setting:
Long press Mode key (○
2) to enter the settings. And then press Mode key (○
2) to select setting modes in sequence: COL (LCD backlight
color) àAL (alarm level setting) àReal-time àECO (energy-saving mode). Press Select key (○
3) to adjust the parameters.
*Note: During the setting process, the device will return to the main screen after 20 sec of idle time.
5.1 COL: The default LCD backlight color is white. A total of 7 colors are optional. The color order is white àturquoise àblue àpurple à
red àyellow àgreen. (Figure 1)
5.2 AL: The default alarm setting is 1,400ppm. The alarm value can be adjusted from 400ppm to 3,000ppm (the interval is 100ppm). (Figure 2)
5.3 Real-time:
5.3.1 Set “12 Hour(AM/PM)/24 Hour ” by pressing Select key (○
3).
5.3.2 The default real-time setting is 0:00(24 Hour Clock). The setting sequence is hour àminute. After setting "hour", press Mode key
(○
2) to set "minute" (the interval is 1 hour / 1 minute)(Figure 3). Press Select key (○
3) to adjust the parameters. Press and hold
Select key (○
3) to quickly set the parameters.
*Note: Complete the settings(hour-minute) to save the real-time values.
5.4 ECO: The default ECO setting is “OFF’. Press Select key (○
3) to select “on”.After ECO mode is turned on, the LCD backlight will be
dark during the period from 22:00 pm to 6:00am for saving power. (Figure 4)
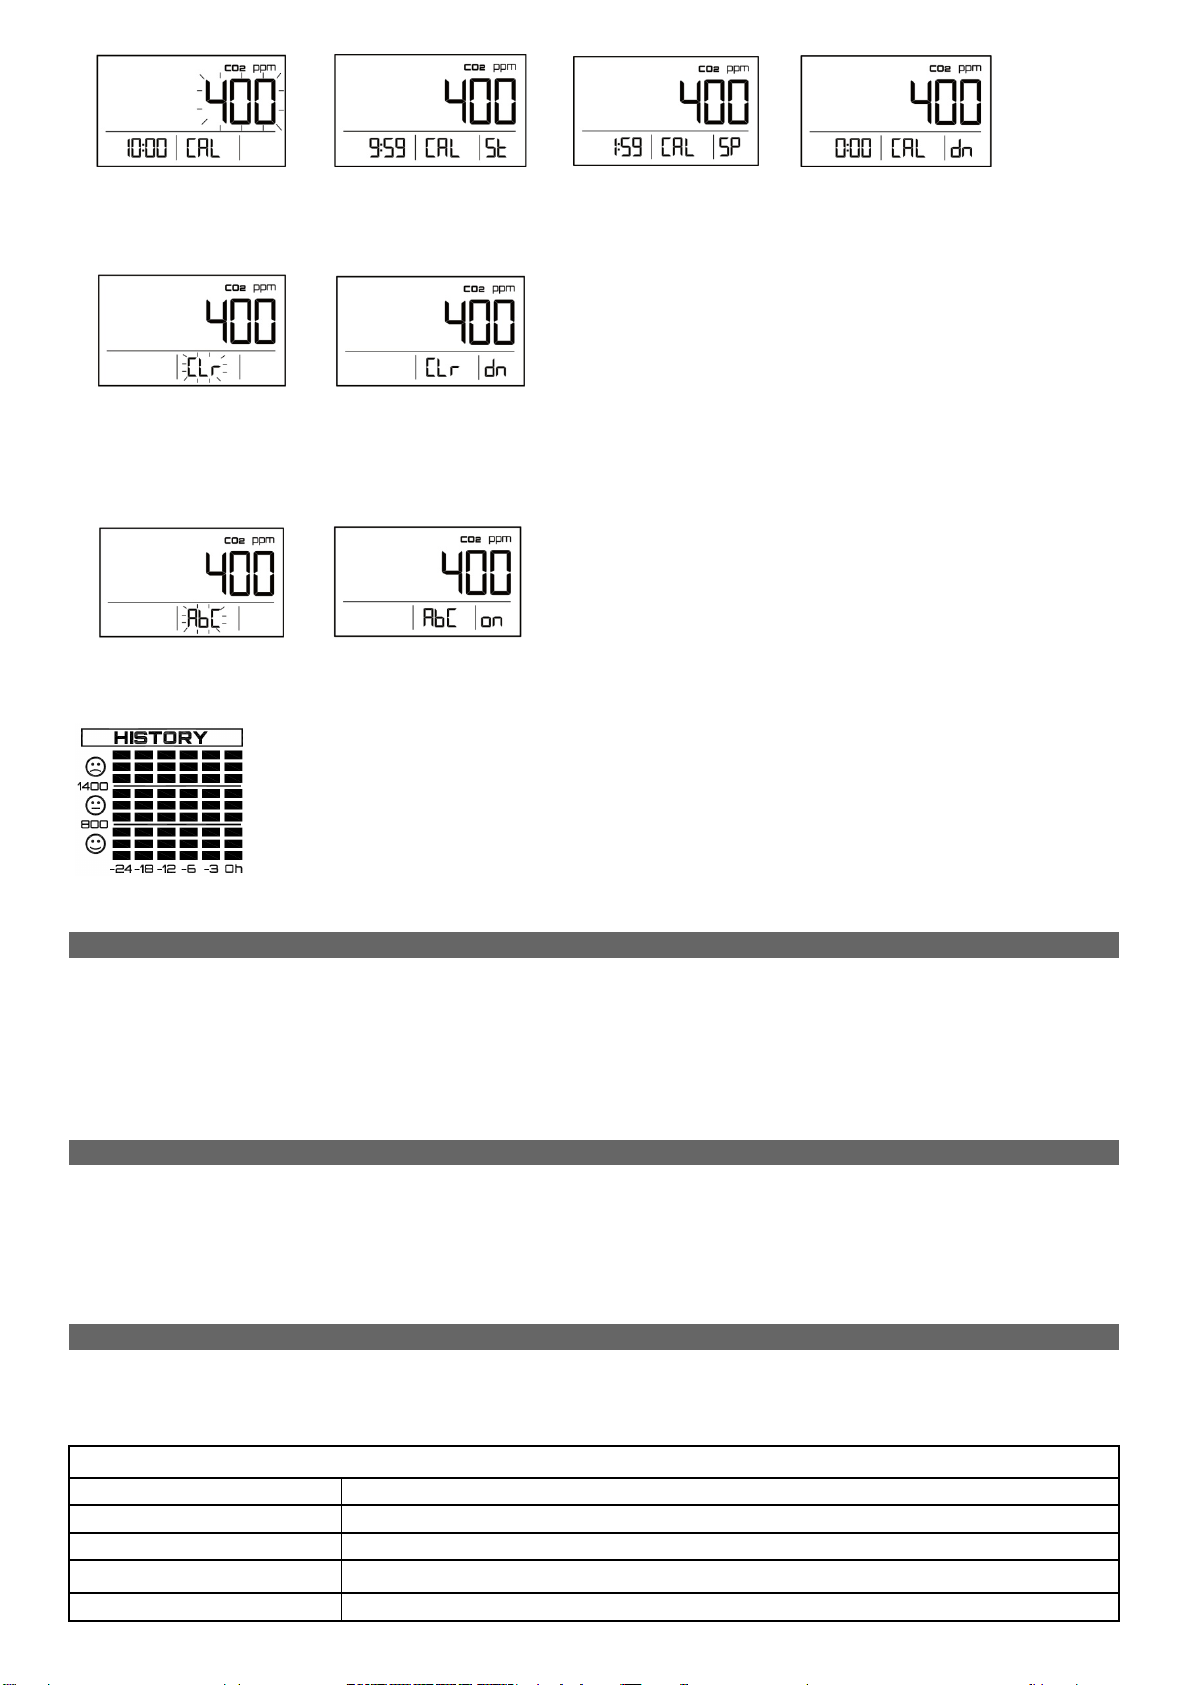
6. Calibration: Press and hold Mode key (○
2) and then press Select key (○
3) together. When the CO2calibration value flashes on the LCD, it
means that the calibration mode has been entered. (Figure 5) Press Select key (○
3) to adjust the CO2calibration range:
350ppm~600ppm, the interval is 10ppm. Press Mode key (○
2) to confirm the value, then "CAL" icon will flash on the LCD.
Press Select key (○
3) to select setting modes in sequence: CAL (background calibration) àCLr (clear the background
calibration value) àAbC (automatic background calibration).
*Note: During the operation, if the device is left idle for 20 sec or the user presses and holds Mode key (
2), the device will
return to the main screen.
6.1 CAL: After confirming the calibration value, the background calibration is the first mode. When "CAL" icon flashes on the LCD, press
Mode key (○
2) to perform the background calibration and start to count down 10 minutes (Figure 6). If you want to interrupt the
process, press Mode key (○
2) to stop it. (Figure 7) When the timer reaches zero, the calibration is completed and “dn” icon is
displayed on the LCD. (Figure 8)