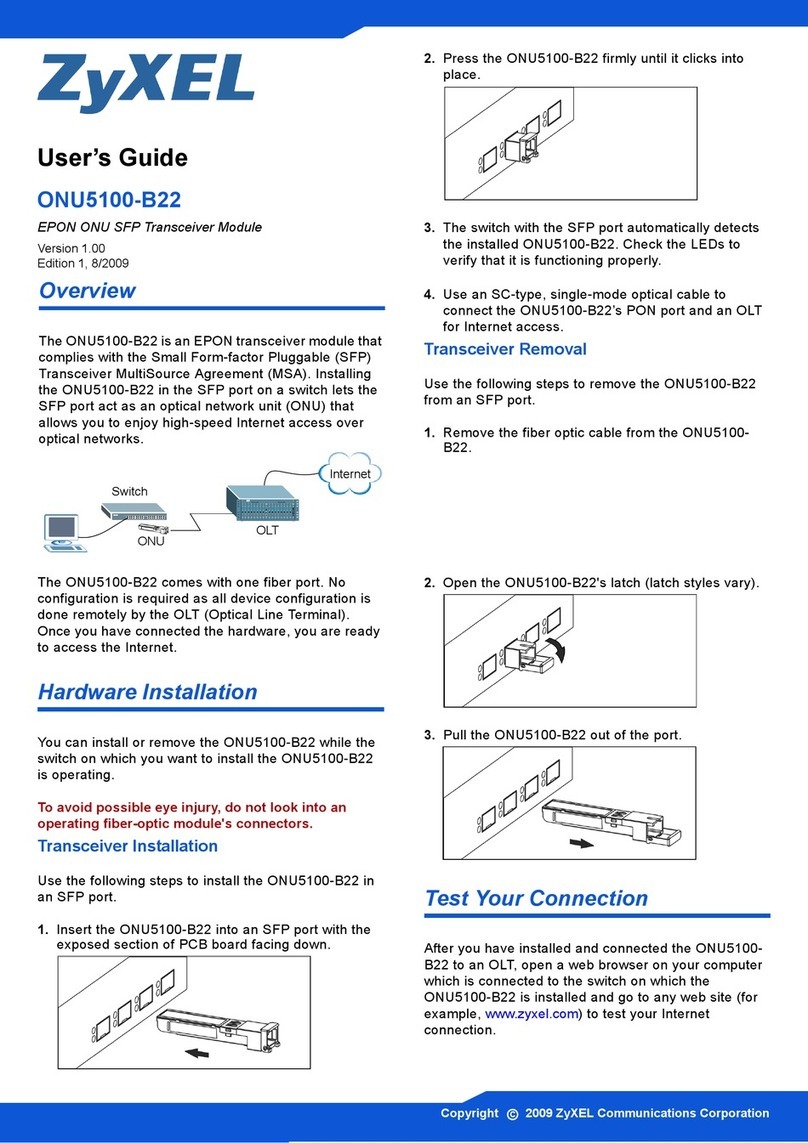
ZyXEL Communications NetAtlas User manual

Copyright © 2009. All rights reserved.
NetAtlas PON, EPON
Manager
for OLT-1308S-22
Quick Start Guide
Version 1.10
6/2009
Edition 1

NetAtlas EPON Manager Quick Start Guide
2
Overview
NetAtlas EPON Manager is a Unix-based Element Management System (EMS) that
allows you to configure and monitor EPON devices from a centralized location.
The following figure displays an EMS application:
• A - The EMS is the computer with the management software installed.
• B- These are the EPON devices being managed by the EMS.
The EMS consists of the EMS Server and the EMS Remote Client. You must install
the EMS Server, which provides everything you need to use the EMS. The EMS
Remote Client is optional. You can install this on other computers if you want to use
the EMS on them as well.
The relationship between the EMS Server and the EMS Remote Client is illustrated
below.
The EMS Server runs on server B, and it uses HP OpenView NNM to communicate
with the EPON devices (C). The EMS Remote Client, if installed, runs on
computer(s) Aand interacts with the EMS Server.
A
B
Internet
ABC

NetAtlas EPON Manager Quick Start Guide
3
This Quick Start Guide includes:
"See the User’s Guide on the included CD for information on all features of
the EMS.
EMS Server System Requirements
Here are the sysem requirements for the EMS server.
EMS Server System Requirements
Part I Installation Procedure - Follow these steps to install the EMS Server for the first time.
1Install HP OpenView Network Node Manager (NNM)
2Install MySQL Server
3Install the EMS Server
4Integrate the EMS with HP Open View NNM
5Start the EMS
6Log in to the EMS
Part II Additional Procedures
Manually Add Network Nodes - If you choose not to use auto discovery or need to add
EPON devices to be managed by EMS manually.
Edit Icon Status Display - If you want the EPON device icons to display correctly in HP
OpenView.
Register the EMS - If you want to activate the standard service with the license key.
Install the EMS Remote Client - If you want to install the EMS Remote Client on other
computers and manage devices via the EMS server.
Uninstall the EMS - If you need to upgrade the EMS from a previous version, uninstall the
EMS version on your computer and then start with step 3 of the Installation Procedure.
Hardware Sun Ultra SPARC Workstation
Hard Disk 60 GB or more
RAM 1 GB or more
Display 1024*768 Graphical Card
Network 10/100/1000 Ethernet Adapter

NetAtlas EPON Manager Quick Start Guide
4
Devices Supported
Part I Installation Procedure
1 Install HP OpenView Network Node Manager (NNM)
See the documentation that comes with the HP OpenView NNM distribution for
detailed information.
1Log in as root to the system where you will install HP OpenView NNM.
2Insert Disk 1 of HP OpenView NNM CD into the CD-ROM drive.
3Mount the CD-ROM drive.
4Enter ./install to start the installation program.
5A welcome message displays. Follow the directions displayed during the installation
process. You will need Disk 2 of HP OpenView NNM to complete the installation. Refer
to documentation provided with the HP OpenView software for more details.
Software Solaris 2.9
X11R6/Motif 2.2
Database: MySQL 4.1.8
HP OpenView Network Node Manager 7.5
Web Server: Apache 2.2.4 (for OSS Interface) (optional)
OLT-1308S-22 3.80(BHJ.0)C0
$ cd /cdrom/cdrom0
====================================================================
Welcome to the installation for:
HP OpenView Network Node Manager
NNM Release B.07.50 for SunOS
July 13 2005
(c) Copyright 1990-2004 Hewlett-Packard Development Company, LP
====================================================================
Do you want Network Node Manager Dynamic Views browser to be started
after the installation? (y|n): y

NetAtlas EPON Manager Quick Start Guide
5
6After the installation is complete, the following message displays and the system starts
the HP OpenView NNM daemons.
7Remove the HP OpenView NNM CD from the CD-ROM drive when you are finished.
2 Install MySQL Server
See the documentation that comes with the MySQL distribution for detailed
information. Follow these steps to install MySQL
1Log in as root.
2Type groupadd mysql to create a new mysql group.
3Type useradd –g mysql mysql to create a new mysql user in the mysql
group.
*******************************************************************
**
* Congratulations! Your installation was successful. *
*******************************************************************
**
Starting Network Node Manager daemons:
Name PID State Last Message(s)
OVsPMD 17913 RUNNING -
pmd 17915 RUNNING Initialization complete.
ovdbcheck 17916 RUNNING Connected to embedded database.
ovrequestd 17917 RUNNING Initialization complete.
ovwdb 17996 RUNNING Initialization complete.
ovsessionmgr 17995 RUNNING Initialization complete.
ovtrapd 17997 RUNNING Initialization complete.
ovactiond 17998 RUNNING Initialization complete.
ovalarmsrv 17999 RUNNING Loading alarms from database
ovtopmd 18003 RUNNING Connected to native database
"openview".
ovuispmd 18010 RUNNING Initialized. 0 ovw clients
registered.
ovalarmsrv 17999 RUNNING Initialization complete.
snmpCollect 18012 RUNNING Initialization complete.
netmon 18011 RUNNING Loading databases...
httpd - unknown (Does not communicate with
ovspmd.)
ovspmd: Attempt to start HP OpenView services is complete.
Would you like to view the Release Notes? (y|n): n
You can view the Release Notes at URL:
file:/opt/OV/www/htdocs/C/ReleaseNotes/README_NNMGR.html
Network Node Manager Installation complete.

NetAtlas EPON Manager Quick Start Guide
6
4Copy the MySQL installation file (for example, mysql-standard-4.1.8-sun-
solaris2.9-sparc.tar.gz) to the /usr/local directory.
5Enter the command to uncompress the MySQL installation file.
6Create a symbolic link mysql to the installation directory (in this example, the
mysql-standard-4.1.8-sun-solaris2.9-sparc directory).
7In the installation directory, enter scripts/mysql_install_db to run the
MySQL installation program.
8Set the owner and the group membership of the MySQL directory and its files by
typing:
$ gunzip mysql-standard-4.1.8-sun-solaris2.9-sparc.tar.gz
$ tar xvf mysql-standard-4.1.8-sun-solaris2.9-sparc.tar
$ ln -s mysql-standard-4.1.8-sun-solaris2.9-sparc mysql
$ cd mysql
$ scripts/mysql_install_db
Installing all prepared tables
040224 16:12:53 ./bin/mysqld: Shutdown Complete
To start mysqld at boot time you have to copy support-files/
mysql.server
to the right place for your system
PLEASE REMEMBER TO SET A PASSWORD FOR THE MySQL root USER !
This is done with:
./bin/mysqladmin -u root -p password 'new-password'
./bin/mysqladmin -u root -h blade150 -p password 'new-password'
See the manual for more instructions.
NOTE: If you are upgrading from a MySQL <= 3.22.10 you should run
the ./bin/mysql_fix_privilege_tables. Otherwise you will not be
able to use the new GRANT command!
You can start the MySQL daemon with:
cd . ; ./bin/safe_mysqld &
You can test the MySQL daemon with the benchmarks in the 'sql-bench'
directory:
cd sql-bench ; run-all-tests
Please report any problems with the ./bin/mysqlbug script!
The latest information about MySQL is available on the web at
http://www.mysql.com
Support MySQL by buying support/licenses at https://order.mysql.com
$ chown –R root /usr/local/mysql
$ chown –R mysql /usr/local/mysql/data
$ chgrp –R mysql /usr/local/mysql

NetAtlas EPON Manager Quick Start Guide
7
9Enter bin/safe_mysqld --user=mysql & to run the MySQL server as a
background process.
10Set the password for the root user. Specify the password in single quotes. In this
example, the new password is set to mysql.
11When the MySQL administration program prompts you to enter the password. Press
[ENTER].
3 Install the EMS Server
Follow the steps below to install the EMS Server.
1Log in as “root”.
2Copy the EMS Server file from the CD-ROM to a folder on your hard drive (for
example, /tmp/epon).
3In the directory where you copy the EMS Server file, extract the package.
4To install the EMS, run the installation script in the directory where you extract the files.
$ ./bin/safe_mysqld --user=mysql &
Starting mysqld daemon with databases from /usr/local/mysql-4.1.8-
sun-solaris2.9-sparc/data
$ /usr/local/mysql/bin/mysqladmin -u root -p password 'mysql'
$ gunzip NetAtlasPON_Server_1.0.300.90.00.tar.gz
$ tar xvf NetAtlasPON_Server_1.0.300.90.00.tar
$ ./install

NetAtlas EPON Manager Quick Start Guide
8
5The EMS begins the installation. Follow the on-screen instructions.
Installing NetAtlas EPON Manager...
OVW and EMS windows/daemons will be stopped before installation.
Continue it? [yes] >>
Where is the OpenView directory in FULL path? [default: /opt/OV] >>
Would you like to install OSS interface (Note: You need to have
Apache2 installed already)? [no] >> yes
Where is the Apache2 directory in FULL path? [default: /usr/local/
apache2] >>
Start installation...
Copying files to /opt/GEPONEMS/bin...
Copying files to /usr/local/apache2/cgi-bin...
Copying files to /usr/local/lib...
Copying files to /opt/GEPONEMS/conf...
Copying files to /etc/opt/OV/share/conf...
Copying files to /opt/GEPONEMS/mib...
Copying LOCALE files...
Load mib files...
Setup the EMS database...
Please input the home directory of MySQL database system [default: /
usr/local/mysql ] >>
Please input the user name who can access the MySQL database system
[default: root ] >>
Please input the user password [default: mysql ] >>
The EMS database exists! Would you like to remove it? [default: no ]
>>
Configure /etc/services...
Add fields to ovw...
Please input the default SNMP get community [default: public ] >>
Please input the default SNMP set community [default: public ] >>
Please input the default device login name [default: admin ] >>
Please input the default device login password [default: 1234 ] >>
NetAtlas EPON Manager is installed successfully!
Would you like to start the EMS daemons now? [yes] >>
Name PID State
alarmserver 14334 RUNNING
devicepoller 14336 RUNNING

NetAtlas EPON Manager Quick Start Guide
9
"After EMS installation is complete please re-login to your workstation so
the NetAtlas EPON menu can be added to the front panel on the desktop.
NetAtlas EPON Desktop Menu
You can use this menu to do the following actions:
NetAtlas EPON Manager
Click this to start the NetAtlas EPON Manager. This will launch the EMS.
HP OpenView Windows
Click this to launch HP OpenView Windows.
NetAtlas EPON Daemon Status
Click this to display the current status of the NetAtlas EPON Daemons.
Start NetAtlas EPON Daemon
Click this to start the NetAtlas EPON Daemons if they are not running.
Stop NetAtlas EPON Daemon
Click this to stop the NetAtlas EPON Daemons.
4 Integrate the EMS with HP Open View NNM
You only have to complete this procedure the first time you start the EMS using HP
OpenView NNM. You can skip this section if you do not want to use HP OpenView
NNM to open the EMS.

NetAtlas EPON Manager Quick Start Guide
10
"If you added nodes manually in HP OpenView NNM, this information is lost
when you run this procedure. You have to add the nodes manually again.
1Stop the EMS from running.
2Exit all HP OpenView NNM sessions and stop the HP OpenView NNM processes using
ovstop.
3Do a complete backup of those parts of the HP OpenView NNM environment that you
have customized. Refer to HP OpenView documentation for details.
4Remove the entire HP OpenView NNM database, current events and SNMP
configuration cache by entering:
5Enter the following commands to integrate fields created by the EMS Server.
6Enter the following to restart HP OpenView NNM.
7Start the EMS services (alarm server, device poller and data collection).
"The alarm server, device poller and data collection server bind to UDP port
numbers 9041, 9042 and 9043 respectively. These programs are
registered in
/etc/services during installation.
$ /opt/GEPONEMS/bin/emsstop
$ /opt/OV/bin/ovstop -c
$ rm -rf /var/opt/OV/share/databases/openview
$ rm -rf /var/opt/OV/share/databases/eventdb
$ /opt/OV/bin/xnmsnmpconf -clearCache
$ /opt/OV/bin/ovstart ovwdb
$ /opt/OV/bin/ovw -fields
$ /opt/OV/bin/ovstart -c
$ /opt/GEPONEMS/bin/emsstart
Name PID State
alarmserver 9125 RUNNING
devicepoller 9127 RUNNING

NetAtlas EPON Manager Quick Start Guide
11
5 Start the EMS
There are three ways to start the EMS. The easiest way is to re-login into your
workstation after installation and use the NetAtlas EPON Menu on the desktop. You
can also launch the EMS via the following command:
Go to Log in to the EMS section on page 13.
Alternatively, you can launch it via HP OpenView NNM:
1Enter /opt/OV/bin/ovw to start HP OpenView NNM. In the screen that displays
double-click on the Internet icon.
$ /opt/GEPONEMS/bin/emsmain

NetAtlas EPON Manager Quick Start Guide
12
2A map of your network displays. Double-click a network icon to display the network
segment map.
3The network segment map displays. Double-click the icon for your EPON device.

NetAtlas EPON Manager Quick Start Guide
13
4Double-click the IP interface icon in the device map to display the EMS login screen.
Go to Log in to the EMS section on page 13.
6 Log in to the EMS
When the EMS login screen displays, enter the username (the default is “admin”)
and password (“1234” is the default) and click OK.
"You must be logged in as a system administrator in order to configure all
EMS menus.

NetAtlas EPON Manager Quick Start Guide
14
After you log in successfully, a warning screen displays. Click Register... to activate
the standard service with a license key. Otherwise, click Evaluate to use a trial
service. See Register the EMS for details.
The main screen then displays as shown next. Double-click on the NetAtlas EPON
Manager icon (A) to display the main device manager screen (B).
A
B

NetAtlas EPON Manager Quick Start Guide
15
Part II Additional Procedures
Manually Add Network Nodes
Use this section, if you did not choose to run auto discovery during HP OpenView
NNM installation or if you want to add additional EPON devices to be managed by
the EMS.
1Double-click the Internet icon and click Edit > Add Object….

NetAtlas EPON Manager Quick Start Guide
16
2In the Add Object Palette screen that displays, click the Network icon (A) and the IP
Network icon (B). Click the middle button on the mouse to drag the selected icon to
the Internet screen.
3An Add Object screen displays.
A) Enter a descriptive name in the Label field (for example, your subnet IP address).
B) Select IP Map in the Object Attributes field and click Set Object Attributes….
4An Add Object – Set Attributes screen displays.
A
B
A
B

NetAtlas EPON Manager Quick Start Guide
17
A) Specify the Network Name and Network Address fields (HP OpenView automatically
calculates the subnet mask).
B) Click OK.
5A new network icon displays in the Internet screen. Double-click on the network icon
to access the network segment map.
A
B

NetAtlas EPON Manager Quick Start Guide
18
6To add a device object icon, click Edit, Add Object…. Select the ZyXEL Device (A)
and the zyxel icon (B) you want to add. Click the middle button on the mouse to drag
the selected icon to the network segment screen.
7An Add Object screen displays:
A) Enter a descriptive name in the Label field.
B) Select General Attributes in the Object Attributes field and click Set Object
Attributes….
8An Add Object – Set Attributes screen displays as shown.
A
B

NetAtlas EPON Manager Quick Start Guide
19
A) Enter the IP address of your EPON device in the Preferred SNMP Address field.
B) Click OK.
9In the Add Objects screen (see step 7), select IP Map in the Object Attributes field
and click Set Object Attributes….
10An Add Object – Set Attributes screen displays.
A) Specify the Hostname and IP Address fields (HP OpenView NNM automatically
calculates the subnet mask).
B) Click OK.
A
B
A
B

NetAtlas EPON Manager Quick Start Guide
20
11A new icon displays in the network segment map. Double-click on the device icon (A)
to display the screen which shows all of the device’s network interfaces. Double-click
on the IP interface icon (B) to display the EMS login screen (C).
Edit Icon Status Display
Perform these steps to ensure that EPON device icons indicate their status using the
same colors as other HP OpenView network devices:
1Backup the /etc/opt/OV/share/lrf/netmon.lrf file.
2Modify the /etc/opt/OV/share/lfr/netmon.lrf file to add “-k connectorL2Ports=legacy”.
3The following is an example of the contents:
netmon:netmon:
OVs_YES_START:ovtopmd,pmd,ovwdb:-P -k segRedux=true -k
migrateHsrpVirtua
lIP=true -k connectorL2Ports=legacy:OVs_WELL_BEHAVED:15:PAUSE
B
C
A
Other manuals for NetAtlas
1
Other ZyXEL Communications Network Accessories manuals

ZyXEL Communications
ZyXEL Communications SHD1110 User manual

ZyXEL Communications
ZyXEL Communications ONU5100-B22 User manual

ZyXEL Communications
ZyXEL Communications NetAtlas User manual

ZyXEL Communications
ZyXEL Communications NMA1115 User manual

ZyXEL Communications
ZyXEL Communications ENC User manual
Popular Network Accessories manuals by other brands

Rutenbeck
Rutenbeck Fibre installation instructions

SKUTCH
SKUTCH BA-1000 Operation manual

Paradyne
Paradyne Hotwire 8620 reference guide

Dell
Dell OptiPlex 5090 Micro Form Factor Cable Cover install guide

Nortel
Nortel Passport 8691SF Important information

Paradyne
Paradyne COMSPHERE 6800 Series Command reference manual