3D AEROWORKS FUN JET X-88 Guide

ASSEMBLY MANUAL
AND USER GUIDE
X-88
FUN JET
By 3D AEROWORKS

OVERVIEW:
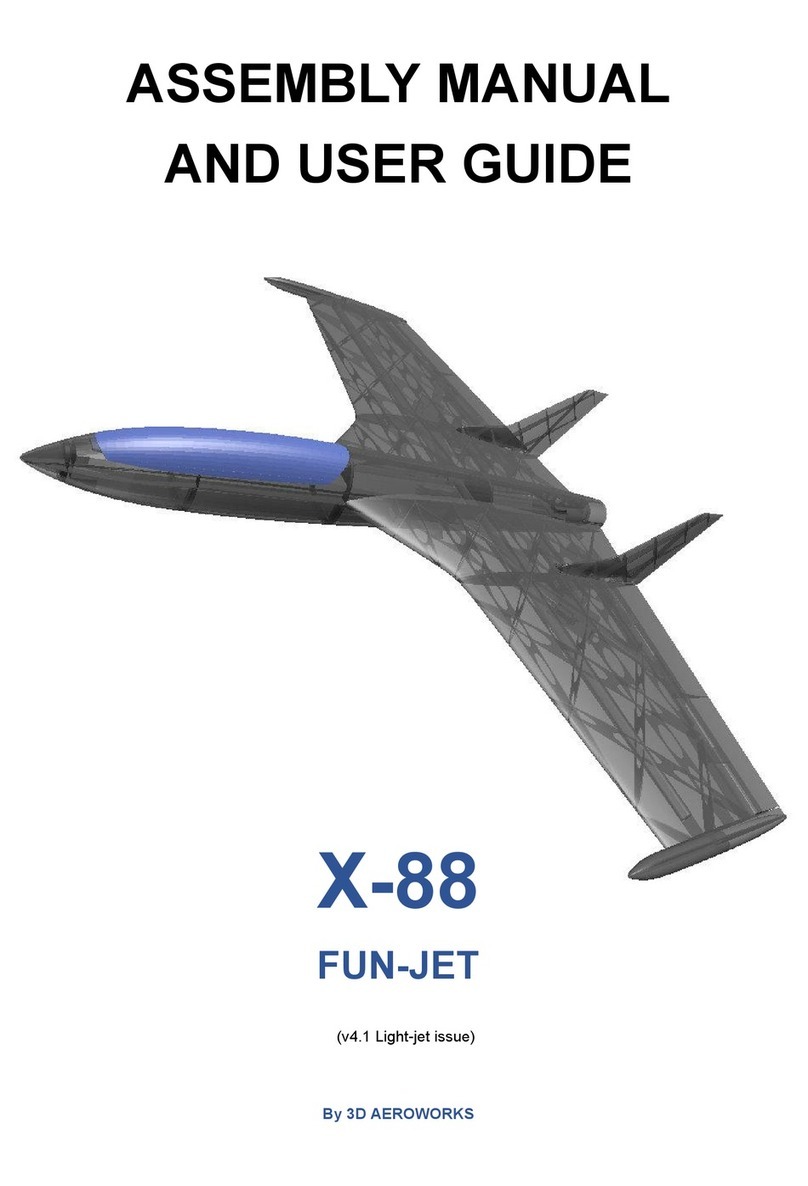
This custom design of a high speed futuristic fighter is designed for quick and easy
construction printed in PLA. For best results the canopy should be printed with clear PLA and
the motor mount and propeller assembly in regular PLA or PETG. Designed to suit the 2826
2200kv outrunner on a 5x5 propeller. Utilising only elevons, this model performs high speed
and aerobatic flight extremely well. Links to components used can be found on the last page
of the user guide.
This model has taken many hours of hard work and testing in order to provide a nice flying
aircraft. Please do not share it. Please show your appreciation by directing interested parties
to the link below.
https://cults3d.com/en/3d-model/various/x-85-funjet
GENERAL SPECIFICATIONS
WINGSPAN: 800mm
PRINT TIME: 66 hrs
PRINT COST: $10 USD
PRINT WEIGHT: 595g
FLYING WEIGHT: 930g
ELECTRICS
MOTOR: 2826 2200KV or (2836 2500kv high power)
ESC: 30amp (min) recommend 40amp
SERVOS: 9g MICRO
BATTERY: 2200mah 3s (or similar)
INCLUDED:
STL FILES OF ALL COMPONENTS (scale to 1000% if not using S3D)
FACTORY FILES FOR (S3D) SIMPLIFY 3D FOR PRINTERS: 200x200200
300x300x400
REQUIRED TOOLS:
KNIFE
LIGHTER
SANDPAPER (MEDIUM GRIT 320 recommended)
PLIERS
CA GLUE
SCREW DRIVERS
FILE OR RASP
REQUIRED COMPONENTS:
X1 2826 2200KV MOTOR (or similar)
X1 30AMP ESC
X1 2200MAH 3S LIPO OR SIMILAR
X2 9G SERVO
3mm BAMBOO FOOD SKEWERS
X2 10mm X 10mm X 2mm MAGNET (ROUND)
X4 16mm x 29mm HINGES
X1 10mm x 800mm or 500mm carbon tube or pine rod (OPTIONAL)
M2 x10mm screws
1mm piano wire
M2 push rod (110mm min length) < FOR RDS ONLY
VELCRO

ASSEMBLY INSTRUCTIONS
1
All faces which are to be glued to other parts need to be given a light sanding (scuff the
surface) to assist with glue adhesion.
2
Check the fitment of all parts before gluing to make sure a good bond takes place. There
should not be any gaps visible in the joins.
Glue sections of the fuselage together using CA glue. (see images)

3
Glue the sections vertical stabilisers together.
NOTE: be sure to match up the side correctly. (example of left vertical stabiliser below)

4
Cut two 35mm sections and one 25mm section of food skewer. Insert the 35mm sections in
the front two holes and the 25mm section into the aft holes of the vertical stabiliser.
Fit the vertical stabiliser to the Inner section of the wing using the skewers to align the parts.
The completion of this section should have the front two skewers protruding from the vertical
stabiliser which will assist the fitment of the outer wing. The aft skewer should be slightly
recessed so as not to interfere with the aileron travel.

5
Fit and glue the outer section of the wing to the already assembled inner section and vertical
stabiliser. The carbon or pine main spar should be test fit before gluing.
6
Glue the aileron sections together. Insert the hinges into the ailerons and test fit the aileron to
the wing.
NOTE: The hinge length may need to be trimmed slightly if it does not seat all the way into
the hinge slot.
7a (RDS option)
- Cut two 110mm lengths of 2mm push rod and bend according to the images below.
TOP VIEW
Left side Right side

SIDE VIEW
ISOMETRIC VIEW
- Fit the torque link to the end of the push rod with the short 90 deg bend.
- Fit the servo connector to the servo. (be sure the connector is centered in the neutral
position when the servo has power.

- Insert the torque link and rod through the aileron end of the torque link tube and
secure it to the servo.
- Install the servo into the wing, the servo gear needs to be on the same side as the
tube for the torque link (see below). Secure with either hot glue or attach the servo
adaptors and screw into place. (the mount plates in the wing for the servo consist of 4
layers and are quite thick. Pre-drilling with a 1.5mm drill bit is advised before mounting
with either m2 screws or the mount screws that come with the servo.)
- Assemble the connector and the torque link using a small screw. NOTE - The torque
link needs to be fitted to the connector so that the screw holds the push rod in the
torque link. See image. (fitting it the other way will allow the rod to fall out of the torque
link)
RDS INSTALLED

CORRECTLY SECURED EXAMPLE
7
Glue the hinges to the aileron first, then the aileron to the wing.
IMPORTANT! Only 2 drops of CA is needed for each slot for the hinges. Too much CA and
the hinge will bind and be unusable.
TIP: After adding the CA, use a tissue to wipe away the excess.
8
Glue the wingtips together and then onto the outer wing section. Be sure to match up the
correct wingtip with each wing.

9
Cut two 20mm sections of skewer and fit to the inner section of the wing. Glue the wing to
the fuselage. The carbon or pine main spar should be test fitted before gluing.
Repeat steps 3-9 for the right wing
10
Glue the sections of the canopy together.
11
Glue the magnets into the canopy and fuselage.
12
Fit the motor to the motor mount and connect to the esc. The motor mount is designed to be
a relatively firm fit. Do not glue it in place, as designed as a pusher it should not fall out
during flight and should be able to be removed for servicing if required.
13
Hot glue or screw the servos to the servo covers and install the aileron servo wires through
the wing into the fuselage.The servo covers can be screwed to the insert of the wing with m2
screws.

14
Install all servos using a small amount of hot glue to secure it in place.
Image of left wing
15
Connect up the control surfaces with 1mm piano wire and check the movements.
(ARROWS INDICATE DIRECTION CONTROL SURFACE DEFLECTION)
CLIMB DESCEND
RIGHT TURN LEFT TURN

BALANCING AND CG
Fit the battery using Velcro as required and balance the aircraft on the CG marking points
located 125mm aft of the leading edge at the wing root.
It is advisable on the first flight for the aircraft to be balanced on the cg markings, then
move forward or aft as desired.
The design of the wing incorporates “up-trim” into the trailing edge, Resulting in the neutral
position of the elevons to be in line with the trailing edge of the wing.
RANGE OF TRAVEL:
NORMAL / MAIDEN FLIGHT:
Elevator +/- 15mm
Aileron +/- 15mm
AEROBATIC:
Elevator +/- 30mm
Aileron +/- 30mm
LAUNCHING:
It was found that the safest and most successful launch technique for this model was the
over-arm style. The aircraft should be launched at approximately 10deg nose up at 50% to
75% power. Too steep and the aircraft will stall, too shallow and it will contact the ground.

PARTS LINKS:
2826 2200KV (medium power option)
https://de.aliexpress.com/item/1005002196959683.html?spm=a2g0o.productlist.0.0.6865546
92gBgqu&algo_pvid=2a35bba8-713a-4d82-be03-7d09757fa32e&algo_expid=2a35bba8-713
a-4d82-be03-7d09757fa32e-0&btsid=2100bdf016211821631778504e2ed8&ws_ab_test=sea
rchweb0_0,searchweb201602_,searchweb201603_
2836 2500kv (high power option)
https://hobbyking.com/en_us/turnigy-aerodrive-sk3-2836-2500kv-brushless-outrunner-motor.
html?___store=en_us
30AMP ESC
https://de.aliexpress.com/item/32905648461.html?spm=a2g0o.productlist.0.0.edb7519evyB8
Nr&algo_pvid=52adfa0e-b4fe-41e1-8092-1d356607a5ba&algo_expid=52adfa0e-b4fe-41e1-8
092-1d356607a5ba-0&btsid=2100bdf016211822080491111e2ed8&ws_ab_test=searchweb0
_0,searchweb201602_,searchweb201603_
2200mah 3s LIPO
https://de.aliexpress.com/item/32833411481.html?spm=a2g0o.productlist.0.0.64ef480aYCzl2
n&algo_pvid=f86fc7a0-0324-4584-9081-c8b4b1a543a2&algo_expid=f86fc7a0-0324-4584-90
81-c8b4b1a543a2-1&btsid=2100bdf016211822705142563e2ed8&ws_ab_test=searchweb0_
0,searchweb201602_,searchweb201603_
9g servo
https://de.aliexpress.com/item/32898059654.html?spm=a2g0o.productlist.0.0.7d394771z9xf
Zq&algo_pvid=26dd1d90-4d3b-4f94-955c-e26a127ba26c&algo_expid=26dd1d90-4d3b-4f94-
955c-e26a127ba26c-3&btsid=2100bdf016211823001362964e2ed8&ws_ab_test=searchweb
0_0,searchweb201602_,searchweb201603_
X2 BAMBOO FOOD SKEWERS (3mm diameter)
HEAT SHRINK TUBE 3mm
https://hobbyking.com/en_us/turnigy-3mm-heat-shrink-tube-black-1mtr-1.html?queryID=c16c
094bb26b18e39fabcb12a93a96cb&objectID=46911&indexName=hbk_live_magento_en_us_
products

X4 10mm X 10mm X 2mm MAGNET (ROUND)
https://www.aliexpress.com/item/1005001362617359.html?spm=a2g0o.productlist.0.0.5da36
07dAATh5j&algo_pvid=b9e32b8a-0d4f-469a-b838-b478442dda50&algo_expid=b9e32b8a-0
d4f-469a-b838-b478442dda50-0&btsid=0bb0623a15991797178681785e1811&ws_ab_test=s
earchweb0_0,searchweb201602_,searchweb201603_
16x29 HINGES
https://de.aliexpress.com/item/32659926010.html?spm=a2g0o.productlist.0.0.5e7f7ef2zIc3q
X&algo_pvid=478c4573-19ad-4939-ba11-475e3dc6139e&algo_expid=478c4573-19ad-4939-
ba11-475e3dc6139e-0&btsid=2100bdf016211823370763498e2ed8&ws_ab_test=searchweb
0_0,searchweb201602_,searchweb201603_
VELCRO – (local hardware store)
10mm x 1000mm carbon tube
https://de.aliexpress.com/item/4000390835692.html?spm=a2g0o.productlist.0.0.63ab4e77k
W2VnK&algo_pvid=3877bd8c-0e1c-46e8-8888-d99e4a90ccd2&algo_expid=3877bd8c-0e1c-
46e8-8888-d99e4a90ccd2-2&btsid=2100bdf016211824187545230e2ed8&ws_ab_test=searc
hweb0_0,searchweb201602_,searchweb201603_
m2 x10mm screws
https://www.ebay.com.au/itm/400PCS-M2-M2-6-Pan-Head-Self-Tapping-Screws-Assorted-Kit
-Stainless-Steel-Black/254399626404?hash=item3b3b663ca4:g:CLEAAOSwQLZdsqkd&frce
ctupt=true
1mm Piano wire
https://de.aliexpress.com/item/32975279180.html?spm=a2g0s.9042311.0.0.2e0f4c4d0HE2d
Z
M2 pushrod (min length 110mm)
https://de.aliexpress.com/item/4000682811650.html?spm=a2g0s.9042311.0.0.27424c4dJCD
kps

Thank you for supporting us! We hope you enjoy many
hours of flying your X-88 fun jet. If you have any
questions regarding the build process or set-up of your
model, please contact us at:
Table of contents
Other 3D AEROWORKS Toy manuals

3D AEROWORKS
3D AEROWORKS Yakovlev Yak-3 Guide

3D AEROWORKS
3D AEROWORKS Pilatus PC-21 Guide

3D AEROWORKS
3D AEROWORKS X-88 Fun-Jet Guide

3D AEROWORKS
3D AEROWORKS Extra 500 Guide

3D AEROWORKS
3D AEROWORKS Focke Wulf FW190-D9 Guide

3D AEROWORKS
3D AEROWORKS Piper Turbo Arrow IV Guide

3D AEROWORKS
3D AEROWORKS PR1 Guide

3D AEROWORKS
3D AEROWORKS PR1 Guide