3D AEROWORKS Piper Turbo Arrow IV Guide

ASSEMBLY MANUAL
AND USER GUIDE
Piper Turbo Arrow IV
PA-28T IV
By 3D AEROWORKS

OVERVIEW:
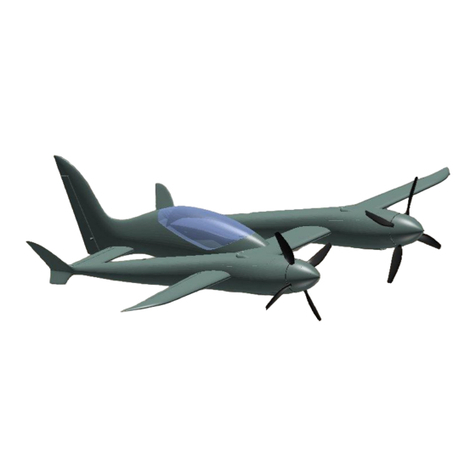
This replica of the famous Piper arrow IV is designed for quick and easy construction and
printed using light weight PLA (LW-PLA). For best results the canopy should be printed with
clear PLA The motor mount and propeller assembly in regular PLA. Designed to suit the
1806 2300kv outrunner on a 2 or 3 blade (5x5) propeller. Utilizing full 4 channel controls;
aileron, elevator, rudder and throttle, this model performs extremely well given its small size
and lightweight. Links to components used can be found on the last page of the user guide.
This model has taken many hours of hard work and testing in order to provide a nice flying
aircraft. Please do not share it. Please show your appreciation by directing interested parties
to the link below.
https://www.rc3dmarket.com/piper-pa-28t-turbo-arrow-iv
GENERAL SPECIFICATIONS
WINGSPAN: 650mm
PRINT TIME: 50 hrs
PRINT WEIGHT: 150g
FLYING WEIGHT: 250g (without landing gear) - 280g (with landing gear)
CENTER OF GRAVITY 40mm aft of L.E at wing root. (Marked with indentation)
ELECTRICS
MOTOR: 1806 2300KV
ESC: 6amp (min) 15amp (recommended)
SERVOS: 3.7g MICRO
BATTERY: 800mah 2s (or similar)
INCLUDED:
STL FILES OF ALL COMPONENTS (scale to 1000% if not using S3D)
G-CODE OF ALL FILES (sized for 200X200X200 printers but works larger printers also)
FACTORY FILES FOR (S3D) SIMPLIFY 3D FOR PRINTERS: 200X200X200
REQUIRED TOOLS:
KNIFE
LIGHTER
SANDPAPER (MEDIUM GRIT)
PLIERS
CA GLUE
SCREW DRIVERS
FILE OR RASP
DRILL 1mm, 2mm, 3mm bits
REQUIRED COMPONENTS:
X1 1806 2300KV MOTOR (or similar)
X1 6AMP or 15AMP ESC
X1 800MAH 2S LIPO OR SIMILAR
X4 3.7G MICRO SERVO
X1 5x5 PROPELLER
BAMBOO SKEWERS 3MM
HEAT SHRINK TUBE 3mm
X2 10mm X 10mm X 2mm MAGNET (ROUND)
X10 MICRO HINGES (OPTIONAL)
VELCRO
X2 x 200mm CARBON STRIP 3mm x 0.6mm (RECOMMENDED)
M2 x10mm SCREWS
1mm PIANO WIRE
M2 PUSH ROD (200mm MINIMUM LENGTH) (ONLY REQUIRED FOR FIXED GEAR OPTION)
M2 WHEEL STOP COLLAR
X1 3mm Square carbon tube (100mm length)

ASSEMBLY INSTRUCTIONS
1
After all parts have been printed, some may require to be cleaned as LW-PLA is prone to
stringing. Do this by gently sanding back the rough sections with a file, sandpaper or blade
until the surface is smooth.
2
All faces which are to be glued to other parts need to be given a light sanding (scuff the
surface) to assist with glue adhesion.

3
Cut 15mm sections of skewer and place into alignment holes in the fuselage sections.
NOTE - It may be required to open up the holes a small amount if the fit is too tight. Do this
by using a 3mm drill bit. Gently spin it in reverse as you insert it into the hole. This will ensure
the bit does not tear the print.
Test fit the sections of the fuse before gluing to ensure a clean fit.
4
Glue all sections of the fuse together except fuse 1 and 4. Fuse 1 will be glued on last in
order to allow for cg balancing and Fuse 4 will be glued fitted after installing the elevator
drive gear.
5
Once glued, with a sharp knife, remove the false floor of the battery hatch. (refer section
marked in red) NOTE: The removed sections of LW-PLA that is the false floor will be used
as hinge pieces later. Do not throw away.

6
From part “fuse 3” remove the inner section of the lead tunnel with a knife or heated metal
rod to allow the servo lead for the aileron to pass through. (refer section marked in red)
7
From fuse 4, remove the section marked in red for the elevator pushrod connecting the
bellcrank to the elevator control arm.

8INSTALLING THE ELEVATOR DRIVE
-Cut a 15mm section of 3mm bamboo skewer and test fit it in the bellcrank seat located
inside fuse 4. Trim as required to obtain a good fit. Once happy with the fit, cut the same
length of 3mm carbon.
-Run a 3mm drill bit through the pivot point of the bellcrank to ensure the carbon rod will
rotate freely. NOTE- there should be no play in the bellcrank, any play will lead to slop in the
elevator.
-Cut a section of 1mm push rod and bend according to the diagram below. A 100mm length
between the 90 bends is required.
- Fit the 100mm length to the bellcrank as indicated below.
- connect another length of 1mm pushrod to the other arm of the bellcrank, this end will
connect to the servo arm and need only be long enough to reach the servo. Its final length
can be adjusted later in the build.

- Fit the elevator bellcrank to fuse 4 with a small amount of hot glue as indicated below.
9
Glue fuse 4 to the remaining fuse sections.
10
Glue the “Vertical stabilizer lower” section to the fuse using the 3mm skewer as a guide. You
may need to remove some material from the top of this section where the push rod is
required to pass through.
11
Remove the highlighted section of the “Vertical stabilizer upper front” in order for the elevator
push rod to pass through.

12
Glue the “elevator races” to the “Vertical stabilizer upper front” section. Be sure that the back
edge of the race is square with the “Vertical stabilizer upper front” section.
13
Test fit the 3mm carbon square tube in the elevator control arm. Make sure the fitment is
tight. Once happy with the fitment remove the carbon tube.
14
Connect the elevator control arm to the upper end of the elevator push rod and insert it into
the “Vertical stabilizer upper front” section.
15
Test fit the “Vertical stabilizer upper front” section onto the “Vertical stabilizer lower section”
and make sure the elevator push rod and assembly has unobstructed travel. Once confirmed
the “Vertical stabilizer upper front” can be glued to the “Vertical stabilizer lower”.

16
Cut a 100mm length of 3mm square carbon tube and test fit it to the tail section through the
elevator control arm.
Next feed the small “bearing liners” onto the carbon tube and press them into each race. The
bearing liners and races should have a neat fitment with as little play as possible to reduce
slop in the elevator.
17
Glue the “Vertical stabilizer upper rear” section to the “Vertical stabilizer upper front” section.
18
Glue the elevator inner sections to the elevator outer sections. Then glue the elevator halves
together. NOTE - Only glue the back of the elevators together as this will make adjustment
possible later if required.

Note the correct neutral position of the elevator control arm relative to the elevator!
19
Glue the sections of the wings together.
20
Glue the wings to the fuselage NOTE – if using 3mm x 0.6mm carbon strip, now is the time
to install it. Simply slide the carbon strip into the slot and cut it so it does not protrude out of
the wing (circled in red, see image). The cross structure of the fuselage spreads the load of
the wings at the root which negates the need of a connecting spar in the fuselage.

21
Run a string through the aileron servo wire tube from the mount hole for the aileron servo to
the wing root. Leave enough length so that you will be able to feed the string through the
fuse later.
22
Install all servos using a small amount of hot glue to secure them in place. The aileron servos
mounting tabs will need to be trimmed. Connect the ailerons to the servos using 1mm wire
and the printed linkage locks.
23
Test fit the hinges in the hinge slots for each control surface and its parent part, this will make
gluing the control surface easier when the time comes. NOTE- Do not force the hinge if it is
too tight. Loosen the slot by gently inserting a stanley knife.
Using the LW-PLA as a hinge:
From the off-cuts from the fuselage false floor, cut small sections of 15mm x 7mm with the
7mm side being against the grain of the layers. Test fit the pieces into the hinge slots of the
control surface and stabiliser or wing.

24
Place a drop of CA in the hinge slot of the control surface and insert the hinge. Be sure that
the hinge is perpendicular to the control surface. Then bend the hinges to 90deg back and
forward a few times to make sure they are appropriately loose. See below
25
Glue the rudder and ailerons in place. Make sure each control surface has full and free
movement.
26
Using an appropriate length of skewer with 1mm steel wire on each end covered in heat
shrink tubing, connect the elevator and rudder to their relative servo.
Elevator = left side
Rudder = right side

RUDDER and ELEVATOR
27
Install the magnets to both the fuselage and the canopy using CA.
28
Place the motor mount in the slot provided on the firewall. Note the orientation of the mount
with the small raised sections at the top. Secure it in place with two m2 x10mm screws into
the lower holes only.

29
Install the motor to the motor mount. The motor mount holes may need to be pre-drilled with
a 3mm drill bit.
30
Secure the motor mount with the final two m2 x10mm screws. The top two screws are first
fed from the front of the aircraft through the cowling mounts, then through the firewall and
finally through the motor mount. The cowling mount can be pre-drilled with a 2mm drill bit if
desired to ensure a firm fitment of the cowling to the firewall. An m2 x10mm can now also be
fitted to the lower center hole in the middle of the landing light to secure the lower section of
the cowling to the fuse.

31
The holes on either side of the motor slot are for the ESC wires to pass through into the
battery compartment of the model.
32
Fit the front cowling to the rear cowling using CA glue.
33
Glue the front and rear section of the canopy together.
34 ** IF NOT USING LANDING GEAR SKIP AHEAD TO STEP 42 **
Cut a 122mm section of 2mm wire and bend according to the diagram below. Make a
mirrored version for the right side.
FRONT VIEW

SIDE VIEW
Fit a 25-30mm foam wheel and secure with an M2 wheel stop collar.

35
Insert the gear leg into the wing as pictured below.
(different aircraft pictured below but the method is the same)
Apply a small amount of hot glue to the outer bend of the leg (red circle on image above.
This will hold it in place but also allow it to be removed if desired. Fit the wheel and secure it
with a shaft collar.
This manual suits for next models
1
Table of contents
Other 3D AEROWORKS Toy manuals

3D AEROWORKS
3D AEROWORKS Pilatus PC-21 Guide

3D AEROWORKS
3D AEROWORKS X-88 Fun-Jet Guide

3D AEROWORKS
3D AEROWORKS Yakovlev Yak-3 Guide

3D AEROWORKS
3D AEROWORKS FUN JET X-88 Guide

3D AEROWORKS
3D AEROWORKS Focke Wulf FW190-D9 Guide

3D AEROWORKS
3D AEROWORKS PR1 Guide

3D AEROWORKS
3D AEROWORKS PR1 Guide

3D AEROWORKS
3D AEROWORKS Extra 500 Guide
Popular Toy manuals by other brands

Copernicus
Copernicus MK100 owner's manual

Brother
Brother Swan Folding Instructions

Nine Eagles
Nine Eagles P51 Mustang instruction manual

Australian Railway Kits
Australian Railway Kits NSWGR C34 4-6-0 instruction manual

LEGO
LEGO 10236 instructions

Airigami
Airigami PAPIER AVION 9GBOE20B04 quick start guide