3D AEROWORKS PR1 Guide

ASSEMBLY MANUAL
AND USER GUIDE
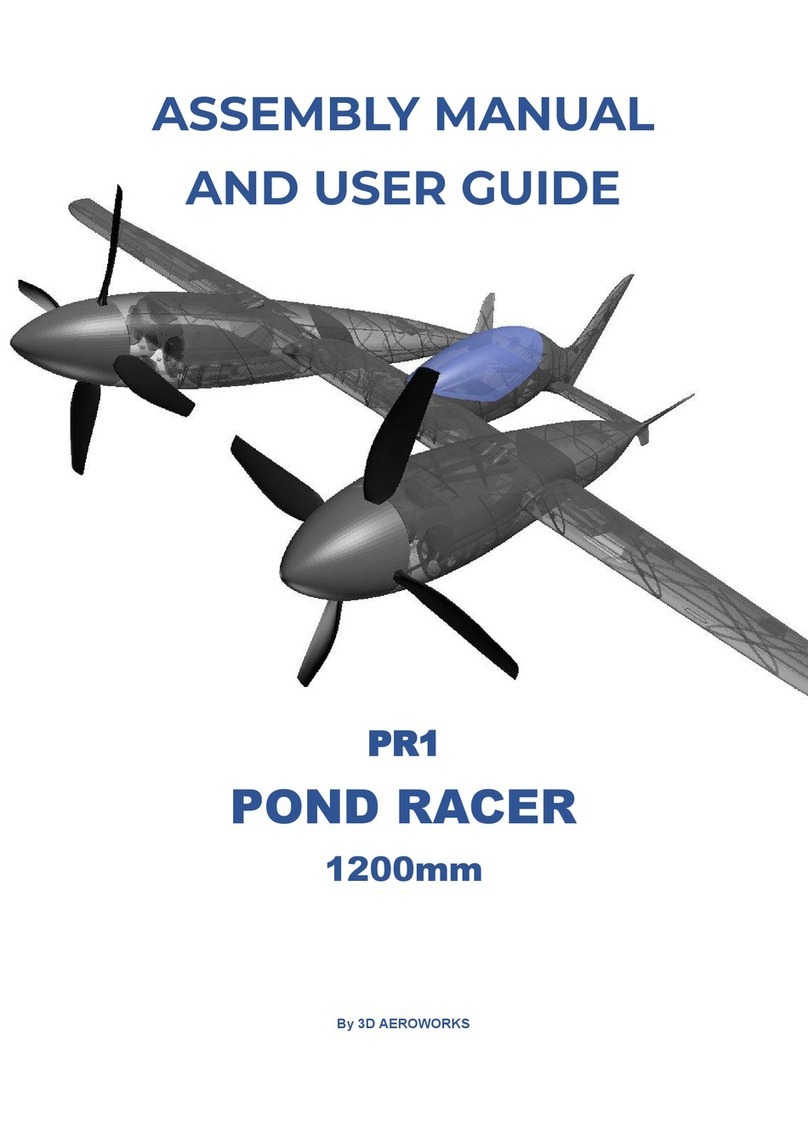
Pond Racer
PR1
By 3D AEROWORKS

OVERVIEW:
This scale replica of Burt Ruhtan’s Pond Racer is designed for quick and easy construction
and printed using light weight PLA (LW-PLA). For best results the canopy should be printed
with clear PLA. Semi scale propellers are included in the plans designed to suit the 2804
2300kv outrunner (6.75x5 blade) in 2 blade configuration. Utilising full 4 channel controls;
aileron, elevator, rudder and throttle, this model performs extremely well given its small size
and lightweight. Links to components used can be found on the last page of the user guide.
This model has taken many hours of hard work and testing in order to provide a nice flying
aircraft. Please do not share it. Please show your appreciation by directing interested parties
to the link below.
https://cults3d.com/en/3d-model/various/pond-racer-700mm
GENERAL SPECIFICATIONS
WINGSPAN: 700mm
PRINT TIME: 78 hrs
PRINT WEIGHT: 200g
FLYING WEIGHT: 498g
CENTER OF GRAVITY 10mm aft of L.E at wing root. (Marked with indentation)
ELECTRICS
MOTOR: 2205 2300KV (1 CW and 1 CCW) (or similar motor)
ESC: 12amp (min) 20amp (recommended)
SERVOS: 3.7g MICRO
BATTERY: 950MAH 2S (45gram or similar)
INCLUDED:
STL FILES OF ALL COMPONENTS (scale to 1000% if not using S3D)
FACTORY FILES FOR (S3D) SIMPLIFY 3D FOR PRINTERS: 200X200X200
REQUIRED TOOLS:
KNIFE
LIGHTER
SANDPAPER (MEDIUM GRIT)
PLIERS
CA GLUE
SCREW DRIVERS
FILE OR RASP
REQUIRED COMPONENTS:
X2 2205 2300KV MOTOR (or similar)
X2 12AMP or 20AMP ESC
X2 950MAH 2S LIPO OR SIMILAR
X4 3.7G MICRO SERVO
BAMBOO SKEWERS 3MM
HEAT SHRINK TUBE 3mm
X6 10mm X 10mm X 2mm MAGNET (ROUND)
X10 MICRO HINGES (OPTIONAL)
VELCRO
X2 x 500mm CARBON STRIP 3mm x 0.6mm (OPTIONAL)
M2 x10mm SCREWS
1mm PIANO WIRE

ASSEMBLY INSTRUCTIONS
1
After all parts have been printed, some may require to be cleaned/trimmed as LW-PLA is
prone to stringing. Do this by gently sanding back the rough sections with a file, sandpaper or
blade until the surface is smooth.
2
All faces which are to be glued to other parts need to be given a light sanding (scuff the
surface) to assist with glue adhesion.
3
Cut 15mm sections of skewer and place into alignment holes in the fuselage sections.
NOTE - It may be required to open up the holes a small amount if the fit is too tight. Do this
by using a 3mm drill bit. Gently spin it in reverse as you insert it into the hole. This will ensure
the bit does not tear the print.
Test fit the sections of the fuse before gluing to ensure a clean fit.

4
Glue all sections of the center fuse and together except fuse 4. This will be glued on after the
elevators have been installed.
5
Once glued, with a sharp knife, remove the false floor of the battery hatch. (see pic/ red
faces) NOTE: The removed sections of LW-PLA that is the false floor will be used as hinge
pieces later. Do not throw away.
6
Glue all sections of the fuse pods together except fuse pod 1. This will be glued on after the
CG has been achieved. 6
7
From parts “center fuse 1, fuse pod 3” remove the inner section of the lead tunnel with a
knife or heated metal rod to allow the servo lead for the aileron to pass through. (marked red)
Center fuse 1 fuse pod 3 left side
Fuse pod 3 right side

8
Cut a 250mm length of carbon strip and gently test fit the “wing outer” section to “fuse pod 3”.
(slot for carbon strip highlighted below)
NOTE - There are internal slots in fuse pod 3 for the carbon strip. Take care not to break
them as the strip is fed through the fuse section.
Now feed the protruding end of the carbon strip into the “center wing section”
Once happy with the fitment, the wing and fuse pod section can be glued in place.
9
● Glue the fuse pod/outer wing assembly to the center wing.
● Cut two 120mm sections of carbon strip and test fit the center wing sections together.
● Glue the center wing,fuse pod and outer wing assembly together with the center fuse
sandwiched in the middle using the alignment holes provided.
Before after
10
Glue the horizontal stabilisers in place, the indent in the trailing edge is face inwards.

11
Assemble each control surface and test fit the hinges in the hinge slots for each control
surface and its parent part, this will make gluing the control surface easier when the time
comes. NOTE- Do not force the hinge if it is too tight. Loosen the slot by gently inserting a
stanley knife.
Using the LW-PLA as a hinge:
From the off-cuts from the fuselage false floor, cut small sections of 15mm x 7mm with the
7mm side being against the grain of the layers. Test fit the pieces into the hinge slots of the
control surface and stabiliser or wing.
12
Place a drop of CA in the hinge slot of the control surface and insert the hinge. Be sure that
the hinge is perpendicular to the control surface. Then bend the hinges to 90deg back and
forward a few times to make sure they are appropriately loose. (the outer aileron and
elevator hinge may need to be trimmed). See below

13
Bend a section of 1mm steel wire to connect the elevators together.
Test fit the wire and the elevators connection to the horizontal stabilisers before gluing the
wire to the elevators, or the elevators to the tail plane. There should be un-obstructed travel.
Once satisfied, glue the elevators in place.

14
Glue the “vertical stabiliser” to “center fuse 4” and this assembly to “center fuse 3”.
Glue the rudder and ailerons in place. Make sure each control surface has full and free
movement.
15
Glue the wingtips and pod tips in place (if not already completed).
16
Install the servos and run the wiring through the tunnels to the cockpit.

17
Install the motor mounts to the firewall.
18
Install the motors to the mounts. (CCW motor = right pod /CW motor = left pod)
19
Connect the two esc’s battery wires by feeding wires through “fuse pod 3” and into the center
wing tunnel and into the other fuse pod. This will balance the voltage across both batteries,
maintaining a constant rpm on both motors and limit a yawing moment in flight. The CCW
motor should be mounted on the right side, This will ensure the propeller does not come
loose in flight or on landing. It will also minimise any adverse yaw if an engine fails.

The CCW motor and propeller should be mounted on the right side, This will ensure the
propeller does not come loose in flight or on landing. It will also minimise any adverse yaw if
an engine fails.
AIRCRAFT VIEWED FROM THE FRONT
- Lastly, feed the receiver wires to the cockpit.
20
Assemble the canopy and battery hatches and install the magnets. It is a good idea to mark
one of the battery hatches on the underside so they don't get mixed up.
21
Using an appropriate length of 1mm steel wire, connect the Ailerons, Elevator and Rudder to
their relative servo.
NOTE - The indent of the side of the center fuse near the rear indicates where the wire
should pass through the fuse section.
Elevator = left side
Rudder = right side

22. INSTALLING THE LANDING GEAR (optional)
Bend up the 2mm section of piano wire according to the diagram below.
SIDE VIEW
The test wheel was a 45mm diameter x 17mm wide foam wheel.
Add a 25mm rake forward to the main gear leg. This will assist in preventing the model from
nosing over on grass fields. See below.
FRONT VIEW

Insert the gear leg into the wing as pictured below.
Apply a small amount of hot glue to the outer bend of the leg (red circle on image above.
This will hold it in place but also allow it to be removed if desired. Fit the wheel and secure it
with a shaft collar.

Bend up the tailwheel link from 1mm piano wire as pictured below.
SIDE VIEW
ISO VIEW
(X)mm refers to the distance required to fit the wheel and wheel lock of your choice to the
axel. Test wheel was printed 20mm diameter x 5mm wide. 2mm should protrude from the
wheel collar once fitted to allow crimping of the wire.

Insert the tail wheel assembly into the rudder as pictured.
The slot should not be drilled out so as to maintain friction and stop the wheel from rotating in
the slot. A drop of CA can be applied to the link once in place if desired however this will
make removal later on much more difficult. Ensure the link is aligned with the rudder so that
the wheel will track straight when taxiing.
Install the wheel and secure it with the printed collar. Crimp the end of the wire with a pair of
vice grips so that the collar will not slip off. A drop of CA can also be added to ensure the
collar does not spin with the wheel.

Fit the propeller hub to the motor and screw in the blades using m2 x 10mm screws. Then
secure the spinner to the hub. The propeller blades will need to be pre-drilled with a 2mm
drill bit for ease of fitment.
Installing the propeller:
- Install the blade to the hub and secure it with an m2 x 10mm screw. (screw direction
towards the back of the hub)
- Install the hub to the motor.
- Secure with either metal nut provided or printed nut.
- Install the spinner. The spinner is designed with an m5 thread to suit most small
motors with a regular cw thread.

BALANCING AND CG
The ballast lead required should be placed in the hollow section of fuse 1. NOTE! Balancing
needs to be done with the propeller attached. See below
Installing the propeller:
- Install the blade to the hub and secure it with an m2 x 10mm screw. (screw direction
towards the back of the hub)
- Install the hub to the motor.
- Secure with either metal nut provided or printed nut.
- Install the spinner. The spinner is designed with an m5 thread to suit most small
motors with a regular cw thread.
Once balanced appropriately, glue Fuse 1in place with ca.
Fit the battery using Velcro as required and balance the aircraft inverted on the CG marking
points located 10mm aft of the leading edge at the wing root.

RANGE OF TRAVEL:
MAIDEN / NORMAL FLIGHT:
Elevator +/- 6mm
Rudder +/- 7mm
Aileron +/- 8mm
AEROBATIC:
Elevator +/- 6mm
Rudder +/- 15mm
Aileron +/- 12mm
LAUNCHING:
It was found that the safest and most successful launch technique for this model was the
over-arm style gripping the model by the base of the cockpit. The aircraft should be launched
at approximately 20deg nose up at 50% power. Too steep and the aircraft will stall, too
shallow and it will contact the ground.
Other manuals for PR1
1
Table of contents
Other 3D AEROWORKS Toy manuals

3D AEROWORKS
3D AEROWORKS Yakovlev Yak-3 Guide

3D AEROWORKS
3D AEROWORKS Pilatus PC-21 Guide

3D AEROWORKS
3D AEROWORKS Piper Turbo Arrow IV Guide

3D AEROWORKS
3D AEROWORKS X-88 Fun-Jet Guide

3D AEROWORKS
3D AEROWORKS Focke Wulf FW190-D9 Guide

3D AEROWORKS
3D AEROWORKS Extra 500 Guide

3D AEROWORKS
3D AEROWORKS FUN JET X-88 Guide

3D AEROWORKS
3D AEROWORKS PR1 Guide