3DCPI 3DCPI-02 User guide

3DCPI-02
START-UP GUIDE
3DCPI-02 START-UP GUIDE

3DCPI-02
START-UP GUIDE
TABLE of CONTENTS
I.Meet the 3DCPI-02
Specifications
Unpacking your printer
What’s included
At a glance
II.Setting up your 3DCPI-02
power switch
Installing spool holder
Loading filament
Attaching cables
III.Installing software
Setting up the operating environment
Installing printer driver
Configuring 3D printing software
Setting up 3D data
IV. Pre-print checks
Leveling the build platform
Turn on the printer
Test printing
V.Printing
Printing from SD card (Recommended)
Printing from computer
VI.PyPy Acceleration
VII.Updating firmware
VIII.Maintenance and Troubleshooting
Thanks for choosing 3DCPI-02 personal 3D printers. To get a better printing experience, we
suggest you to take time reading this manual. It will guide you from installing software to
operating the machine step by step. Please keep this manual for future reference.

3DCPI-02
START-UP GUIDE
I. Meet the 3DCPI-02
3DCPI-02 Specifications
FEATURES
Positiong Precision 0.1mm
Layer Resolition 0.05-0.3mm
Build Volume 250 x220 x190mm(single head)
220 x220 x190mm(dual head)
Maximum Extruders Temperature 210-260°C
Build Speed 50-120mm/S
Filament Types PLA, ABS
PHYSICAL DIMENSIONS
Size 405 x405 x405mm
Shipping Box 520 x520 x580mm
Weight 20.05KG(single head)20.55KG(dual head)
ELECTRICAL
AC Input 100-240V, 50-60 Hz
Connectivity USB, SD card with SDHC support
MECHANICAL
Chassis Steel
Front Cover PVC Panel
XYZ Bearings IKO Linear Bearings
Stepper Motors 1.8° step angle with 1/16 micro stepping
SOFTWARE
Printer Host Software ReplicatorG
File Types STL
Oèrating Systems Windows7/XP, Ubuntu Linux(10.4+),
Mac OSX (10.6+)
3DCPI-02
START-UP GUIDE
I.Meet the 3DCPI-02
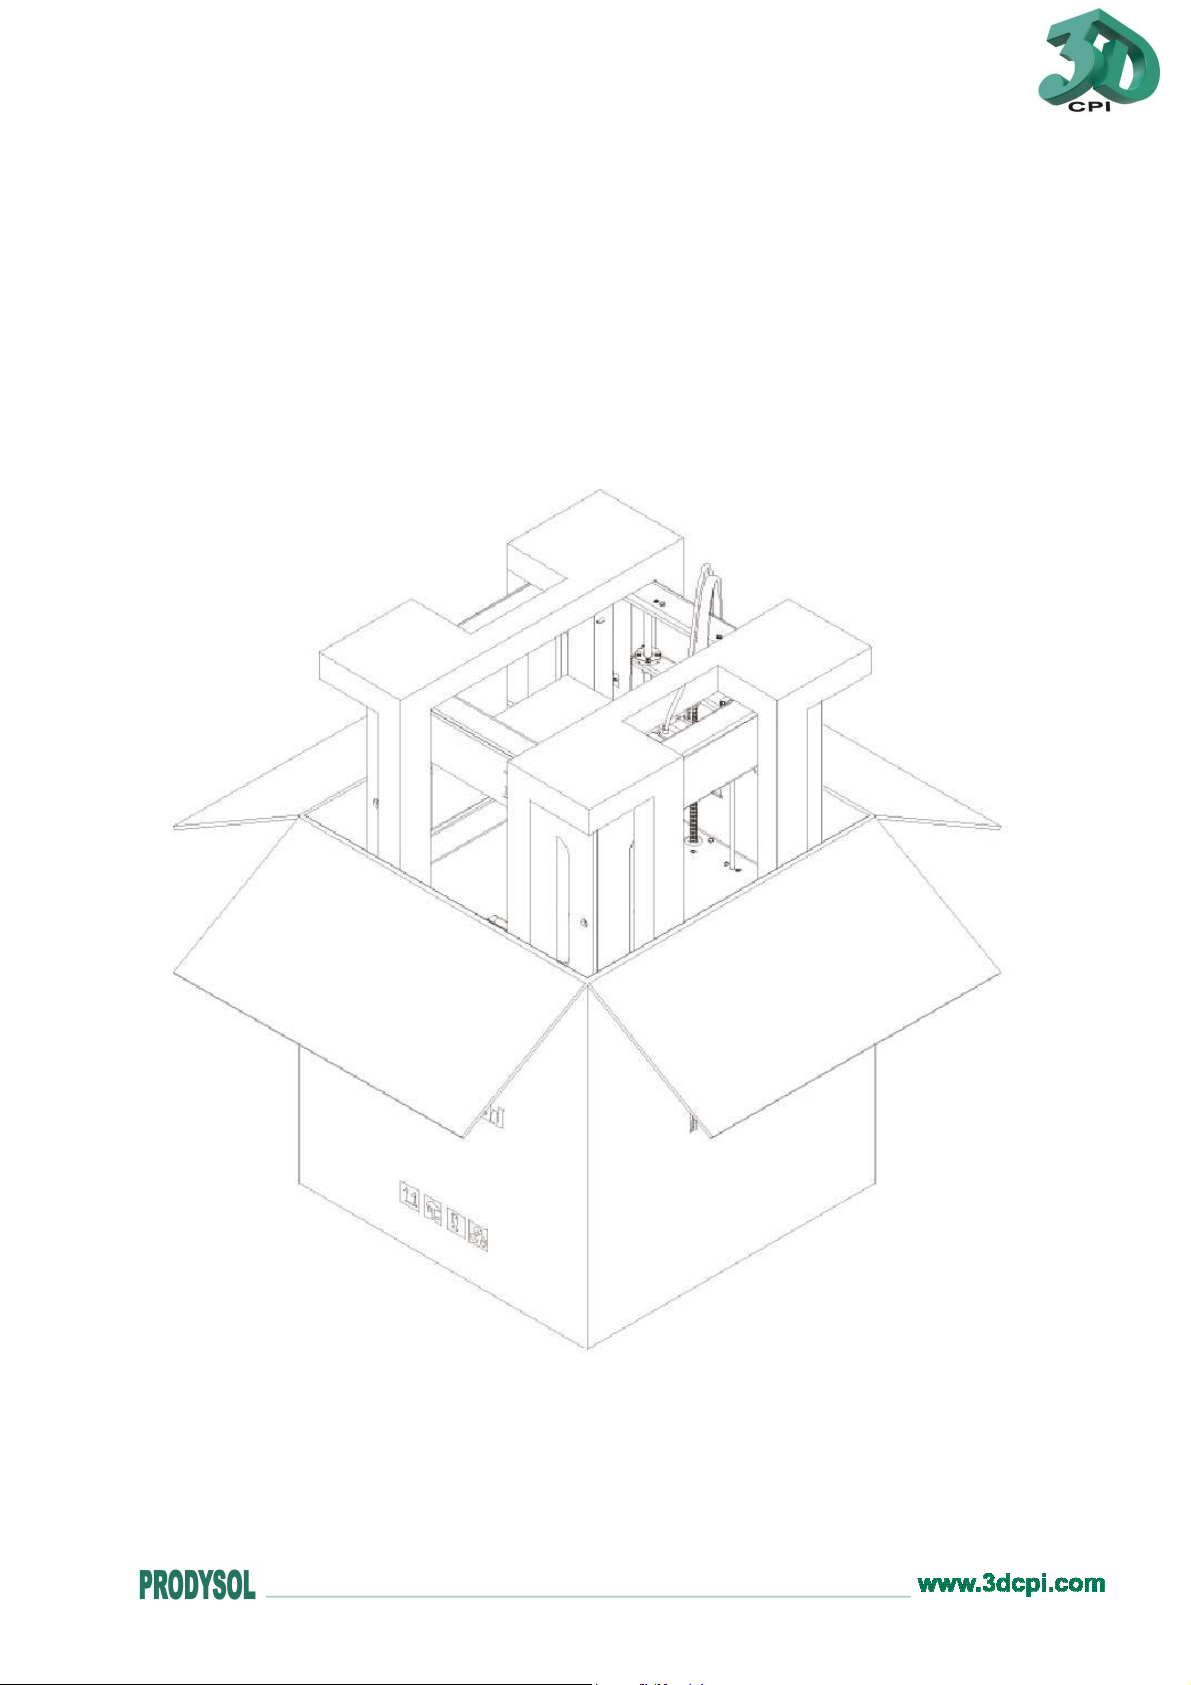
1. Place the box on the ground and open it up.
2. Slowly take 3DCPI-02 out of the box by grasping the upper frame with two hands.
Place it on a sturdy table.
3. Gently remove all the fixtures holding parts in place for transport. Be careful with
scissors.

3DCPI-02
START-UP GUIDE
I.Meet the 3DCPI-02
What´s included
The box contains the following accessories. If anything is missing or damaged, please
contact your sales representative from whom you purchased the printer.

3DCPI-02
START-UP GUIDE
I.Meet the 3DCPI-02
At a glance
[1] LCD panel
[2] Function buttons
[3] Threaded Z-axis rod
[4] Build platform
[5] Build plate
[6] Feed tube
[7] Extruder cable
[8] USB port

3DCPI-02
START-UP GUIDE
II.Setting up your 3DCPI-02
Power switch
The power supply of 3DCPI-02 3D printer could be switched between 220 Volt and
110 volt. It is located on the bottom side and the origin out put is 220 volt.

3DCPI-02
START-UP GUIDE
Installing spool holder
Tilt the spool holder and insert it into one of the holder mounts on the back of the
printer. Then, fit your filament spool onto the installed holder.

3DCPI-02
START-UP GUIDE
II.Setting up your 3DCPI-02
Loading filament
Open the package and take out the filament spool. Fit it onto the right holder on the
back of the machine. Make sure the spool spins clockwise (when viewed from the back
of the machine) when printing, and that the end of the feed tube isn’t lower than the
spool holder, as shown below. Then, push filament through the feed tube into the
extruder.
(As for CubeII with dual extruders, mount the second spool on the left holder and
ensure that it spins counter-clockwise.)

3DCPI-02
START-UP GUIDE
II.Setting up your 3DCPI-02
Attaching cables
Insert one end of the USB cable into the port on the right of the machine, and DON’T
attach the other end to any device yet.
Make sure your printer power switch is in the OFF position and then plug the power
cord into the power supply located on the back of the machine and power on.
Table of contents
Other 3DCPI 3D Printer manuals


