manuals.online logo
Brands
  1. Home
  2. •
  3. Brands
  4. •
  5. 3M
  6. •
  7. Projector
  8. •
  9. 3M Multimedia Projector MP8610 Manual

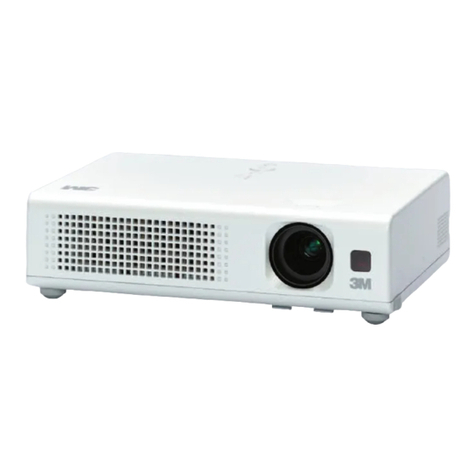
3M Multimedia Projector MP8610 Manual

Other manuals for Multimedia Projector MP8610

5

Other 3M Projector manuals

3M Multimedia Projector MP8640 Manual

3M

3M Multimedia Projector MP8640 Manual

3M X90W User manual

3M

3M X90W User manual

3M X90W User manual

3M

3M X90W User manual

3M X21i Manual

3M

3M X21i Manual

3M 2770 Setup guide

3M

3M 2770 Setup guide

3M Digital Projector X75 Manual

3M

3M Digital Projector X75 Manual

3M SCP715 Manual

3M

3M SCP715 Manual

3M X3li Manual

3M

3M X3li Manual

3M Digital Projector X75 Manual

3M

3M Digital Projector X75 Manual

3M MP225a Configuration guide

3M

3M MP225a Configuration guide

3M Multimedia Projector MP8625 User manual

3M

3M Multimedia Projector MP8625 User manual

3M DX70 - Digital Projector XGA DLP Operating manual

3M

3M DX70 - Digital Projector XGA DLP Operating manual

3M MobiShow User manual

3M

3M MobiShow User manual

3M Overhead Projector 1800 Series Manual

3M

3M Overhead Projector 1800 Series Manual

3M Multimedia Projector X65 Installation and operating manual

3M

3M Multimedia Projector X65 Installation and operating manual

3M 9000 Series Manual

3M

3M 9000 Series Manual

3M WX36 Manual

3M

3M WX36 Manual

3M Digital Projector X30N Manual

3M

3M Digital Projector X30N Manual

3M Multimedia Projector MP8630 User manual

3M

3M Multimedia Projector MP8630 User manual

3M Multimedia Projector X68 Installation and operating manual

3M

3M Multimedia Projector X68 Installation and operating manual

3M Multimedia Projector MP8749 Manual

3M

3M Multimedia Projector MP8749 Manual

3M Multimedia Projector X62 Manual

3M

3M Multimedia Projector X62 Manual

3M MPro 120 User manual

3M

3M MPro 120 User manual

3M X21i User manual

3M

3M X21i User manual

Popular Projector manuals by other brands

Eiki LC-X985 Specification sheet

Eiki

Eiki LC-X985 Specification sheet

InFocus LitePro 610 quick start

InFocus

InFocus LitePro 610 quick start

Epson EH-TW5900 datasheet

Epson

Epson EH-TW5900 datasheet

FOREVER MLP-100 manual

FOREVER

FOREVER MLP-100 manual

Toshiba TDP-MT8U Specifications

Toshiba

Toshiba TDP-MT8U Specifications

Mitsubishi XD500U specification

Mitsubishi

Mitsubishi XD500U specification

Kodak Ektapro 3020 Illustrated parts list

Kodak

Kodak Ektapro 3020 Illustrated parts list

Toshiba TDP-EW25U Specifications

Toshiba

Toshiba TDP-EW25U Specifications

Barco iQ PRO G500 supplementary guide

Barco

Barco iQ PRO G500 supplementary guide

NEC Showcase Series HT1100 user manual

NEC

NEC Showcase Series HT1100 user manual

Philips LC1341 user guide

Philips

Philips LC1341 user guide

Epson PowerLite 1266 user guide

Epson

Epson PowerLite 1266 user guide

MAGINON DLP 1400S user manual

MAGINON

MAGINON DLP 1400S user manual

Toshiba TLP-380 owner's manual

Toshiba

Toshiba TLP-380 owner's manual

Philips PicoPix PPX2480/EU user manual

Philips

Philips PicoPix PPX2480/EU user manual

Hitachi CP-X605 Series Specifications

Hitachi

Hitachi CP-X605 Series Specifications

Optoma TW1692 user manual

Optoma

Optoma TW1692 user manual

Kodak EKTAPRO instruction manual

Kodak

Kodak EKTAPRO instruction manual

manuals.online logo
manuals.online logoBrands
  • About & Mission
  • Contact us
  • Privacy Policy
  • Terms and Conditions

Copyright 2025 Manuals.Online. All Rights Reserved.

MP8610 Multimedia Projector Quick Setup Instructions
Pro
j
ector Packout
Remote Control
Start U
p
Procedure
Remote Button Description of Button Functions
Switch between Standby mode (lamp off, fan off) and operation mode (lamp on, fan on).
PC Switches to PC mode.
VIDEO Switches to video mode. Press repeatedly to select video source.
AUX Not used
MENU Display On Screen Menu System.
DISC PAD
Mouse emulation ON
, disc pad controls the movement of the pointing device.
Emulation OFF
, disc pad centers image on screen.
L/ENTER Mouse emulation ON, left mouse button. Mouse emulation OFF, Enter button for confirmation.
R Right mouse button, when mouse-emulation active.
1-6 Not used.
REVEAL/7 Press REVEAL to mask image. Use the disc pad to reveal image or press REVEAL for full image.
BLANK/8 Display white background. Press again to return projection image.
TIMER/9 Press for timer-window. The timer starts with the last used adjustment. A new start value is entered
by operating the ENTER key and adjusting the value with the disc pad. Operating the ENTER key
again starts the timer. When the timer has run down, the timer blinks.
OPTIMIZE Optimize (adjust) brightness and contrast settings for best picture.
VOL Volume adjustment.
Mute.
BRIGHT Brightness adjustment.
MOUSE ON: The L and R buttons operate the left and right mouse key functions. Drag-and-drop functions
are possible by simultaneous operation of the L/R mouse key and disc pad.
OFF: L button is the Enter confirmation key. R button not used. Disc pad centers image.
POINTER Places a pointing device on the screen. Move pointer by operating the disc pad.
MAGNIFY Press MAGNIFY to double the image size in horizontal and vertical direction. Move the disc pad to
displace the magnified area within the image. Press the MAGNIFY key again to switch back to
normal presentation.
In Video mode
, press MAGNIFY to switch between scaled & unscaled representation (NTSC only).
FREEZE Stores (freezes) the projected image. Press FREEZE again to return normal image.
PC
ENTER
MENU
VIDEO AUX
1 2 3
4 5 6
789
0
VOL BRIGHT
REVEAL
LR
BLANK
OPTIMIZE
TIMER
MOUSE
POINTER MAGNIFY
FREEZE
8610-05aA
MP8610
8610-11A
56
123
7
4
1. Press the power switch (1) to ON to apply power to
the projector (|= ON, O = OFF). The
red
LED (3)
will illuminate.
2. Press the Standby button (2). The
green
LED (3)
will illuminate and an image will appear and grow
brighter on the screen.
3. Check all ventilation slots and clear away any
obstructions.
4. Turn the lens (4) to focus the image.ctions.
5. Press the foot lock button (5) to release the height
adjustment feet.
6. Raise/lower projector body to extend or retract feet
(6) to obtain best image height.
7. Rotate feet
(7) for fine adjustment.
8. Power up your computer source and video
source(s).
√Note
In most cases, the projector will automatically adjust to the
graphic mode of your computer by selecting a pre-programmed
setting.
Shutdown Procedure
1. Wait until the cooling fan motor cycles off
then press the main power switch to Off.
2. Turn off the power to your input devices.
3. To transport the projector, disconnect the
power cord, computer cable, mouse cable
and audio/video cables.
Fully retract the
projection lens to protect it during transport.
√Note
Switching the power off before the fan has cycled off, will
decrease the life of the projection lamp.
Standby Mode
1. Press the Standby button.
2. The lamp will switch off and the
red
LED will
illuminate.
3. Press the standby button again to illuminate
the lamp and project an image on the screen.
√Note
In standby mode, the fan motor will continue to run for a
few minutes until the projector cools down.
1. MP8610 Multimedia Projector
2. Remote control transmitter (AAA batteries included)
3. VGA cable 15-15 pin male to male)
4. Mouse cable (9–9 pin female to female)
5. Power cord set (U.S., UK, and European)
6. PS/2 mouse adapter
7. Audio cable (RCA–mini jack)
8. S-video cable
9. RCA video cable
MP8610
PC
ENTER
MENU
VIDEO AUX
123
456
789
0
VOL BRIGHT
REVEAL BLANK
OPTIMIZE
TIMER
MOUSE
POINTER MAGNIFY
FREEZE
123 4 5
6789
8610-10A
MP8610 Multimedia Projector Quick Setup Instructions
1. Power Cord
2. Computer Source
3. Mouse Emulation
a) MS Mouse Port
b PS/2Mouse Port
4. S-VHS
5. VCR
Technical Assistance & Product Information
1-800-328-1371
E-mail: techsupport@mmm.com 3M 1998 78-6970-8960-1
Submenu Menu Item Explanation of Adjustment/Setting
Setup*/Picture** <Mode>* Selects graphic mode.
Brightness Image brightness.
Contrast Image contrast.
V. off* (vertical
offset) Adjusts the vertical position of the image.
H. off (horizontal
offset) Adjusts the horizontal position of the image.
Color** Color saturation.
Inverse* Inverse image displayed.
(Default=off)
Sync*
Set manual
synchronization (phase) or
automatic
adjustment.
Tracking*
Set manual
screen width or
automatic
adjustment.
Pix.* Image format. (For unscaled image use 800 x 600)
Option Projection Change image direction.
(Default=std.)
Lamp Mode Select lamp power: eco. (low), std. (high) (
Default = eco.)
Remote Turn remote control feature On/Off.
(Default=On)
Auto Mode* Turn automatic mode detection On/Off.
(Default=On)
Language Select menu display language.
(Default=English)
Help Turn menu help text messages On/Off.
(Default = On)
Std.** Selection of video standard (Default = Auto)
Lamp* Lamp life indicator. Green – good, Red - replace
Sog* Sync-On-Green level. Only for Sync-On-Green mode.
Deinterlacing** On = Standard video input (VCR).
Off = Motion video input (camera).
Reset Restores video modes to factory default settings.
<Sync Mode>* Change synchronization mode (separate, composite, Sog).
Hue** Color level for NTSC video.
NTSC** Default setting of NTSC image (scaled or unscaled)
Audio Volume Volume level.
Treble Treble setting.
Bass Bass setting.
Balance Left/right balance of speakers.
Audio Speakers On/Off.
(Default = On)
Stereo Stereo sound On/Off.
(Default = On)
<Audio assignment> Audio-In 1: Data S-VHS S-VHS
Audio-In 2: Video Data Video
(Default=Data/Video)
<Video Mode> Select video source: Data, Video or S-VHS
* = Data Menu only ** = Video/S-VHS Menu only No marking = Item appears on both menus
Cable Connections
Always turn power off when making any cable connections. System Menus