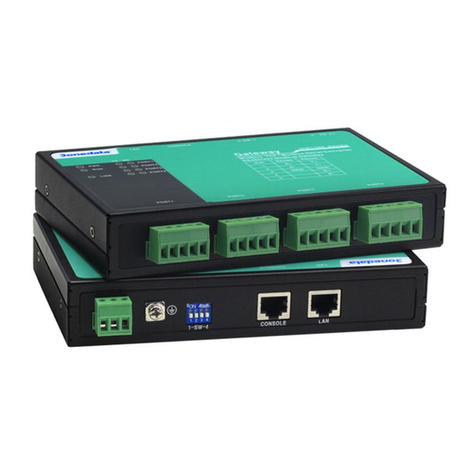
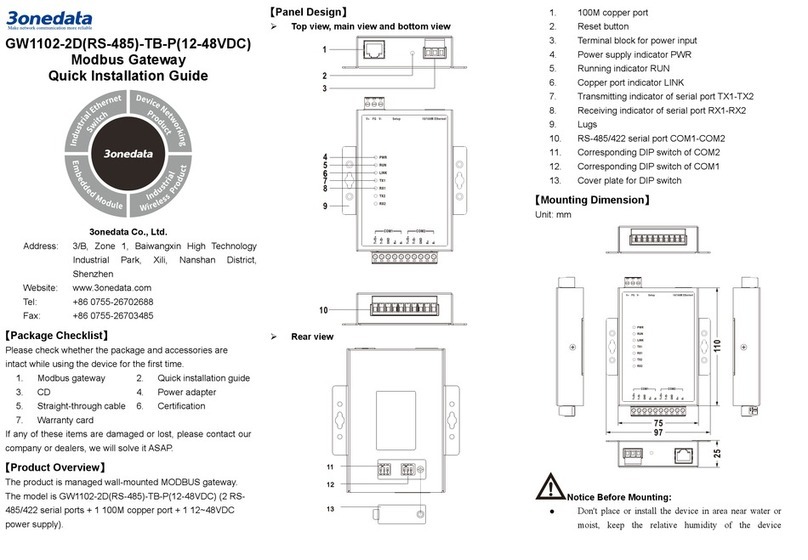
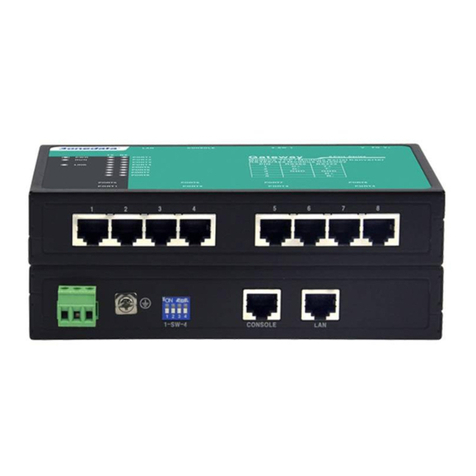
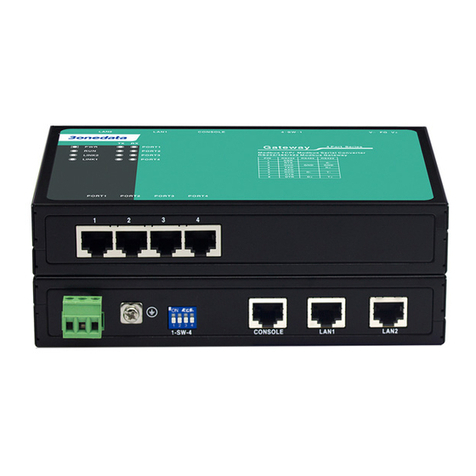
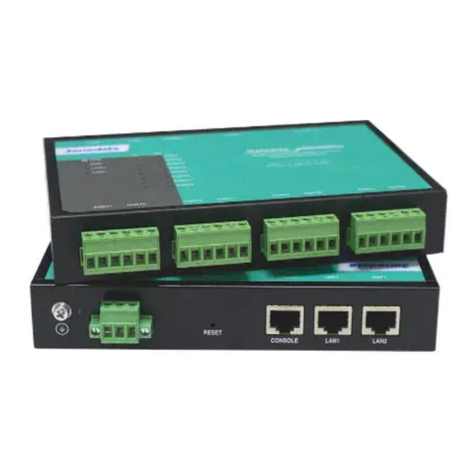
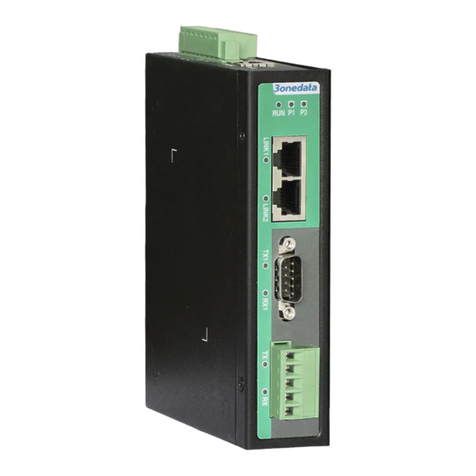
3One data GW110X Series User manual

Shenzhen 3onedata Technology Co., Ltd
GW110X series
Modbus Gateway CLI User Manual
Version 1.0.1, Nov 2015
Shenzhen 3onedata Technology Co., Ltd
www.3onedata.com

Shenzhen 3onedata Technology Co., Ltd
- 1 - www.3onedata.com
Statement
Copyright Notice
Information in this document is reserved by Shenzhen 3onedata Technology Co., Ltd.
Reproduction and extract without permission is prohibited.
Trademarks Notice
and is registered trademarks of Shenzhen 3onedata
Technology Co.,Ltd. All other trademarks or regitered marks in this manual belong to their
respective manufacturers.
Agreement
As the product version upgrades or other reasons, this document is subject to change
without notice. Unless other agreement, this document only as a guide to use. All statement,
information and suggestion in this document, without warranty of any kind, either expressed
or implied.
Revision History
Version No.
Date
Reason
V1.0.0
2015-07
Creating Documents
V1.0.1
2015-11
Added document content
Notes
In reading this manual, please pay attention to the following symbols,
:Information necessary to explain.
:Special attention.

Shenzhen 3onedata Technology Co., Ltd
- 2 - www.3onedata.com
Content
Chapter 1 Access to MODBUS Gateway ..........................................................................................................................1
1.1 Configuration through Telnet...................................................................................................................................... 1
1.2 Agreement................................................................................................................................................................... 2
1.3 Command line port..................................................................................................................................................... 2
1.3.1 View of Command Lines...................................................................................................................................... 2
1.3.2 Command lines online help ................................................................................................................................. 4
1.3.3 Frequent Incorrect Information of Command Lines............................................................................................ 5
1.3.4 History command................................................................................................................................................. 5
Chapter 2 Modbus information configuration.................................................................................................................6
2.1 Enter into the view of Modbus information................................................................................................................ 6
2.2 Show Modbus Gateway information.......................................................................................................................... 7
Chapter 3 COM Setting .....................................................................................................................................................9
3.1 Enter into the view of serial information.................................................................................................................... 9
3.2 Display serial information ........................................................................................................................................ 11
Chapter 4 Device Security Management ........................................................................................................................12
4.1 Enter into the view of Security Management ........................................................................................................... 12
4.2 Display Security Management.................................................................................................................................. 14
Chapter 5 System Management....................................................................................................................................... 16
5.1 Enter into the view of System Management............................................................................................................. 16
5.2 Display System Management ................................................................................................................................... 17
Chapter 6 Device Information.........................................................................................................................................18
6.1 Enter into the view of device information ................................................................................................................ 18
6.2 Display device information....................................................................................................................................... 19
Shenzhen 3onedata Technology Co., Ltd
1www.3onedata.com
Chapter 1 Access to MODBUS Gateway
1.1 Configuration through Telnet
Terminal device use telnet connect to Modbus gateway through PC, the requirements are as follows:
1. The IP address of Modbus gateway can get it by search or modify (Use IP command under the system
management view).
2. If PC and Modbus gateway device in the same local area network, the IP address must in a same network
segment, otherwise, PC and Modbus gateway device must cross-router.
If satisfied these two requirements, can use telnet access to Modbus gateway device, and configure the Modbus
gateway device.
1)After establish configuration environment, just connect PC’s Ethernet port connect to Modbus gateway
device’s Ethernet port through Local area network.
2)Before access Modbus gateway through Telnet, need to input“Telnet+ Space+ Modbus gateway’s IP
address”for checking, Figure 1.1.1 as follows:
(Figure 1.1.1)
3)Hit “Enter”, checkout successful and till PC show“Please input hostname and password”, ask user to input
user name and password, default is admin, figure 1.1.2 as follows:
(Figure 1.1.2)
4)Use command to configure Modbus gateway and check the running statues, if need help, please input“?” at any
time. Specific configuration command please reference “Modbus Gateway CLI user manual”.

Shenzhen 3onedata Technology Co., Ltd
2www.3onedata.com
1.2 Agreement
1. Command line format agreement table 1.2.1 as follow:
Table 1.2.1
Format Description
italicParameter of the command show italic type.
[ ] It shows part in “[]”is optical when command configuration is need.
{ x | y | ... } It shows to pick up one from two or more items.
[ x | y | ... ] It shows to pick up one or no one from two or more items.
{ x | y | ... }
It shows to pick up one at least, all at most from two or more items.
Bold Key words of the command show by bold type.
2. Format agreement of figure interface Table 1.2.2 as follows:
Table 1.2.2
Format Description
< > “< >” shows press name, like ”click<OK>”
[ ]
“[ ]” shows windows name, menu name and data list. like “eject [create user]window”
/
Multilevel is separated by “/”. Like [file/create/folder] means[create] a [folder] under the
menu of [file]
1.3 Command line port
Modbus gateway provides command lines port and its configuration for user’s easy configuration and
management. Command lines port includes the following features:
1. Local configuration through LAN port;
2. Supports history command saving which means it can save 10 pieces. History commands can be selected by
up and down key.
3. User can type in “help” or”?” to get some help;
4. Supports intelligent complement with Tab when commands input;
5. Command interpreter take the method of partial matching. User can type in conflict-free key words, such as
config command, only need to type in conf.
1.3.1 View of Command Lines
Modbus gateway’ view of command lines aim at configuration of different functions. First of all, Modbus gateway
establish connection, then confirmation of user name and password finished, after enter the correct user name and
password, enter “help or ?” in “Device#”, enter into system view, Under the view of system, corresponding view
appears after typing indifferent command, figure 1.3.1 as follows:

Shenzhen 3onedata Technology Co., Ltd
3www.3onedata.com
(Figure 1.3.1)
Table 1.3.1 system view command list
View Function DOS Prompt Enter Quit
System View Device # Help or ?
Quit and
return to user
login
Modbus
Show or modify Modbus
information Device (Modbus)# Modbus
Exit and
return to the
view of
system
serial Show or modif
y serial
information,
like as baud rate,
data bit, flow control
Device (Serial)# Serial
Security
Show or modify the IP and
MAC address filtering, user
name and password settings
Device(Security)# Security
manage
Show or modify IP address and
subnet mask, Set Console
Overtime and Reset to default
configure
Device (manage)# Manage
Information
Show or modify device type,
name, device description, serial
number, contact way, etc
Device (information)# Information

Shenzhen 3onedata Technology Co., Ltd
4www.3onedata.com
1.3.2 Command lines online help
Command lines port provides the following online help:
Total help
Partial help
1. Total help
1)Type in <?> To get all commands and their description.
Example:
Device# ?
List --List commands of current menu
Help --Help commands of current menu
Quit --Quit from CLI
Exit --Exit from current menu
Reboot --Reboot switch
Modbus <dir> --Enter Modbus manage menu
Serial <dir> --Enter serial setting menu
Security <dir> --Enter security setting menu
Manage <dir> --Enter system manage menu
Information <dir> --Enter device information menu
2)Type in a command and “?”, between there is a space, if key word is in this location, then type in all
keywords and descriptions.
Switch(System)# show ?
mac --Device MAC Address
version --Device version
others --Device name, type, etc
2. Partial help
1)Type in a character string with <?>. It can show all commands beginning with this character string.
Example:
Device# m?
Modbus <dir> --Enter Modbus manage menu
Manage <dir> --Enter system manage menu
2)Type in former letters of some key word of the command, press<Tab> key. If the letters are unique, it can
show the completed key word.
Example:
Device# inf + <Tab>
Device# information

Shenzhen 3onedata Technology Co., Ltd
5www.3onedata.com
1.3.3 Frequent Incorrect Information of Command Lines
All commands typed by users, if it is certificated by grammar, it can run correctly, or users will be sent incorrect
information. Frequent incorrect information is in table 1.3.3 as below:
Table 1.3.3 frequent incorrect information
English incorrect information
Reason
Invalid Command
Command cannot be found.
Key word cannot be found.
The type of parameter is wrong.
The parameter is beyond the border.
Incomplete Command Command is not completed.
Too many parameters Parameter is too much.
Must One To One option! Based mode is necessary
1.3.4 History command
Command lines port can provides the function similar to Dos key. It automatic save command lines that users types
in, and users can use these history commands. Detailed operating please check table 1.3.4 as follows:
Table 1.3.4 access history command
Operating Key Result
Visit previous history command Up <↑> If exists earlier command, it is taken out.
Visit next history command Down <↓> If exists later command, it is taken out.

Shenzhen 3onedata Technology Co., Ltd
6www.3onedata.com
Chapter 2 Modbus information configuration
2.1 Enter into the view of Modbus information
Please check the view as figure 2.1.1
Table 2.1.1
Operating Command Description
Enter into the view of
Modbus information Modbus Run in the view of system
Add gateway TCP Slave
entry
AddGateWayT
<RemoteIP>
<RemotePort>
<VIDmin>
<VIDmax>
<Offset>
<RIDmin>
<RIDmax>
<RemoteIP> --Remote
Ip such as
192.168.1.254
<RemotePort> --Config RemotePort:1-65535
<VIDmin> --Config VIDmin:0-247
<VIDmax> --Config VIDmax:0-247
<Offset> --Config Offset:(-253)-(253)
<RIDmin> --Config RIDmin:0-247
<RIDmax> --Config RIDmax:0-247
Delet
e gateway TCP Slave
entry DelGateWayT <Index> <Index> --Config Index: 1-32
Set serial gateway entry
SetGateWayS
<Index>
<DeviceType>
<VIDmin>
<VIDmax>
<Offset>
<RIDmin>
<RIDmax>
<Index> --Config Index: 1-4 or 8
<DeviceType> --serial DeviceType
1 --RTU Master
2 --RTU Slave
3 --ASCII Master
4 --ASCII Slave
<VIDmin> --Config VIDmin:0-247
<VIDmax> --Config VIDmax:0-247
<Offset> --Config Offset:(-253)-(253)
<RIDmin> --Config RIDmin:0-247
<RIDmax> --Config RIDmax:0-247
Set response timeout and
interval timeout
SetResponseTime
<Index>
<ResponseTime>
<Inter_character_Timeout>
<Inter_frame_Delay>
<Index>
--Config Index: (serial:1-4 or 8)(tcp:5 or 9)
<ResponseTime>
--Config ResponseTime:10-120000ms
<Inter_character_Timeout>
--Config Inter character Timeout:10-500ms
<Inter_frame_Delay>
--Config Inter frame Delay:10-500ms
Set Initial Delay
SetInitSetting
<InitTime>
<TcpExceptionEn>
<InitTime> --Config InitTime:0-30000ms
<TcpExceptionEn> --TcpExceptionEn
0 --disable
1 --enable

Shenzhen 3onedata Technology Co., Ltd
7www.3onedata.com
Example: Enter into device information view, enter the bold type command as follows and enter return key.
Switch(Modbus)# ?
List --List commands of current menu
Help --Help commands of current menu
Quit --Quit from CLI
Exit --Exit from current menu
Reboot --Reboot switch
SetGateWayS --Config GateWay
AddGateWayT --Config GateWay
DelGateWayT --Del GateWayTCP
Show GateWay --Show Modbus GateWay information
SetResponseTime --Config ResponseSetting
Show ResponseTime --Show Response config information
SetInitSetting --Config InitSetting
Show InitSetting --Show Init config information
Example: Slave ID Map Table Channel NO.1, Channel type is RTU Slave. Virtual ID Start is 3, Virtual ID End is 3,
and Slave ID Offset is 0. Virtual ID Start is 3, Virtual ID End is 3.
Switch(Modbus)# setGateWayS 1 2 3 3 0 3 3
[OK]
2.2 Show Modbus Gateway information
Please check the device information command as table 2.2.1
Table 2.2.1
Operating Command Description
Show Modbus GateWay information show GateWay Carry out under the view of
MODBUS information
Show Response config information
Show ResponseTime
Show Initial Delay information Show InitSetting
Example: show Modbus gateway information
Switch(Modbus)# show GateWay
VirtualSerialEn : Disable
Index Mode VIDMin VIDMax Offset RIDMin RIDMax
PORT1 RTU Slave 3 3 0 3 3
PORT2 RTU Master 0 0 0 0 0
PORT3 RTU Master 0 0 0 0 0
PORT4 RTU Master 0 0 0 0 0
PORT5 RTU Master 0 0 0 0 0
PORT6 RTU Master 0 0 0 0 0
PORT7 RTU Master 0 0 0 0 0

Shenzhen 3onedata Technology Co., Ltd
8www.3onedata.com
PORT8 RTU Master 0 0 0 0 0
Index IP Port VIDMin VIDMax Offset RIDMin RIDMax
Example: show Response Timeout and Interval Timeout information
Switch(Modbus)# show ResponseTime
name Index ResponseTimeout InterCharacterTimeout InterFrameDelay
COM 1 1000 ms 0 ms 0 ms
COM 2 1000 ms 0 ms 0 ms
COM 3 1000 ms 0 ms 0 ms
COM 4 1000 ms 0 ms 0 ms
COM 5 1000 ms 0 ms 0 ms
COM 6 1000 ms 0 ms 0 ms
COM 7 1000 ms 0 ms 0 ms
COM 8 1000 ms 0 ms 0 ms
TCP 9 1000 ms 0 ms 0 ms
Example: Show Initial Delay information
Switch(Modbus)# show InitSetting
Init Time : 0 ms
TcpExceptionEn : Enable

Shenzhen 3onedata Technology Co., Ltd
9www.3onedata.com
Chapter 3 COM Setting
3.1 Enter into the view of serial information
Please refer to table 3.1.1 to set up the view serial command.
Table 3.1.1
Operating
Command
Description
Enter into the view of serial
information Serial Run in the view of system
Set Serial alias Com alias <port> <string>
<port> --1~4 or 8
<string> --alias:1-30 chars
Set serial baud rate
Com baudrate
<port>
< baudrate >
<port>
--1~4 or 8
<baudrate> --serial Baudrate
Tip:
{300,600,1200,2400,4800,9600,1
9200,38400,57600,115200, }
Set serial data bits, stop bits
and parity bits
Com linctrl
<port>
<parity>
<databits>
<stopbits>
<port>:--1~4 or 8
<parity> --Parity
0 --None
1 --Odd
2 --Even
3 --Mark
4 --Space
<databits> --Databits
2 --7bits
3 --8bits
<stopbits> --Stopbits
0 --1bit
1 --2bits
Set serial mode Com mode <port> <mode>
<port>
:--1~4 or 8
<mode> --com mode
0 --RS232
1 --RS485
2 --RS422
Set flow control Com flow_ctrl <port> <flow_ctrl>
<port>
--1~4 or 8;
<flow_ctrl> --flow ctrl
0 --None
1 --RTS/CTS
2 --Xon/Xoff
3 --DTR/DSR

Shenzhen 3onedata Technology Co., Ltd
10 www.3onedata.com
Operating
Command
Description
Set serial RTS Com rts <port> <rts>
<port>:--1~4 or 8;
<rts> --rts ctrl
0 --Auto
1 --On
2 --Off
Set serial DTR Com dtr <port> <dtr>
<port>:--1~4 or 8;
<dtr> --dtr ctrl
0 --Auto
1 --On
2 --Off
Example: Enter into serial information view, enter the bold type command as follows and enter return key.
Switch(Serial)# ?
List --List commands of current menu
Help --Help commands of current menu
Quit --Quit from CLI
Exit --Exit from current menu
Reboot --Reboot switch
Show config --Show COM config information
Show com_state --Show com state info
Com alias --COM set
Com buadrate --COM set
Com linctrl --COM set
Com mode --COM set
Com flow_ctrl --COM set
Com rts --COM set
Com dtr --COM set
Example: Set the serial COM1 Parameters, the parity bit is ODD, the data bits are 8, and the stop bit is 2.
Switch(Serial)# com linctrl 1 1 3 1
[OK]
Example: Set the serial COM1 Parameters, the alias is 111.
Switch(Serial)# com alias 1 111
[OK]
Example: Set the serial COM1 Parameters, the baud rate is 300.
Switch(Serial)# com buadrate 1 300
[OK]
Example: Set the serial COM1 Parameters, the flow control is RTS/CTS.
Switch(Serial)# com flow_ctrl 1 1
[OK]

Shenzhen 3onedata Technology Co., Ltd
11 www.3onedata.com
Example: Set the serial COM1 Parameters, the RTS is disable.
Switch(Serial)# com rts 1 2
[OK]
Example: Set the serial COM1 Parameters, the DTR is disable.
Switch(Serial)# com dtr 1 2
[OK]
3.2 Display serial information
Please check the serial information command as table 3.2.1
Table 3.2.1
Operating Command Description
Show the serial information Show config<port_list> <port_list>:1~4 or 8, all
Example: Enter into device information view, enter the bold type command as follows and enter return key
Switch(Serial)# show config 1
COM<1>
Alias: 111
COM work mode: RS485
Buadrate: 300(bps)
Data bit: 8(bits)
Parity bit: ODD
Stop bit: 2(bits)
Flow ctrl: RTS/CTS
FIFO ctrl: Enable
Rts ctrl: OFF
Dtr ctrl: OFF

Shenzhen 3onedata Technology Co., Ltd
12 www.3onedata.com
Chapter 4 Device Security Management
4.1 Enter into the view of Security Management
Please check the device information command as table 4.1.1
Table 4.1.1
Operating Command Description
Enter into the view of device
information Security Run in the view of system
Set user management
UserManage Add
<username>
<password>
<affirm>
<user_level>
<username>
--user name:No more than 20 characters
<password>
--password:No more than 20 characters
<affirm> --affirm password
<user_level> --user level:
--0 guest
--1administrator
Modify user management
UserManage modify
<name_index>
<username>
<password>
<affirm>
<user_level>
<name_index>
--name index:user name index
<username> --user name
<user_level> --user level:
0 guest
1 administrator
Delete user management
UserManage delete
<username>
<username>
--user name:No more than 20 characters
IP filter set IpFilter def
<def_permission>
<def_permission>
--0:forbidden 1:allow
IP address filter enable setup IpFilter set <filter_en> <filter_en> --0:disable 1:enable
Modify IP address filtering
entries
IpFilter modify
<list>
<state>
<permission>
<ip>
<netmask>
<list> 1-16
<state> --0:disable 1:enable
<permission> --0:forbidden 1:allow
<ip> --ip address
<netmask> --netmask
MAC
address filter enable
setup
MacFilter enable <filter_en> <filter_en> --0:disable 1:enable
MAC filter set MacFilter def
<def_permission>
<def_permission>
--0:forbidden 1:allow

Shenzhen 3onedata Technology Co., Ltd
13 www.3onedata.com
Operating Command Description
Modify NAC address filtering
entries
MacFilter def<list_id>
<state>
<access_permission>
<MAC_addr>
<list_id> 1-16
<state> --0:disable 1:enable
<access_permission>
--0:forbidden 1:allow
<MAC_addr>
--MAC address:xx.xx.xx.xx.xx.xx
Set device security funtion
DeviceSecurity
<web_console>
<telnet_console>
<serach>
<upgrade>
<web_console> 0:disable 1:enable
<telnet_console> 0:disable 1:enable
<serach> 0:disable 1:enable
<upgrade> 0:disable 1:enable
Example: Enter into device information view, enter the bold type command as follows and enter return key.
Switch(Security)# ?
List --List commands of current menu
Help --Help commands of current menu
Quit --Quit from CLI
Exit --Exit from current menu
Reboot --Reboot switch
UserManage show --User Manage
Auth --Authentication setting
UserManageAdd User Manage
UserManage modify User Manage
UserManage delete User Manage
IpFilter show Ip Filter
IpFilter set IP Filter
IpFilter def IP Filter
IpFilter modify IP filter
MacFilter show MAC Filter
MacFilter set MAC Filter
MacFilter def MAC Filter
MacFilter modify MAC Filter
Device show --Device Manage
Device modify Device Security
Example: Set the user name and password are admin123.
Switch(Security)# userManage add admin123 admin123 admin123 1
[OK]
Example: set the user management 2 of the user name and password are set to admin111, for the administrator.
Switch(Security)# userManage modify 2 admin111 admin111 admin111 1
[OK]

Shenzhen 3onedata Technology Co., Ltd
14 www.3onedata.com
Example: User management entries delete.
Switch(Security)# userManage delete 2
[OK]
Example: set the IP filter rule to prohibit access
Switch(Security)# ipFilter def 0
[OK]
Example: modify the status of IP filtering rule entries 1 to allow, access permission for the permission to access,
allowing access to the address 192.168.2.188, subnet mask is set to 255.255.255.0
Switch(Security)# ipFilter modify 1 1 1 192.168.2.188 255.255.255.0
[OK]
Example: modify the status of MAC filtering rule entry 1 to allow, access permission to allow access, allowing the
MAC address for 00.00.00.00.00.01
Switch(Security)# macFilter modify 1 1 1 00.00.00.00.00.01
[OK]
4.2 Display Security Management
Please check the security information command as table 4.2.1
Table 4.2.1
Operating
Command
Description
Display user management
information userManage show
Display IP filtering information
IpFilter show <list_id>
<list_id> --1-16 or all
Display MAC filtering
information
MacFilter show <list_id> <list_id> --1-16 or all
Display device security settings
information Device show
Example: Display serial COM1 basic parameters set information
Switch(Security)# userManage show
user_index:1 user_name:admin user_level:administrator
user_index:2 user_name:admin123 user_level:guest
user_index:3 user_name:admin1 user_level:guest
Example: display IP address filtering item 1 information
Switch(Security)# ipfilter show_details 1
list_id:1
state: enable
acess permission: allow
ip address: 192.168.2.188
subnet mask: 255.255.255.0

Shenzhen 3onedata Technology Co., Ltd
15 www.3onedata.com
Example: display MAC address filtering item 1 information
Switch(Security)# macFilter show_details 1
list_id:1
state: enable
acess permission: allow
mac address: 00.00.00.00.00.00
Example: display device security settings information
Switch(Security)# device show
web: Enable
telnet: Enable
search: Enable
upgrade: Enable

Shenzhen 3onedata Technology Co., Ltd
16 www.3onedata.com
Chapter 5 System Management
5.1 Enter into the view of System Management
Please check the device information command as table5.1.1
Table5.1.1
Operating Command Description
Enter into the view of
device information Manage Run in the view of system
Set gateway Gateway <gateway>
<gateway>
--gateway address such as 192.168.1.1
Set IP address and subnet
mask Ip <ip_address> <mask>
<ip_address>
--ip address such as 192.168.1.254
<mask>
--subnet mask such as 255.255.255.0
Set overtime Set <time_out> <time_out> --Range [0-60] minutes
0 --Close timeout function
Recovery equipment to
factory settings Restore
Upload configuration file
upload
Download configuration
file
download
Software upgrade upgrade
Example: Enter into device information view, enter the bold type command as follows and enter return key
Device# manage
Switch(Manage)# ?
List --List commands of current menu
Help --Help commands of current menu
Quit --Quit from CLI
Exit --Exit from current menu
Reboot --Reboot switch
Gateway --Set gateway
Ip --Set ip address and subnet mask
Show net_address --Show Internet address
Set --Set Console Overtime
Restore --Reset to default config
Upgrade --upgrade switch
Upload --Upload switch configuration files
Download --Download switch configuration files

Shenzhen 3onedata Technology Co., Ltd
17 www.3onedata.com
Example: set the device gateway to 192.168.2.1
Switch(Manage)# gateway 192.168.2.1
[OK]
The device is rebooting. Please waiting.........
Example: set the timeout period to 60min
Switch(Manage)# set 60
[OK]
Example: software upgrade
Switch(Manage)# upgrade
Please send upgrade file, or press [Esc] to quit .
CCCCCCC
Example: upload configuration file
Switch(Manage)# upload
Please send configuration file, or press [Esc] to quit .
CCCC
Example: download the configuration file
Switch(Manage)# download
Please select file path and ready to receive file .
Or press [Esc] to quit .
5.2 Display System Management
Please check the device information command as table 5.2.1
Table 5.2.1
Operating
Command
Description
Display system address
information
show net_address Carry out under the view of system management
Example: display device address information
Switch(Manage)# show net_address
Device IP address : 192.168.2.66
Device mask address : 255.255.0.0
Device gateway : 192.168.2.1
Other manuals for GW110X Series
1
Table of contents
Other 3One data Gateway manuals

3One data
3One data GW1108 Series User manual

3One data
3One data GW1104 Series User manual

3One data
3One data IGW1111-3IN1-DB User manual

3One data
3One data GW1101-1DI(3IN1)-DB-P(12-48VDC) User manual

3One data
3One data GW11X8-8D (3IN1)-RJ45 Series User manual

3One data
3One data GW110X Series User manual

3One data
3One data IGW1111 Series User manual

3One data
3One data GW11 Series User manual

3One data
3One data GW1118 Series User manual

3One data
3One data GW1102 Series User manual