ElEctric DragstEr
To Parents: Read all instructions before
providing guidance to your children.
1. Please read through these instructions before you start.
2. Adult supervision and assistance are required at all times.
3. Intended for children of ages 8 and up.
4. This kit and its finished product contain small parts which may
cause choking if misused. Keep away from children under 3 years old.
5. To prevent possible short circuits, never touch the contacts inside the battery case with any metal.
B. USE OF BATTERY
1. Requires two “AAA”, 1.5V batteries (not included).
2. For best results, always use fresh batteries.
3. Insert batteries into the battery compartment according to the correct polarity.
4. Remove the batteries from the kit when not in use.
5. Replace exhausted batteries straight away to avoid possible damage to the kit.
6. Rechargeable batteries must be removed from the kit before recharging.
7. Rechargeable batteries should be recharged under adult supervision.
8. Do not attempt to recharge non-rechargeable batteries.
9. Do not mix old and new batteries.
10. Do not mix alkaline, standard (carbon-zinc), or rechargeable (Ni-Cd) batteries.
11. Make sure that the supply terminals are not short circuited.
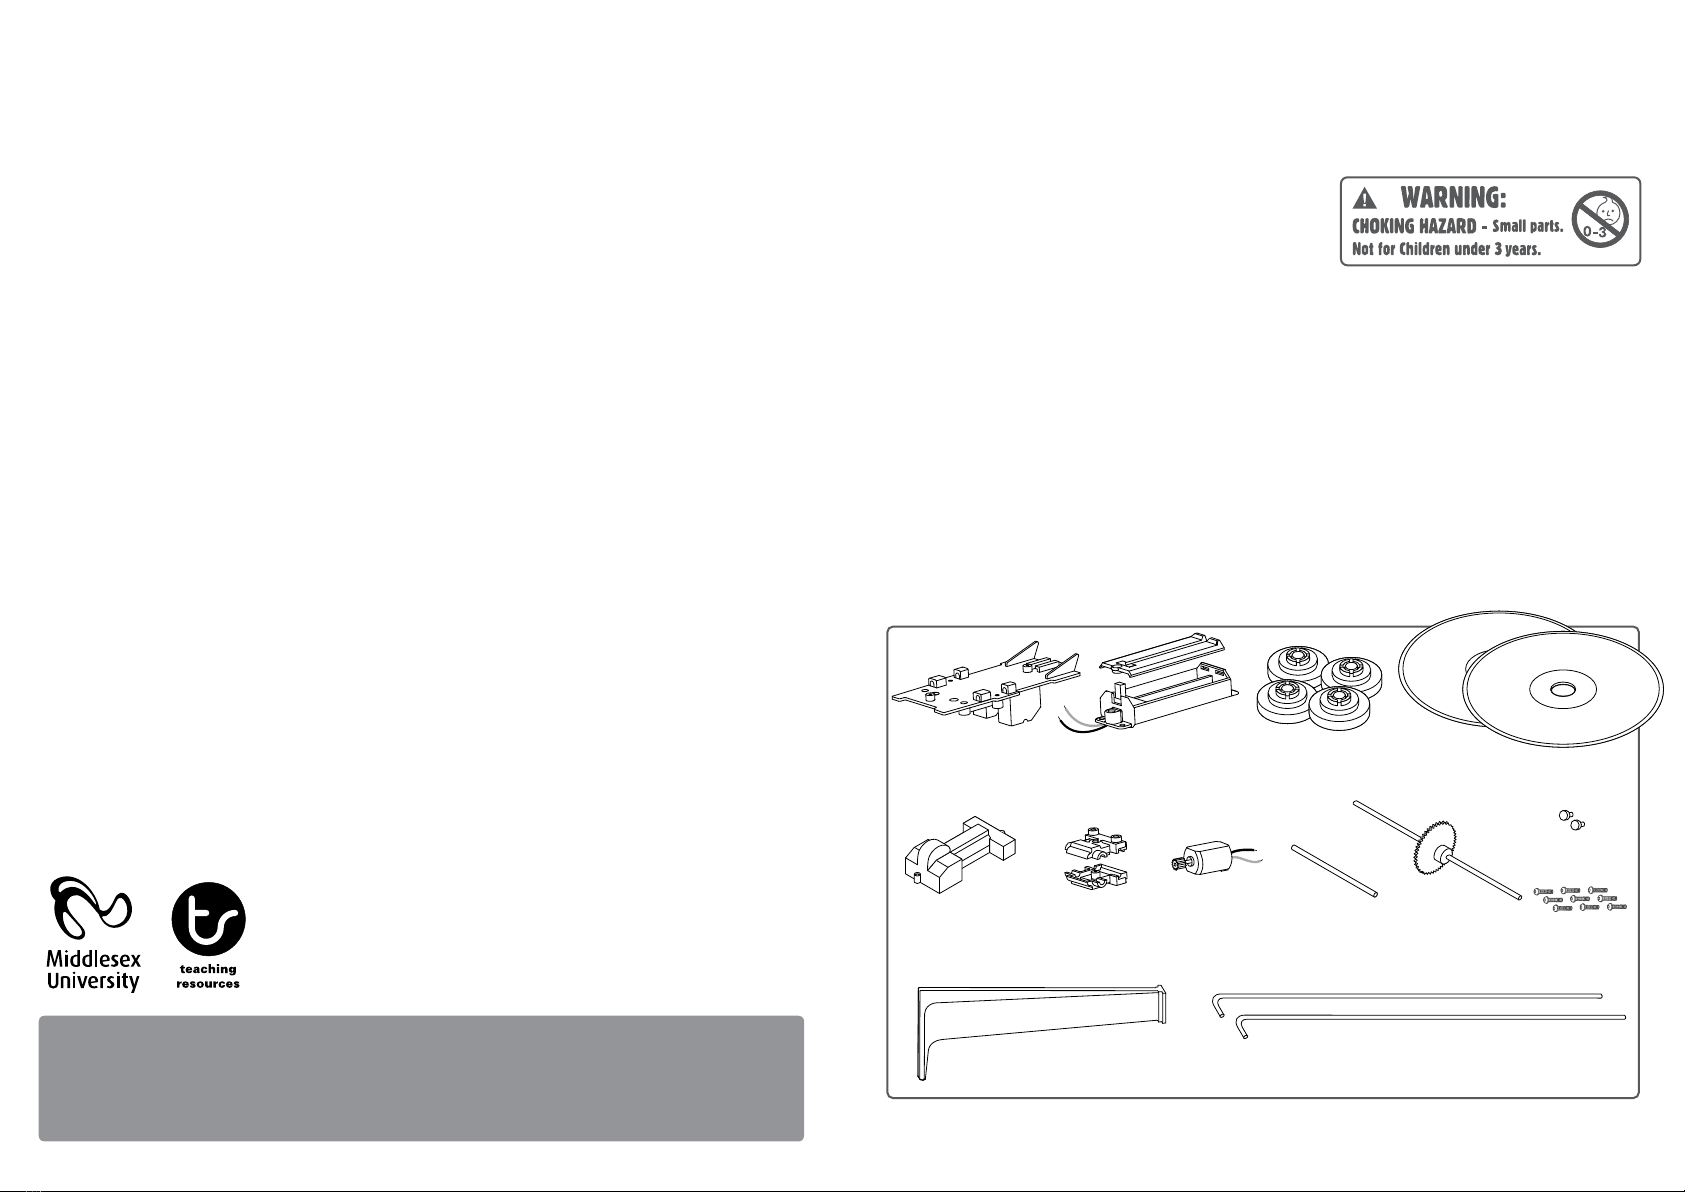
C. CONTENTS
1 motor (with wires and
worm gear attached)
1 motor housing
1 motor/axle
coveraxe
1 battery case (with wires)
1 long axle (with cog
attached)
1 short axle
4 wheels
2 metal rods
1 front axle assembly
top & base
screws
2 terminal caps
2 CDs
Also required but not included: 2 x ‘AAA’ 1.5 volt batteries, small crosshead screwdriver.
1 tail fin
If the motor does not run:
• Check that you are using fresh batteries.
• Check that the batteries are inserted the correct way round in the battery case.
• Check that all four wires are touching the metal terminal caps.
If the Dragster runs backwards:
• Remove the motor/axle cover and check that you have connected the wires the correct way round (see step 3).
If the Dragster does not run in a straight line:
• Loosen the two screws holding the metal rods on the front axle assembly, straighten the assembly and retighten the
screws.
F. TROUBLE SHOOTING
G. HOW DOES IT WORK?
The larger the rear wheels, the greater the dragster’s speed. You can work out the speed of the dragster by multiplying
the speed of the gearbox (about 100 revolutions per minute) by the circumference (distance around the edge) of the CD
(about 37 cm). This gives an answer of 3,700 cm (37 metres) per minute or 60 cm per second. The speed also depends
on the smoothness of the surface the dragster runs on. Speed also depends on the wheels. The CDs are very thin, with a
hard edge, and offer very little rolling resistance (a force that tries to slow the turning of a wheel). Wider, softer wheels,
such as flat bicycle tyres create much more rolling resistance.
H. WHAT NEXT
Decorate the tail fin with your favourite sticker patterns. You could also change the wheels to show off the graphics of
old CDs you find.
I. FUN FACTS
• A dragster is a specialised vehicle. It is designed for racing over short distances. Its large rear wheels, with wide slick
tyres are driven by a powerful engine. This combination gives very high acceleration.
• Some enthusiasts put large rear wheels on their cars to make them look like dragsters.
• CDs make very good wheels because they are so thin. This means that they roll very easily over a at surface – much
better than fat wheels with tyres.
• Strange but true! Most dragsters do a ‘wheelie’ when they start off because of the immense power of the engine.
Sometimes the whole body tips over backwards by accident.
• Strange but true! Billions of CDs are made every year. Some estimates say that more CDs are made than any other
objects – including matchsticks.
J. QUESTIONS & COMMENTS
We treasure you as a customer and your satisfaction with this product is important to us. In case you have any comments
or questions, or you find any parts of this kit missing or defective, please do not hesitate to contact our distributor in your
country, whose address is printed on the package. You are also welcome to contact our marketing support team at Email:
COPYRIGHT 2005-2008 4M INDUSTRIAL DEVELOPMENT LIMITED
41-03905/1/V1
A. SAFETY MESSAGES
280808


