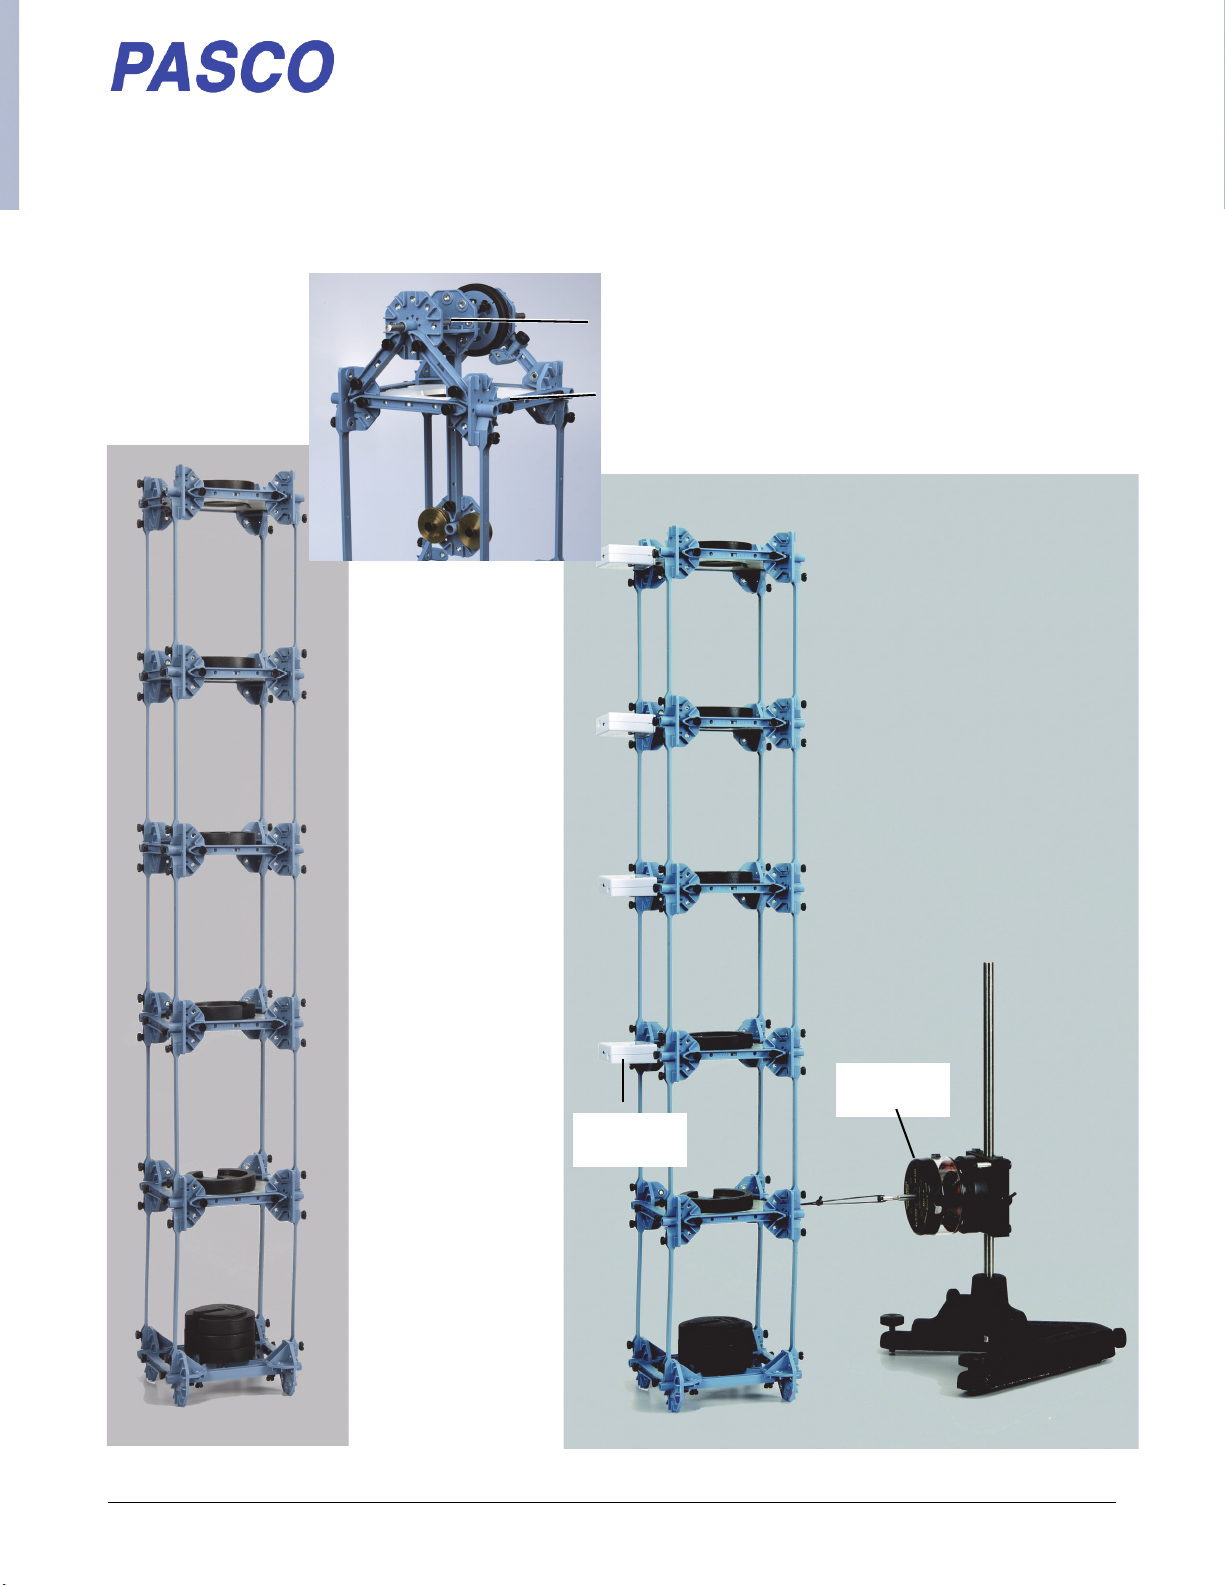
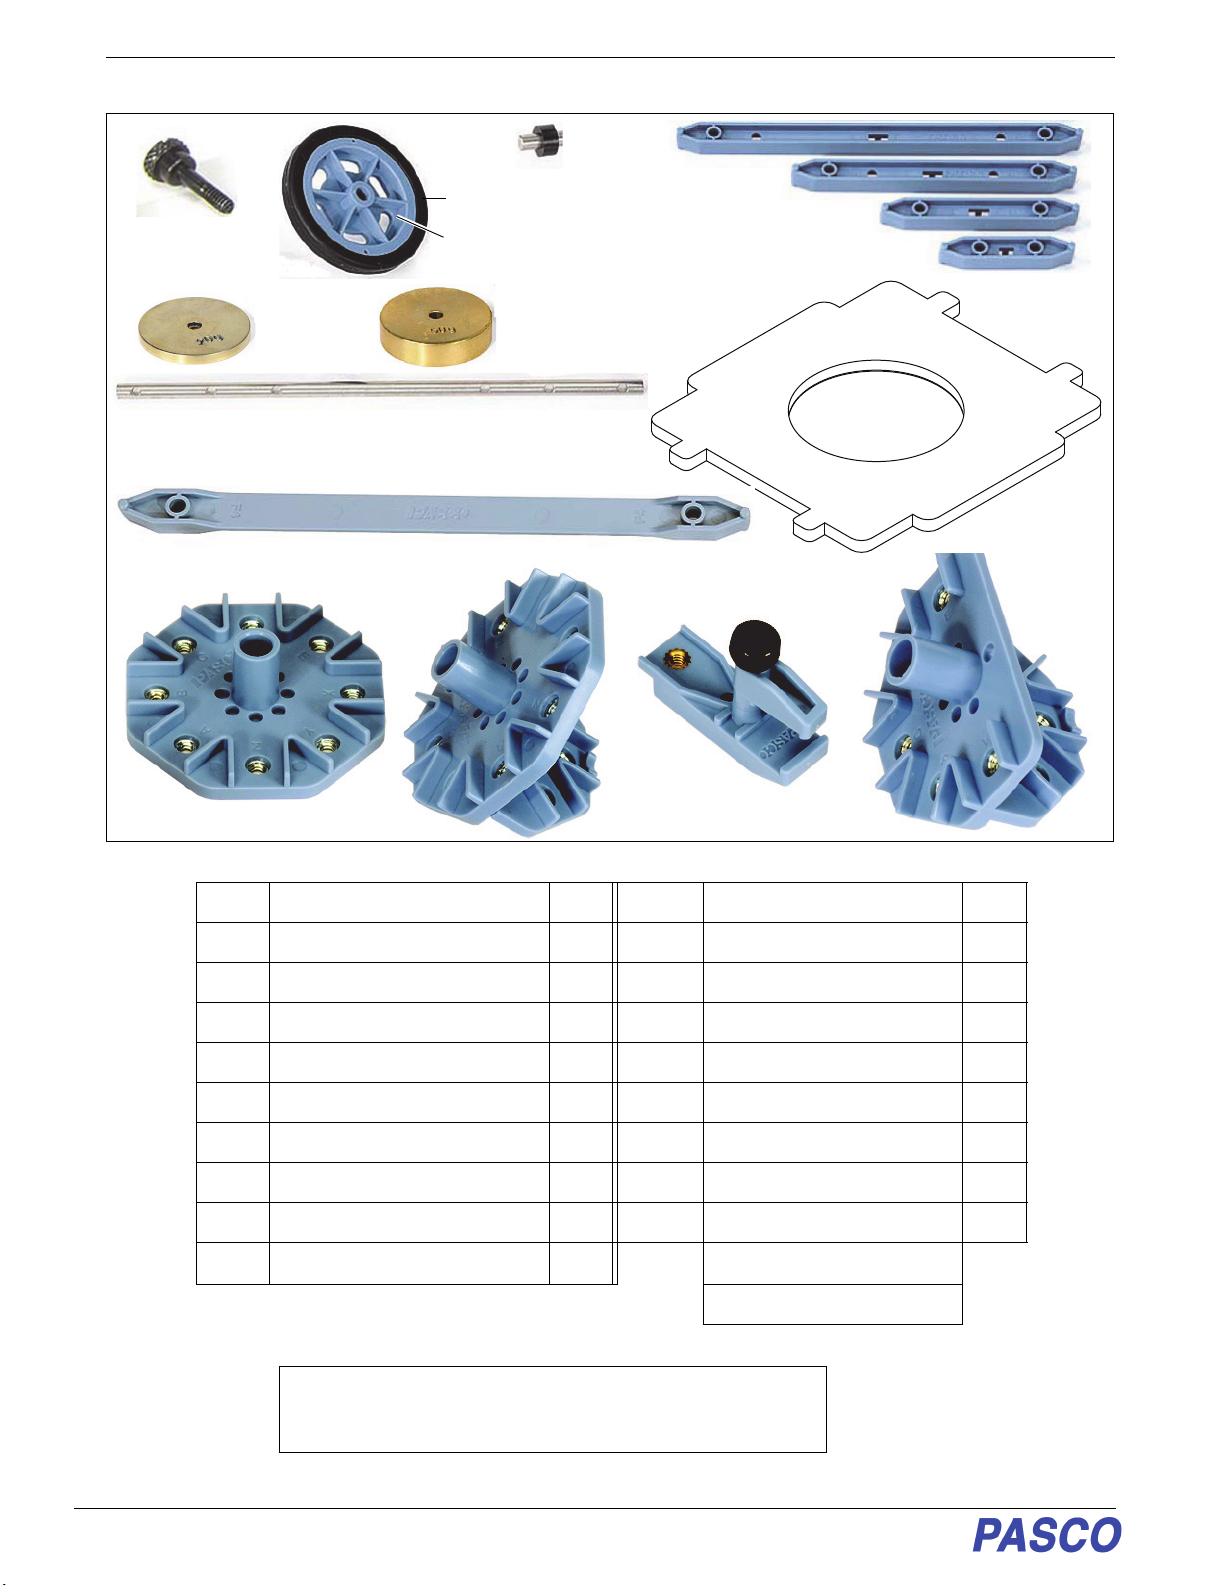
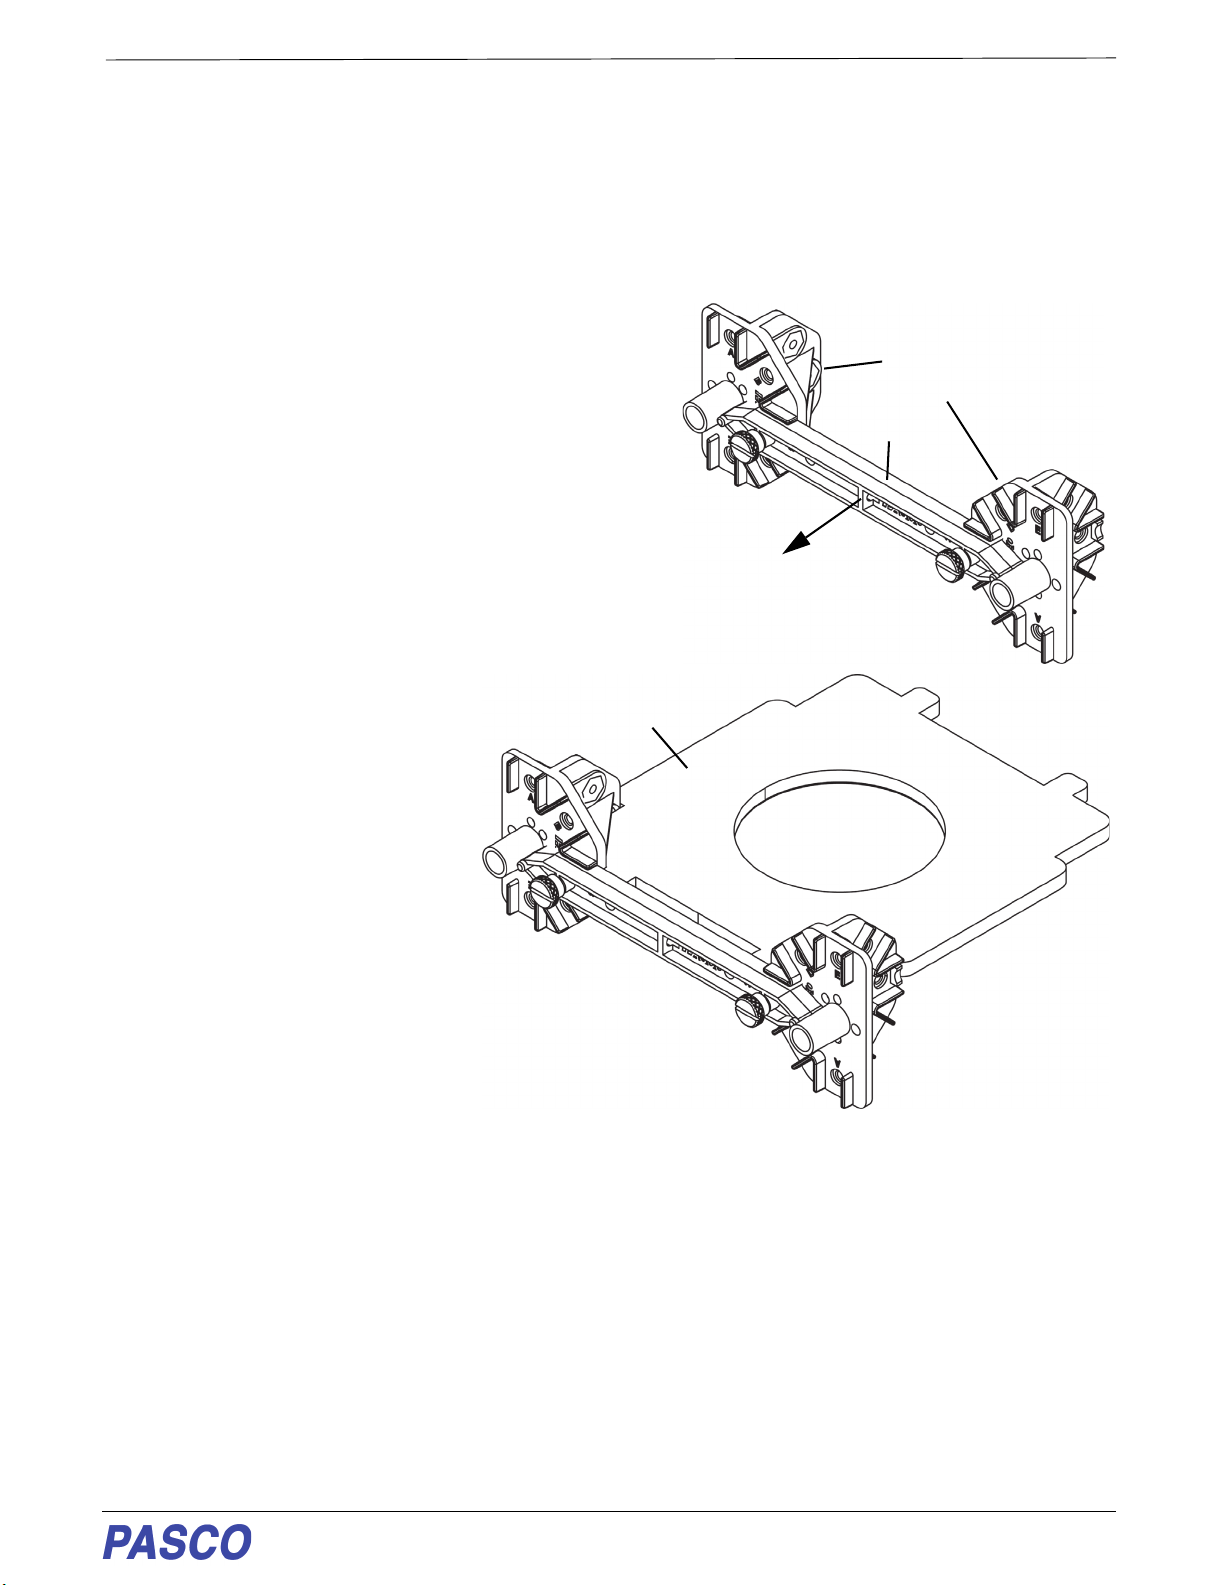
PASCO ME-7018 User manual
Other PASCO Science Education Product manuals

PASCO
PASCO ME-9885A User manual

PASCO
PASCO ES-9080B User manual

PASCO
PASCO Spark SLS User manual

PASCO
PASCO ME-7001 User manual

PASCO
PASCO //control.Node User manual

PASCO
PASCO Node Cart User manual

PASCO
PASCO ES-9070 User manual

PASCO
PASCO EM-3535 User manual

PASCO
PASCO EM-3536 User manual

PASCO
PASCO SPARK User manual


Popular Science Education Product manuals by other brands

ARBOR SCIENTIFIC
ARBOR SCIENTIFIC 93-3501 Assembly instructions

Alga Science
Alga Science SOLAREXPLORER quick start guide

HAKUBUN
HAKUBUN magnet SA manual

Aurora
Aurora Plasma Globe owner's guide

Dentsply Sirona
Dentsply Sirona Sim Multi Bench installation instructions

Circuitmess
Circuitmess CircuitPet user guide