RUSH100 OPERATOR MANUAL
5 .11 TA C TI C A L ®
1360 REYNOLDS, SUITE 101
IRVINE, CA 92614, USA
866.451.1726 | WWW.511TACTICAL.COM
06
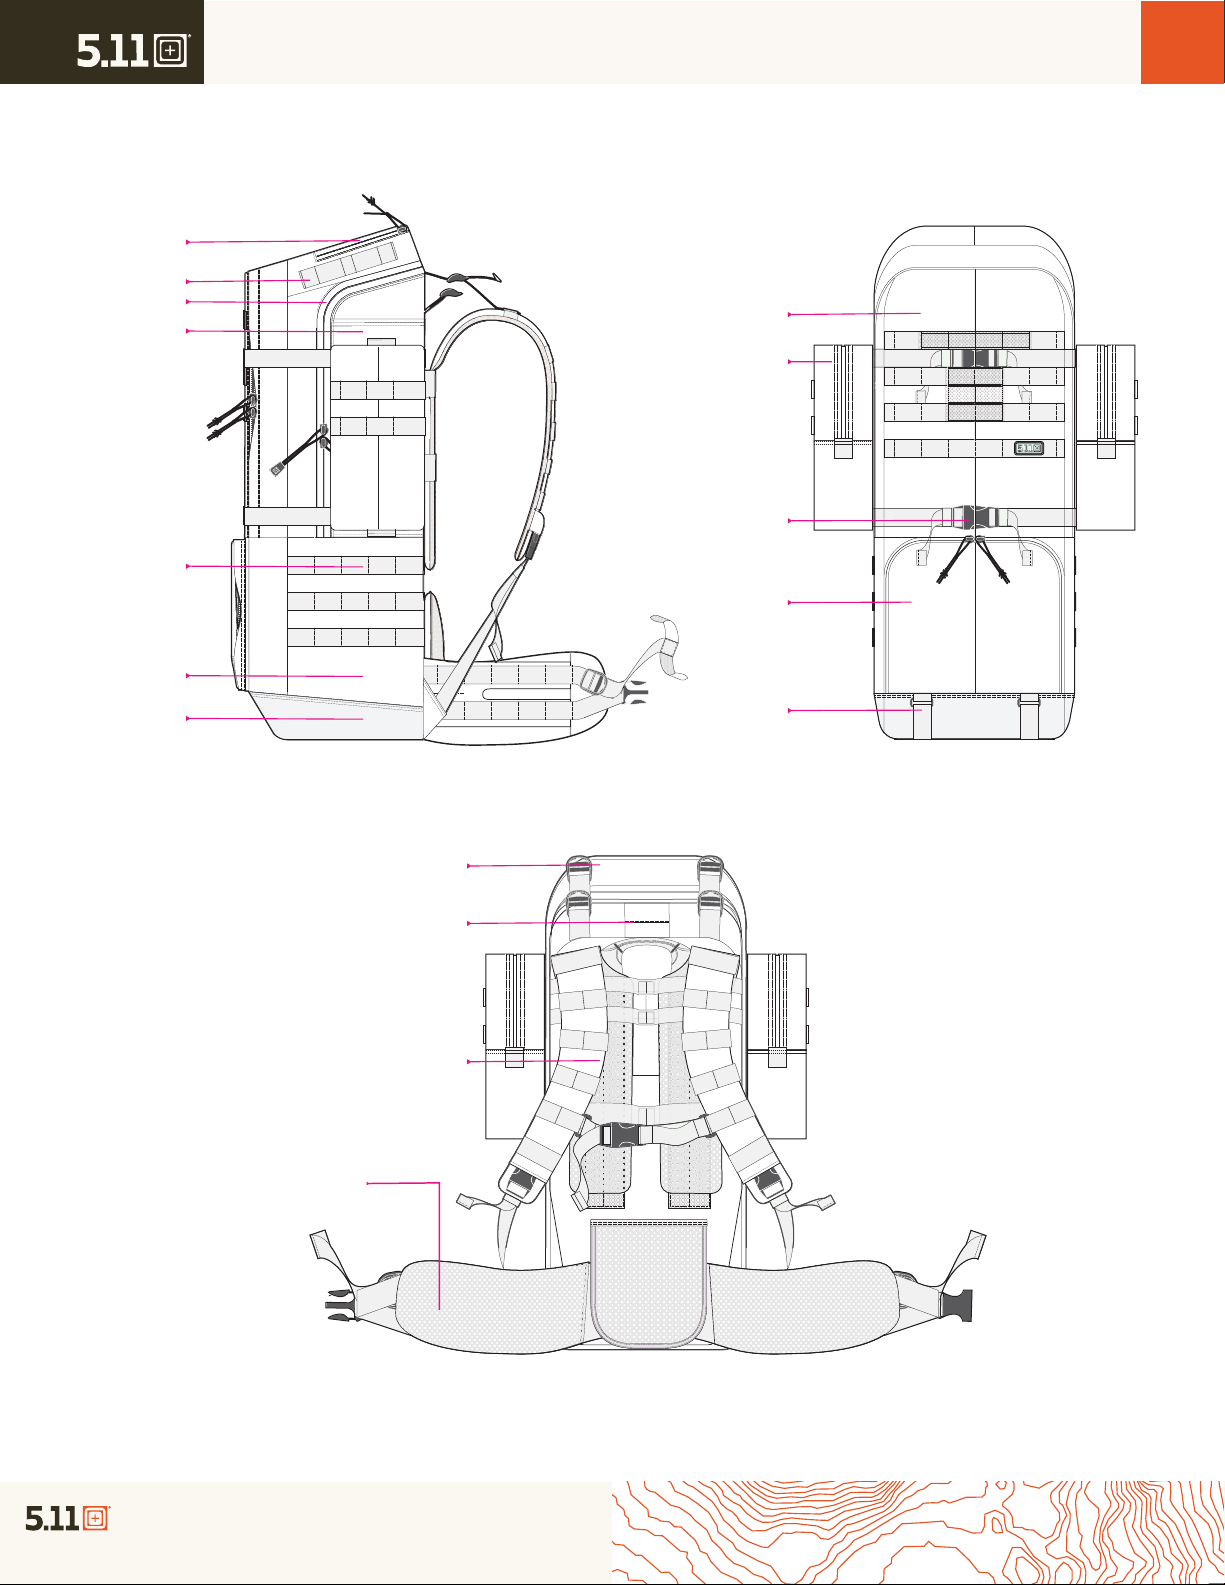
FIT ADJUSTMENT
The RUSH100TM backpack has several ways to adjust your load to fit your body. The custom aluminum and fiberglass frame along with the reinforced
load-bearing waist belt are designed to place the majority of the load on your hips for maximum comfort on your long haul.
FIT ADJUSTMENT 04:
Attach the sternum strap so it’s roughly 1” below your collarbone.
+
Buckle the sternum strap and tighten to comfort.
+
FIT ADJUSTMENT 01:
+Put the pack on. The shoulder straps do not need to be tight.
+Load your pack with roughly 7kgs of weight to simulate a loadout.
+
+
Buckle the waist belt and adjust the pack so the belt padding rests
on top of your hip bones.
Tighten the waist belt so that it fits securely and snugly while being
comfortable. There should be a few inches between the front ends
of the padding so there is room for adjustment.
FIT ADJUSTMENT 02:
+
Tighten the shoulder straps so the straps wrap closely around your
shoulders. If there is too little or too much space, adjust the
location of the shoulder straps.
+
More of the weight should be on the belt versus the
shoulder straps. If not, adjust the height location of the shoulder
straps and/or check the location of the belt.
FIT ADJUSTMENT 03:
Tighten the load lifter straps to bring the upper portion of the pack
towards your back. The load lifter straps should roughly be at a
45 degree angle to the back panel for optimum performance.
+
If needed, reattach the load lifters at the lower or upper load lifter
attachment point.
+
Do not overtighten the load lifters.
+
1
1
2
2
3
3
4
4
5
5
Load Lifter Attachment Points
Load Lifter Straps
Shoulder Straps
Sternum Strap
Load-bearing Waist Belt
* the fit adjustment may vary depending on the total load weight,
how the backpack is packed and personal preferences in comfort.