6 Riding and Parking
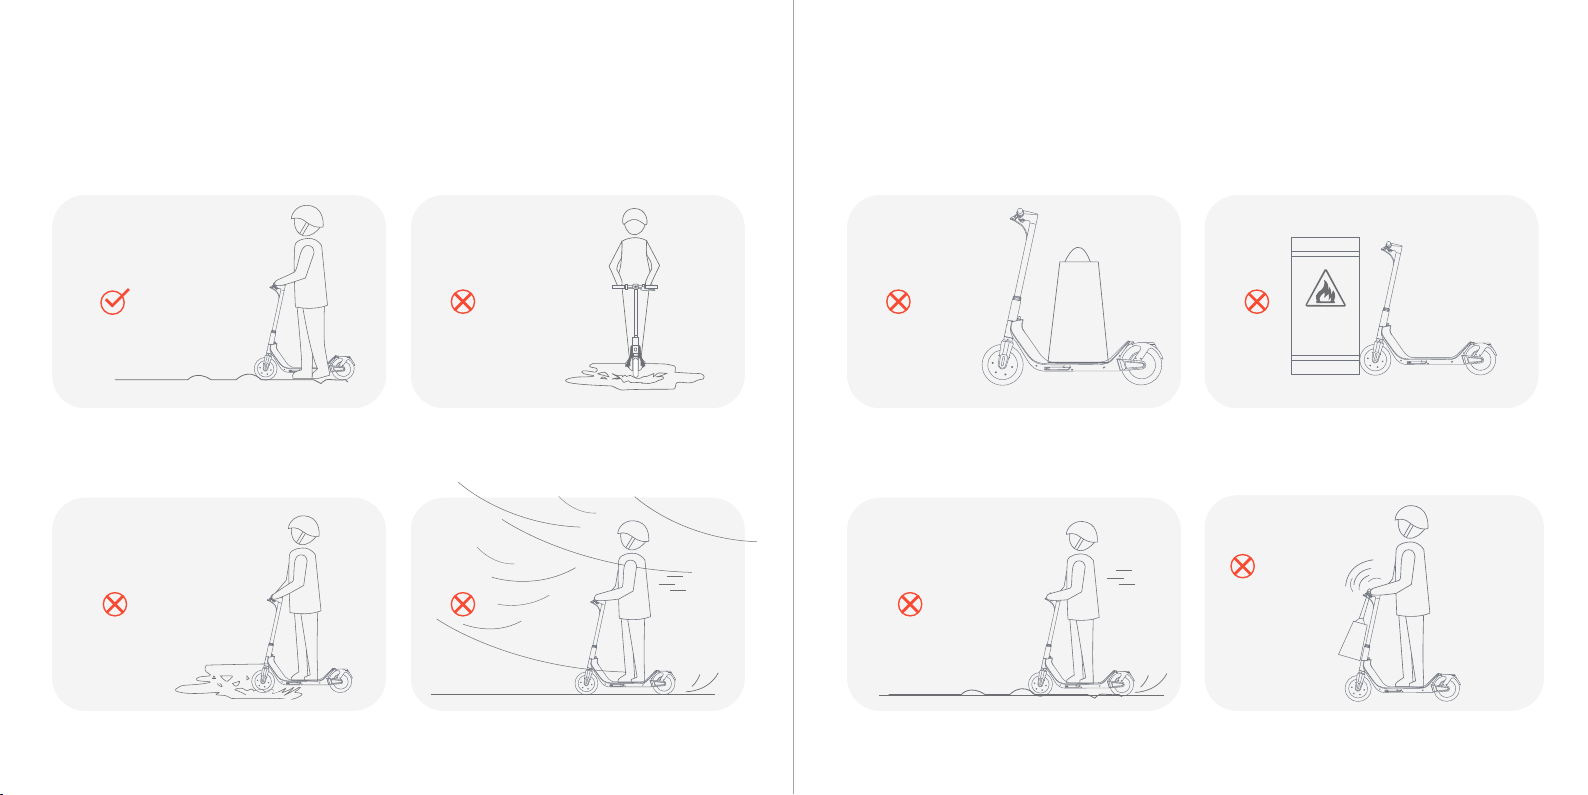
1.Select an appropriate riding place.
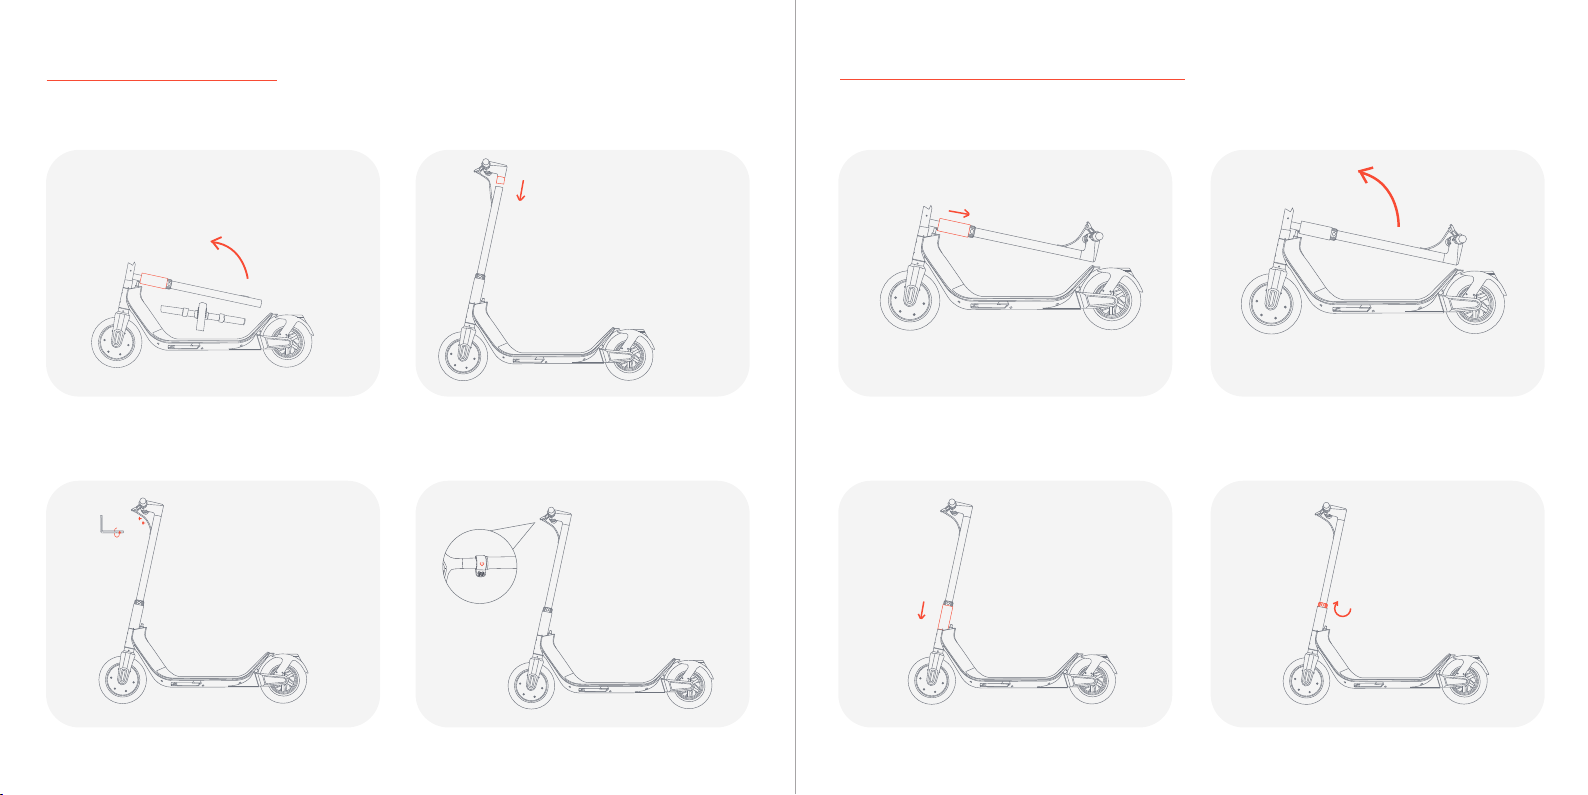
2.Unfold the scooter according to the
unfolding instructions and wear protective
equipment.
3.It is necessary to check that the steering
system is correctly adjusted, that all
connection elements (such as a folding
system) are correctly tightened and not
broken, and that the brakes and wheels are in
good condition.
1.Press the power button to turn on the scooter.
2.Put one foot on the footboard and the other foot on
the ground.
3.Make the scooter body slide forwards to 3km/h and
gently press the right thumb accelerator. The scooter
will slowly run forwards. When the scooter is running
steadily, put the other foot onto the footboard. The
larger holding angle of the right thumb accelerator,
the higher the speed.
Note: For the riding safety, G1 has a non-zero start
mode. The accelerator cannot be enabled until the
body slides forwards for a certain distance.
1.Under normal circumstances, if you hold
the left brake lever, the motor will be
immediately powered off and subject to
braking. The greater the holding force, the
greater the braking force.
2.Under emergency conditions, you can step
on the rear brake to simultaneously enable
the electromagnetic brake of the front wheel
and friction brake of the rear wheel.
Preparation for riding
Riding Stop
16 17
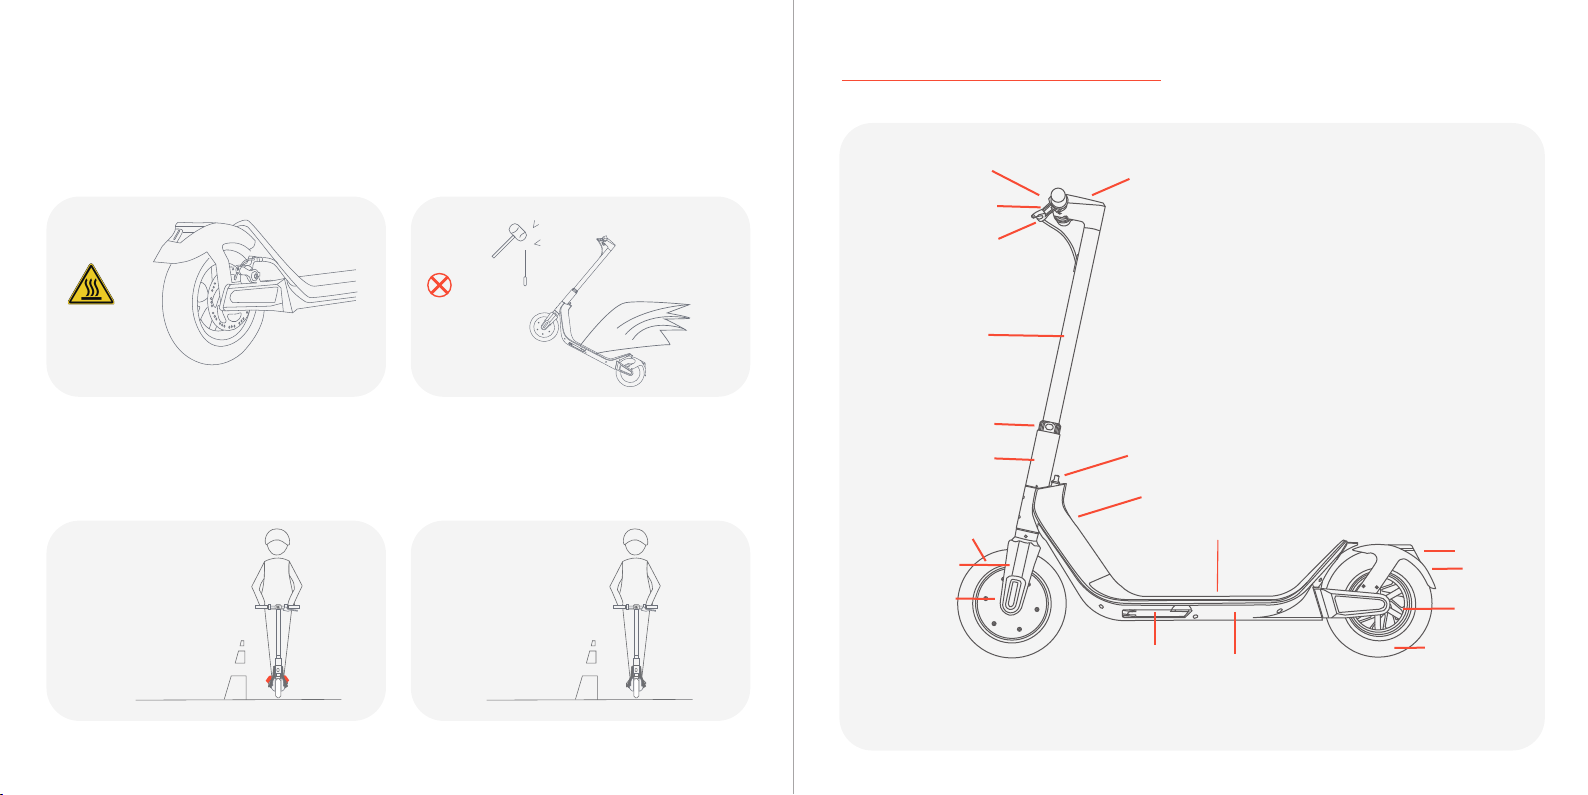
7 Control System
Power Button Gear Indicator Speed Control
Brake Lever Instrument Display Disc brake