8*8 SPA 303 User manual

QUICK START GUIDE
1
Cisco Model SPA 303 Quick Start Guide
Welcome
Thank you for choosing the Cisco Small Business IP phone. This guide describes how to install your phone and how to perform some
basic tasks.
1Installing Your IP Phone
Use this procedure to install the phone and connect it to your network.
Do not insert a telephone line cord into the port marked “AUX”.
Step 1. Turn the phone body over to expose the ports on the back of
the unit.
Step 2. Insert one end of the phone cord into the slot marked with a
phone symbol (the Handset Port). Insert the other end into the
jack at the bottom of the handset (not shown).
Step 3. (Optional) Connect the desk stand by lining up the tabs on
the desk stand with the slots on the back of the phone. Slide the
bottom tabs into the slots and lightly press down on the top of
the desk stand. It should easily slide into the top slots.
Do not force.
Step 4. If you are using an external power source, plug one end of the power cord into the building’s power outlet and insert the other end of
the power cord into the phone base.
Step 5. Connect your phone to the network using an Ethernet Connection. Insert one end of the Ethernet cable into the network port on
the phone body marked “SW.” Insert the other end of the Ethernet cable into the appropriate device, such as a network switch, on
your network.
Step 6. (Optional) To provide network access to a PC, connect one end of an additional Ethernet cable (not provided) to the PC port on the
back of the phone body. Connect the other end of the Ethernet cable to the network port on your PC.
Step 7. (Optional) To install the phone on a vertical surface, use the Cisco MB100 Wall Mount bracket. See the Cisco Small Business IP Phone
SPA 50X User Guide (SIP) or the Cisco Unied Communications Manager Express for the Cisco Small Business IP Phone SPA 50X
documents on www.cisco.com for more information. The Where to Go From Here section contains links to the documentation area
on www.cisco.com.

QUICK START GUIDE
Cisco SPA 303G
2
2Phone Lines and Buttons
Numbered objects in the photo are explained in the following table.
#Phone Feature Description
1Handset Pick up to place or answer a call.
2Message Waiting
Indicator
Displays solid red when you have a new voice mail message. Flashes red during an incoming call or when
the phone’s rmware is being updated.
3LCD Screen Displays date and time, phone station name, line extensions and softkey options.
4Line keys Indicates phone line status. Typically when lit:
Green: Line is idle.
Red (steady): Line is active or in use.
Red (blinking): Line is on hold.
Orange: Line is unregistered (cannot be used).
Orange (Flashing): The phone is not connected to the network.
5Softkey buttons Press a softkey button to perform the action shown on the label on the LCD screen above.
6Navigation button Press an arrow to scroll left, right, up, or down through items shown on the LCD screen.
7Messages button Press to access voice mail (must be set up by your phone system administrator).
8Hold button Press to place a call on hold.

QUICK START GUIDE
Cisco SPA 303G
3
#Phone Feature Description
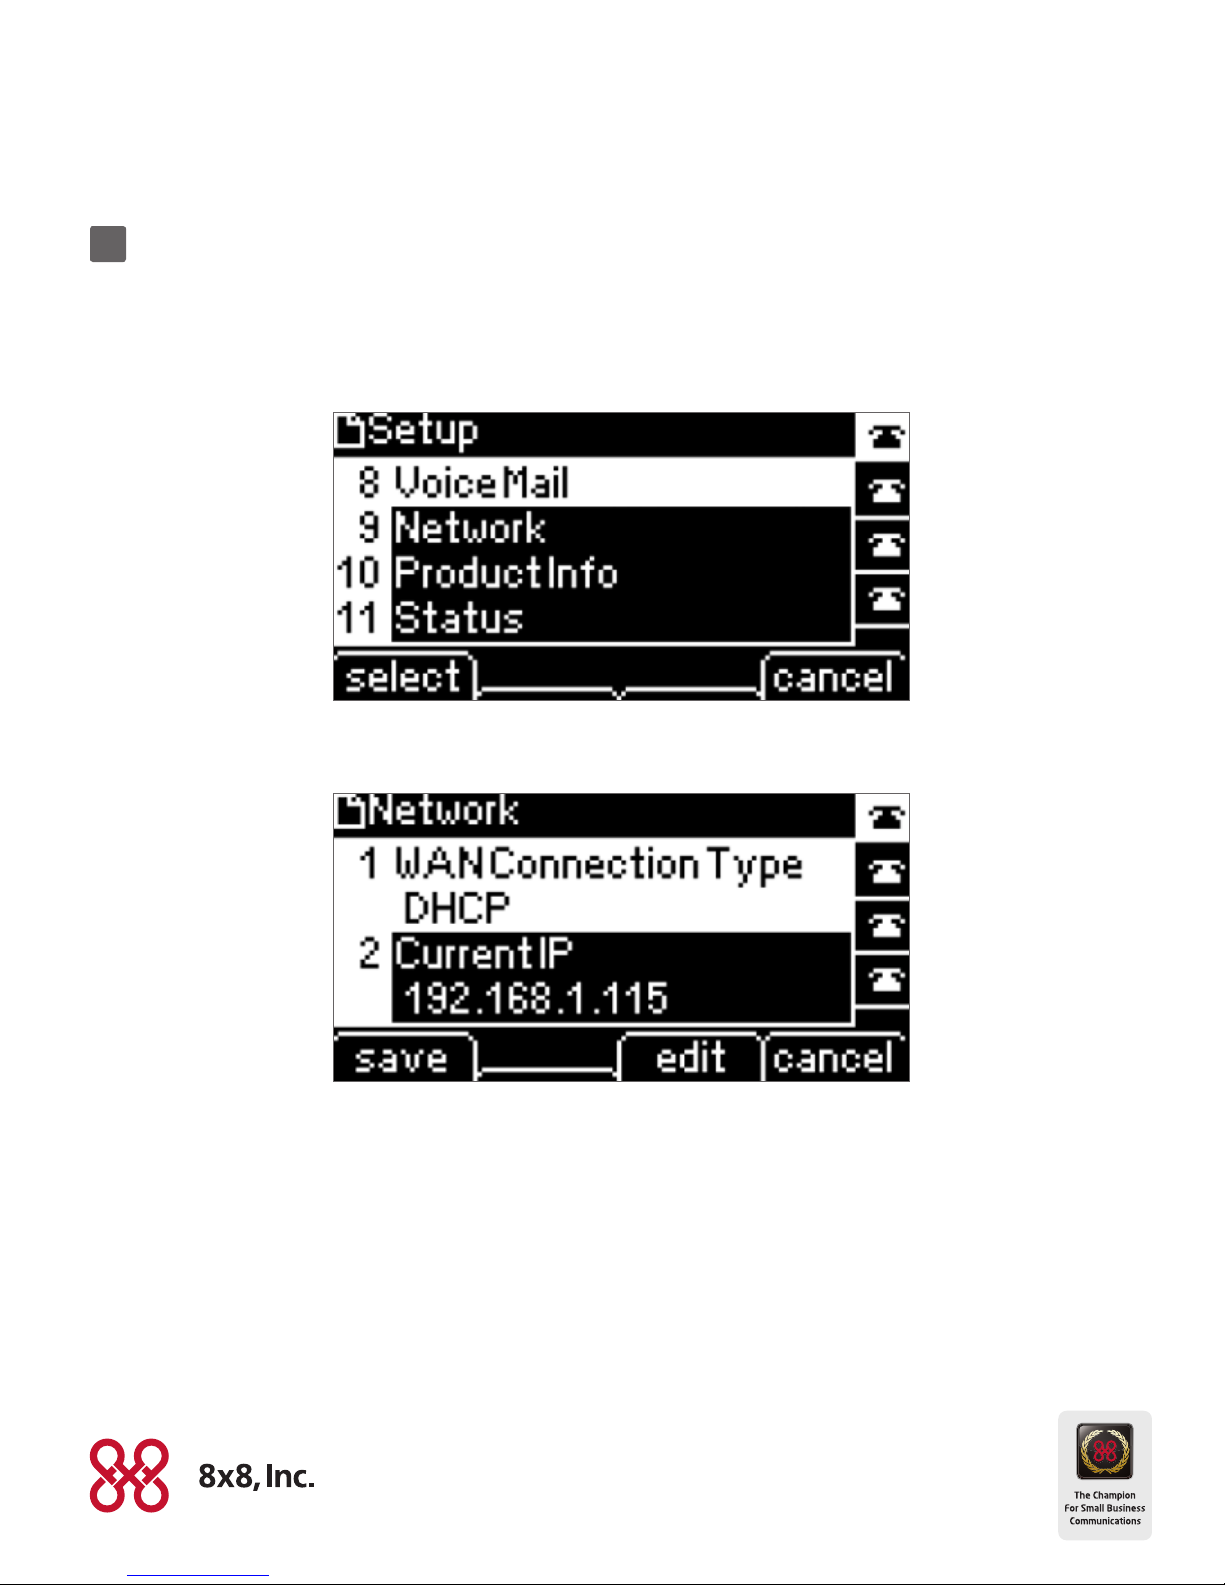
9Setup button Press to access a menu to congure features and preferences (such as your directory and speed dials),
access your call history and set up functions (such as call forwarding).
10 Mute button Press to mute or unmute the phone. When phone is muted, the button glows red. A ashing mute button
indicates the network connection cannot be found.
11 Headset button Push to turn the headset on or o. When the headset is on, the button glows green.
12 Volume button Press + to increase the volume and - to lower the volume of the handset, headset, speaker (when the
handset is o the phone), or ringer volume (when the handset is on the phone).
13 Speaker button Push to turn the speaker on or o. When the speaker is on, the button glows green.
14 Keypad Use to dial phone numbers, enter letters and choose menu items.
3Softkey Buttons
Press the right arrow on the navigation button to view additional softkey buttons. Below is a partial listing of softkey buttons that are
available on your phone.
Phone Feature Description
<< o r >> Move left or right through an entry without deleting characters.
add Add an entry.
apps Accesses supported 8x8 Virtual Oce applications.
bxfer Performs a blind call transfer (transferring a call without speaking to the party to whom you are transferring the call).
callpark Puts a call on hold at a designated “park” number. The call is parked on the line until you unpark it or the caller
disconnects. Must be congured by your phone system administrator.
cancel Cancels any changes you have made (press cancel before pressing Ok or save).
cfwd Forwards all calls coming to your phone to a specied number.
-cfwd Clears Call Forward.
clear Clears the entry.
conf Initiates a conference call.
confLx Brings active lines on the phone together into a conference call.
confserv Dials into the 8x8 conference bridge.
delChr Deletes the last number or letter.
delete Deletes an entire item (for example, a number from the Call History list).
dial Dials a number.
dir Provides access to phone directories.
dnd Do Not Disturb; prevents incoming calls from ringing your phone.
-dnd Clears Do Not Disturb.
edit Opens an item so that you can edit numbers or letters, or enable or disable a feature.
endCall Ends the call in progress.
exit Closes a menu.
hold Places a call on hold.
intercom Allows you to automatically connect to a remote extension.
join Joins two calls into a conference call and drops you from the call.

QUICK START GUIDE
Cisco SPA 303G
4
Phone Feature Description
lcr Returns the last missed call by dialing the number that called you.
missed calls Shows the Missed Calls list.
more Displays other softkey buttons that are available.
record Records the call in progress.
redial Displays a list of recently dialed numbers.
resume Resumes a call that is on hold.
save Saves your changes.
select Selects the highlighted item on the LCD screen.
xfer Performs a call transfer.
xfer2vm Transfers an active call to voice mail.
y/n Enters a submenu and when pressed, toggles between Yes or No to enable or disable an option.
4Using Your IP Phone
Placing or Answering Calls
To place or answer a call, you can pick up the handset, press the Speaker or Headset button, or press a line button.
Putting a Call on Hold
To put a call on hold, press the Hold button. The caller hears a series of three rapid beeps or music while on hold.
To resume the call, press the ashing red line button for the call or the Resume softkey.
Ending a Call
If you are using the handset, hang up or press the endCall softkey. If you are using the speakerphone, press the Speaker button. If you are
using the headset, press the Headset button.
Adjusting Volume and Muting
To adjust the volume of the handset or speaker, lift the handset or press the speaker button. Press +on the Volume button to increase the
volume, or press -to decrease the volume. Press Save.
To adjust the ringer volume, press the Volume button when the handset is on the phone and the Speaker button is o. Press the
Save softkey.
To mute the phone microphone, speaker, or headset microphone, press the Mute button on the phone. The button glows red. Press the Mute
button again to unmute.

QUICK START GUIDE
Cisco SPA 303G
NASDAQ: EGHT
www.8x8.com
© 2011. The 8x8, Inc. logo is a registered trademark of 8x8, Inc. 8x8, Inc. is a publicly traded company. PM402/411
5Using Keyboard Shortcuts
When using the phone menus, you can use the keypad to enter the number shown next to the menu or sub-menu item on the LCD screen. For
example, to obtain your IP address, press the Setup button and dial 9.
The IP address is displayed on the Network screen.
Table of contents