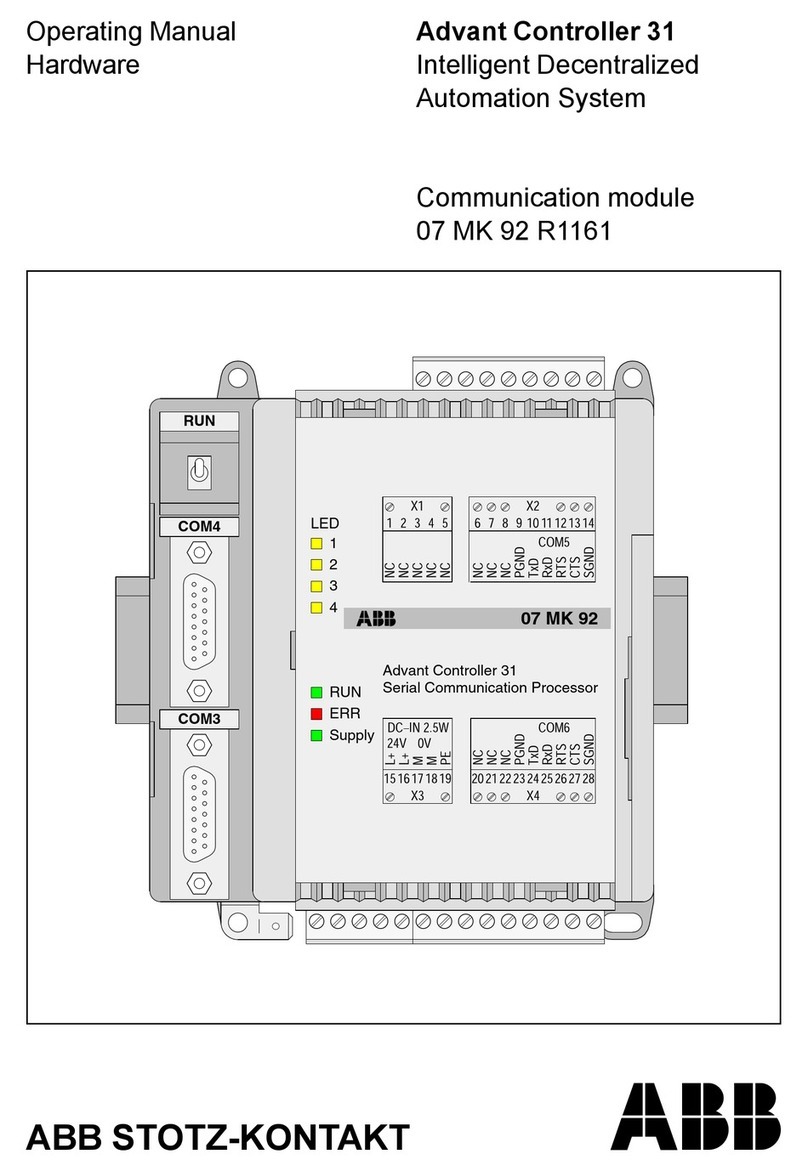
ABB IMASI13 User manual

Instruction
Harmony Series
Analog Input Module
IMASI13

WBPEEUI240766B0
Preface
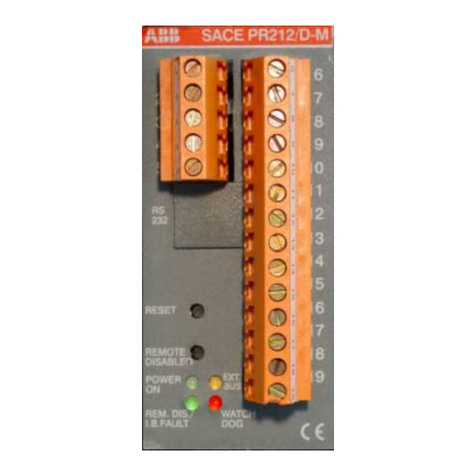
The IMASI13 Analog Input Module is a Harmony rack I/O
module that is part of the Symphony Enterprise Management
and Control System. It has 16 analog input channels that
interface isolated thermocouple, millivolt, RTD, and high level
analog signals to a controller with an analog-to-digital conver-
sion resolution of 24 bits. Each channel has its own ana-
log-to-digital converter and can be independently configured to
handle the desired input type. These analog inputs are used by
a controller to monitor and control a process.
The IMASI13 module can be used as a direct replacement for
the IMASI03 module with only minor modifications. Changes
to specification S11 in function code 216 are required to
handle the differences in resolution choices. Verification of
power supply sizing calculations and system current require-
ments could be necessary because of the change in power
consumption.
This instruction explains the IMASI13 module specifications
and operation. It details the procedures necessary to complete
setup, installation, maintenance, troubleshooting, and
replacement of the module.
NOTE: The IMASI13 module is fully compatible with existing INFI 90®OPEN
Strategic Enterprise Management Systems.

WBPEEUI240766B0
List of Effective Pages
NOTE: Changed text or tables are indicated by a vertical bar adjacent to the changed area. Changed fig-
ures are indicated by a vertical bar next to the figure caption. The date appears beside the page number.
Total number of pages in this instruction is 78, consisting of the following:
Page No. Change Date
Preface Original
List of Effective Pages Original
iii through ix Original
1-1 through 1-9 Original
2-1 through 2-12 Original
3-1 through 3-7 Original
4-1 through 4-11 Original
5-1 through 5-2 Original
6-1 through 6-9 Original
7-1 through 7-4 Original
8-1 Original
A-1 through A-9 Original
B-1 through B-2 Original
Index-1 through Index-3 Original

WBPEEUI240766B0 iii
Table of Contents
Section 1 Introduction ..................................................................................................1-1
Overview .................................................................................................................. 1-1
Intended User .......................................................................................................... 1-1
Features .................................................................................................................. 1-1
Instruction Content.................................................................................................. 1-3
How to Use this Instruction...................................................................................... 1-4
Document Conventions ............................................................................................ 1-5
Glossary of Terms and Abbreviations........................................................................ 1-5
Reference Documents............................................................................................... 1-5
Related Nomenclature .............................................................................................. 1-6
Specifications........................................................................................................... 1-6
Section 2 Description and Operation .........................................................................2-1
Introduction............................................................................................................. 2-1
Module Description .................................................................................................. 2-1
Functional Operation ............................................................................................... 2-1
Isolated A/D Converter......................................................................................... 2-2
Cold Junction Reference....................................................................................... 2-2
Digital Input Multiplexer (MUX) ............................................................................ 2-3
Microcontroller and Memory................................................................................. 2-3
Switch Settings .................................................................................................... 2-3
LED Indicators ..................................................................................................... 2-4
I/O Expander Bus.................................................................................................... 2-4
I/O Expander Bus Interface.................................................................................. 2-5
Data Values ......................................................................................................... 2-5
Termination Units ................................................................................................ 2-5
Function Codes .................................................................................................... 2-6
Automatic Adjustments and Corrections .................................................................. 2-6
Input Processing .................................................................................................. 2-6
Point Value Calculation ........................................................................................ 2-7
Input Calibration.................................................................................................. 2-7
Cold Junction Compensation................................................................................ 2-7
User Gain and Offset Adjustment ......................................................................... 2-8
Engineering Units Conversion .............................................................................. 2-8
Automatic Calibration .......................................................................................... 2-9
Field Calibration................................................................................................... 2-9
Diagnostic, Security, and Integrity Checks ............................................................... 2-9
Diagnostics in Diagnostic Mode ............................................................................ 2-9
Diagnostics During Normal Operation ................................................................ 2-10
Diagnostics on Reset .......................................................................................... 2-10
I/O Expander Bus Communication Security....................................................... 2-10
Open Input Detection ......................................................................................... 2-10

iv WBPEEUI240766B0
Table of Contents (continued)
Section 2 Description and Operation (continued)
Alarm and Exception Reporting...........................................................................2-10
Online Configuration ..............................................................................................2-11
Logic Power ............................................................................................................2-11
Mounting Hardware................................................................................................2-11
Section 3 Installation ....................................................................................................3-1
Introduction .............................................................................................................3-1
Special Handling ......................................................................................................3-1
Unpacking and Inspection ........................................................................................3-2
Setup and Installation ..............................................................................................3-2
Address Selection Switch (S1) ...............................................................................3-3
Configuring Inputs................................................................................................3-4
Termination Unit Configuration ............................................................................3-5
Physical Installation..............................................................................................3-6
Wiring Connections and Cabling...............................................................................3-6
Wiring ..................................................................................................................3-6
Cable Connections ................................................................................................3-7
Section 4 Configuration and Calibration ....................................................................4-1
Introduction .............................................................................................................4-1
Configuring Inputs ...................................................................................................4-1
Configuring Function Codes .....................................................................................4-1
Calibrating Inputs ....................................................................................................4-3
Field Calibration.......................................................................................................4-4
Procedure .............................................................................................................4-6
Test Equipment Required......................................................................................4-7
Individual Channel Calibration .............................................................................4-8
Section 5 Operating Procedures .................................................................................5-1
Introduction .............................................................................................................5-1
Startup.....................................................................................................................5-1
Operation .................................................................................................................5-1
Status LEDs .............................................................................................................5-1
Section 6 Troubleshooting ..........................................................................................6-1
Introduction .............................................................................................................6-1
Status LEDs .............................................................................................................6-1
Alarm and Exception Reporting ................................................................................6-1
Problem Reports .......................................................................................................6-1

WBPEEUI240766B0 v
Table of Contents (continued)
Section 6 Troubleshooting (continued)
Error Messages and Corrective Actions..................................................................... 6-3
Input Channel Status........................................................................................... 6-3
Analog Input Module Errors ................................................................................. 6-4
Error Example...................................................................................................... 6-6
I/O Expander Bus Interface Test .............................................................................. 6-7
Module Pin Connections........................................................................................... 6-7
Section 7 Maintenance .................................................................................................7-1
Introduction............................................................................................................. 7-1
Preventive Maintenance Schedule............................................................................. 7-1
Equipment and Tools Required................................................................................. 7-2
Preventive Maintenance Procedures.......................................................................... 7-2
Printed Circuit Board Cleaning ............................................................................ 7-3
General Cleaning and Washing ......................................................................... 7-3
Edge Connector Cleaning.................................................................................. 7-3
Checking Connections.......................................................................................... 7-4
Section 8 Repair and Replacement .............................................................................8-1
Introduction............................................................................................................. 8-1
Module Repair and Replacement .............................................................................. 8-1
Appendix A NTAI06 Termination Unit ........................................................................ A-1
Introduction............................................................................................................. A-1
Cold Junction Reference Input .................................................................................A-1
Configuring Inputs ................................................................................................... A-1
Appendix B Replacing an IMASI03 Module ............................................................... B-1
Introduction.............................................................................................................B-1
Function Code 216 Modifications .............................................................................B-1
Power Consumption Comparison..............................................................................B-1

vi WBPEEUI240766B0
List of Figures
No. Title Page
1-1. Harmony Rack I/O Architecture ................................................................1-2
2-1. IMASI13 Functional Block Diagram ...........................................................2-2
2-2. Mounting Hardware.................................................................................2-12
3-1. Module Layout...........................................................................................3-3
3-2. S1 Switch ..................................................................................................3-4
3-3. Four Pin Jumper Block Configurations ......................................................3-5
3-4. Six Pin Jumper Block Configurations.........................................................3-5
3-5. Cable Connections.....................................................................................3-7
A-1. NTAI06 Layout (Rev A Hardware) .............................................................. A-2
A-2. NTAI06 Layout (Rev B Hardware) .............................................................. A-3
A-3. NTAI06 Input Circuit ................................................................................ A-6
A-4. NTAI06 Field Input Termination Examples................................................ A-7
A-5. IMASI13 Input Examples .......................................................................... A-8
A-6. NTAI06 Cable Connection ......................................................................... A-9
A-7. Millivolt and RTD Special Shorting Jumper............................................... A-9
List of Tables
No. Title Page
1-1. Glossary of Terms and Abbreviations .........................................................1-5
1-2. Reference Documents ................................................................................1-5
1-3. Related Nomenclature................................................................................1-6
1-4. Specifications ............................................................................................1-6
3-1. Sample Address Switch Settings (S1) .........................................................3-4
3-2. Jumper Block Reference ............................................................................3-5
6-1. IMASI13 Error Types .................................................................................6-2
6-2. Module Status (Byte 3) Error Codes ...........................................................6-4
6-3. P1 Power Connections ...............................................................................6-8
6-4. P2 Expander Bus Connections...................................................................6-8
6-5. P3 Input Signal Connections......................................................................6-9
7-1. Preventive Maintenance Schedule ..............................................................7-2
A-1. NTAI06 Input Types.................................................................................. A-3
A-2. NTAI06 Jumper Configurations................................................................. A-4
A-3. NTAI06 Input Type Descriptions ............................................................... A-4

WBPEEUI240766B0 vii
Safety Summary
Electrostatic Sensitive Device
Devices labeled with this symbol require special handling precau-
tions as described in the installation section.
GENERAL
WARNINGS
Equipment Environment
All components, whether in transportation, operation or storage,
must be in a noncorrosive environment.
Electrical Shock Hazard During Maintenance
Disconnect power or take precautions to insure that contact with
energized parts is avoided when servicing.
SPECIFIC
WARNINGS
Disconnect power before installing dipshunts on the MMU back-
plane. Failure to do so will result in contact with cabinet areas that
could cause severe or fatal shock. (p. 3-6)
Never clean electrical parts or components with live power present.
Doing so exposes you to an electrical shock hazard. (p. 7-2)
Wear eye protection whenever working with cleaning solvents.
When removing solvents from printed circuit boards using com-
pressed air, injury to the eyes could result from splashing solvent as
it is removed from the printed circuit board. (p. 7-2)
There are exposed AC and DC connections inside the cabinet.
These exposed electrical connections present a shock hazard that
can cause injury or death. (p. 7-4)
If input or output circuits are a shock hazard after disconnecting sys-
tem power at the power entry panel, then the door of the cabinet
containing these externally powered circuits must be marked with a
warning stating that multiple power sources exist. (p. 7-4)

viii WBPEEUI240766B0
Support Services
ABB will provide assistance in the operation and repair of its
products. Requests for sales or application services should be
made to your nearest sales or service office. ABB can also pro-
vide installation, repair and maintenance contract services.
When ordering parts, use nomenclature or part numbers and
part descriptions from equipment manuals. Parts without a
description must be ordered from the nearest sales or service
office. Recommended spare parts lists, including prices are
available through the nearest sales or service office.
ABB has modern training facilities available for training your
personnel. On-site training is also available. Contact your
nearest ABB sales office for specific information and
scheduling.
Additional copies of this instruction, or other instructions, can
be obtained from the nearest ABB sales office at a reasonable
charge.

WBPEEUI240766B0 ix
Trademarks and Registrations
Registrations and trademarks used in this document include:
™ Composer Trademark of ABB Automation Inc.
® INFI 90 Registered trademark of ABB Automation Inc.

WBPEEUI240766B0

WBPEEUI240766B0
Preface
The IMASI13 Analog Input Module is a Harmony rack I/O
module that is part of the Symphony Enterprise Management
and Control System. It has 16 analog input channels that
interface isolated thermocouple, millivolt, RTD, and high level
analog signals to a controller with an analog-to-digital conver-
sion resolution of 24 bits. Each channel has its own ana-
log-to-digital converter and can be independently configured to
handle the desired input type. These analog inputs are used by
a controller to monitor and control a process.
The IMASI13 module can be used as a direct replacement for
the IMASI03 module with only minor modifications. Changes
to specification S11 in function code 216 are required to
handle the differences in resolution choices. Verification of
power supply sizing calculations and system current require-
ments could be necessary because of the change in power
consumption.
This instruction explains the IMASI13 module specifications
and operation. It details the procedures necessary to complete
setup, installation, maintenance, troubleshooting, and
replacement of the module.
NOTE: The IMASI13 module is fully compatible with existing INFI 90®OPEN
Strategic Enterprise Management Systems.

WBPEEUI240766B0
List of Effective Pages
NOTE: Changed text or tables are indicated by a vertical bar adjacent to the changed area. Changed fig-
ures are indicated by a vertical bar next to the figure caption. The date appears beside the page number.
Total number of pages in this instruction is 78, consisting of the following:
Page No. Change Date
Preface Original
List of Effective Pages Original
iii through ix Original
1-1 through 1-9 Original
2-1 through 2-12 Original
3-1 through 3-7 Original
4-1 through 4-11 Original
5-1 through 5-2 Original
6-1 through 6-9 Original
7-1 through 7-4 Original
8-1 Original
A-1 through A-9 Original
B-1 through B-2 Original
Index-1 through Index-3 Original

WBPEEUI240766B0 iii
Table of Contents
Section 1 Introduction ..................................................................................................1-1
Overview .................................................................................................................. 1-1
Intended User .......................................................................................................... 1-1
Features .................................................................................................................. 1-1
Instruction Content.................................................................................................. 1-3
How to Use this Instruction...................................................................................... 1-4
Document Conventions ............................................................................................ 1-5
Glossary of Terms and Abbreviations........................................................................ 1-5
Reference Documents............................................................................................... 1-5
Related Nomenclature .............................................................................................. 1-6
Specifications........................................................................................................... 1-6
Section 2 Description and Operation .........................................................................2-1
Introduction............................................................................................................. 2-1
Module Description .................................................................................................. 2-1
Functional Operation ............................................................................................... 2-1
Isolated A/D Converter......................................................................................... 2-2
Cold Junction Reference....................................................................................... 2-2
Digital Input Multiplexer (MUX) ............................................................................ 2-3
Microcontroller and Memory................................................................................. 2-3
Switch Settings .................................................................................................... 2-3
LED Indicators ..................................................................................................... 2-4
I/O Expander Bus.................................................................................................... 2-4
I/O Expander Bus Interface.................................................................................. 2-5
Data Values ......................................................................................................... 2-5
Termination Units ................................................................................................ 2-5
Function Codes .................................................................................................... 2-6
Automatic Adjustments and Corrections .................................................................. 2-6
Input Processing .................................................................................................. 2-6
Point Value Calculation ........................................................................................ 2-7
Input Calibration.................................................................................................. 2-7
Cold Junction Compensation................................................................................ 2-7
User Gain and Offset Adjustment ......................................................................... 2-8
Engineering Units Conversion .............................................................................. 2-8
Automatic Calibration .......................................................................................... 2-9
Field Calibration................................................................................................... 2-9
Diagnostic, Security, and Integrity Checks ............................................................... 2-9
Diagnostics in Diagnostic Mode ............................................................................ 2-9
Diagnostics During Normal Operation ................................................................ 2-10
Diagnostics on Reset .......................................................................................... 2-10
I/O Expander Bus Communication Security....................................................... 2-10
Open Input Detection ......................................................................................... 2-10

iv WBPEEUI240766B0
Table of Contents (continued)
Section 2 Description and Operation (continued)
Alarm and Exception Reporting...........................................................................2-10
Online Configuration ..............................................................................................2-11
Logic Power ............................................................................................................2-11
Mounting Hardware................................................................................................2-11
Section 3 Installation ....................................................................................................3-1
Introduction .............................................................................................................3-1
Special Handling ......................................................................................................3-1
Unpacking and Inspection ........................................................................................3-2
Setup and Installation ..............................................................................................3-2
Address Selection Switch (S1) ...............................................................................3-3
Configuring Inputs................................................................................................3-4
Termination Unit Configuration ............................................................................3-5
Physical Installation..............................................................................................3-6
Wiring Connections and Cabling...............................................................................3-6
Wiring ..................................................................................................................3-6
Cable Connections ................................................................................................3-7
Section 4 Configuration and Calibration ....................................................................4-1
Introduction .............................................................................................................4-1
Configuring Inputs ...................................................................................................4-1
Configuring Function Codes .....................................................................................4-1
Calibrating Inputs ....................................................................................................4-3
Field Calibration.......................................................................................................4-4
Procedure .............................................................................................................4-6
Test Equipment Required......................................................................................4-7
Individual Channel Calibration .............................................................................4-8
Section 5 Operating Procedures .................................................................................5-1
Introduction .............................................................................................................5-1
Startup.....................................................................................................................5-1
Operation .................................................................................................................5-1
Status LEDs .............................................................................................................5-1
Section 6 Troubleshooting ..........................................................................................6-1
Introduction .............................................................................................................6-1
Status LEDs .............................................................................................................6-1
Alarm and Exception Reporting ................................................................................6-1
Problem Reports .......................................................................................................6-1

WBPEEUI240766B0 v
Table of Contents (continued)
Section 6 Troubleshooting (continued)
Error Messages and Corrective Actions..................................................................... 6-3
Input Channel Status........................................................................................... 6-3
Analog Input Module Errors ................................................................................. 6-4
Error Example...................................................................................................... 6-6
I/O Expander Bus Interface Test .............................................................................. 6-7
Module Pin Connections........................................................................................... 6-7
Section 7 Maintenance .................................................................................................7-1
Introduction............................................................................................................. 7-1
Preventive Maintenance Schedule............................................................................. 7-1
Equipment and Tools Required................................................................................. 7-2
Preventive Maintenance Procedures.......................................................................... 7-2
Printed Circuit Board Cleaning ............................................................................ 7-3
General Cleaning and Washing ......................................................................... 7-3
Edge Connector Cleaning.................................................................................. 7-3
Checking Connections.......................................................................................... 7-4
Section 8 Repair and Replacement .............................................................................8-1
Introduction............................................................................................................. 8-1
Module Repair and Replacement .............................................................................. 8-1
Appendix A NTAI06 Termination Unit ........................................................................ A-1
Introduction............................................................................................................. A-1
Cold Junction Reference Input .................................................................................A-1
Configuring Inputs ................................................................................................... A-1
Appendix B Replacing an IMASI03 Module ............................................................... B-1
Introduction.............................................................................................................B-1
Function Code 216 Modifications .............................................................................B-1
Power Consumption Comparison..............................................................................B-1

vi WBPEEUI240766B0
List of Figures
No. Title Page
1-1. Harmony Rack I/O Architecture ................................................................1-2
2-1. IMASI13 Functional Block Diagram ...........................................................2-2
2-2. Mounting Hardware.................................................................................2-12
3-1. Module Layout...........................................................................................3-3
3-2. S1 Switch ..................................................................................................3-4
3-3. Four Pin Jumper Block Configurations ......................................................3-5
3-4. Six Pin Jumper Block Configurations.........................................................3-5
3-5. Cable Connections.....................................................................................3-7
A-1. NTAI06 Layout (Rev A Hardware) .............................................................. A-2
A-2. NTAI06 Layout (Rev B Hardware) .............................................................. A-3
A-3. NTAI06 Input Circuit ................................................................................ A-6
A-4. NTAI06 Field Input Termination Examples................................................ A-7
A-5. IMASI13 Input Examples .......................................................................... A-8
A-6. NTAI06 Cable Connection ......................................................................... A-9
A-7. Millivolt and RTD Special Shorting Jumper............................................... A-9
List of Tables
No. Title Page
1-1. Glossary of Terms and Abbreviations .........................................................1-5
1-2. Reference Documents ................................................................................1-5
1-3. Related Nomenclature................................................................................1-6
1-4. Specifications ............................................................................................1-6
3-1. Sample Address Switch Settings (S1) .........................................................3-4
3-2. Jumper Block Reference ............................................................................3-5
6-1. IMASI13 Error Types .................................................................................6-2
6-2. Module Status (Byte 3) Error Codes ...........................................................6-4
6-3. P1 Power Connections ...............................................................................6-8
6-4. P2 Expander Bus Connections...................................................................6-8
6-5. P3 Input Signal Connections......................................................................6-9
7-1. Preventive Maintenance Schedule ..............................................................7-2
A-1. NTAI06 Input Types.................................................................................. A-3
A-2. NTAI06 Jumper Configurations................................................................. A-4
A-3. NTAI06 Input Type Descriptions ............................................................... A-4

WBPEEUI240766B0 vii
Safety Summary
Electrostatic Sensitive Device
Devices labeled with this symbol require special handling precau-
tions as described in the installation section.
GENERAL
WARNINGS
Equipment Environment
All components, whether in transportation, operation or storage,
must be in a noncorrosive environment.
Electrical Shock Hazard During Maintenance
Disconnect power or take precautions to insure that contact with
energized parts is avoided when servicing.
SPECIFIC
WARNINGS
Disconnect power before installing dipshunts on the MMU back-
plane. Failure to do so will result in contact with cabinet areas that
could cause severe or fatal shock. (p. 3-6)
Never clean electrical parts or components with live power present.
Doing so exposes you to an electrical shock hazard. (p. 7-2)
Wear eye protection whenever working with cleaning solvents.
When removing solvents from printed circuit boards using com-
pressed air, injury to the eyes could result from splashing solvent as
it is removed from the printed circuit board. (p. 7-2)
There are exposed AC and DC connections inside the cabinet.
These exposed electrical connections present a shock hazard that
can cause injury or death. (p. 7-4)
If input or output circuits are a shock hazard after disconnecting sys-
tem power at the power entry panel, then the door of the cabinet
containing these externally powered circuits must be marked with a
warning stating that multiple power sources exist. (p. 7-4)

viii WBPEEUI240766B0
Support Services
ABB will provide assistance in the operation and repair of its
products. Requests for sales or application services should be
made to your nearest sales or service office. ABB can also pro-
vide installation, repair and maintenance contract services.
When ordering parts, use nomenclature or part numbers and
part descriptions from equipment manuals. Parts without a
description must be ordered from the nearest sales or service
office. Recommended spare parts lists, including prices are
available through the nearest sales or service office.
ABB has modern training facilities available for training your
personnel. On-site training is also available. Contact your
nearest ABB sales office for specific information and
scheduling.
Additional copies of this instruction, or other instructions, can
be obtained from the nearest ABB sales office at a reasonable
charge.

WBPEEUI240766B0 ix
Trademarks and Registrations
Registrations and trademarks used in this document include:
™ Composer Trademark of ABB Automation Inc.
® INFI 90 Registered trademark of ABB Automation Inc.
This manual suits for next models
1
Table of contents
Other ABB Control Unit manuals

ABB
ABB FSO-12 User manual

ABB
ABB COM600 series 5.0 Product manual

ABB
ABB RELION 650 SERIES Datasheet

ABB
ABB COM600 series User manual

ABB
ABB Tina 5A User manual

ABB
ABB TA571-SIM User manual

ABB
ABB SAS-W1.1E User guide

ABB
ABB ACL30-04 Series Troubleshooting guide

ABB
ABB Foundation LD 810HSE Ex User manual

ABB
ABB Welcome M2307 Setup guide

ABB
ABB ACS850-04 series Use and care manual

ABB
ABB REF542plus User manual

ABB
ABB IEC 61850 Edition 2 User manual

ABB
ABB REF542plus User manual

ABB
ABB BCU-02 User manual

ABB
ABB i-bus EIB User manual

ABB
ABB M4M Instruction Manual

ABB
ABB RELION Series User manual

ABB
ABB SafeRing User manual

ABB
ABB MPS-C 2000 User manual