manuals.online logo
Brands
  1. Home
  2. •
  3. Brands
  4. •
  5. ABB
  6. •
  7. Controllers
  8. •
  9. ABB PST30 User manual

ABB PST30 User manual

Other manuals for PST30

3

This manual suits for next models

1

Other ABB Controllers manuals

ABB STD 420E User manual

ABB

ABB STD 420E User manual

ABB ACS800-37-0060-3 User manual

ABB

ABB ACS800-37-0060-3 User manual

ABB RVC User manual

ABB

ABB RVC User manual

ABB ACS150 series User manual

ABB

ABB ACS150 series User manual

ABB ABB-Welcome User manual

ABB

ABB ABB-Welcome User manual

ABB COM600S IEC User manual

ABB

ABB COM600S IEC User manual

ABB ACS580-07-0495A-4 User manual

ABB

ABB ACS580-07-0495A-4 User manual

ABB ACQ810-04 User manual

ABB

ABB ACQ810-04 User manual

ABB UMC100-FBP Parts list manual

ABB

ABB UMC100-FBP Parts list manual

ABB ACS880-07 User manual

ABB

ABB ACS880-07 User manual

ABB CR307 Series User manual

ABB

ABB CR307 Series User manual

ABB UMC100.3 User manual

ABB

ABB UMC100.3 User manual

ABB 300 Series User manual

ABB

ABB 300 Series User manual

ABB ACS 400 User manual

ABB

ABB ACS 400 User manual

ABB LP10 User manual

ABB

ABB LP10 User manual

ABB ECA06 Quick guide

ABB

ABB ECA06 Quick guide

ABB ACS880-01 Series User manual

ABB

ABB ACS880-01 Series User manual

ABB Relion 630 Series Operating instructions

ABB

ABB Relion 630 Series Operating instructions

ABB C250 User manual

ABB

ABB C250 User manual

ABB i-bus KNX User manual

ABB

ABB i-bus KNX User manual

ABB COM600 series User manual

ABB

ABB COM600 series User manual

ABB i-bus KNX JRA/S 6.230.3.1 User manual

ABB

ABB i-bus KNX JRA/S 6.230.3.1 User manual

ABB ACS 800 Series User manual

ABB

ABB ACS 800 Series User manual

ABB ACS580-04 User manual

ABB

ABB ACS580-04 User manual

Popular Controllers manuals by other brands

Sunricher SR-ZV9003T3-RGBW-US Installation

Sunricher

Sunricher SR-ZV9003T3-RGBW-US Installation

Ksenia intro Installation and configuration manual

Ksenia

Ksenia intro Installation and configuration manual

Inovance CAN200 Series manual

Inovance

Inovance CAN200 Series manual

Gauzy LC6 FLEX Controller Installation and operation guide

Gauzy

Gauzy LC6 FLEX Controller Installation and operation guide

Viking SLP-1 Technical practice

Viking

Viking SLP-1 Technical practice

CKD KBX-30E-U Series instruction manual

CKD

CKD KBX-30E-U Series instruction manual

Sharp Energy Sun Flux User manual & installation guide

Sharp Energy

Sharp Energy Sun Flux User manual & installation guide

Yamaha RCX40 user manual

Yamaha

Yamaha RCX40 user manual

AB Quality PowerFlex 400 Frames D-H Service bulletin

AB Quality

AB Quality PowerFlex 400 Frames D-H Service bulletin

Yamaha MJC8 owner's manual

Yamaha

Yamaha MJC8 owner's manual

AL-KO ATC operating instructions

AL-KO

AL-KO ATC operating instructions

Savant SmartControl 2 Deployment guide

Savant

Savant SmartControl 2 Deployment guide

GameSir T3S user manual

GameSir

GameSir T3S user manual

Kostal inveor operating manual

Kostal

Kostal inveor operating manual

Emerson Yarway 20-55 Operating and safety instructions

Emerson

Emerson Yarway 20-55 Operating and safety instructions

CoCo ACM-LV24 Quick installation guide

CoCo

CoCo ACM-LV24 Quick installation guide

Brooks SLA5810/20 Installation and operation manual

Brooks

Brooks SLA5810/20 Installation and operation manual

SIGMA TEK SR 011 Technical manual

SIGMA TEK

SIGMA TEK SR 011 Technical manual

manuals.online logo
manuals.online logoBrands
  • About & Mission
  • Contact us
  • Privacy Policy
  • Terms and Conditions

Copyright 2025 Manuals.Online. All Rights Reserved.

1
1SFC132004M0201
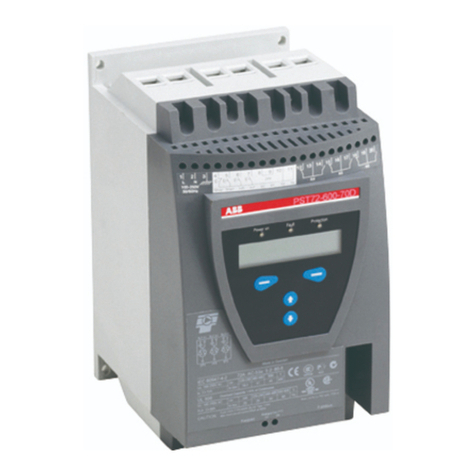
Quickstart PST30...PSTB1050
This document is a short guide to how to connect, do the
configuration and start the softstarter in the easiest way.
Warning!
Mounting, electrical connection and settings of the
softstarter shall be made in accordance with existing laws
and regulations and be performed by authorised personnel.
Do not change any parameters in the Service Settings
menu.
Connection
1. Mount the softstarter according to Chapter 4 “Mounting“,
see manual 1SFC132003M0201.
2. Be aware of the ambient temperature.
Derating is required above 40 °C (104 °F).
3. Connect the main circuit: terminals 1L1 - 3L2 - 5L3 to the
line side and terminals 2T1 - 4T2 - 6T3 to the motor side.
4. Connect the supply voltage: terminal 1 and 2
(100-250V 50/60Hz).
5. Connect the functional ground: terminal 3.
The wire shall be as short as possible, and be connected to
the mounting plate.The mounting plate should also be
earthed.
6. Connect the start/stop circuits: terminal 4, 5, 8, 9 and 10
according to the diagram. 24V DC only.
7. Check that the main and supply voltage corresponds to
the softstarter ratings.
8. Switch on the supply voltage.
9. The green "Power on" LED is on and the LCD shall
appear as in figure 3.
Power on ProtectionFault
1
2
3
4
1SFC132029F0001
U= 0% I=0.0A
Menu
F
igure 1:
1
Status indication LEDs
2
LCD display
3
Selection keys for selecting, changing
and storing parameters
4
Navigation keys for navigating in the
menus
Arrows shown in the display indicates
that the value/menu is possible to
change or scroll
L1
L2
L3
N
KM1
1L1 3L2 5L3
2T1 4T2 6T3
6789
12 13 14 15 16 17 18 19 20
UVW
12 3 4 5
45 10
M
3
1SFC132030F0001
10 11
F
igure 2: Standard connection PST
StartStart
Start
Stop
Power on ProtectionFault
F
igure 3: Top level
U= 0% I=0.0A
Menu
21SFC132004M0201
Quickstart PST30...PSTB1050
ABB Automation Technologies AB, Cewe-Control, SE-721 61 Västerås, Sweden, Telephone +46 21 32 07 00, Telefax +46 21 12 60 01
Manual 1SFC132003M0201 January 2005 ABB Automation Technologies AB, Cewe-Control
Configuration
1. Enter the Application Setting by pressing left selection key
twice. Press Select using the left selection key. Figure 4.
2. Select the appropriate type of load using navigation keys.
Figure 5.
3. Press Store Set and Next to continue or Back to previous
parameter using the selection keys. Figure 6.
4. Set the Setting Ie using the navigation keys.
In Line connected = rated motor current
nside Delta connected = 58% ( ) of the rated motor
Icurrent. Figure 7.
5. Press Store and Next to continue or Back to previous
parameter using the selection keys. Figure 8.
6. Set the required overload class using the navigation keys.
Figure 9.
7. Press Store and Next to continue or Back to previous
parameter using the selection keys. Figure 10.
8. If an external by-pass contactor is used set Ext ByPass to
Yes using the navigation keys. (PST30...300 only).
Figure 11.
9. Press Store and Next to continue or Back to return to pre-
vious parameter using the selection keys. Figure 12.
10.Select Yes if ready or Tune Set if ramp times, initial volt-
age, current limit etc. needs to be adjusted using selection
keys. Figure 13.
11.To change presentation language, see manual
1SFC132003M0201.
Start of the motor
1. Switch on the main voltage.
2. Give start command to the softstarter.
(To start the softstarter from the keypad, enter the LOCAL
CONTROL menu, select Start/Stop and press Start. The
motor must be stopped before leaving this menu.)
Application Setting
Select Back
F
igure 4: Application setting menu
Centrifugal Pump
Store Set Back
F
igure 5: Centrifugal pump
Centrifugal Pump
Next Back
F
igure 6: Centrifugal pump stored 13()⁄
Setting Ie 99.0A
Store
F
igure 7: Setting Ie
Setting Ie 99.0A
Next Back
F
igure 8: Setting Ie stored
OL Class 10
Store
F
igure 9: OL Class
OL Class 10
Next Back
F
igure 10:OL class stored
Ext ByPass No
Store
F
igure 11: External Bypass
Ext ByPass No
Next Back
F
igure 12:External Bypass stored
Ready?
Yes Tune Set
F
igure 13:Ready / Tune Set