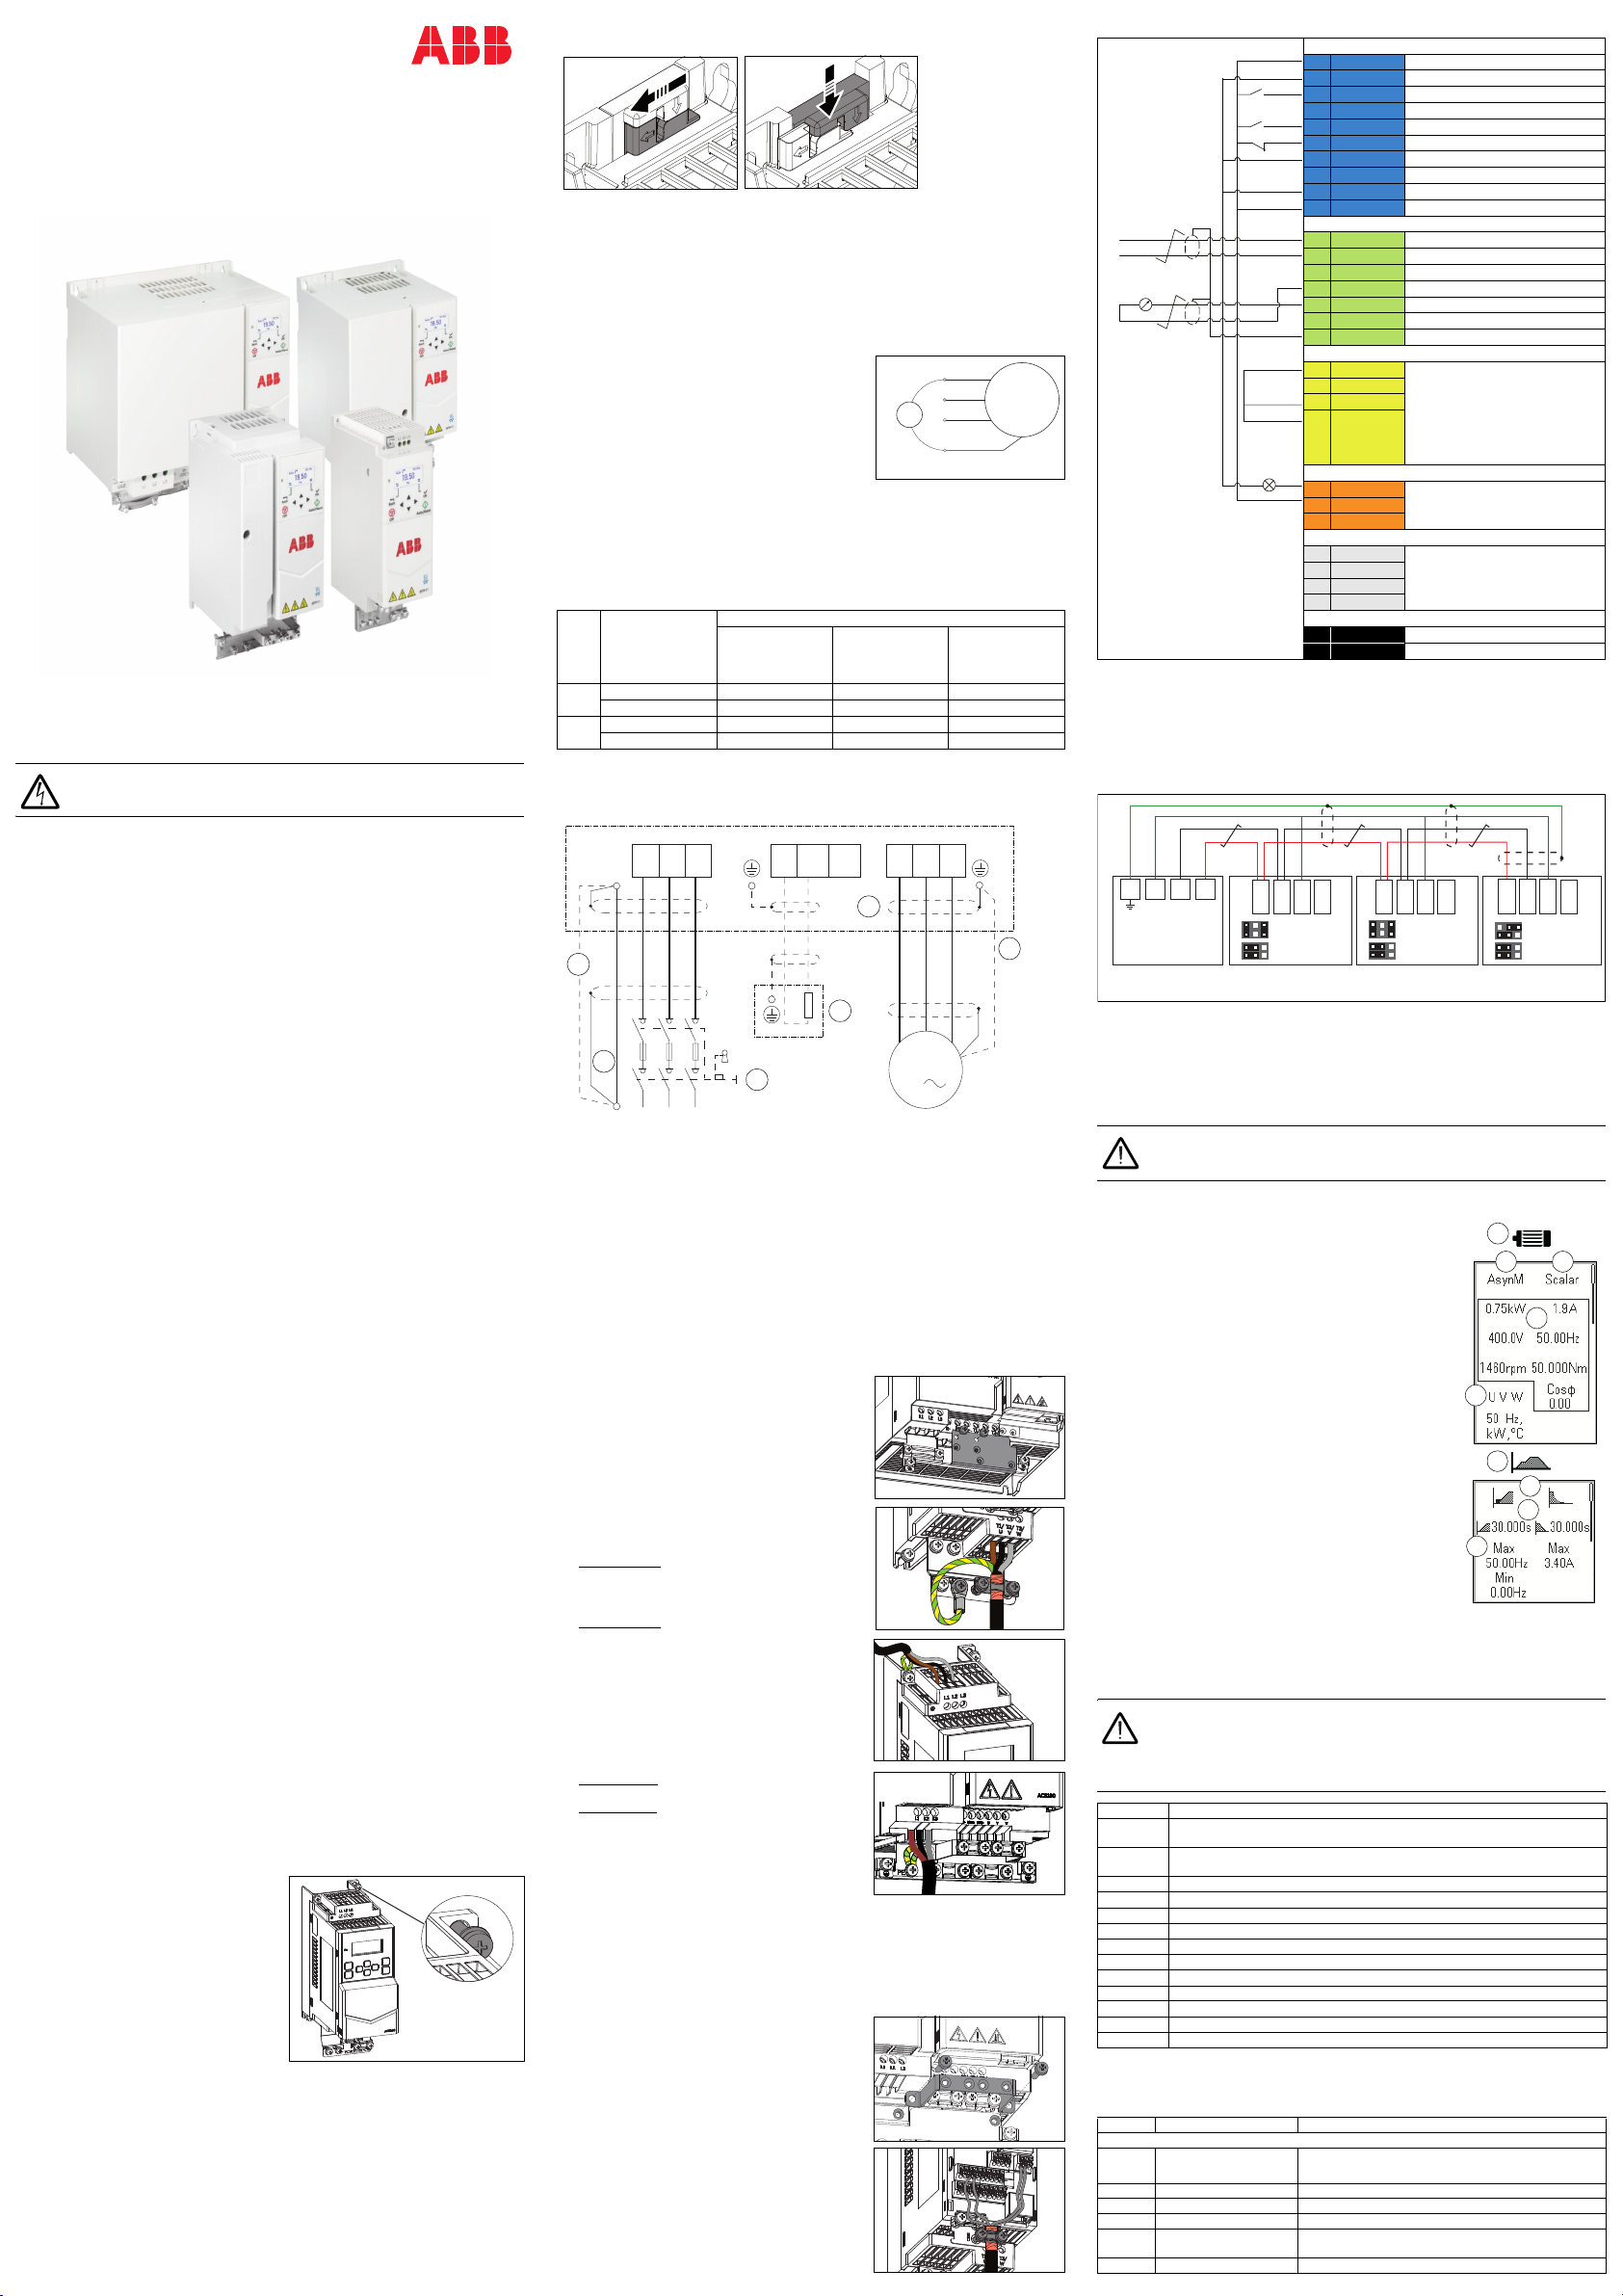
manuals.online logo
Brands
  1. Home
  2. •
  3. Brands
  4. •
  5. ABB
  6. •
  7. DC Drive
  8. •
  9. ABB ACH180 Installation manual

ABB ACH180 Installation manual

Safety instructions
WARNING! Obey these instructions. If you ignore them, injury or death, or damage
to the equipment can occur. If you are not a qualified electrical professional, do
not do electrical installation or maintenance work.
• Do not do work on the drive, motor cable, motor, or control cables when the drive is
connected to the input power. Before you start the work, isolate the drive from all
dangerous voltage sources and make sure that it is safe to start the work. Always wait for
5 minutes after disconnecting the input power to let the intermediate circuit capacitors
discharge.
• Do not do work on the drive when a rotating permanent magnet motor is connected to it.
A rotating permanent magnet motor energizes the drive, including its input and output
terminals.
1. Unpack the delivery
Keep the drive in its package until you install it. After unpacking, protect the drive from dust,
debris and moisture.
Make sure that all of the items are present and that there are no signs of damage:
•drive
•installation accessories (mounting template, cable clamps, screws, etc.)
•safety instructions
•multilingual warning sticker sheet (residual voltage warning)
•user interface guide (under the drive front cover)
•quick installation and start-up guide.
2. Reform the capacitors
If the drive has not been powered up for a year or more, you must reform the DC link
capacitors. The manufacturing date is on the type designation label. Refer to Capacitor
reforming instructions (3BFE64059629 [English]).
3. Select the cables and fuses
•Select the power cables. Obey the local regulations.
•Input power cable: ABB recommends to use symmetrical shielded cable (VFD cable)
for the best EMC performance.
•Motor cable: Use symmetrical shielded cable (VFD cable) for the best EMC
performance. Symmetrical shielded cable also reduces bearing currents, wear, and
stress on motor insulation.
•Power cable types: For IEC installations, use copper or aluminum cables (if
permitted). In North America, use only copper cables.
•Current rating: max. load current.
•Voltage rating: min. 600 V AC.
•Temperature rating: For IEC installations, select a cable rated for at least 70°C
(158°F) maximum permissible temperature of conductor in continuous use. For
North America, select a cable rated for at least 75°C (167°F).
•Size: Refer to Fuses and typical power cable sizes for the typical cable sizes and to
Terminal data for the power cables for the maximum cable sizes.
•Select the control cables. Use double-shielded twisted-pair cable for analog signals. Use
double-shielded or single-shielded cable for the digital, relay and I/O signals. Do not run
24 V and 115/230 V signals in the same cable.
•Protect the drive and input power cable with the correct fuses. Refer to Fuses and typical
power cable sizes.
4. Examine the installation site
The drive is intended for cabinet installation and has a degree of protection of IP20 / UL open
type as standard.
Examine the site where you will install the drive. Make sure that:
•The installation site is sufficiently ventilated and hot air does not recirculate.
•There is sufficient free space around the drive for cooling, maintenance, and operation.
Refer to Free space requirements.
•The ambient conditions meet the specifications. Refer to Ambient conditions.
•The installation surface is as close to vertical as possible and strong enough to support
the weight of the drive. Refer to Dimensions and weights.
•The materials behind, above and below the drive are not flammable.
•There are no sources of strong magnetic fields such as high-current single-core
conductors or contactor coils near the drive. A strong magnetic field can cause
interference or inaccuracy in the operation of the drive.
5. Install the drive
You can install the drive with screws, or to a DIN rail (top hat type, width × height = 35 mm ×
7.5 mm [1.4 in × 0.3 in]).
• You can install the drives tilted by up to 90 degrees, from vertical to fully horizontal
orientation.
• Do not install the drive upside down.
• You can install several drives side by side.
To install the drive with screws
1. Make marks onto the surface for the
mounting holes. Use the mounting
template that was delivered with the drive.
2. Drill the holes for the mounting screws. If
necessary, install plugs or anchors into the
holes.
3. Install the mounting screws into the holes.
Refer to Dimensions and weights for the
maximum screw diameter. Leave a gap
between the screw head and installation
surface.
4. Put the drive onto the mounting screws.
5. Tighten the mounting screws.
To install the drive to a DIN installation rail
DIN rail mounting kit is available for frames R1 and R2. Refer to BDRK-01 Installation guide
(3AXD10001526036 [multilingual]) for R1 and BDRK-02 Installation guide (3AXD10001523769
[multilingual]) for R2.
Use the integrated lock to install frames R3 and R4 to a DIN installation rail:
1. Move the locking part to the left. If necessary, use a slotted screwdriver.
2. Push and hold the locking button down.
3. Put the top tabs of the drive onto the top edge of the DIN rail.
4. Put the drive against the bottom edge of the DIN rail.
5. Release the locking button.
6. Move the locking part to the right.
7. Make sure that the drive is correctly installed.
To move the drive, use a slotted screwdriver to open the locking part.
Note: For UL/CSA installations: Warning label 3AXD50001058098 (included in the delivery)
must be adhered near the drive and clearly visible.
6. Measure the insulation resistance
Drive: Do not do voltage tolerance or insulation resistance tests on the drive as testing can
damage the drive.
Input power cable: Before you connect the input power cable to the drive, measure its
insulation resistance according to local regulations.
Motor and motor cable:
1. Make sure that the motor cable is connected to the motor and disconnected from the
drive output terminals T1/U, T2/V and T3/W.
2. Use a voltage of 1000 V DC to measure the
insulation resistance between each phase
conductor and the protective earth conductor. The
insulation resistance of an ABB motor must be
more than 100 Mohm (at 25 °C [77 °F]). For the
insulation resistance of other motors, refer to the
manufacturer’s instructions.
Note: Moisture inside the motor reduces the
insulation resistance. If you think that there is
moisture in the motor, dry the motor and do the
measurement again.
7. Make sure that the drive is compatible with the
grounding system
You can install all drive types to a symmetrically grounded TN-S system (center-grounded
wye). The drive is delivered with the EMC and VAR screws installed. The material of the screws
(plastic or metal) depends on the product variant. The table shows when to remove the metal
EMC screw (disconnect the internal EMC filter) or metal VAR screw (disconnect the varistor
circuit).
8. Connect the power cables
Connection diagram (shielded cables)
1. Disconnecting device.
2. Two protective earth (ground) conductors. Drive safety standard IEC/EN61800-5-1
requires two PE conductors, if the cross-sectional area of the PE conductor is less than
10 mm2Cu or 16 mm2Al. For example, you can use the cable shield in addition to the
fourth conductor.
3. Use a separate grounding cable or a cable with a separate PE conductor for the line side,
if the conductivity of the fourth conductor or shield does not meet the requirements for
the PE conductor.
4. Use a separate grounding cable if the conductivity of the shield is not sufficient, or if
there is no symmetrically constructed PE conductor in the cable.
5. 360° grounding of the cable shield is required for the motor cable and brake resistor
cable (if used). It is also recommended for the input power cable.
6. Brake resistor and resistor cable (optional, for frames R2...R4 only).
Connection procedure (shielded cables)
For the tightening torques, refer to Terminal data for the power cables.
1. Attach the residual voltage warning sticker in the local
language to the drive.
2. Install the grounding plate.
3. Strip the motor cable.
4. Ground the motor cable shield under the grounding
clamp for 360° grounding.
5. Twist the motor cable shield into a bundle and mark it
with yellow-green insulation tape. Install a cable lug
and connect the shield to the grounding terminal.
6. Connect the phase conductors of the motor cable to
terminals T1/U, T2/V and T3/W.
7. Frames R2…R4: If you use a brake resistor, connect
the resistor cable to terminals R- and UDC+. Use a
shielded cable and ground the shield under the
grounding clamp for 360° grounding.
8. Frames R2…R4: Make sure that the R- and UDC+
terminal screws are tightened. Do this step also if you
do not connect cables to the terminals.
9. Strip the input power cable.
10. If the input power cable has a shield, twist the shield
into a bundle, mark it and connect it to the grounding
terminal.
11. Connect the PE conductor of the input power cable to
the grounding terminal. If necessary, use a second PE
conductor.
12. 3-phase drives: Connect the phase conductors of the
input power cable to terminals L1, L2 and L3.
1-phase drives: Connect the phase and neutral
conductors to terminals L and N.
13. Mechanically attach the cables on the outside of the
drive.
9. Connect the control cables
Connection procedure
Do the connections according to the default control connections of the HVAC default macro.
Keep the signal wire pairs twisted as near to the terminals as possible to prevent inductive
coupling. The tightening torque for the terminal connections is 0.5 …0.6 N·m (4.4 …5.3 lbf·in).
1. Remove the front cover.
2. Install the grounding plate.
3. Strip a part of the outer shield of the control cable for
grounding the shield.
4. Use a 360° grounding clamp to connect the outer
shield to the grounding plate.
5. Strip the control cable conductors. For stranded
(multi-wire) conductors, install ferrules at the bare
conductor ends.
6. Connect the conductors to the correct control
terminals. Insert the conductor into a push-in
terminal. To release, push the open/close button all
the way down firmly with a flathead screwdriver.
7. Connect the shields of the twisted pairs and
grounding wires to the SCREEN terminal.
8. Mechanically attach the control cables on the outside
of the drive.
Default I/O connections (HVAC default)
1) Reference signal (0...10 V)
Embedded fieldbus connection
Connect the fieldbus to the EIA-485 Modbus RTU terminal which is on the front of the drive.
To configure Modbus RTU communication with the embedded fieldbus:
1. Connect the fieldbus cables and the necessary I/O signals.
2. Use the jumpers to set the termination and bias settings.
3. Power up the drive and set the necessary parameters.
A connection example is shown below.
1) The devices at the ends of the fieldbus must have termination set to ON. All other devices
must have termination set to OFF.
2) Attach the cable shields together at each drive, but do not connect them to the drive.
Connect the shields only to the grounding terminal in the automation controller.
3) Connect the AGND conductor to the signal ground reference terminal in the automation
controller.
10. Start up the drive
WARNIN G! Before you start up the drive, make sure that the installation is
completed. Make sure also that it is safe to start the motor. Disconnect the motor
from other machinery, if there is a risk of damage or injury.
For information on the user interface, refer to the ACH180 User interface guide
(3AXD50000955909 [English]).
1. Power up the drive.
2. Set the unit (international or US).
3. Go to Motor data view.
4. Set the motor type:
• AsynM: Asynchronous motor
• PMSM: Permanent magnet synchronous motor
• EC Ti: Ferrite assisted synchronous reluctance motor.
5. Set the motor control mode:
Scalar: Frequency reference. Do not use this mode for
permanent magnet synchronous motors.
Use this mode when:
• The number of motors can change.
• The nominal motor current is less than 20% of the nominal
drive current.
Vec tor : Speed reference. This is suitable for most cases. The
drive does an automatic standstill ID run when the drive is
started for the first time.
6. Set the nominal motor values.
7. Press the Auto/Hand key to start the motor and check the
direction of rotation. If the direction is incorrect, you can:
• change the Motor phase order setting, or
• change the phase order of the motor cable.
8. Go to Motor control view.
9. Set the start and stop mode.
10. Set the acceleration and deceleration times.
11. Set the maximum and minimum frequencies (or speeds).
12. Tune the drive parameters to the application. You can also use the Assistant control panel
(ACH-AP-...) or the Drive Composer PC tool.
Warnings and faults
WARNIN G! If you activate the automatic fault reset or automatic restart functions
of the drive control program, make sure that no dangerous situations can occur.
These functions reset the drive automatically and continue operation after a fault
or supply break. If these functions are activated, the installation must be clearly
marked as defined in IEC/EN 61800-5-1, subclause 6.5.3, for example, “THIS
MACHINE STARTS AUTOMATICALLY”.
List of most commonly used parameters
Most commonly used parameters and selections are shown in the table. Refer to the drive
firmware manual for the complete lists.
—
ABB DRIVES FOR HVAC
ACH180 drives
Quick installation and start-up guide
Screw
label
Factory default
screw material
Grounding systems
Symmetrically
grounded TN-S
systems (center-
grounded wye)
Corner-grounded
delta, midpoint-
grounded delta
and TT systems
IT systems
(ungrounded or
high-resistance
grounded)
EMC Metal Do not remove Remove Remove
Plastic Do not remove 1)
1) Can install the metal screw (included in the drive delivery) to connect the internal EMC filter.
Do not remove Do not remove
VAR Metal Do not remove Do not remove Remove
Plastic Do not remove Do not remove Do not remove
U1
V1
W1
PE
M
3~
ohm
U1-PE, V1-PE, W1-PE
PE
PE
L1 L2 L3 R- R+
UDC+ UDC-
U1 W1
MPE
3
T1/
U
T2/
V
T3/
W
V1
L1 L2 L3
(L) (N)
2
34
5
ACH180
1
6
R1 Top in
R2…R4
Bottom in
Digital I/O
21 24 V Aux. +24 V DC, max 200 mA
22 DGND Aux. voltage output common
8 DI1 Stop (0) / Start (1)
9 DI2 Not configured
10 DI3 Constant speed selection
11 DI4 Start interlock 1 (1 = allow start)
12 DCOM Digital input common
18 DO Running
19 DO COM Digital output common
20 DO SRC Digital output auxiliary voltage
Analog I/O
14 AI1/DI5 Speed reference (0…10V)
13 AGND Analog input circuit common
15 AI2 Not used
16 AGND Analog output circuit common
17 AO Output frequency (0...20mA)
23 10V Ref. voltage +10 V DC
24 SCREEN Signal cable shield (screen)
Safe torque off (STO) (only on ACH180-04S)
1S+
Safe torque off (STO). Both circuits
must be closed for the drive to start.
The drawing shows the simplified
connection of a safety circuit through
safety contacts. If STO is not used,
leave the factory-installed jumpers in
place. See also section Safe torque
off (STO).
2SGND
3S1
4S2
Relay output
5NC
Damper control
6COM
7NO
EIA-485 Modbus RTU
25 B+
Embedded Modbus RTU (EIA-485)
26 A-
27 DGND
28 SHIELD
Jumper
J1 Termination Modbus termination selection
J2
Comm.Mode
Communication mode selection
Code Description
2310 Overcurrent. The output current is more than the internal limit. This can be
caused by an earth fault or phase loss.
2330 Earth leakage. A load unbalance that is typically caused by an earth fault in the
motor or the motor cable.
2340 Short circuit. There is a short circuit in the motor or the motor cable.
3130 Input phase loss. The intermediate DC circuit voltage oscillates.
3181 Wiring or earth fault. The input and motor cable connections are incorrect.
3210 DC link overvoltage. There is an overvoltage in the intermediate DC circuit.
3220 DC link undervoltage. There is an undervoltage in the intermediate DC circuit.
3381 Output phase loss. All three phases are not connected to the motor.
5091 Safe torque off. The Safe torque off (STO) function is on.
6681 EFB communication loss. Break in embedded fieldbus communication.
AFF6 Identification run. The motor ID run occurs at the next start.
FA81 Safe torque off 1: Safe torque off circuit 1 is broken.
FA82 Safe torque off 2: Safe torque off circuit 2 is broken.
Par. No. Par. Name Settings/Range (default value in bold)
Group 99 Motor data
99.03 Motor type [0]Asynchronous motor, [1]Permanent magnet motor,
[3]PMaSynRM
99.04 Motor control mode [0]Vector, [1]Scalar
99.06 Motor nominal current depends on rating
99.07 Motor nominal voltage depends on rating
99.08 Motor nominal
frequency
depends on rating
99.09 Motor nominal speed depends on rating
1...10 kohm
Max. 500 ohm
1)
1)
GR -+
B+
A-
'GND
Shield
B+
A-
'GND
Shield
B+
A-
'GND
Shield
J1
J2
J1
J2
J1
J2
Termination ON1)
Drive Drive Drive
Automation
controller
2)
3)
Termination OFF
Modbus mode
Termination OFF
Modbus mode
Termination ON1)
Modbus mode
4 5
6
7
9
10
11
3
8
Related documents
3AXD50000955862 Rev A EN 2023-05-29
Original instructions.
© Copyright 2023 ABB. All rights reserved.
ACH180 manual list Ecodesign information (EU
2019/1781)
99.10 Motor nominal power depends on rating
99.11 Motor nominal cosφ0.00 … 1.00
99.12 Motor nominal torque depends on rating
99.16 Motor phase order [0]UVW, [1]UWV
Group 01 Actual values (read-only)
1.01 Motor speed used -30000.00 … 30000.00 rpm
1.06 Output frequency -500.00 … 500.00 Hz
1.07 Motor current 0.00 … 30000.00 A
1.10 Motor torque -1600.00% … 1600.00%
1.11 DC voltage 0.00 … 2000.00 V
1.13 Output voltage 0 … 2000 V
1.14 Output power -32768.00 … 32767.00 kW
Group 5 Diagnostics (read-only)
5.02 Run-time counter 0 … 65535 days
5.11 Inverter temperature -40.0 … 160.0%
Group 10 Standard DI, RO
10.24 RO1 source [2]Ready run, [7]Running, [14]Fault, [16]Fault/Warning
[54]Damper control
Group 11 Standard DI, RO
11.06 DO1 output source [0]Not energized, [2]Ready run, [7]Running, [14]Fault,
[16]Fault/Warning, [54]Damper control
11.21 DI5/AI1 configuration [0]Digital input 5, [1]Analog input 1
Group 12 Standard AI
12.15 AI1 unit selection [2]V, [10]mA
12.17 AI1 min 0.000 … 11.000 V or 0.000 … 22.000 mA, 0.000 V or
0.000 mA
12.18 AI1 max 0.000 … 11.000 V or 0.000 … 22.000 mA, 10.000 V or
20.000 mA
12.19 AI1 scaled at AI1 min -32768.000 … 32767.000, 0.000
12.20 AI1 scaled at AI1 max -32768.000 … 32767.000, 50.000
12.25 AI2 unit selection [2]V, [10]mA
12.27 AI2 min 0.000 … 11.000 V or 0.000 … 22.000 mA, 0 V or 4 mA
12.28 AI2 max 0 … 11.000 V or 0 … 22.000 mA, 10 V or 20 mA
12.29 AI2 scaled at AI2 min -32768.000 … 32767.000, 0.000
12.30 AI2 scaled at AI2 max -32768.000 … 32767.000, 50.000
Group 13 Standard AO
13.12 AO1 source [3]Output frequency, [4]Motor current
13.15 AO1 unit selection [2]V, [10]mA
13.17 AO1 source min -32768.0 … 32767.0, 0.0
13.18 AO1 source max -32768.0 … 32767.0, 50.0
13.19 AO1 out at AO1 src min 0.000 … 11.000 V or 0.000 … 22.000 mA, 0.000mA or
0.000 V
13.20 AO1 out at AO1 src max 0.000 … 11.000 V or 0.000 … 22.000 mA, 20.000 mA or
10.000 V
Group 19 Operation mode
19.11 Ext1/Ext2 selection [0]EXT1, [1]EXT2, [3]DI1, [4]DI2, [5]DI3, [6]DI4, [7]DI5
Group 20 Start/stop/direction
20.01 Ext1 commands [0]Not selected, [1]In1 Start,[2]In1 Start;In2 Dir, [3]In1
Start fwd;In2 Start rev, [4]In1P Start;In2 Stop,[5]In1P
Start;In2 Stop;In3 Dir, [6]In1P Start fwd;In2P Start
rev;In3 Stop, [11]Control panel, [14]Embedded fieldbus
20.03 Ext1 in1 source [0]Always off, [2]DI1, [3]DI2, [4]DI3, [5]DI4, [6]DI5
20.04 Ext1 in2 source [0]Always off,[2]DI1, [3]DI2, [4]DI3, [5]DI4, [6]DI5
20.05 Ext1 in3 source [0]Always off, [2]DI1, [3]DI2, [4]DI3, [5]DI4, [6]DI5
20.06 Ext2 commands [0]Not selected, [1]In1 Start, [2]In1 Start;In2 Dir, [3]In1
Start fwd;In2 Start rev, [4]In1P Start;In2 Stop,[5]In1P
Start;In2 Stop;In3 Dir, [6]In1P Start fwd;In2P Start
rev;In3 Stop, [11]Control panel, [14]Embedded fieldbus
20.08 Ext2 in1 source [0]Always off, [2]DI1, [3]DI2, [4]DI3, [5]DI4, [6]DI5
20.09 Ext2 in2 source [0]Always off, [2]DI1, [3]DI2, [4]DI3, [5]DI4, [6]DI5
20.10 Ext2 in3 source [0]Always off, [2]DI1, [3]DI2, [4]DI3, [5]DI4, [6]DI5
20.21 Direction [0]Request, [1]Forward, [2]Reverse
Group 21 Start/stop mode
21.01 Start mode [0]Fast, [1]Const time, [2]Automatic
21.02 Magnetization time 0 … 10000 ms, 500 ms
21.03 Stop mode [0]Coast, [1]Ramp, [2]Torque limit
21.19 Scalar start mode [0]Normal, [1]Const time, [2]Automatic, [3]Torque
Boost, [4]Automatic+boost [5]Flying start [6]Flying
start+boost
Group 22 Speed reference selection
22.11 Ext1 speed ref1 [1]AI1 scaled, [2]AI2 scaled, [8]EFB ref1, [9]EFB ref2,
[16]PID
22.18 Ext2 speed ref1 [0]Zero, [1]AI1 scaled, [2]AI2 scaled, [8]EFB ref1, [9]EFB
ref2, [16]PID
22.22 Constant speed sel1 [0]Always off, [2]DI1, [3]DI2, [4]DI3, [5]DI4, [6]DI5
22.23 Constant speed sel2 [0]Always off, [2]DI1, [3]DI2, [4]DI3, [5]DI4, [6]DI5
22.26 Constant speed 1 -30000.00 … 30000.00 rpm, 300.00 rpm
22.27 Constant speed 2 -30000.00 … 30000.00 rpm, 600.00 rpm
22.28 Constant speed 3 -30000.00 … 30000.00 rpm, 900.00 rpm
22.71 Motor potentiometer
function
[0]Disabled, [1]Enabled (init at stop/power-up),
[2]Enabled (resume always), [3]Enabled (init to actual)
[4]Enabled (resume/init to actual)
22.72 Motor potentiometer
initial value
-32768.00… 32767.00, 0.00
22.73 Motor potentiometer up
source
[0]Not used, [2]DI1, [3]DI2, [4]DI3, [5]DI4, [6]DI5
22.74 Motor potentiometer
down source
[0]Not used, [2]DI1, [3]DI2, [4]DI3, [5]DI4, [6]DI5
22.75 Motor potentiometer
ramp time
0.0…3600.0 s, 40.0 s
22.76 Motor potentiometer
min value
-32768.00… 32767.00, -50.00
22.77 Motor potentiometer
max value
-32768.00… 32767.00, 50.00
Group 23 Speed reference ramp
23.12 Acceleration time 1 0.000 … 1800.000 s, 20.000 s
23.13 Deceleration time 1 0.000 … 1800.000 s, 20.000 s
Group 28 Frequency reference chain
28.11 Ext1 frequency ref1 [1]AI1 scaled, [2]AI2 scaled, [8]EFB ref1, [9]EFB ref2,
[16]PID
28.15 Ext2 frequency ref1 [0]Zero, [1]AI1 scaled, [2]AI2 scaled, [8]EFB ref1, [9]EFB
ref2, [16]PID
28.22 Constant frequency sel1 [0]Always off, [2]DI1, [3]DI2, [4]DI3, [5]DI4, [6]DI5
28.23 Constant frequency sel2 [0]Always off, [2]DI1, [3]DI2, [4]DI3, [5]DI4, [6]DI5
28.26 Constant frequency 1 -500.00 … 500.00 Hz, 5.00 Hz
28.27 Constant frequency 2 -500.00 … 500.00 Hz, 10.00 Hz
28.28 Constant frequency 3 -500.00 … 500.00 Hz, 15.00 Hz
28.72 Freq acceleration time 1 0.000 … 1800.000 s, 30.000 s
28.73 Freq deceleration time 1 0.000 … 1800.000 s, 30.000 s
Group 30 Limits
30.11 Minimum speed -30000.00 … 30000.00 rpm, 0.00 rpm
30.12 Maximum speed -30000.00 … 30000.00 rpm, 1500.00 rpm
30.13 Minimum frequency -500.00 … 500.00 Hz, 0.00 Hz
30.14 Maximum frequency -500.00 … 500.00 Hz, 50.00 Hz
30.17 Maximum current depends on rating
Group 31 Fault functions
31.11 Fault reset selection [0]not used, [2]DI1, [3]DI2, [4]DI3, [5]DI4, [6]DI5
Group 40 Process PID set 1
40.07 Process PID operation
mode
[0]Off, [1]On, [2]On when drive running
40.08 Set 1 feedback 1 source [8]AI1 percent, [9]AI2 percent
40.16 Set 1 setpoint 1 source [2]Internal setpoint, [11]AI1 percent, [12]AI2 percent
40.24 Set 1 internal setpoint 0 -200000.00 … 200000.00, 0.00
40.31 Set 1 deviation inversion [0]Not inverted (Ref - Fbk), [1]Inverted (Fbk - Ref)
40.32 Set 1 gain 0.01 … 100.00, 1.00
40.33 Set 1 integration time 0.0 … 9999.0 s, 10.0 s
Group 45 Energy efficiency
45.11 Energy optimizer [0]Disable, [1]Enable
Group 58 Embedded fieldbus
58.01 Protocol enable [0]None, [1]ModbusRTU, [2]BACnet MSTP, [5]N2, [7]GP1
Par. No. Par. Name Settings/Range (default value in bold) Ratings
Fuses and typical power cable sizes
Terminal data for the power cables
Notes:
•The minimum specified wire size does not necessarily have sufficient current carrying
capacity at maximum load.
•The terminals do not accept a conductor that is one size larger than the maximum
specified wire size.
•The maximum number of conductors per terminal is 1.
Free space requirements
Dimensions and weights
Type
ACH18
0-04x-
...
Input
current Output ratings
No
chok
e
With
chok
e
Max.
curre
nt
Nominal use Light-duty use Heavy-duty use
I
1
I
1
I
max
I
n
P
n
I
Ld
P
Ld
I
Hd
P
Hd
AAAAkWhpAkWhp AkWhp
1-phase
U
n= 200 … 240 V
06A9-1 12.6 9.2 8.1 6.9 1.1 1.5 6.6 1.1 1.5 4.5 0.75 1.0
07A8-1 17.3 12.0 11.9 7.8 1.5 2.0 7.5 1.5 2.0 6.6 1.1 1.5
09A8-1 21.8 17.0 13.5 9.8 2.2 3.0 9.8 2.2 3.0 7.5 1.5 2.0
12A2-1 23.9 21.1 17.6 12.2 3.0 3.0 11.6 3.0 3.0 9.8 2.2 3.0
3-phase
U
n= 200 … 240 V
06A9-2 7.1 6.9 8.1 6.9 1.1 1.5 6.6 1.1 1.5 4.5 0.75 1.0
07A8-2 8.9 7.8 11.9 7.8 1.5 2.0 7.5 1.5 2.0 6.6 1.1 1.5
09A8-2 12.1 9.8 13.3 9.8 2.2 2.0+ 9.3 2.2 2.0+ 7.5 1.5 2.0
15A6-2 19.1 15.6 19.3 15.6 3.0 3.0 14.6 3.0 4.0 10.7 2.2 3.0
17A5-2 21.2 17.5 26.3 17.5 4.0 4.0 16.7 4.0 5.0 12.2 3.0 4.0
25A0-2 27.2 25.0 31.5 25.0 5.5 7.5 24.2 5.5 7.5 17.5 4.0 5.0
033A-2 35.0 32.0 45.0 32.0 7.5 10.0 30.8 7.5 10.0 25.0 5.5 7.5
048A-2 48.0 48.0 57.6 48.0 11.0 15.0 46.2 11.0 15.0 32.0 7.5 10.0
3-phase
U
n= 380 … 415 V
04A0-4 6.3 3.3 5.9 4.0 1.5 - 3.8 1.5 - 3.3 1.1 -
05A6-4 9.1 4.6 7.2 5.6 2.2 - 5.3 2.2 - 4.0 1.5 -
07A2-4 12.0 5.9 10.1 7.2 3.0 - 6.8 3.0 - 5.6 2.2 -
09A4-4 13.0 7.9 13.0 9.4 4.0 - 8.9 4.0 - 7.2 3.0 -
12A6-4 17.4 12.6 16.9 12.6 5.5 - 12.0 5.5 - 9.4 4.0 -
17A0-4 25.2 17.0 22.7 17.0 7.5 - 16.2 7.5 - 12.6 5.5 -
25A0-4 31.8 25.0 30.6 25.0 11.0 - 23.8 11.0 - 17.0 7.5 -
033A-4 40.9 32.0 45.0 32.0 15.0 - 30.5 15.0 - 25.0 11.0 -
038A-4 49.0 38.0 57.6 38.0 18.5 - 36.0 18.5 - 32.0 15.0 -
045A-4 55.7 45.0 68.4 45.0 22.0 - 42.0 22.0 - 38.0 18.5 -
050A-4 55.7 50.0 81.0 50.0 22.0 - 48.0 22.0 - 45.0 22.0 -
3-phase
U
n= 440 … 480 V
04A0-4 4.6 2.8 5.9 3.5 - 2.0 3.5 - 2.0 3.0 - 1.5
05A6-4 6.9 3.8 7.2 4.8 - 3.0 4.8 - 3.0 3.5 - 2.0
07A2-4 9.2 5.0 10.1 6.0 - 3.0 6.0 - 3.0 4.8 - 3.0
09A4-4 10.3 6.7 13.0 7.6 - 5.0 7.6 - 5.0 6.3 - 3.0
12A6-4 14.8 11.0 16.9 11.0 - 7.5 11.0 - 7.5 7.6 - 5.0
17A0-4 20.3 14.0 22.7 14.0 - 10.0 14.0 - 10.0 11.0 - 7.5
25A0-4 26.6 21.0 30.6 21.0 - 15.0 21.0 - 15.0 14.0 - 10.0
033A-4 33.9 27.0 45.0 27.0 - 20.0 27.0 - 20.0 21.0 - 15.0
038A-4 41.3 34.0 57.6 34.0 - 25.0 34.0 - 25.0 27.0 - 20.0
045A-4 46.9 40.0 68.4 40.0 - 30.0 40.0 - 30.0 34.0 - 25.0
050A-4 46.9 42.0 81.0 42.0 - 30.0 42.0 - 30.0 42.0 - 30.0
I
1
Input current for 230 V and 400 V with motor power P
N
(kW), and for 480 V with motor
power P
Ld
(hp).
I
max
Maximum output current. Available for 2 seconds every 10 minutes when the output
frequency is less than 9 Hz.
I
n
Nominal output current. Maximum continuous rms output current (no overload).
I
Ld
Continuous rms output current. Allows 10% overload for 1 minute every 10 minutes.
I
Hd
Continuous rms output current. Allows 50% overload for 1 minute every 10 minutes.
P
n
Typical motor power in nominal use (no overload)
P
Ld
Typical motor power in light-duty use (10% overload)
P
Hd
Typical motor power heavy-duty use (50% overload)
The kilowatt ratings are applicable to most IEC 4-pole motors. The horsepower ratings
are applicable to most NEMA 4-pole motors.
Type
ACH18
0-04x-
...
Fuses Cable conductor
sizes (Cu)
Frame
size
gG gR UL class T 1 ) 2) 3 ) 4)
1) The recommended branch protection fuses must be used to maintain the IEC/EN/
UL 61800-5-1 listing.
2) The drive is suitable for use on a circuit capable of delivering not more than 100000
symmetrical amperes (rms) at 480 V (480 V drives) or 240 V (240 V drives) maximum when
protected by the fuses given in this table.
3) As an alternative to Class T fuses, you can use Class J or Class CF fuses of the same voltage
and current rating for branch circuit protection of 3-phase drives.
4) Refer to Alternate Fuses, MMPs and Circuit Breakers for ABB Drives (3AXD50000645015
[English]) for additional UL fuses and circuit breakers that can be used as branch circuit
protection.
Bussmann type Bussmann
type
Bussmann/
Edison type mm2AWG
1-phase
U
n= 200 … 240 V
06A9-1 C10G20 FWP-50G14F JJS-70 3×1.5 + 1.5 16 R1
07A8-1 C10G25 FWP-50G14F JJN-25 3×2.5 + 2.5 14 R1
09A8-1 C14G40 FWP-50G14F JJN-35 3×2.5 + 2.5 14 R1
12A2-1 C14G40 FWP-63G22F JJN-35 3×2.5 + 2.5 14 R2
3-phase
U
n= 200 … 240 V
06A9-2 C10G16 FWP-50G14F JJN-15 3×1.5 + 1.5 16 R1
07A8-2 C10G20 FWP-50G14F JJN-20 3×2.5 + 2.5 14 R1
09A8-2 C10G25 FWP-50G14F JJN-20 3×2.5 + 2.5 14 R1
15A6-2 C10G32 FWP-50G14F JJN-30 3×6 + 6 10 R2
17A5-2 C10G32 FWP-50G14F JJN-35 3×6 + 6 10 R2
25A0-2 OFAF000H50 FWP-80G22F JJN-40 3×6 + 6 10 R3
033A-2 OFAF000H63 FWP-100G22F JJN-50 3×10 + 10 8 R3
048A-2 OFAF000H100 FWP-150A JJN-100 3×25 + 16 4 R4
3-phase
U
n= 400 V (range 380 … 415 V) or 460 V (range 440 … 480 V)
04A0-4 C10G10 FWP-25G14F JJS-10 3×1.5 + 1.5 16 R1
05A6-4 C10G16 FWP-25G14F JJS-20 3×1.5 + 1.5 16 R1
07A2-4 C10G20 FWP-32G14F JJS-20 3×2.5 + 2.5 14 R1
09A4-4 C10G25 FWP-32G14F JJS-25 3×2.5 + 2.5 14 R1
12A6-4 C14G32 FWP-50G14F JJS-30 3×2.5 + 2.5 14 R2
17A0-4 C14G40 FWP-50G14F JJS-35 3×6 + 6 10 R2
25A0-4 OFAF000H50 FWP-80G22F JJS-40 3×6 + 6 10 R3
033A-4 OFAF000H63 FWP-100G22F JJS-60 3×10 + 10 8 R3
038A-4 OFAF000H80 FWP-125A JJS-70 3×10 + 10 8 R4
045A-4 OFAF000H100 FWP-150A JJS-70 3×16 + 16 6 R4
050A-4 OFAF000H100 FWP-150A JJS-70 3×25 + 16 4 R4
Frame size L1, L2, L3, T1/U, T2/V, T3/W, R-, R+/UDC+, UDC- PE
Min. wire size
(solid/
stranded)
Max. wire size
(solid/
stranded)
Tightening
torque
Max. wire size
(solid/
stranded)
Tightening
torque
mm2AWG mm2AWG N·m lbf·in mm2AWG N·m lbf·in
R1...R2 0.2/0.2 18 6/6 10 0.5…0.6 5 6/4 10 1.2 10.6
R3 0.5/0.5 18 10/6 8/10 1.2…1.5 11…13 16/16 6 1.2 10.6
R4 0.5/0.5 18 25/16 4/6 2.5…3.7 22…32 16/16 6 1.2 10.6
Above Below Sides Front
mm in mm in mm in mm in
75 2.95 75 2.95 0 0 0 0
Frame
size
Dimensions Weights
H1 H2 H3 W D M1 M2
mm in mm in mm in mm in mm in mm in mm in kg lb
R1
190 7.48 220 8.66 152 5.98 70 2.76 143 5.63 60 2.36 180 7.09 1.24 2.73
R2
202 7.95 230 9.06 165 6.48 120 4.72 143 5.63 106 4.17 191 7.52 1.92 4.23
R3
205 8.07 241 9.49 165 6.48 170 6.69 174 6.85 148 5.83 191 7.52 3.30 7.28
R4
205 8.07 240 9.45 165 6.48 260 10.24 179 7.03 234 9.21 191 7.52 5.30 11.69


Ambient conditions
Markings
The applicable markings are shown on the type label of the product.
Safe torque off (STO)
The drive has a Safe torque off function (STO) in accordance with IEC/EN 61800-5-2. It can be
used, for example, as the final actuator device of safety circuits that stop the drive in case of
danger (such as an emergency stop circuit).
When activated, the STO function disables the control voltage of the power semiconductors
of the drive output stage, thus preventing the drive from generating the torque required to
rotate the motor. The control program generates an indication as defined by parameter 31.22.
If the motor is running when Safe torque off is activated, it coasts to a stop. Closing the
activation switch deactivates the STO. Any faults generated must be reset before restarting.
The STO function has a redundant architecture, that is, both channels must be used in the
safety function implementation. The safety data given is calculated for redundant use, and
does not apply if both channels are not used.
WARNING! The STO function does not disconnect the voltage from the main and
auxiliary circuits of the drive.
Notes:
•If stopping by coasting is not acceptable, stop the drive and machinery using the
appropriate stop mode before activating the STO.
•The STO function overrides all other functions of the drive.
Wiring
The safety contacts must open/close within 200 ms of each other.
Double-shielded twisted-pair cable is recommended for the connection. The maximum length
of the cabling between the switch and the drive control unit is 300 m (1000 ft). Ground the
shield of the cable at the control unit only.
Validation
To ensure the safe operation of a safety function, a validation test is required. The test must
be carried out by a competent person with adequate expertise and knowledge of the safety
function. The test procedures and report must be documented and signed by this person.
Validation instructions of the STO function can be found in the drive hardware manual.
Technical data
•Minimum voltage at S1 and S2 to be interpreted as “1”: 13 V DC
•STO reaction time (shortest detectable break): 1 ms
•STO response time: 5 ms (typical), 10 ms (maximum)
•Fault detection time: Channels in different states for longer than 200 ms
•Fault reaction time: Fault detection time + 10 ms
•STO fault indication (parameter 31.22) delay: < 500 ms
•STO warning indication (parameter 31.22) delay: < 1000 ms
•Safety integrity level (EN 62061): SIL 3
•Performance level (EN ISO 13849-1): PL e
The drive STO is a type A safety component as defined in IEC 61508-2.
For the full safety data, exact failure rates and failure modes of the STO function, refer to the
drive hardware manual.
Declaration of conformity
Requirement During operation (installed for stationary use)
Installation site
altitude
0 … 2000 m (0 … 6562 ft)
Derating:
The output current must be derated 1% for each 100 m (330 ft)
above 1000 m (3281 ft).
Surrounding air
temperature
-10 … +60 °C (14 … 140 °F). No frost permitted.
See derating in hardware manual
(3AXD50000955862 [English]).
Relative humidity <95% (IEC 60068-2-78) without condensation
Contamination levels No conductive dust permitted.
Shock or free fall Not permitted
CE UL RCM UKCA EIP BTL WEEE TÜV Nord

Other ABB DC Drive manuals

ABB ACQ580-01 Series Installation manual

ABB

ABB ACQ580-01 Series Installation manual

ABB ACx580-01 Series User manual

ABB

ABB ACx580-01 Series User manual

ABB Dodge HSCXT105 User manual

ABB

ABB Dodge HSCXT105 User manual

ABB InRouter 615 User manual

ABB

ABB InRouter 615 User manual

ABB ACS1000i air-cooled User manual

ABB

ABB ACS1000i air-cooled User manual

ABB ACS 580-OP User manual

ABB

ABB ACS 580-OP User manual

ABB DCS880 series User manual

ABB

ABB DCS880 series User manual

ABB ACS880-37 User manual

ABB

ABB ACS880-37 User manual

ABB ACS560 Installation manual

ABB

ABB ACS560 Installation manual

ABB ACS880-01 Series User manual

ABB

ABB ACS880-01 Series User manual

ABB DCS800 User manual

ABB

ABB DCS800 User manual

ABB ACSM1-04 Series User manual

ABB

ABB ACSM1-04 Series User manual

ABB ACS310 User manual

ABB

ABB ACS310 User manual

ABB ACS850-04 series User manual

ABB

ABB ACS850-04 series User manual

ABB ACS880-04F Installation manual

ABB

ABB ACS880-04F Installation manual

ABB ACS880-07 User manual

ABB

ABB ACS880-07 User manual

ABB ACS880-307LC User manual

ABB

ABB ACS880-307LC User manual

ABB ACS550-CC User manual

ABB

ABB ACS550-CC User manual

ABB ACS310 User manual

ABB

ABB ACS310 User manual

ABB ACQ80-04 Series Installation manual

ABB

ABB ACQ80-04 Series Installation manual

ABB ACS580 Series Use and care manual

ABB

ABB ACS580 Series Use and care manual

ABB ACH550-UH HVAC User manual

ABB

ABB ACH550-UH HVAC User manual

ABB ACH580-01 Series Installation manual

ABB

ABB ACH580-01 Series Installation manual

ABB ACS355 series User manual

ABB

ABB ACS355 series User manual

Popular DC Drive manuals by other brands

turck IMC-DO-11EX/L quick start guide

turck

turck IMC-DO-11EX/L quick start guide

Eaton AGSVX9000 Quick setup guide

Eaton

Eaton AGSVX9000 Quick setup guide

Oerlikon Torque-Hub CW18 Series Service manual

Oerlikon

Oerlikon Torque-Hub CW18 Series Service manual

Chziri ZVF300H user manual

Chziri

Chziri ZVF300H user manual

Eaton MVX9000 Series quick start guide

Eaton

Eaton MVX9000 Series quick start guide

Raymarine E12026 installation guide

Raymarine

Raymarine E12026 installation guide

Inovance MD800 Series quick start guide

Inovance

Inovance MD800 Series quick start guide

Lenze 9300 Servo PLC manual

Lenze

Lenze 9300 Servo PLC manual

Moeller DF4-340 Series installation instructions

Moeller

Moeller DF4-340 Series installation instructions

LS ELECTRIC LSLV-H100 Series user manual

LS ELECTRIC

LS ELECTRIC LSLV-H100 Series user manual

ATO GK3000 user manual

ATO

ATO GK3000 user manual

Kollmorgen AKD-x00306 installation manual

Kollmorgen

Kollmorgen AKD-x00306 installation manual

Emerson Control Techniques Epsilon Ei Reference manual

Emerson

Emerson Control Techniques Epsilon Ei Reference manual

Cole Parmer MasterFlex I/P 7591-07 operating manual

Cole Parmer

Cole Parmer MasterFlex I/P 7591-07 operating manual

Freecom USB DAT S-KIT datasheet

Freecom

Freecom USB DAT S-KIT datasheet

Bosch Servodyn-D manual

Bosch

Bosch Servodyn-D manual

SERAD IMD 20 Series installation guide

SERAD

SERAD IMD 20 Series installation guide

PFAFF silberblau S 20 operating instructions

PFAFF silberblau

PFAFF silberblau S 20 operating instructions

manuals.online logo
manuals.online logoBrands
  • About & Mission
  • Contact us
  • Privacy Policy
  • Terms and Conditions

Copyright 2025 Manuals.Online. All Rights Reserved.