PL-0370 Rev 00 / December 2019 / Page 1
ID Alarm/
Alert
Text Mes-
sage System Status & OperatorResponse
S1 Alarm POWER ON
TEST FAIL
The Pump will not start. An audible alarm will sound, which
cannot be muted. Switch the Console OFF and ON again. If
the alarm reappears, switch to the backup Console, Motor
and Flow Probe, record the alarm message and contact
your local Abbott Medical representative.
S2 Alarm
SYSTEM
FAULT
(Run-Time
System
Failure)
The Pump will stop. An audible alarm will sound, which
cannot be muted. Clamp the return tubing and switch to
the backup Console, Motor and Flow Probe according the
procedure described in Section 2. Resume support. Record
the alarm message and contact your local Abbott Medical
representative.
M1 Alarm MOTOR
STOPPED
The Pump will stop. An audible alarm will sound, which
can be muted for 60 seconds.Clamp the return tubing
and switch to the backup Console, Motor and Flow Probe
according the procedure described in Section 2. Resume
support. Record the alarm message and contact your local
Abbott Medical representative.
M2 Alarm
MOTOR
DISCON-
NECTED
The Pump will stop. An audible alarm will sound, which can
be muted for 60 seconds.
During setup of the System:
Press the alarm acknowledge button and check that the Mo-
tor connector is fully inserted into the back of the Console.
During support:
Press the alarm acknowledge button and check that the
connector of the Motor is fully inserted into the back of the
Console. Resume support. If the visual alarm message
does not disappear, clamp the return tubing and switch to
the backup Console, Motor and Flow Probe according the
procedure described in Section 2. Resume support. Record
the alarm message and contact your local Abbott Medical
representative.
M3 Alarm PUMP NOT
INSERTED
System will not start. An audible alarm will sound, which can
be muted for 60 seconds. Press the alarm acknowledge
button. Insert or reinsert the pump and secure it with
the locking screw. If the alarm repeats, switch to backup
Console, Motor and Flow Probe according the procedure
described in Section 2.
M4 Alarm MOTOR
ALARM
An audible alarm will sound and the System will continue
to operate. Press the alarm acknowledge button, if the
visual alarm message does not disappear, clamp the return
tubing, stop the pump and switch to the backup Console,
Motor and Flow Probe according the procedure described
in Section 2. Resume support. Record the alarm message
and contact your local Abbott Medical representative.
M5 Alert
SET PUMP
SPEED NOT
REACHED
Check the Pump ow. If pump ow is satisfactory, reduce
set speed while insuring that ow is maintained. Press
the alarm acknowledge button. If the alert repeats, clamp
the return tubing, stop the pump and switch to the backup
Console, Motor and Flow Probe according the procedure
described in Section 2. Resume support. Record the alert
message and contact your Abbott Medical representative.
If the pump ow is not satisfactory, clamp the return tubing
and switch to the backup Console, Motor and Flow Probe
according to the procedure described in Section 2. Resume
support. Record the alert message and contact Abbott Med-
ical representative.
ID Alarm/
Alert
Text Mes-
sage System Status & OperatorResponse
B1 Alert
BATTERY
MODULE
FAIL
The Console battery will not function. An audible alarm
will sound. Switch to the backup Console, Motor and Flow
Probe according to the procedure described in Section 2.
Resume support. Record the alert message and contact
your Abbott Medical representative.
B2 Alert
BATTERY
BELOW
MINIMUM
The Pump will stop after a very short time. Plug the Console
into a AC power outlet to charge the battery. If no AC outlet
is available, switch to the backup Console, Motor and Flow
Probe according to the procedure described in Section 2.
Resume support.
F1 Alert
FLOW
PROBE
DISCON-
NECTED
Check the Flow Probe connection on back of the Console.
If necessary, reconnect the Flow Probe connector to the
back of the Console. Press the alarm acknowledge button.
Switch to the backup Flow Probe, if the alert message
repeats.
S3 Alert SYSTEM
ALERT
Press the alarm acknowledge button, if the message does
not disappear, clamp the return tubing, stop the pump
and switch to the backup Console, Motor and Flow Probe
according the procedure described in Section 2. Resume
support. Record the alert message and contact your local
Abbott Medical representative.
F2 Alert
FLOW
SIGNAL
INTER-
RUPTED
(Flow rate
sensor error)
Manually disconnect, reposition and reconnect the
Flow Probe transducer to the tubing. Press the alarm
acknowledge button. Switch to the backup Flow Probe,
if the alert message repeats. If problem still persists after
switching to the backup Flow Probe, stop the pump and
switch to a backup Console. Follow the instructions
described in Section 2. Resume support. Record the alert
message and contact your Abbott Medical representative.
F3 Alert
FLOW
BELOW
MINIMUM
(Low Flow)
Check for physiologic cause or circuit obstruction.
Check minimum ow set point. Do not increase RPM
without conrming that adequate blood volume is available.
Common cause of this alert is inadequate blood volume at
the drainage cannula site for the desired pump ow.
F4 Alert
FLOW
ABOVE
MAXIMUM
Reduce Pump speed and check for cause.
P1 Alert
PRESSURE
1 DISCON-
NECTED
Check the electrical connections on the pressure 1 trans-
ducer and recalibrate. If the problem persists disconnect,
reconnect, and recalibrate the transducer. Consider chang-
ing the transducer and cable if the problem persists.
P2 Alert
PRESSURE
2 DISCON-
NECTED
Check the electrical connections on the pressure 2 trans-
ducer and recalibrate. If the problem persists disconnect,
reconnect, and recalibrate the transducer. Consider chang-
ing the transducer and cable if the problem persists.
ID Alarm/
Alert
Text Mes-
sage System Status & OperatorResponse
P3 Alert
PRESSURE
SYSTEM
FAIL
The pressure monitoring system will not function. If pressure
monitoring is needed then change to the backup Console,
Motor and Flow Probe. Switch to the backup System
according the procedure described in Section 2. Resume
support. Record the alert message and contact your Abbott
Medical representative.
P4 Alert
PRESSURE
1 BELOW
MINIMUM
Check for and resolve a physiological or mechanical cause.
Ensure appropriate pressure alarms are set. Consider re-
calibrating the transducer, if alert cannot be explained by
conventional troubleshooting.
P5 Alert
PRESSURE
2 BELOW
MINIMUM
Check for and resolve a physiological or mechanical cause.
Ensure appropriate pressure alarms are set. Consider re-
calibrating the transducer, if alert cannot be explained by
conventional troubleshooting.
P6 Alert
PRESSURE
1 ABOVE
MAXIMUM
Check for and resolve a physiological or mechanical cause.
Ensure appropriate pressure alarms are set. Consider re-
calibrating the transducer, if alert cannot be explained by
conventional troubleshooting. Consider reducing RPM to
reduce the pressure if appropriate.
P7 Alert
PRESSURE
2 ABOVE
MAXIMUM
Check for and resolve a physiological or mechanical cause.
Ensure appropriate pressure alarms are set. Consider re-
calibrating the transducer, if alert cannot be explained by
conventional troubleshooting. Consider reducing RPM to
reduce the pressure if appropriate.
M6 Alert MOTOR
OVER TEMP
Switch to backup Console, Motor and Flow Probe accord-
ing to the procedure described in Section 2. Verify that the
backup Motor stands free and is not covered (e.g. blankets).
B3 Alert
BATTERY
CHARGER
FAIL
Press the alarm acknowledge button. If the alert message
repeats, switch to backup System as described in Section
2. If this alert is associated with BATTERY MODULE FAIL
then carry out the procedure associated with that alarm.
B4 Alert
BATTERY
MAINTE-
NANCE
REQUIRED
Do not use the Console. Perform battery maintenance ac-
cording to the Battery Maintenance Procedure listed in the
CentriMag Circulatory Support System Operation Manual.
B5 Alert LOW
BATTERY
Plug the Console into a AC power outlet to charge the
battery. If no AC outlet is available, switch to the backup
Console, Motor and Flow Probe according to the procedure
described in Section 2.
Resume support.
B6 Alert ON BAT-
TERY
Verify that the user wants the Console to be on battery. If so,
carefully monitor the status of the battery charge indicator,
while using the System on battery.
Reconnect to AC-outlet, as soon as possible.
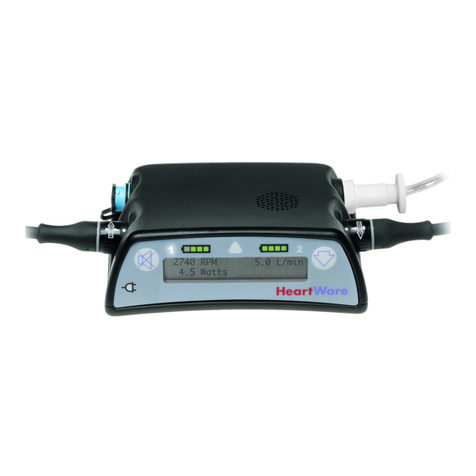
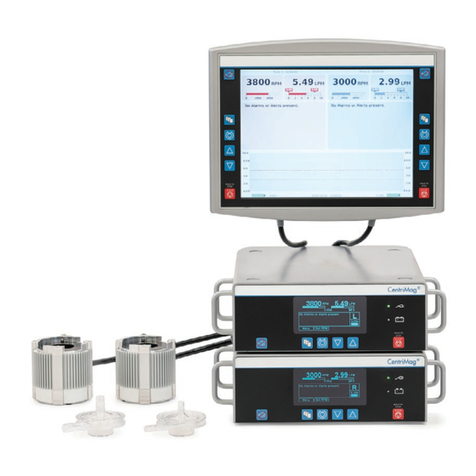
CentriMagTM Circulatory Support System
Alarms and Alerts Quick Reference Guide
1 RESPONSE TO SYSTEM ALARMS OR ALERTS
When a System alarm or alert condition occurs, an alarm or alert tone sounds and
text message appears on the display of the 2nd Generation CentriMag Primary
Console. Most alarms and alerts require some action on the user’s part to correct
the cause. The following table can be used to determine how to respond to an
alarm or alert condition.

