manuals.online logo
Brands
  1. Home
  2. •
  3. Brands
  4. •
  5. Ambu
  6. •
  7. Medical Equipment
  8. •
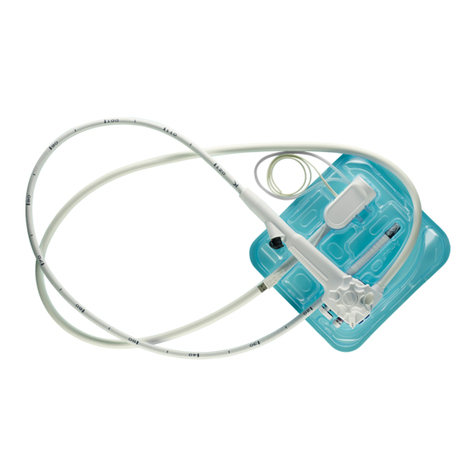
  9. Ambu aScope 2 User manual

Ambu aScope 2 User manual

Ambu®aScope™2 - Quick Guide for PDT
1. Functions
The Ambu®aScope™ 2 can be used/switched on for a total of
8 hours from first plugged into the aScope Monitor.
When the 8-hour period is exceeded the power to the aScope 2
system is switched off. The timer within the aScope 2 is
independent of the aScope Monitor and will remember at which
point the aScope 2 was switched on. The time remaining for the
aScope 2 will be shown as symbols on the aScope Monitor at all
times when powered on and connected.
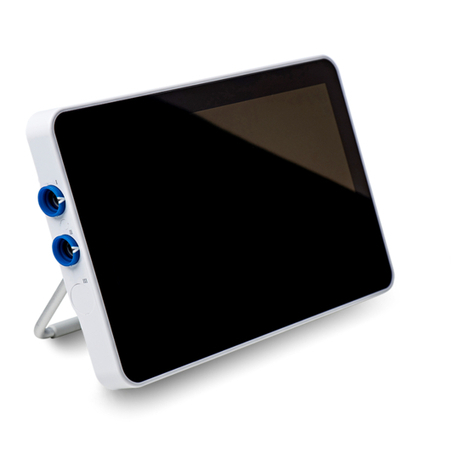
The reusable monitor displays the video image from the aScope 2.
Fully charged battery
(green).
Half battery capacity (orange).
Low battery capacity (red).
Battery error (the power plug
is connected but the battery is
not charging).
Shown on screen from start and until
there are 10 minutes left (green).
Shown on screen when there are between
10 and 5 minutes left (orange).
Time are expiring.
Less than 5 minutes left (red).
Plug is connected and the monitor
battery is fully charged (green).
Plug is connected and the monitor
battery is half charged (orange).
Plug is connected and the moni
tor
battery power is low (red).
Ambu®aScope™ 2
operation time icons
Plug icons
Ambu®aScope™
Monitor battery icons
Please wait...
Start-up picture
Scope time expired
2. Connecting the system
3. Preparation for use
The aScope 2 is inserted through the endotracheal tube and aligned with the tube so the
tip of the aScope 2 is placed at tip of the tube.
The cuff is deflated and the tube and scope is retracted until it is just above the place
of the incision.
The aScope 2 is now ready to be used for monitoring during needle insertion, dilatation,
and tube placement.
Always have an additional aScope 2 or reusable scope at hand as a precaution.
496 2016 01 • V03 • 03/2011 - Ambu A/S - Technical data may be modied without further notice.
PDT is currently not part of indication for use in the USA.
Icons
Connect the plug on the
aScope 2 cable to the
socket on the front of
the aScope Monitor.
Push the ON/OFF button
on the aScope Monitor
to start up the system.
After about 10 seconds
the aScope Monitor is
ready to display the view.
Push the ON/OFF button
on the aScope 2.
Warning: Read Directions For Use before using the
Ambu®aScope™2 and Ambu®aScope™Monitor.
A
Next page
Ambu®aScope™2 - Quick Guide for PDT
4. Preparation for use
The aScope Monitor can be placed on a flat surface or secured to an
I.V. pole using the bracket supplied. The bracket also has a hook that
facilitates easy, accessible storage of the Ambu®aScope™ 2 via the
hole in the top of the aScope 2 pouch.
Most users find the default contrast and brightness settings to be
optimal but these can be adjusted if required.
Consider dimming the room lights to see the image from the
aScope 2 more clearly.
Check the battery indicator on the aScope Monitor.
If the time remaining is not sufficient for the procedure –
charge the monitor by plugging it into the mains.
5. Monitoring with the aScope™ 2 during the PDT
Insert the aScope 2 into the ET tube and advance until you reach the tip of the ET tube.
Keep the cord of the aScope 2 as straight as possible by holding the handle of the aScope 2
high. This increases the range of movement of the tip and allows you more control.
Advance the aScope 2 slowly, allowing the light of the camera to re-adjust at each stage.
Advancement needs to be slower than that of traditional reusable scopes.
The aScope 2 will allow the operator to see and verify the accurate placement of the
guidewire prior to the tracheal dilatation as well as the placement of the needle.
When the tip comes into contact with secretions the image may blur or bubble.
If this happens try using the flick method (flick the bending control lever up or down
allowing it to return to a neutral position afterwards) to clear the lens. If this
doesn’t work try dabbing the camera tip on an internal mucosal wall to clear the image.
If the above fails, remove the aScope 2, rub the lens clean with either gauze or an alcohol
swap. Do not be afraid to exert a little pressure when doing this. Proceed as above.
6. Control the placement of the
Tracheostomy Tube
When the tracheostomy tube is in place, the aScope 2 can be
used to control the placement of the tube
Check the placement from above the tube before removing
the aScope 2 from the mouth or nose of the patient.
Check the placement by advancing the aScope 2 through
the tracheostomy tube.
B
Ambu A/S
Baltorpbakken 13
DK-2750 Ballerup
Danmark
Tlf.: +45 72 25 20 00
Fax: +45 72 25 20 53
www.ambu.com

Other Ambu Medical Equipment manuals

Ambu AmbuMan Instrument User manual

Ambu

Ambu AmbuMan Instrument User manual

Ambu AuraOnce User manual

Ambu

Ambu AuraOnce User manual

Ambu Oval Plus User manual

Ambu

Ambu Oval Plus User manual

Ambu AuraOnce Single Use Laryngeal Mask User manual

Ambu

Ambu AuraOnce Single Use Laryngeal Mask User manual

Ambu Oval Plus Neonate User manual

Ambu

Ambu Oval Plus Neonate User manual

Ambu PEEP 20 User manual

Ambu

Ambu PEEP 20 User manual

Ambu SPUR II User manual

Ambu

Ambu SPUR II User manual

Ambu aScope 5 User manual

Ambu

Ambu aScope 5 User manual

Ambu aScope 4 Broncho Series User manual

Ambu

Ambu aScope 4 Broncho Series User manual

Ambu Mark IV User manual

Ambu

Ambu Mark IV User manual

Ambu Redi-ACE Adult User manual

Ambu

Ambu Redi-ACE Adult User manual

Ambu aScope 3 Regular User manual

Ambu

Ambu aScope 3 Regular User manual

Ambu Mini Perfit ACE User manual

Ambu

Ambu Mini Perfit ACE User manual

Ambu Perfit ACE Manual

Ambu

Ambu Perfit ACE Manual

Ambu Aura-i User manual

Ambu

Ambu Aura-i User manual

Ambu AuraGain User manual

Ambu

Ambu AuraGain User manual

Ambu AuraOnce User manual

Ambu

Ambu AuraOnce User manual

Ambu VivaSight 2 SLT User manual

Ambu

Ambu VivaSight 2 SLT User manual

Ambu AmbuMan Manual

Ambu

Ambu AmbuMan Manual

Ambu aScope 3 User manual

Ambu

Ambu aScope 3 User manual

Ambu aScope 3 5.0/2.2 User manual

Ambu

Ambu aScope 3 5.0/2.2 User manual

Ambu aScope 4 RhinoLaryngoIntervention User manual

Ambu

Ambu aScope 4 RhinoLaryngoIntervention User manual

Ambu aScope 4 RhinoLaryngo Slim User manual

Ambu

Ambu aScope 4 RhinoLaryngo Slim User manual

Ambu aBox 2 User manual

Ambu

Ambu aBox 2 User manual

Popular Medical Equipment manuals by other brands

Ossur Symbionic Leg 3 Instructions for use

Ossur

Ossur Symbionic Leg 3 Instructions for use

Erbe ICC 350 instruction manual

Erbe

Erbe ICC 350 instruction manual

Creative PC-68B user manual

Creative

Creative PC-68B user manual

Direct Supply Direct Choice DSDC2CPD owner's manual

Direct Supply

Direct Supply Direct Choice DSDC2CPD owner's manual

VISIOMED Visiocheck BW-X07HD user manual

VISIOMED

VISIOMED Visiocheck BW-X07HD user manual

Stanley Healthcare Hugs instructions

Stanley Healthcare

Stanley Healthcare Hugs instructions

Huvitz HDR-7000 Service manual

Huvitz

Huvitz HDR-7000 Service manual

NeuWave Medical Certus 140 User's reference manual

NeuWave Medical

NeuWave Medical Certus 140 User's reference manual

CAE Aria user guide

CAE

CAE Aria user guide

LINET Eleganza 2 User manual and technical description

LINET

LINET Eleganza 2 User manual and technical description

Kodak 8000C user guide

Kodak

Kodak 8000C user guide

Volk VistaView Instructions for use

Volk

Volk VistaView Instructions for use

Widex Mind 330 Series User instructions

Widex

Widex Mind 330 Series User instructions

Guldmann 2832 Series manual

Guldmann

Guldmann 2832 Series manual

Alert-it P139B quick start guide

Alert-it

Alert-it P139B quick start guide

Owandy RX Service manual

Owandy

Owandy RX Service manual

Invacare Solara Installation and operating instructions

Invacare

Invacare Solara Installation and operating instructions

Somatex SurgLite SL0200-15 Instructions for use

Somatex

Somatex SurgLite SL0200-15 Instructions for use

manuals.online logo
manuals.online logoBrands
  • About & Mission
  • Contact us
  • Privacy Policy
  • Terms and Conditions

Copyright 2025 Manuals.Online. All Rights Reserved.