manuals.online logo
Brands
  1. Home
  2. •
  3. Brands
  4. •
  5. ABC Design
  6. •
  7. Stroller
  8. •
  9. ABC Design 3 Tec User manual

ABC Design 3 Tec User manual

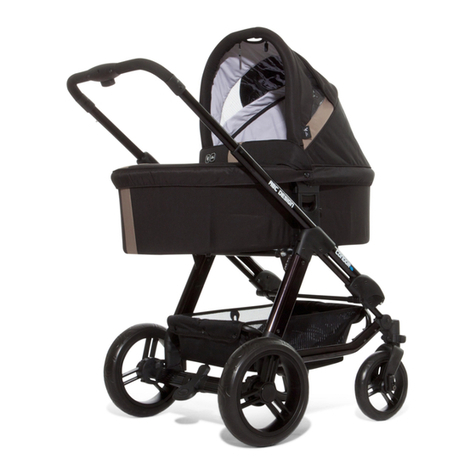
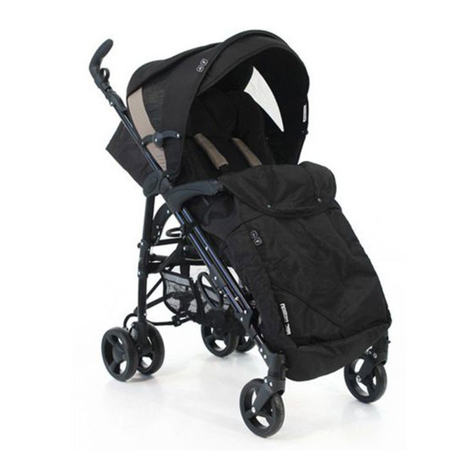
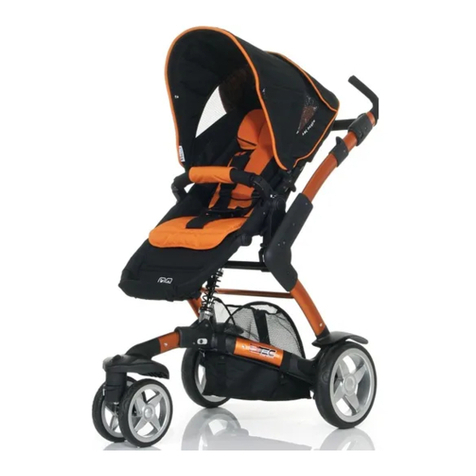
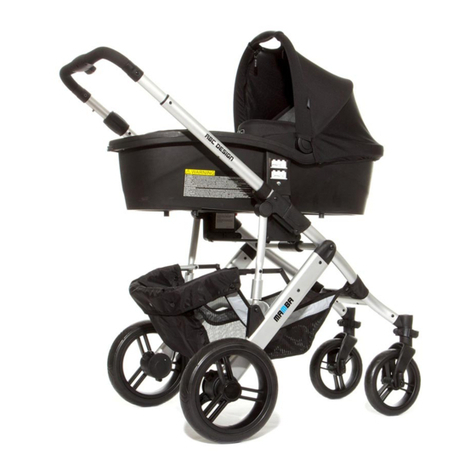
3 Tec
- 3-wheeled stroller with seatunit
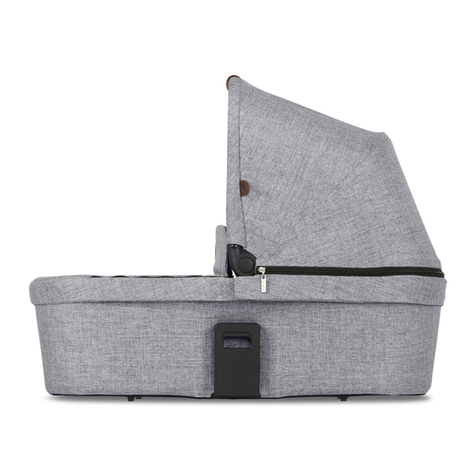
- including carry cot
- height adjustable handle
- swivable and lockable front wheels
- suitable from 6 months to 3 years (max.
15kg) incl. carry cot from date of birth
(max. 15 kg)
- 4-times adjustable backrest
- weight: 15,2 kg
- tested according to EN 1888 : 2005
WARNING:
WARNING:WARNING:
WARNING:
This stroller is no sport vehicle
and may not used for jogging or
inline-skating.
Dear Cust omer,
Congratulations on the purchase of your ABC-Design Stroller. We are pleased that you have chosen one of our products and hope that you will be
completely satisfied with the service you receive from the product. We advise you to read the Instruction Leaflet carefully before use of the pram and
then to keep it in a safe place. If you fail to do this the safety of your child can be jeopardised. Kindly pay attention to the washing and care
instructions so that you enjoy long and trouble free use of your new purchase.
Your ABC-Design Team
Hints for care and use
Hints for care and useHints for care and use
Hints for care and use
1. The manufacture of materials used in the fabrication of this product meet the standards required by the AZO, EN71-2 und EN71-3. for clothing
claimed light originality values. However, we advise you not to expose the product to the sun for a long time. Attrition and fading of colours during
heavy solar radiation do not justify a damage claim. The f abric case of your stroller is washable. You can wash the case by hand or machine cold
wash.
2. Each product frame is manufactured according to EN 1888: 2005 standards. To maintain the safety of your product, the moving components
must be lubricated regularly and if required rerivetted.
Look out: Use only silicon-oil or silicon-spray for oiling.
3. Regular care and maintenance contribute to the safety and longevity of your product. Environmental influences such as salty air, road strewn salt
or acid rain as well as outdoor storage contribute towards corrosion. Therefore always store your pram indoors.
4. We recommend regular maintenance of all varnished components. Should the frame and varnished components become soiled use a damp
cloth moistend with water diluted mild detergent to wipe away the dirt.
5. Damaged air tubes are no reason for reclamation. Spare tubes can be bought in all retail shops.
By adhering to the aforementioned hints you will enjoy satisfactory use of your ABC-Design product for a long time
page 2
1. Open the stroller
1. Open the stroller1. Open the stroller
1. Open the stroller
Move up the front part until it is locked.
Move up the handle until the frame is locked completely.
WARNING:
WARNING:WARNING:
WARNING:
Please make sure that all locks are closed before
using
.
2. Installation of the wheels
2. Installation of the wheels2. Installation of the wheels
2. Installation of the wheels
Put the rear wheels on the axles until it is locked.
For removing the wheels you have to put down the handle as
shown on the right picture, that the wheel is released.
Now you can take down the wheel from the axle.
For the installation of the front wheel block put the wheel on
the front part of the fork until it is locked.
For removing the wheel block press the button located on the
wheel block surface.
page 3
3
33
3. Installation of the swivelling wheels
. Installation of the swivelling wheels. Installation of the swivelling wheels
. Installation of the swivelling wheels
Move the lever for fixing the wheels to the left hand side.
For the swivelling position move the lever to the right hand
side.
4
44
4. Fixing and removing of the breaking system
. Fixing and removing of the breaking system. Fixing and removing of the breaking system
. Fixing and removing of the breaking system
For fixing the break push the lever down.
For releasing the break, pull the lever up.
page 4
5. Fixation seat unit
5. Fixation seat unit5. Fixation seat unit
5. Fixation seat unit
Please fix the seat unit onto the frame as shown on the
pictures.
Please make sure that the seat unit is correctly locked onto the
frame.
WARNING:
WARNING:WARNING:
WARNING: Please use the seat unit only in the driving
direction as shown on picture
page 5
6. Fixing and removing of the bumper
6. Fixing and removing of the bumper6. Fixing and removing of the bumper
6. Fixing and removing of the bumper
For fixing the bumperbar please take it into both plastic
fixations on the left and right side as shown on the stroller.
For removing the bumper from the stroller turn both clips to
the inner side and pull the bumper to the front.
7
77
7. Adjustment of the l
. Adjustment of the l. Adjustment of the l
. Adjustment of the leg support
eg supporteg support
eg support
For adjusting the leg support push both buttons on both sides.
Fix the legrest in releasing both buttons.
page 6
8
88
8. Belt locking
. Belt locking. Belt locking
. Belt locking
For locking the belt put both plastic parts (1) together until it
locks.
9
99
9. Belt opening
. Belt opening. Belt opening
. Belt opening
For belt opening, put both plastic parts together (1) and then
pull it apart (2).
W
WW
WARNING
ARNINGARNING
ARNING:
::
: Please use the pelvic belt together with the crotch
belt
10
1010
10.
..
. Seat
SeatSeat
Seat unit
unitunit
unit adjustment
adjustmentadjustment
adjustment
For adjusting the seat unit, pull the lever on the rear side to the
top and adjust it.
When you have reached the requested position lot off the lever
and it locks automatically in the position you want.
page 7
11
1111
11. Unfold the carry
. Unfold the carry. Unfold the carry
. Unfold the carry-
--
-cot
cotcot
cot
Lift the sides of the carry-cot.
Fix the sides firmly in place by pushing both steel braces into
their respective pockets.
Make certain that the braces are both properly locked in place.
12
1212
12.
..
. Assembling
AssemblingAssembling
Assembling of the
of theof the
of the adapt
adaptadapt
adapto
oo
or
rr
r
Put the adaptor onto the carry cot like shown on the picture.
13
1313
13. Fitting the mattress
. Fitting the mattress. Fitting the mattress
. Fitting the mattress
Place the mattress in the cover.
Press the mattress right down onto the floor of the carry-cot.
page 8
14
1414
14. Adjust of the carrying handle
. Adjust of the carrying handle. Adjust of the carrying handle
. Adjust of the carrying handle
To adjust the carrying handle, you must press the buttons on
the two sides as shown on the photo.
Now you can adjust the carrying handle.
15
1515
15. Fitting the leg
. Fitting the leg. Fitting the leg
. Fitting the leg-
--
-cover
covercover
cover
Feed the closed end of the leg-cover over the bottom
end of the carry-cot
Pull the leg-cover towards the head end of the carry-cot.
Fasten the ends of the leg blanket to the outside of the cover
with the velcro provided for it.
page 9
16. Fixation of the carry cot on the stroller
16. Fixation of the carry cot on the stroller16. Fixation of the carry cot on the stroller
16. Fixation of the carry cot on the stroller
Put the carry cot on the stroller frame until it is fixed completely
on the frame.
For removing the carry cot from the frame pull the lever
upwards, and move the cot slightly from the frame until it is
removed completely.
Attention: Check carefully that the carry cot is fixed on the
frame properly.
page 10
17. Adjustment of the handles
17. Adjustment of the handles17. Adjustment of the handles
17. Adjustment of the handles
For adjusting the levers in height press the buttons as shown
on the picture. If you have reached the requested height of the
handle release the buttons and wait until it locks.
18. Folding the stroller
18. Folding the stroller18. Folding the stroller
18. Folding the stroller
For folding the stroller push the button as shown on the picture
(1).Move both levers up (2).
Move the handle down as shown on the picture.
Pull both levers located on the front wheel frame to the front.
Push the front part to the inner side.
REMARK: For opening the stroller again, see point one „open
the stroller“.
WARNING: Please make sure that all locks are closed before
using.
page 11
-Please read this instruction carefully before using the stroller. If you don’t pay attention to
these instructions, the safety of your baby can be in danger.
- This stroller is suitable for babies from the age of 6 month (by using a carry cot from date of
birth) till the age of 3 years and a weight up to 15 kg.
- WARNING:
WARNING:WARNING:
WARNING: Never leave you child unsupervised in the stroller!
- WARNING
WARNINGWARNING
WARNING: Please make sure that all locks are closed before using.
- WARNING
WARNINGWARNING
WARNING: Please use the seat unit only in the driving direction
- WARNING
WARNINGWARNING
WARNING: Always use the safety belt when your child is in the stroller.
- The mesh basket is suitable for a maximal weight of 2 kg.
- This stroller is suitable for one baby.
- The brakes have to be fixed, while taking the child in or out.
-
WARNING
WARNINGWARNING
WARNING: Please use the pelvic belt together with the crotch belt
- WARNING:
WARNING:WARNING:
WARNING: If you carry the stroller up- or downstairs always take your child out of the
stroller.
- WARNING:
WARNING:WARNING:
WARNING: When using the carry cot please make sure that the carry cot is fixed in the right
way.
- From time please check loosen parts regularly and lock it again.
WARNING:
WARNING:WARNING:
WARNING: If you place heavy weight at the handle, the stability of the stroller is in danger
WARNING:
WARNING:WARNING:
WARNING: Keep away from fire
WARNING:
WARNING:WARNING:
WARNING: This stroller is no sport vehicle and may not used for jogging or inline-skating.
-
Do not use a Kiddyboard, the stroller is not approved for
use of a Kiddyboard.
- Normal problems regarding to years of wear and damages through heavy uses is no reason for
reclamation.
- Damages which are caused by wrong using of this product are no reason for reclamation.
- Damages through wrong installations are no reason for reclamation.
- Flat air tubes caused through long time standing periods are no reason for reclamation.
- Flat air tubes caused by nails, glass fragments, etc. are no reason for reclamation.
- Damages through wrong using of the stroller are no reason for reclamation.
- Parts of rust caused by missing servicing are no reason for reclamation.
- Scratches are normal damages and are no reasons for reclamation.
- Damp textile parts, which can’t be dried or mouldy parts, are no reason for reclamation.
Through sun intensity, sweat, cleansing agent, rub-downs or often washings, the fabric colour can
fade out. and this is also no reason for a reclamation.
- Used wheels are normal damages and are no reason for reclamation. This is also no reason for a
reclamation.
- Used wheels are normal damages and are no reason for reclamation.
ABC Design GmbH
Dr. Rudolf-Eberle-Str. 29
D-79774 Albbruck

Other ABC Design Stroller manuals

ABC Design Primo User manual

ABC Design

ABC Design Primo User manual

ABC Design ZOOM AIR User manual

ABC Design

ABC Design ZOOM AIR User manual

ABC Design Pramy Luxe User manual

ABC Design

ABC Design Pramy Luxe User manual

ABC Design Turbo 4S User manual

ABC Design

ABC Design Turbo 4S User manual

ABC Design PING User manual

ABC Design

ABC Design PING User manual

ABC Design Turbo 6 S User manual

ABC Design

ABC Design Turbo 6 S User manual

ABC Design Mamba User manual

ABC Design

ABC Design Mamba User manual

ABC Design Mamba 6970 User manual

ABC Design

ABC Design Mamba 6970 User manual

ABC Design Cobra User manual

ABC Design

ABC Design Cobra User manual

ABC Design Primo User manual

ABC Design

ABC Design Primo User manual

ABC Design AVUS AIR User manual

ABC Design

ABC Design AVUS AIR User manual

ABC Design Limbo User manual

ABC Design

ABC Design Limbo User manual

ABC Design Take Off User manual

ABC Design

ABC Design Take Off User manual

ABC Design Salsa 4 User manual

ABC Design

ABC Design Salsa 4 User manual

ABC Design circle Milano User manual

ABC Design

ABC Design circle Milano User manual

ABC Design Tandem User manual

ABC Design

ABC Design Tandem User manual

ABC Design CONDOR User manual

ABC Design

ABC Design CONDOR User manual

ABC Design TRAGEWANNE ZOOM User manual

ABC Design

ABC Design TRAGEWANNE ZOOM User manual

ABC Design Giro User manual

ABC Design

ABC Design Giro User manual

ABC Design Cobra PLUS User manual

ABC Design

ABC Design Cobra PLUS User manual

ABC Design Condor 4S User manual

ABC Design

ABC Design Condor 4S User manual

ABC Design Avito User manual

ABC Design

ABC Design Avito User manual

ABC Design Mamba User manual

ABC Design

ABC Design Mamba User manual

ABC Design Pramy Luxe User manual

ABC Design

ABC Design Pramy Luxe User manual

Popular Stroller manuals by other brands

BOB DUALLIE instruction manual

BOB

BOB DUALLIE instruction manual

Akces-Med RACEREVO user manual

Akces-Med

Akces-Med RACEREVO user manual

Brevi Scatto 717 Instructions for use

Brevi

Brevi Scatto 717 Instructions for use

UPPAbaby SnugSeat Assembly

UPPAbaby

UPPAbaby SnugSeat Assembly

Urban Detour Arctic User guide & guarantee

Urban Detour

Urban Detour Arctic User guide & guarantee

BEBE CONFORT trophy avenue air 6 Instructions for use

BEBE CONFORT

BEBE CONFORT trophy avenue air 6 Instructions for use

Joovy Qool instruction manual

Joovy

Joovy Qool instruction manual

Kinderkraft EVOLUTION user manual

Kinderkraft

Kinderkraft EVOLUTION user manual

Diono Quantum instruction manual

Diono

Diono Quantum instruction manual

ALLIS Venus instruction manual

ALLIS

ALLIS Venus instruction manual

Joovy Scooter 0036X instruction manual

Joovy

Joovy Scooter 0036X instruction manual

JANE Nurse FLY instructions

JANE

JANE Nurse FLY instructions

AneX cross Maintenance manual

AneX

AneX cross Maintenance manual

Chicco SEETY manual

Chicco

Chicco SEETY manual

Jole chrome dlx instruction manual

Jole

Jole chrome dlx instruction manual

Contours Lite Series instruction sheet

Contours

Contours Lite Series instruction sheet

Evobike BTA42S Owner's assembly and safety manual

Evobike

Evobike BTA42S Owner's assembly and safety manual

Mountain Buggy +One instructions

Mountain Buggy

Mountain Buggy +One instructions

manuals.online logo
manuals.online logoBrands
  • About & Mission
  • Contact us
  • Privacy Policy
  • Terms and Conditions

Copyright 2025 Manuals.Online. All Rights Reserved.