Note: Dimensions are nominal measurements only
180
TOP VIEW
FRONT VIEW SIDE VIEW
180
180
400
250
1075
1130
2300
1100
93
COLD WATER
INLET
Finish Floor approx. Finish Floor approx.
HOT WATER
INLET
2300
Note: Dimensions are nominal measurements only
180
TOP VIEW
FRONT VIEW SIDE VIEW
180
180
400
250
1075
1130
2300
1100
93
COLD WATER
INLET
Finish Floor approx. Finish Floor approx.
HOT WATER
INLET
2300
Disclaimer: Products in this specification manual must by regulation be installed by licensed and registered trade people. The manufacturer/distributor reserves the right to vary specifications or delete
models from their range without prior notification. Dimensions are nominal measurements only. Dimensions and set-outs listed are correct at time of publication however the manufacturer/distributor
takes no responsibility for printing errors. All ABI Products are designed in Australia. Copyright ABI Interiors Pty Ltd 2021.
SPECIFICATIONS
RECOMMENDED USE
MATERIAL
PRESSURE RATING
TEMPERATURE RATING
STANDARDS
Domestic
Maximum continuous working temperature 75°C
If the water temperature exceeds 75°C, an approved tempering
valve must be fitted
WELS Star Rating 3 star - 9L/min
S16553, WM-032145
AS/NZS 3662:2005
WM-032145
SOLA OUTDOOR SHOWER SET
Stainless Steel 316
Recommended minimum working pressure 150kPa
Recommended maximum working pressure 500kPa
Hot and cold water inlet pressure should be equal
1. Use the base as a template to mark holes.
2. Place lid on top to check level. Double check
your position is correct.
1
1. Tighten nuts to secure base down.
2. Attach hot and cold water pipes (use
appropriate thread sealant).
3
5Attach and bolt body to base. 6
1. Trim plastic housing to be level with floor
structure (if required).
2. Secure water pipes appropriately.
4
1. Remove base, drill the holes into the
concrete footing to a depth of 60mm.
2. Insert dyna bolts.
CONCRETE FOOTING
2
1.
1.
1.
1.
2.
2.
2.
Hot
Cold
2.
60
Connect shower head to Arm.
Note: Drainage not shown, please ensure drainage
is compliant with your local standard
Important!
There are many installation options for this product. We recommend consulting
your designer or plumber prior to commencing any works to determine the most
appropriate method for you. Please note this product must not be installed
encased in concrete to allow access to water connections. See examples of
correct installation methods below. ABI's warranty is void if this product
is installed incorrectly or encased in concrete.
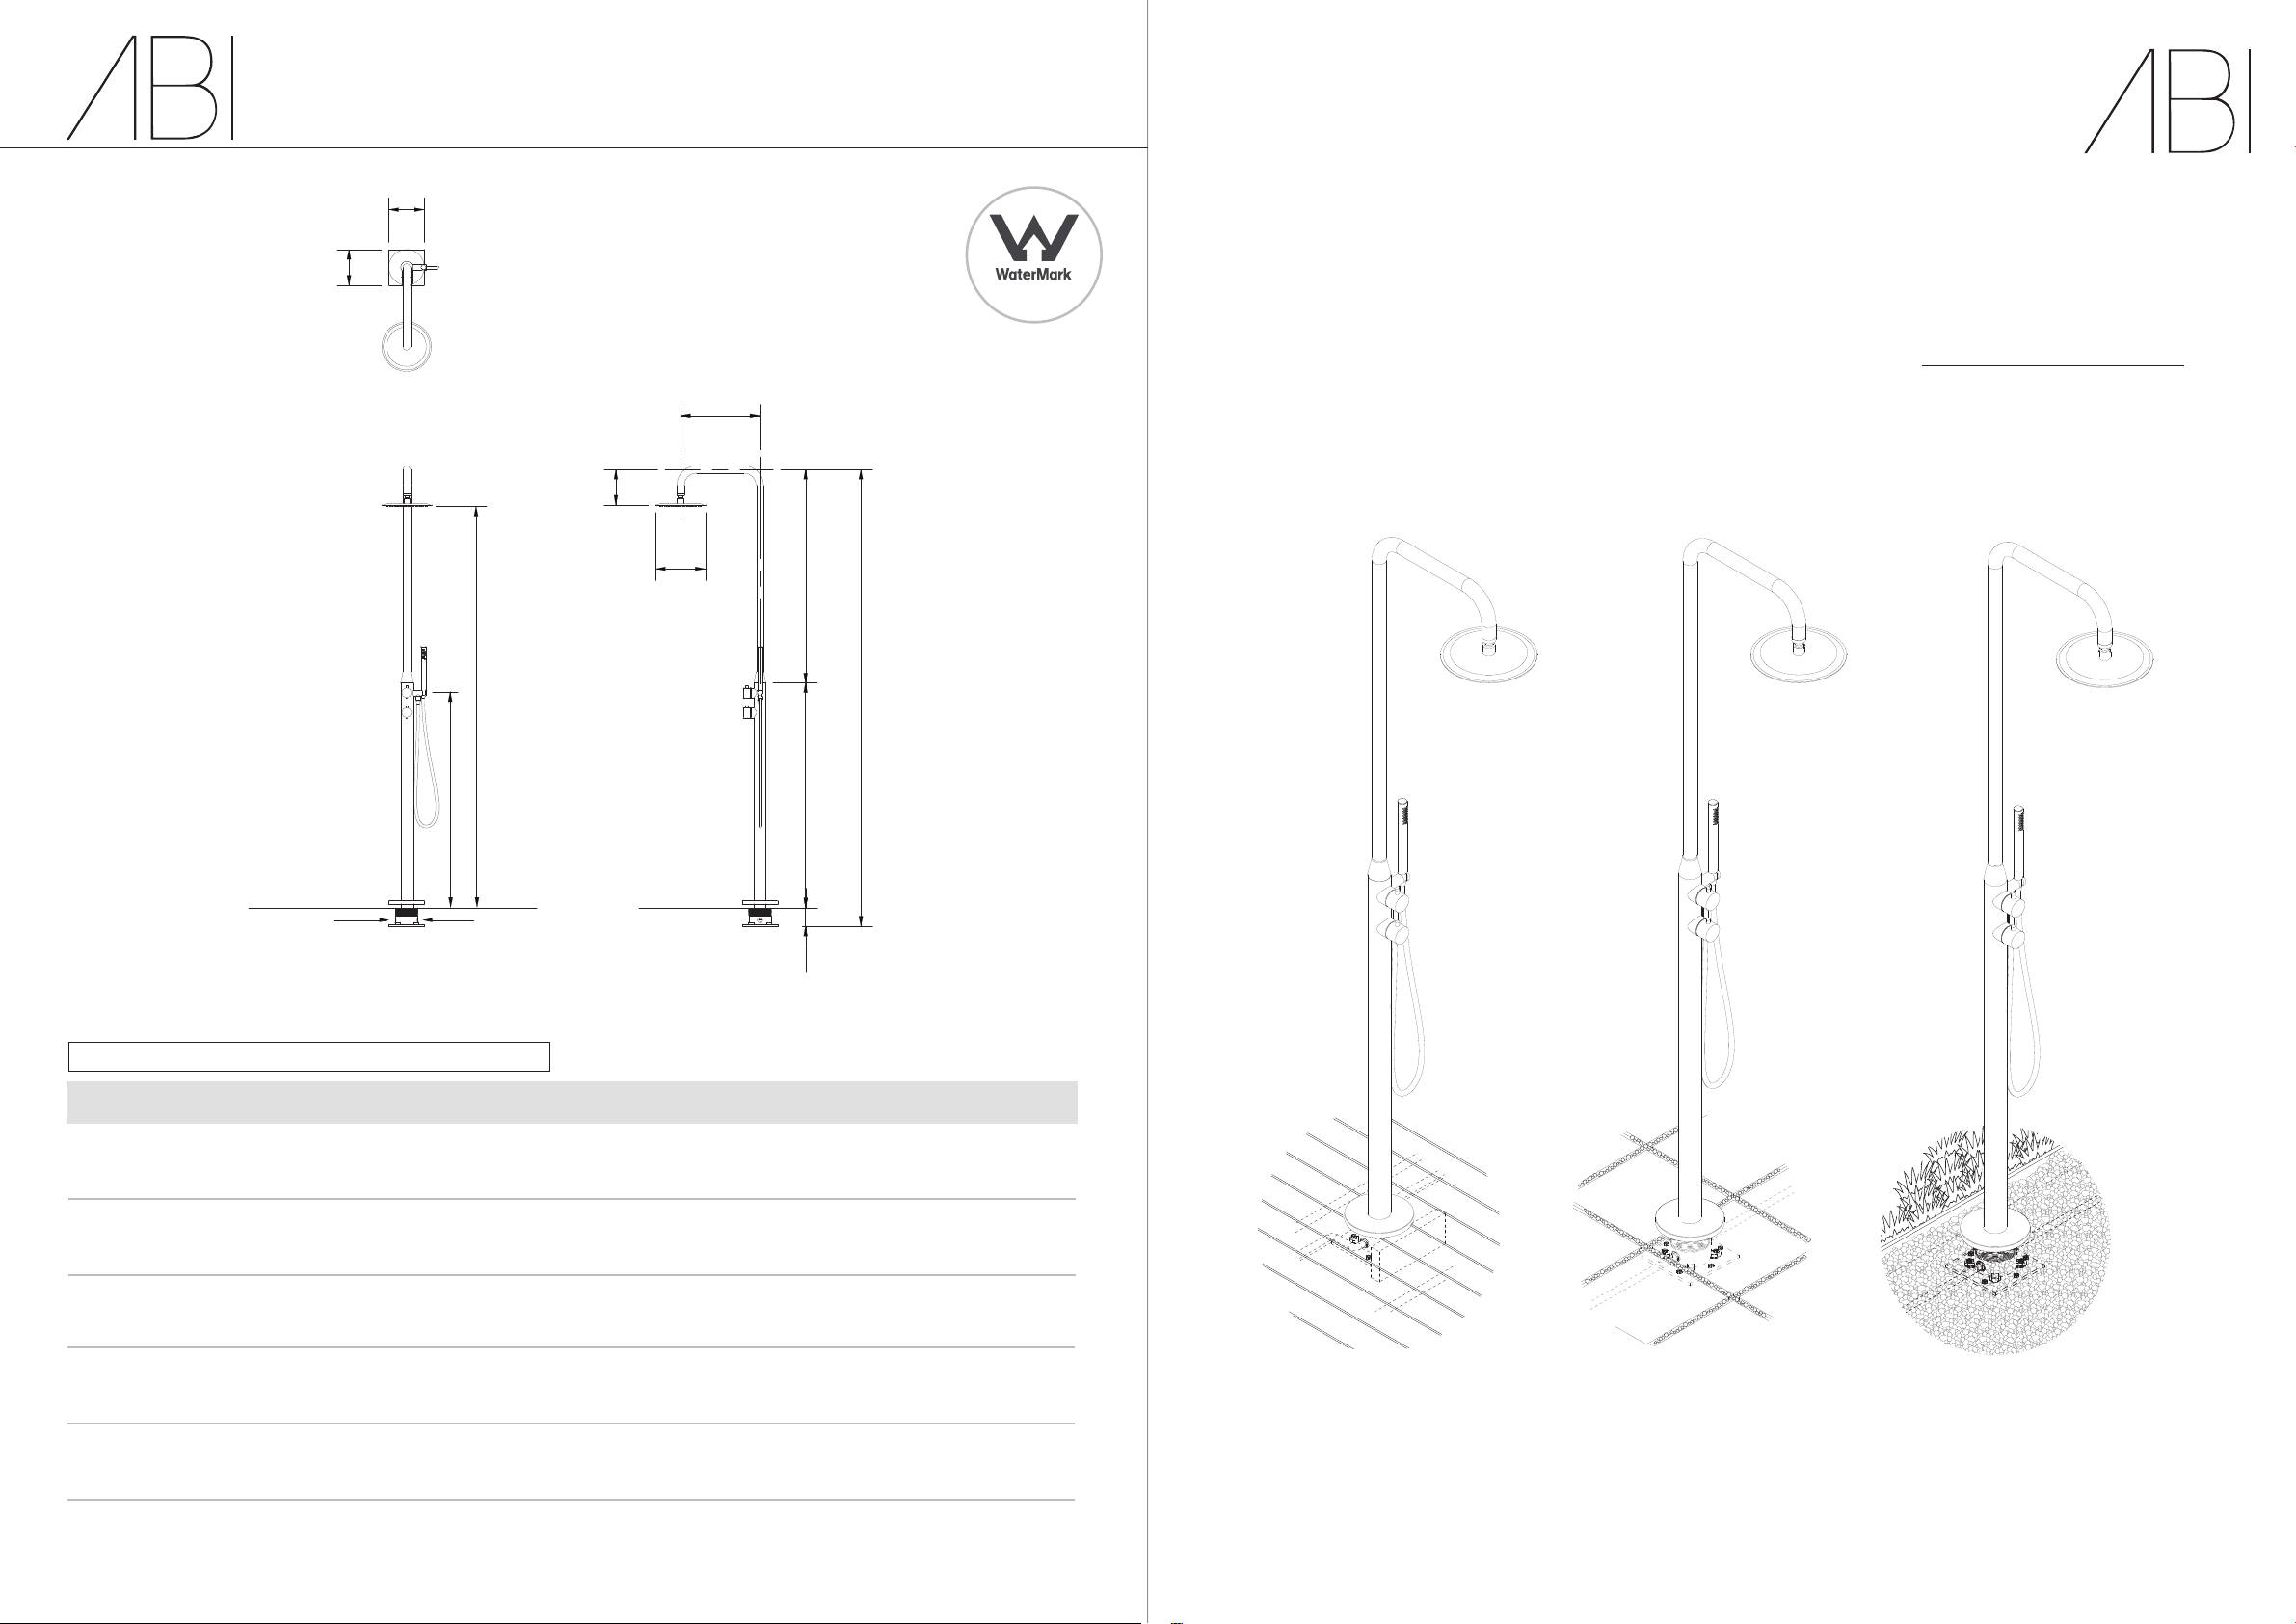
Installation on top of
concrete slab
with timber decking
This installation in shown in
the following Install Guide
Installation on top
of concrete slab
with fine stone fill,
decorative stone
and removable
paving
Installation on top
of concrete slab
with fine stone fill
and decorative stones
ABI'S WARRANTY IS VOID IF
THIS PRODUCT IS INSTALLED
INCORRECTLY OR ENCASED
IN CONCRETE.
WARNING!
INSTALLATION GUIDE
Note: This product must be installed by a licensed plumber. This is a general installation guide - there are
many factors that are involved that can alter the installation method. This product install must comply with
AS/NZS 3500, for installs outside Australia and New Zealand, the standards in your respective country must
be adhered to by your licensed tradesperson


