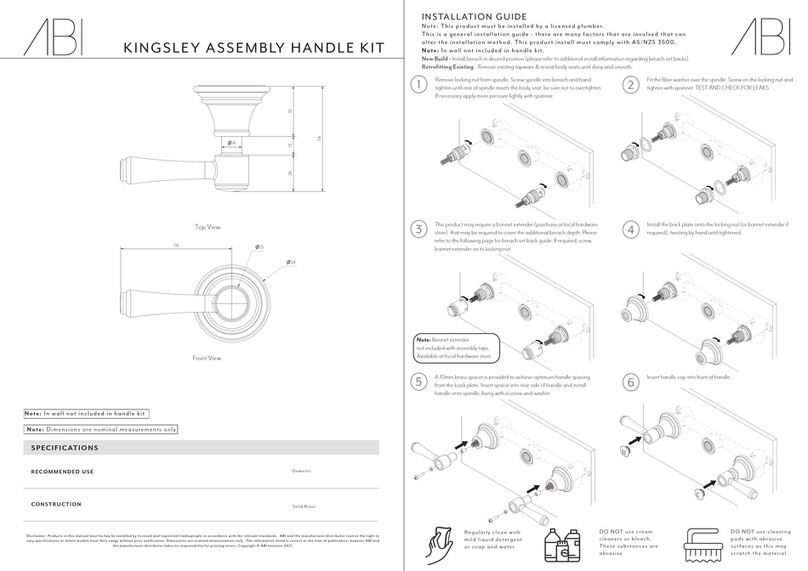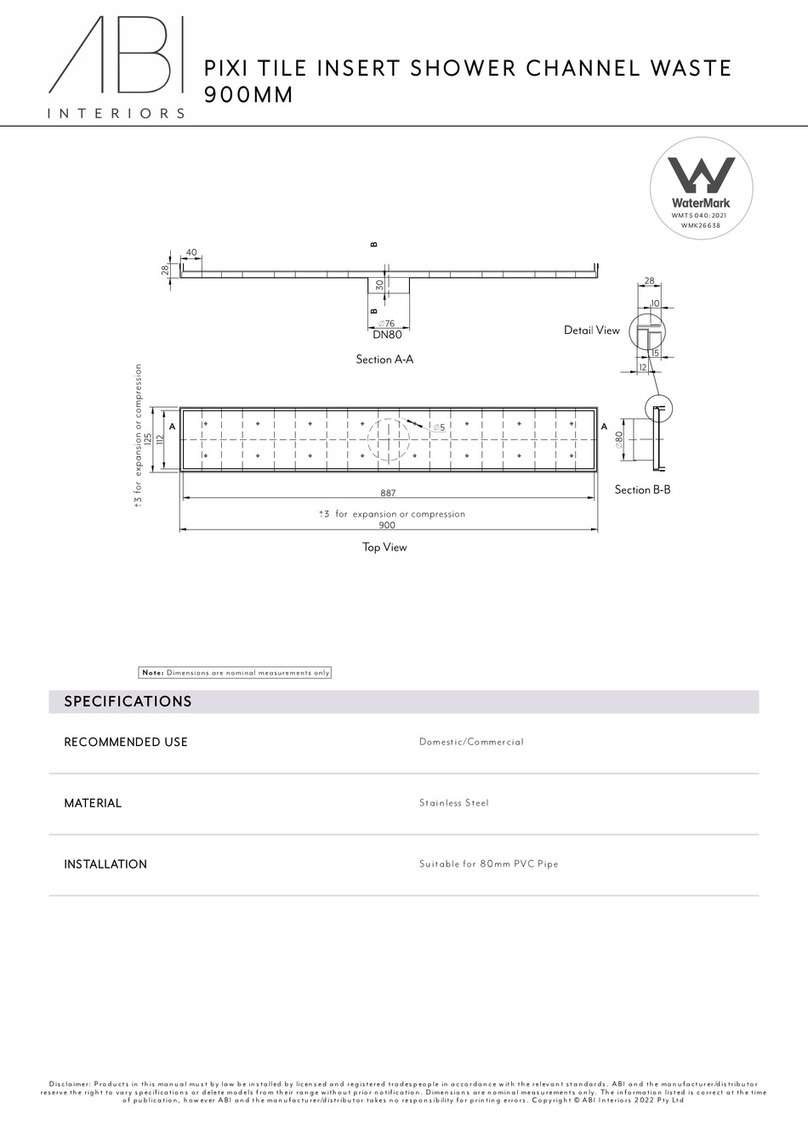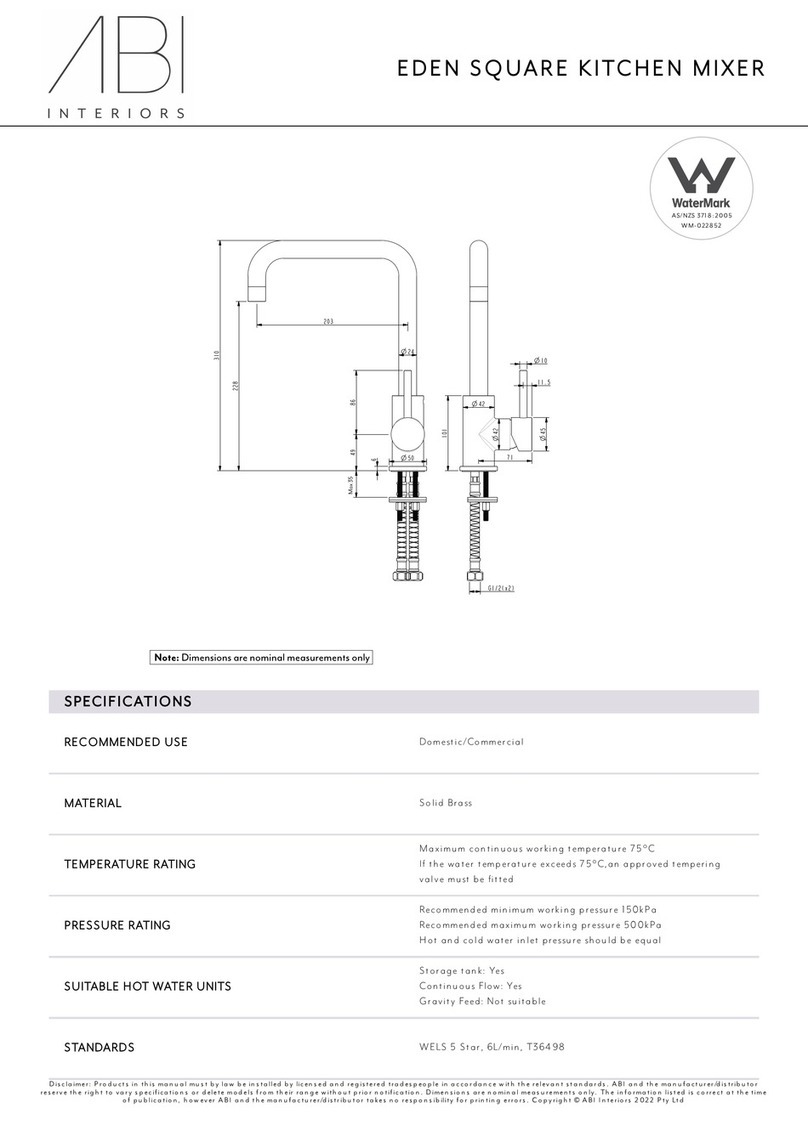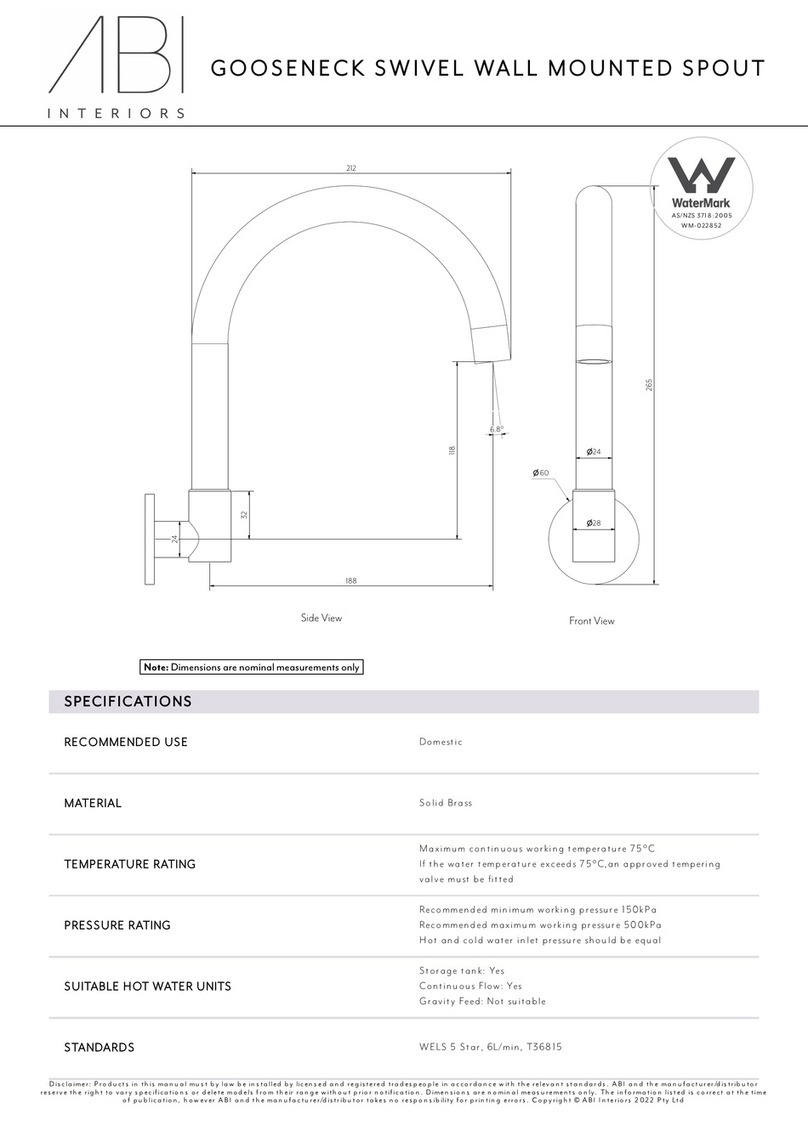
SPECIFICATIONS
RECOMMENDED USE
CONSTRUCTION
Disclaimer: Products in this manual must by law be installed by licensed and registered tradespeople in accordance with the relevant standards. ABI and the manufacturer/distributor reserve the right to
vary specifications or delete models from their range without prior notification. Dimensions are nominal measurements only. The information listed is correct at the time of publication, however ABI and
the manufacturer/distributor takes no responsibility for printing errors. Copyright © ABI Interiors 2021.
Note: Dimensions are nominal measurements only
INSTALLATION GUIDE
Note: This product must be installed by a licensed plumber.
This is a general installation guide - there are many factors that
are involved that can alter the installation method. This product
install must comply with AS/NZS 3500.
IMPORTANT: Spindle set backs are critical, refer to following pages for more details
PIXI TILE INSERT
ASSEMBLY HANDLE KIT
Domestic
Solid Brass
Front View
Top View A-A
Back View
Note: Dimensions are nominal measurements only
A
A
10 10
65
50
6
44
13
1
53
Ø57 (max tile)
G1/2
8 6
M5x0.9x4
M5x0.9x4
20.5
65
53
65
60
54
45
15
1Screw backplate on to spindle & tighten firmly. 2Mount spindle attachment to spindle.* IMPORTANT:
Ensure spindles are in the off position, turn clockwise
to turn off cold and anti-clockwise for hot
3Place cut tile on face of spindle attachment
and push both back and forth to align tile
face with the face of the handle. Tile face
should finish 43mm from face of base plate.
41. Remove tile from spindle attachment.
2. Fix spindle attachment into postion by inserting
and tightening M5 grub screw using allen key
provided.
5Put a small amount of silicone on the front perimeter
of the tile and push into handle and screw both on to
base plate.
How to orientate H/C sybmbol.
At this point note where the symbol is located when
the handle is in the off position. Mark with a pencil
the position it needs to be. Return to step 2 and adjust
the base plates orientation by the referenced amount.
61. Screw handle on to spindle attachment, while
holding then tile in disired position.
2. Fix handle into postion by inserting and
tightening the grub screw using allen key
provided.
1.
2.
IN THE BOX
2x Backplate 2x Spindle Att.
2x Handles 1x 5mm Allenkey 4x M5 Grub Screw1x Diamond Hole Saw
43mm
1.
2.
SILICONE
DO NOT use cream
cleaners or bleach.
These substances are
abrasive
Regularly clean with
mild liquid detergent
or soap and water
DO NOT use cleaning
pads with abrasive
surfaces as this may
scratch the material


