EN
9
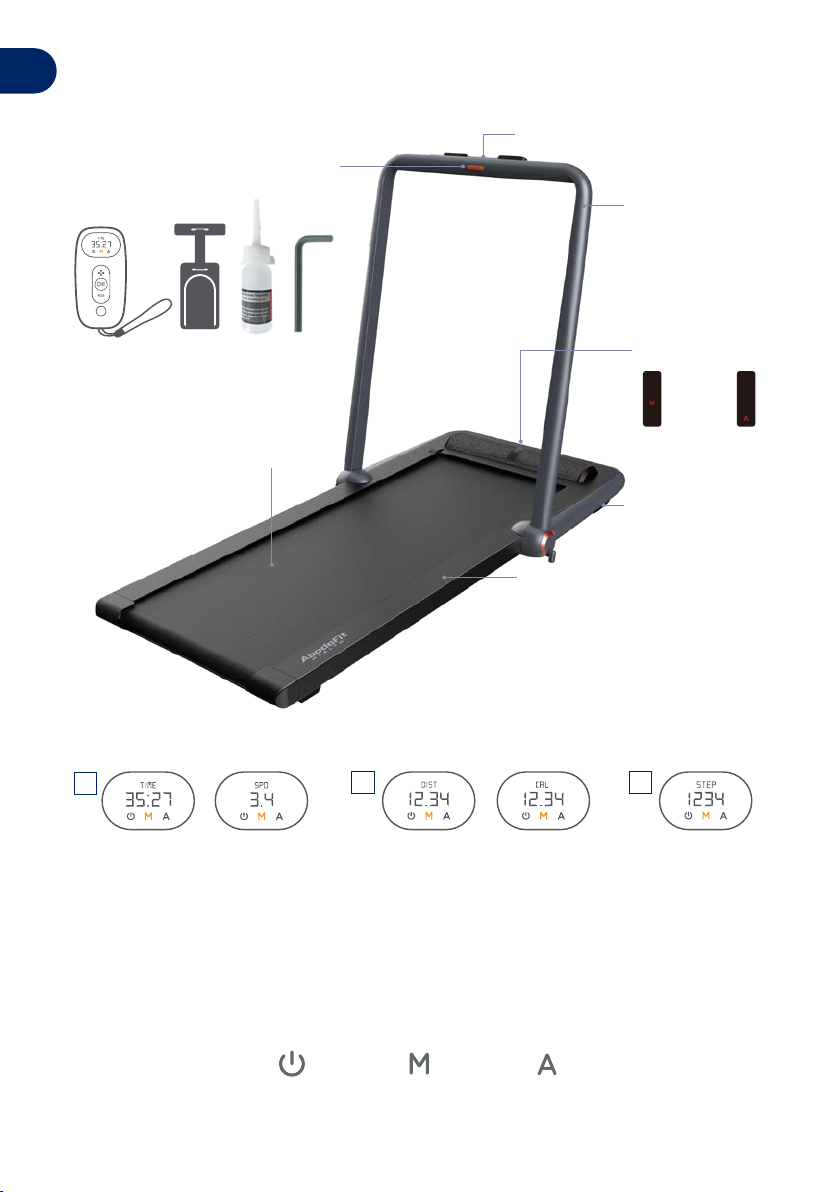
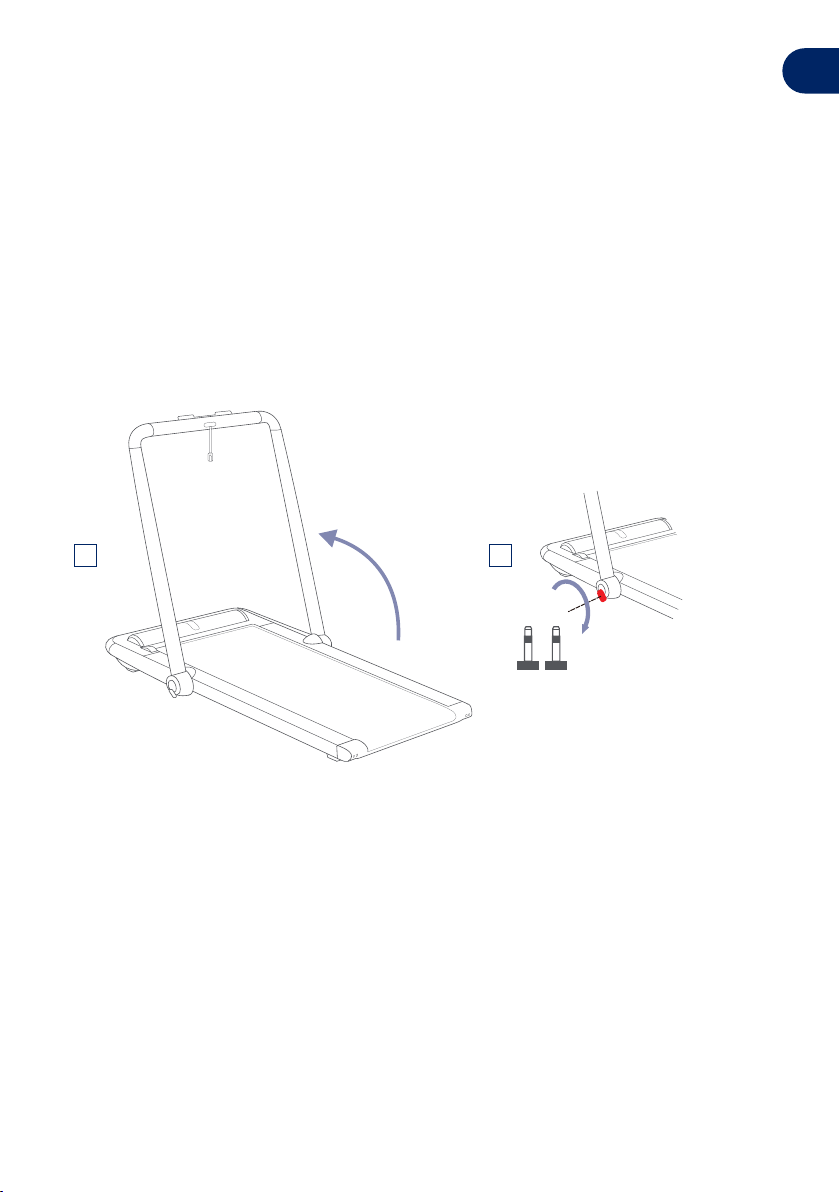
Using your Walkslim 830
STARTING THE WALKSLIM 830 USING THE MANUAL MODE (M)
• The Manual mode is for beginners and uses the Remote Control to adjust speed. It
is recommended to start walking using the Manual mode and once proficient the
Automatic mode can be used.
• Plug in the power, turn on the power switch which is located on the underside of the
Display Screen.
• Take out the Safety Key from the accessories box and insert it into the Safety Key
Holder in the middle of the Handrail. Clip the other end to your clothes.
• Press the Mode button on the Remote Control to switch to Manual Mode. M will be
displayed on screen in red.
• If you stop using the Walkslim 830 for more than 10 minutes, it will switch to Standby
Mode automatically. In Standby Mode the treadmill motor stops functioning to
prevent non-users from setting off the treadmill. will be displayed in red on the
display screen.
• When the Treadmill stops, you can lock the treadmill by pressing and holding the
Mode button for more than 2 seconds.
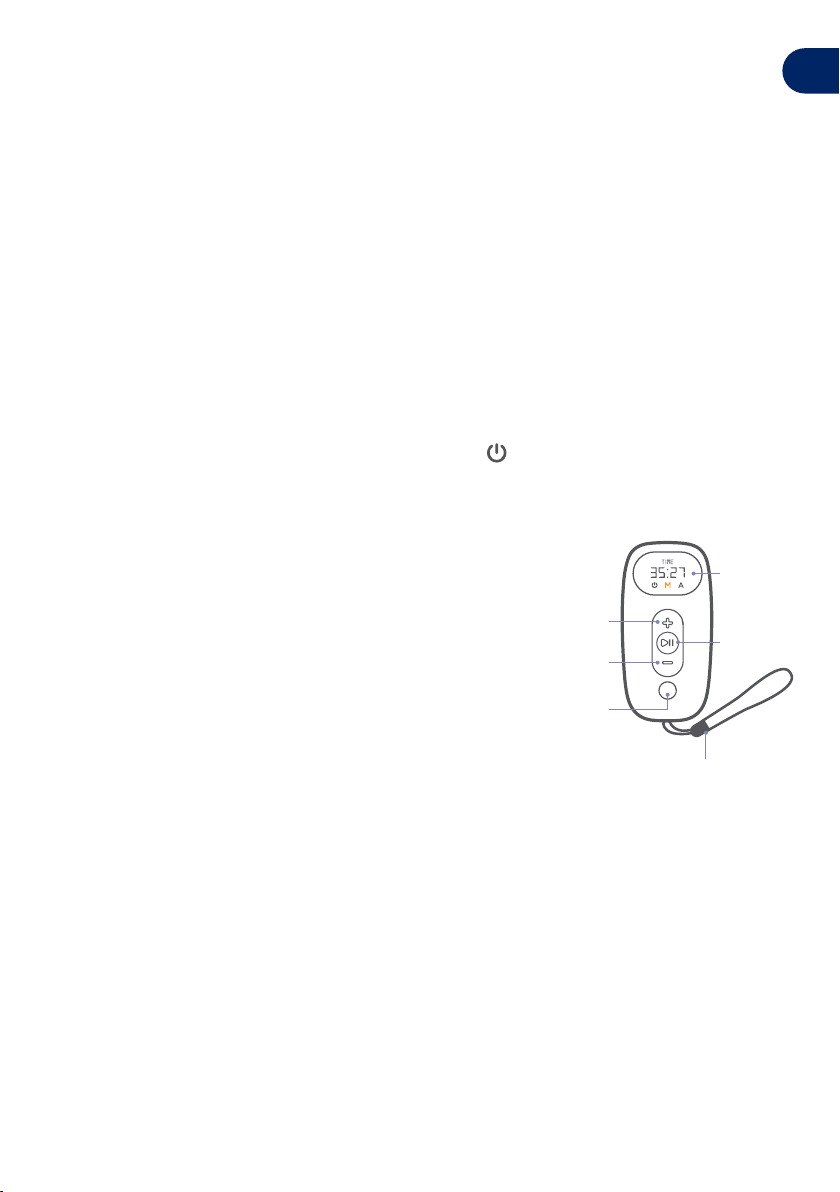
• To retstart the Treadmill, press and hold the Start/Stop
button for more than 2 seconds.
• Speed Increase/Decrease: A single press of the +
Speed Increase or –Speed Decrease on the remote
control will accelerate or decelerate the speed by
0.5km/hr. Press and hold to continuously accelerate
or decelerate.
• Starting/Stopping the Treadmill: Press the Start/
Stop button on the remote to Start or Stop the
Treadmill. By Pressing Stop when you have finished
your session, the Treadmill will stop
slowly and enter standby mode. Ensure when the Walkslim 830 comes to a stop that
you hold onto the handrail for support and stability. Press and hold the Start/Stop
button for more than 2 seconds to unlock the Treadmill.
NOTE
When the Handrail is down, you can start the treadmill without inserting the
Safety Key in the Safety Key Holder. Speed will automatically adjust to 0.8-6km/hour
which is suitable for walking.
When the Handrail is lifted, you can start the treadmill only after inserting the
Safety Key into the Safety Key Holder. Speed automatically adjusts to 0.8-12km/hour,
which is suitable for running.
Wrist Strap
Lanyard Holder
Display
Screen
Start/Stop
Speed
Increase
Speed
Decrease
Mode