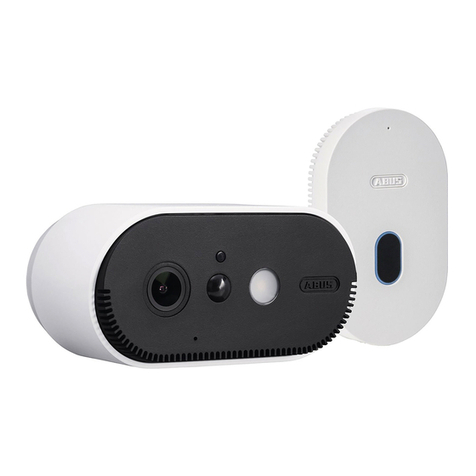
Abus PPIC90000 User manual

ABUS AKKU CAM & BASISSTATION
ABUS BATTERY CAM & BASE STATION
QUICK GUIDE

2
2.4 GHz WLAN Netzwerk mit Passwort und Verschlüsselung.
2.4GHz Wi-Fi network with password and encryption.
Der Standortdienst des mobilen Endgeräts muss aktiviert sein.
The site service of the mobile end device must be activated.
Die Kamera kann nur in Verbindung mit der App2Cam Plus benutzt werden.
The camera can only be used in conjunction with the App2Cam.
Max. zwei Kameras pro Basisstation und max. 8 Basisstationen pro App.
Max. two cameras per base station and max. 8 base stations per app.
Bei der Vergabe des WLAN-Passwortes sind folgende Sonderzeichen nicht möglich.
The following special characters are not possible when allocating the Wi-Fi password.
SYSTEMVORAUSSETZUNGEN
SYSTEM REQUIREMENTS
Router mit einer 5 GHz Frequenz sowie Netzwerke ohne Verschlüsselung werden nicht unterstützt.
Routers with a 5GHz frequency and networks without encryption are not supported.
Erhöhung der Reichweite / Signalstärke
Eine zusätzliche Basisstation kann eingesetzt werden, wenn z.B. bei größeren Objekten
die Position von zwei Kameras, die einer Basisstation zugeordnet sind, zu weit auseinanderliegen.
In diesem Fall wird eine zweite Basistation in der Nähe der zweiten Kamera eingesetzt
und die Kamera dieser Basisstation zugeordnet.
Increasing the range/signal strength
An additional base station can be used if, for example, two cameras assigned to one base station
are positioned too far apart in a larger building. In this case, a second base station can be
installed close to the second camera and the camera can be assigned to this base station.

1
1
1
1
2
1
ABUS WLAN Akku Cam mit Basisstation (PPIC90000)
ABUS Wi-Fi battery cam with base station (PPIC90000)
ABUS WLAN Basisstation für Akku Cam (PPIC90010)
ABUS Wi-Fi base station for battery cam (PPIC90010)
ABUS WLAN Zusatz Akku Cam (PPIC90520)
ABUS Wi-Fi additional battery cam (PPIC90520)
ABUS WLAN Akku Cam 2er Set mit Basisstation (PPIC90200)
ABUS Wi-Fi battery cam 2-set with base station (PPIC90200)
3
LIEFERUMFANG
SCOPE OF DELIVERY
USB Stecknetzteil
USB plug-in
power supply
Entnahmehilfe für die SD Karte
Removal aid for the SD card
USB Stecknetzteil
USB plug-in
power supply
Wandhalterung
Wall bracket
Wandhalterung
Wall bracket
Micro-USB Kabel
Micro USB cable
Micro-USB Kabel
Micro USB cable
Montagematerial
Installation material
Montagematerial
Installation material
USB Stecknetzteil
USB plug-in
power supply
Wandhalterung
Wall bracket
Micro-USB Kabel
Micro USB cable
Entnahmehilfe
für die SD Karte
Removal aid for
the SD card
Entnahmehilfe
für die SD Karte
Removal aid for
the SD card
Montagematerial
Installation material
Die integrierten Akkumulatoren der Kamera müssen vor der Inbetriebnahme geladen werden.
The integrated camera batteries must be charged before operation.
2
2
1
1 1
1
1
1 11
111
1 1

4
KAMERA
CAMERA
Vorderseite
Front
Rückseite
Rear
*Funk-Frequenz: 2,4 GHz (802.11 b/g/n) Max. Sendeleistung 20 dBm
*Wireless frequency: 2.4GHz (802.11b/g/n) max. transmission power 20dBm
LED signalisiert den Ladezustand
LED signals the charge level
Lichtsensor
Photo sensor
Objektiv
Lens
Mikrofon
Microphone
PIR
Sensor
Weißlicht LED
White light LED
Lautsprecher
Loudspeaker
Innenliegende Antenne*
Internal antenna*
1/4“ Gewinde für Halterung
1/4“ thread for the mount
Taste EIN/AUS und PAIRING
ON/OFF and PAIRING button
Micro-USB Anschluss
Micro USB connection
Abdeckung
Cover

5
Reset Taste
Reset button
Pairing Taste
Pairing button
Für eine Aufzeichnung ist eine handelsübliche Micro-SD Karte (max. 128 GB Speicher-
kapazität) erforderlich. Zum Einsetzen und der Entnahme der SD-Karte muss die Basisstation
von der USB-Schnittstelle getrennt werden. Beim Einsetzen rastet die SD-Karte hörbar ein.
Für die Entnahme steht das beiliegende Entnahmewerkzeug zur Verfügung.
A standard micro USB card (max. 128GB storage capacity) is required for recording.
Thebasestation must be disconnected from the USB interface in order to insert and
remove the SDcard. The SD card audibly snaps into place when fully inserted.
The provided removal aid can be used to remove the card.
BASISSTATION
MAIN UNIT
Micro-SD Kartenslot (max. 128 GB)
Micro SD card slot (max. 128GB)
Status LED
Optional Micro-SD Karte
Optional micro SD card
Entnahmehilfe
Removal aid

6
ERFASSUNGSBEREICH DES SENSORS
COVERAGE AREA OF THE SENSOR
Der Erfassungsbereich des integrierten Bewegungssensors (PIR) ist auf 8m begrenzt.
Personen die sich außerhalb dieses Bereiches au alten werden zwar von der Kamera
„gesehen“ und auf dem Livebild dargestellt, lösen aber keine Aufnahme aus. Die Empfehlung
für eine optimale Montage liegt bei 2m Montagehöhe und einem Neigungswinkel von 12,5°.
The coverage area of the integrated motion sensor (PIR) is limited to 8m.
Persons located outside of this range are “seen” by the camera and shown on the live
image but do not trigger a recording. The ideal installation recommendation is a 2 m
installation height and an inclination angle of 12.5°.
Montagehöhe (m) und Neigungswinkel (°)
Installation height (m) and inclination angle (°)
Reichweichte des
Bewegungssensors (m)
Range of the motion
sensor (m)
Max. 8m Reichweite des Bewegungssensors
Max. 8m range of the motion sensor
Livebild, aber keine Auslösung
Live image but no trigger
REC °REC
112°
Neigungswinkel (°)
Inclination angle (°)
8m4-5m
2m | 12,5°
1,5m | 0°
max.6m | 50,0°

7
BEDIEN- UND ANZEIGELEMENTE
OPERATION AND DISPLAY ELEMENTS
Taste EIN/AUS und PAIRING
ON/OFF and PAIRING button
Reset Taste
Reset button
LED
Pairing Taste
Pairing button
Auf werkseitige Einstellung zurücksetzen:
Taste 5s gedrückt halten bis die rote LED blinkt.
Resetting to factory settings:
Press and hold the button for
5seconds until the red LED ashes.
Einschalten der Kamera: Taste 1x kurz drücken.
Switching on the camera: Press the button
once brie y.
Pairing Funktion: Taste 3x kurz drücken.
Pairing function: Press the button three
times brie y.
Kamera ausschalten: Taste 5s gedrückt halten.
Switching o the camera: Press and hold the
button for 5seconds.
Die Basisstation kann nur mit aktiver Stromversorgung in Betrieb genommen werden.
The base station can only be operated with an active power supply.
Verbindungsbereitscha (Pairing):
Taste 3s gedrückt halten bis die blaue LED blinkt.
Connection readiness (pairing):
Press and hold the button for
3seconds until the blue LED ashes.

8
Die Kamera kann auch ohne Wandhalterung
auf einer ebenen Fläche aufgestellt werden.
Hierbei sind folgende Punkte zu beachten:
·Die Position der Kamera ist beim Aufstellen
nicht xiert und kann unabsichtlich ver-
schoben und damit der Erfassungsbereich
verändert werden.
·Größere Gegenstände zwischen der Kamera
und der Basisstation können die Übertragung
beein ussen.
·Die Kamera muss möglichst frei an der Kante
der Aufstell äche positioniert werden,
um Lichtre exionen zwischen Kamera
und Stell äche zu vermeiden.
·Das Sichtfeld der Kamera darf nicht
durch Gegenstände abgedeckt werden.
·Die Positionierung auf Glasregalen kann
bei der Aufnahme störende Re ektionen
verursachen.
The camera can also be set up without
a wall bracket on a at surface.
The following aspects must be observed here:
·The position of the camera is not
xed during setup and could be
accidentally shi ed, thus changing
the recording area.
·Large objects located between the camera
and the base station could impact the
transmission.
·Where possible, the camera should be posi-
tioned unobstructed at the edge of the setup
surface in order to prevent light re ections
between the camera and the setup surface.
·The camera‘s eld of vision must not
be obstructed by objects.
·Positioning the camera on a glass shelf could
lead to interfering re ections during recording.
KAMERA MONTAGE
CAMERA INSTALLATION
Montage der Kamera ohne Wandhalterung
Installing the camera without a wall bracket
1 3
2
9
Befestigungslöcher (6mm Bohrer
erforderlich) mit Hilfe der Bohr-
schablone in die ebene Wand-
äche bohren, und die Rück-
platte mit dem mitge lieferten
Montagematerial befestigen.
Drill xing holes (6mm drill
required) onto the at wall
surface with the aid of the
drilling template and fasten
the back panel using the in-
stallation material provided.
Kugelgelenk einsetzen,
Abdeckung aufsetzen und
festdrehen. Anschließend
Fixierring auf setzen und
leicht festziehen.
Insert the ball joint, position
the cover and tighten. Then
position the xing ring and
tighten gently.
Kamera aufschrauben und auf
den gewünschten Erfassungs-
bereich ausrichten. Fixierring
festziehen, um die Kamera in
dieser Position zu sichern.
Unscrew the camera and align
it according to the desired
recording area. Tighten the
xing ring in order to secure
the camera in this position.
Kugelgelenk
Ball joint
Rückplatte
Back panel
Abdeckung
Cover
Fixierring
Fixing ring
Bohrschablone
Drilling template
Montage der Kamera mit Wandhalterung
Installing the camera with a wall bracket

App
- App2Cam Plus -
1
2
10
INSTALLATION APP
INSTALLATION APP
Starten Sie die App2Cam Plus und
wählen Sie das Plus aus, um den
Einlernprozess zu starten.
Start the App2Cam Plus and
select the plus to start the
programming process.
Installieren Sie die App2Cam Plus
Install the App2Cam Plus
iOS
Apple App Store
Android
Google Play Store
S c h r i t t 1 – A p p 2 C a m P l u s S o w a r e i n s t a l l i e r e n
S t e p 1 – I n s t a l l t h e A p p 2 C a m P l u s s o w a r e
Die folgenden Abbildungen wurden aus der iOS App entnommen.
The following gures were taken from the iOS app.

3 4
5
11
EINLERNEN SYSTEM
PROGRAMMING SYSTEM
Wählen Sie
„Neues Gerät“
aus für die Erst-
installation.
Select „new
device“ for the
initial installation.
Wählen Sie die
„Akku Kamera“ für
die Installation aus.
Select the „battery
camera“ for the
installation.
Scannen Sie den QR-Code
auf der Rückseite der Basis-
station. Verbinden Sie die
Basisstation anschließend
mit dem USB- Netzteil und
schließen Sie es an einer
Steckdose an.
Scan the QR code on the
back of the base station.
Then connect the base
station to the USB power
supply unit and plug it
into a socket.
QR-Code scannen
Scan the QR code
Basisstation anschließen und
mit einer Steckdose verbinden
Connect the base station and
plug into a socket
Schritt 2 – Basisstation und Kamera auswählen
Step 2 – Select the base station and camera
Für eine optimale Inbetriebnahme müssen die Standortdienste in den Einstellungen aktiviert sein.
The site services must be activated in the settings for optimal operation.

7.2
7.1
6
Home
12
Wählen Sie hier Ihr
Heimnetzwerk aus
und geben Sie das
Passwort ein.
Select your home
network here and
enter the password.
Basisstation ist nach 45 Sekunden einsatzbereit,
sobald der Sprachbefehl „Bereit für das Verbinden
mit dem Netzwerk“ ausgegeben wird.
Bitte verbinden Sie anschließend Ihr Smartphone
mit dem Netzwerk-Namen aus angegebener Liste,
in welches die Basisstation eingelernt werden soll.
The base station is ready for use aer 45seconds,
as soon as the voice command „Ready to connect
to the network“ is emitted.
Please then connect your smartphone to the
network on the displayed list in which the
base station should be programmed.
45 Sekunden warten
Wait 45 seconds
Geben Sie hier das WLAN
Passwort ein (siehe
Abschnitt „Systemvoraus-
setzung | Sonderzeichen).
Falls nicht das richtige
Netzwerk angezeigt wird,
können Sie durch Auswahl
„anderes Netzwerk“
nochmals zurück gehen.
Enter the Wi-Fi password
here (see section „System
requirements | Special
characters“). If the right
network is not displayed,
you can go back by
selecting „other network“.
iOS-Setup Android-Setup
Schritt 3 – Basisstation mit WLAN verbinden
Step 3 – Connect the base station to the Wi-Fi
Siehe Systemvoraussetzungen „2.4 GHz WLAN Netzwerk“ und „Sonderzeichen“.
See system requirements „2.4GHz Wi-Fi network“ and „special characters“.

98
13
Die App überträgt per
Sound die WLAN Daten an
die Basisstation, der max-
imale Abstand zwischen
dem Smartphone und der
Basisstation darf max.
30cm betragen. Drücken
Sie auf „Jetzt Sound
Information senden“.
The app transmits the
Wi-Fi data to the base
station via sound; the
maximum permissible
distance between the
smartphone and the
base station is 30cm.
Press “Send sound
information now”.
Stellen Sie die Laut-
stärke Ihres Smart-
phones auf mindes-
tens 70%. Nach links
wischen um den
nächsten Schritt
anzuzeigen.
Set the volume of
yoursmartphone to
at least 70%. Swipe
to the le in order to
view the next step.
Wiedergabelautstärke des Smartphone auf ca. 70% einstellen
Set the output volume of the smartphone to approx. 70%
Max. 30 cm Abstand
Max. 30 cm gap
Kommunikation zwischen der App (Smartphone) und der Basisstation
Communication between the app (smartphone) and the base station
Soundübertragung nur in leiser Umgebung. Umgebungsgeräusche stören den Prozess.
Only transmit sound in a quiet environment. Surrounding noises will disturb the process.

10
1 0.1
14
Nach erfolgreicher Übertragung
120 Sekunden warten
Wait 120 seconds aer a
successful transmission
Die Basisstation gibt den Sprach-
befehl „Netzwerkinformationen
erhalten“ aus. Um den Sound
erneut zu übertragen, klicken Sie auf
„Erneut senden“. Bei erfolgreicher
Übertragung, ist die Basisstation
eingelernt und startet neu, dies
kann bis zu 120 Sekunden dauern.
The base station emits the voice
command „Network information
received“. To transmit the sound
again, click on „Send again“.
Once the transmission is
successful, the base station is
programmed and will restart,
this could take up to 120seconds.
Falls die Sound-Übertragung nicht
erfolgreich war, können Sie auch
die „Alternative Installation“ nutzen.
If the sound transmission was
unsuccessful, you can also use
the „Alternative installation“.
Weitere Schritte der „Alternativen Installation“ nden Sie in der Bedienungsanleitung.
You can nd additional steps for the „Alternative installation“ in the operating instructions.

12
11
15
3s gedrückt halten
Press and hold for
3 seconds
3x kurz drücken
Press 3 times briey
Schritt 4 – Kamera der Basisstation zuordnen
Step 4 – Assign the camera to the base station
Eine zusätzliche Basisstation kann eingesetzt werden, wenn z.B. bei größeren Objekten die
Position von zwei Kameras, die einer Basisstation zugeordnet sind, zu weit auseinanderliegen.
In diesem Fall wird eine zweite Basistation in der Nähe der zweiten Kamera eingesetzt und die
Kamera dieser Basisstation zugeordnet. An einer Basisstation können zwei Kameras betrieben
werden. Bis zu 8 Basisstationen werden von der App unterstützt.
An additional base station can be used if, for example, two cameras assigned to one base
station are positioned too far apart in a larger building. In this case, a second base station
an be installed close to the second camera and the camera can be assigned to this base
station. Two cameras can be operated from one base station. Up to 8 base stations are
supported by theapp.
Bei der werkseitigen Auslieferung der Kamerasets (mit einer und zwei Kameras) ist/sind die
Kamera(s) bereits für diese Basisstation eingelernt. Der Schritt 4 kann hier übersprungen werden.
In the case of camera sets (with one or two cameras) delivered from the factory, the
camera(s) is/are already programmed for this base station. Step 4 can therefore be skipped.
Drücken Sie die Pairing Taste für mindestens
3 Sekunden bis die LED blau blinkt. Der Sprach-
befehl „Bereit für Kameraverbindung“ wird
ab gespielt. Falls die Kamera bereits in einer
Basisstation eingelernt ist, löschen Sie diese
bitte vorab aus der Liste.
Press and hold the pairing button for at
least 3seconds until the blue LED ashes.
The voice command „Ready for camera
connection“ is emitted. If the camera is
already programmed in a base station,
please delete it from the list in advance.
Schalten Sie die Kamera ein. Drücken Sie 3x
kurz auf das Einschaltzeichen, um die Kamera
einzulernen. Bei erfolgreicher Verbindung wird
der Sprachbefehl „Kamera verbindung erfolgreich
abgeschlossen“ wiedergegeben.
Switch on the camera. Press the activation
symbolbriey 3times in order to programme
thecamera. If the connection is successful,
thevoice command „Camera connection
completed successfully“ is emitted.

13
16
Klicken Sie nun auf das Kamerabild
in der Übersicht um das Livebild zu starten.
Click on the camera image in the
overview to start the live view.
14
Sicherheitscode ändern
•••••••
•••••••
Bei der Erstinstallation muss der werkseitige
Sicherheitscode 123456 geändert werden.
Es wird empfohlen eine Kombination aus
Zahlen sowie Klein- und Großbuchstaben zu
verwenden.
During the initial installation, the factory
default security code 123456 must be changed.
We recommend using a combination of
numbers and letters in lower and uppercase.
Schritt 5 – Einstellungen anpassen
Step 5 – Customise the settings

15
17
1) Einstellungssymbol unten
1) Settings symbol bottom
2) Einstellungsicon oben
2) Settings icon top
Um weitere Einstellungen an
der Basis station und der Kamera
vorzunehmen, klicken Sie auf
das 1) Einstellungssymbol unten
und im Anschluss auf das
2) Einstellungsicon im Kamerabild.
In order to congure additional
settings for the base station and
camera, click on the 1) Settings
symbol at the bottom and then
on the 2) Settings icon in the
camera image.
16
Bei der Erstinbetriebnahme muss das Admin
Passwort geändert werden. Geben Sie das werkseitige
Passwort „123456“ ein und aktivieren Sie „Auto Anmel-
dung“ um das Passwort auf dem Endgerät zu speichern.
Das Passwort muss aus 8 Zeichen – einer Kombination
aus Zahlen, Klein- und Großbuchstaben – bestehen.
The admin password must be changed during
commissioning. Enter the factory default password
„123456“ and activate „auto-registration“ in order
to save the password on the end device. The password
must consist of 8 characters – a combination of numbers
as well as lower and uppercase letters.

17
18
Weitere Infos und Hilfestellungen nden Sie auf akku-cam.abus.com
You can nd additional information and help at akku-cam.abus.com
Sie haben die Installation erfolg-
reich durchgefüht. Nun haben
Sie Zugri auf Ihre Kamera und
verschiedene Einstellungen
im unteren Menüfeld.
You have successfully completed
the installation. You now have
access to your camera and
various settings in the
bottom menu eld.
Schritt 6 – Installation abschließen
Step 6 – Complete the installation

19
Die angezeigten Screenshots und Icons wurden aus der iOS App entnommen.
Leichte Abweichungen in der Beschri ung, Anordnung oder Funkionalität bei Android-Geräten.
The screenshots and icons shown here are from the iOS app.
There may be some deviations in the labels, design or functionality when using Android devices.
Alarm ist aktiv
Die Kamera zeichnet bei erkannten
Bewegungen auf und versendet
Nachrichten (Push oder E-Mail).
Alarm is active
The camera records when motion
is detected and sends noti cations
(push or e-mail).
Alarm ist deaktiviert
Die Kamera zeigt ein Livebild,
führt aber keine weiteren
Aktionen bei erkannten
Bewegungen durch.
Alarm is deactivated
The camera displays a live view
but does not carry out any other
actions when motion is detected.
Gegensprechfunktion
Sie können durch Nutzung
des Mikrofons des mobilen
Endgerätes an der Kamera
Gegensprechen. Halten Sie
das Symbol gedrückt um
die Gegensprechfunktion zu
aktivieren. Sobald Sie das
Symbol loslassen, wird die
Übertragung deaktiviert.
Intercom function
You can use the microphone
of the mobile end device to
communicate through the
camera intercom. Press and
hold the symbol in order
to activate the intercom
function. The transmission
is deactivated as soon as
you release the symbol.
Screenshot
erstellen
Create a
screenshot
Audio aktivieren/
deaktivieren
Enable/disable
audio output
Manuelle
Aufnahme starten
Start manual
recording
Wechsel zwischen
Kamera 1 und Kamera 2
Switch between camera
1 and camera 2
Die Funktionen der App2Cam Plus Liveansicht
Functions of the App2Cam Plus live view
APP2CAM PLUS FUNKTIONEN
APP2CAM PLUS FUNCTIONS

Eine alternative Inbetriebnahme sowie detaillierte Informationen zum jeweiligen
Produkt erhalten Sie in der Bedienungsanleitung erhältlich auf der ABUS Internetseite.
Vous trouverez une alternative de mise en service ainsi que des informations détaillées
sur le produit concerné dans le manuel d’utilisation disponible sur le site Internet ABUS.
Een alternatieve ingebruikname en gedetailleerde informatie vindt u in de
gebruikershandleiding op de ABUS-website.
Per imformazioni su un attivazione alternativa o sui dettagli del prodotto,
consultare le istruzioni per l‘uso disponibili sul nostro sitro ww.abus.com.
An alternative installation option as well as detailed information on the respective
product can be found in the operating instructions available on the ABUS website.
Alternativ idritagning samt detaljerede oplysninger ndes i
betjeningsvejledningen, som ndes på ABUS-hjemmesiden.
Informacje dotyczące alternatywnych sposobów uruchomienia oraz dodatkowe
szczegóły dotyczące poszczególnych produktów znajdują się winstrukcji obsługi,
którą można pobrać na stronie internetowej ABUS.
En el manual de instrucciones disponible en la página web de ABUS podrá consultar
una puesta en funcionamiento alternativa, así como información más detallada.
Alternativ idritagning samt detaljerad information nns i bruksanvisningen
som kan hämtas på ABUS-webbsidan.
Für weitere Hilfe steht unsere Support-Team für Sie zur Verfügung: [email protected]
Our Support Team will be happy to help you with any further questions: [email protected]
ABUS | Security Center GmbH & Co. KG
abus.com
Linker Kreuthweg 5
86444 Ang
Germany
Tel: +49 8207 959 90-0
Fax: +49 8207 959 90-190
info.[email protected]
abus.com/products/
PPIC90000
abus.com/products/
PPIC90010
abus.com/products/
PPIC90200
abus.com/products/
PPIC90520
Other manuals for PPIC90000
7
This manual suits for next models
2
Table of contents
Other Abus Security Camera manuals

Abus
Abus TVIP51500 User manual

Abus
Abus HDCC82500 User manual

Abus
Abus Eyseo TV7220 User manual

Abus
Abus TVCC12020 User manual

Abus
Abus HDCC32561 User manual

Abus
Abus IPCS58571A User manual

Abus
Abus IPCS29511 User manual

Abus
Abus TVCC34010 User manual

Abus
Abus Eyseo TVCC40000 User manual

Abus
Abus HDCC61510 User manual

Abus
Abus TVIP71501 User manual

Abus
Abus IPCS82520 User manual

Abus
Abus PPIC31020 User manual

Abus
Abus IPCS84511 User manual

Abus
Abus IPCB62520 User manual

Abus
Abus TVAC15010 User manual

Abus
Abus TVIP20000-20550 User manual

Abus
Abus TVHD40010 User manual

Abus
Abus TVAC19000B User manual

Abus
Abus HDCC68551 User manual