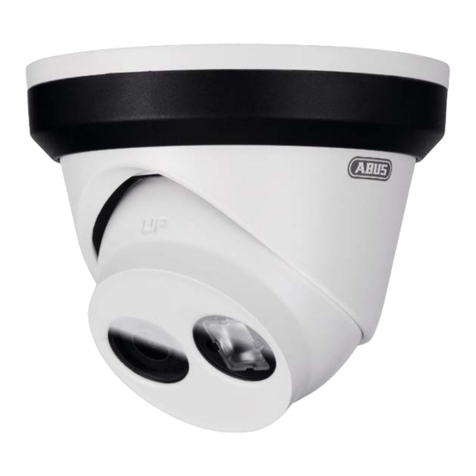
Abus TVAC19000B User manual

TVAC19000B
User guide
Betjeningsvejledning
Instrukcja obsługi
E
Manual de instrucciones
S
Bruksanvisning
Инструкция по эксплуатации
Version 10/2014

This user guide contains important information on starting operation and using the device. Make sure
that this user guide is handed over when the product is given to other persons.
Keep this user guide to consult later.
For a list of contents with the corresponding page numbers, see page 7.
Denne betjeningsvejledning indeholder vigtige henvisninger til idriftsættelse og håndtering. Vær også
opmærksom på dette, hvis produktet gives videre til en tredje person.
Opbevar derfor denne betjeningsvejledning til senere brug!
Indholdet kan ses med sideanvisninger kan findes i indekset på side 32.
Niniejsza instrukcja obsługi zawiera ważne wskazówki dotyczące uruchamiania i obsługi. Pamiętaj o
tym, także przekazując produkt osobie trzeciej.
Zachowaj instrukcję do wykorzystania w przyszłości!
Spis treści wraz z numerami stron znajduje się na stronie 57.
Este manual de instrucciones contiene indicaciones importantes para el manejo y la puesta en
funcionamiento del producto. Téngalas también en cuenta si entrega la máquina a terceros.
Por ello, consérvelas en un lugar adecuado para su posterior lectura.
En el índice de la página 83 encontrará un listado de los contenidos con las páginas donde podrá
consultarlos.
Denna bruksanvisning innehåller viktiga anvisningar för idrifttagande och
användning.
Dessa anvisningar ska observerad även om denna produkt överlämnas till tredje part.
Förvara denna bruksanvisning för framtida referens!
På sidan 102 finns finns en innehållsförteckning med sidoreferenser.
Данная инструкция по эксплуатации содержит важные указания по вводу в
эксплуатацию иобращению спродуктом.
Примите это во внимание, также при передаче продукта впользование третьим лицам.
По этой причине сохраните данную инструкцию для повторного прочтения!
Вся информация отражена вСодержании суказанием соответствующих номеров страниц на
Странице 126.
English
Dansk
Español
Polski
Svenska
Русский

TVAC19000B
User guide
You can find important information and FAQs about this product
and additional products on the website
www.abus.com/plug-and-play
Version 10/2014
English translation of the original German user guide.
Keep for future use.

4
English
Introduction
Dear Customer,
Thank you for purchasing this product.
This device complies with the requirements of the applicable EU directives.
The declaration of conformity can be ordered from:
ABUS Security-Center GmbH & Co. KG
Linker Kreuthweg 5
86444 Affing
GERMANY
To maintain this condition and to ensure risk-free operation, you as the user must observe these operation
instructions!
Before initial start-up, read through the complete operating instructions observing operating and safety
instructions.
All company and product names mentioned in this document are registered trademarks.
All rights reserved.
If you have any questions, please contact your installer or your local dealer!
Disclaimer
This user manual was prepared with greatest care. If you should notice omissions or inaccuracies, please
inform us about these on the back of this manual given address.
The ABUS Security-Center GmbH assumes no liability for technical and typographical faults and reserves
the right to make at any time modifications to the product or user manual without a previous announcement.
The company is not liable or responsible for direct and indirect subsequent damages which are caused in
connection with the equipment, the performance and the use of this product.
No guarantee for the content of this document is taken.

5
English
Icon explanation
A flash in the triangle is used if there is danger for the health, e.g. by an electric shock.
An exclamation mark in the triangle points to an important note in this user manual which
must be minded.
This symbol can be found when you are to be given tips and information on operation.
Important safety advice
The warranty will expire for damage due to non-compliance with these operating
instructions. ABUS will not be liable for any consequential loss!
ABUS will not accept liability for damage to property or personal injury caused by
incorrect handling or non-compliance with the safety-instructions.
In such cases the warranty will expire.
The device has been manufactured in compliance with international safety standards. Please read these
safety advices carefully.
Safety advice
1. Mains supply
100–240 V AC, 50–60 Hz (via power adapter plug to 5 V DC)
Operate this product only from the type of power supply indicated on the marking label. If you are not sure
of the type of power supplied to your home, consult your local power company. Disconnect the product
from the mains before you start any maintenance or installation procedures.
2. Overloading
Do not overload a wall outlet, extension cord or adapter as this may result in electric fire or shock.
3. Liquids
Protect the device from any kind of liquids entering.
4. Cleaning
Disconnect the product from the wall outlet before cleaning. Use a light damp cloth (no solvents) to dust
the product.
5. Accessories
Do not use any unsupported accessories as these may be hazardous or cause damage the product.
6. Location
This device is intended for indoor use.
The product will be damaged even it falls from a low height.
During the installation of the camera please take care that direct sunlight cannot fall onto the
image sensor of the device. Please follow the installation instructions in the corresponding
chapter of this user manual.
Do not place the device near a radiator or heat register.
Setup the device only in areas with the advised operating temperatures of -10° ~ 50°C.

6
English
7. Wireless transmission
The range of wireless transmission depends on various environmental factors. The local conditions at the
installation location can have a negative impact on the range. For this reason, if there is a clear line of
sight between the receiver and the transmitter, the range can be as much as 200 m, but in buildings it is
significantly less.
The following environmental factors impair both the range and the frame rate:
Mobile phone masts, high-tension electricity pylons, power lines, ceiling and walls, devices with the same
or similar radio frequency.
Warnings
Follow all safety and operating advises before starting-up the device!
1. Follow these directions in order to avoid damage of the power cord or plug:
Do not modify or process the power cord or plug arbitrarily.
Make sure to disconnect the power cord holding the plug.
Keep heating appliances as far as possible from the power cord in order to prevent the cover
vinyl from melting.
The outdoor camera’s power supply unit must be protected against humidity and damp. The
power supply unit may be used indoors only.
2. Follow these directions. Failure to follow any of them may cause electrical shock:
Do not open the main body or the power supply.
Do not insert metal or inflammable objects inside the product.
In order to avoid any damage during lighting use a surge protection.
3. Do not use the product when it is out of order. If you continue to use the product when defective, serious
damage can be caused to it. Make sure to contact your local product distributor if the product is out of
order.
During the installation into an existing video surveillance system make sure that all devices are
disconnected from the low and supply voltage circuit.
If in doubt allow a professional electrician to mount, install and wire-up your device. Improper
electrical connection to the mains does not only represent at threat to you but also to other
persons.
Wire-up the entire system making sure that the mains and low voltage circuit remain separated
and cannot come into contact with each other in normal use or due to any malfunctioning.
Avoid using the device under the following unfavorable ambient conditions:
wetness or excessive air humidity
extreme cold or heat
direct sunlight
dust or combustible gases, vapors or solvents
strong vibration
strong magnetic fields, such as those found in the vicinity of machinery or loudspeakers
the camera must not be directed into the sun as this can destroy the sensor.
the camera may not be installed on unstable surfaces
Unpacking
While you are unpacking the device please handle it with utmost care.
If you notice any damage of the original packaging, please check at first the device.
If the device shows damages, please contact your local dealer.

7
English
Table of contents
1. Intended use ...........................................................................................................................................8
2. Scope of delivery....................................................................................................................................8
3. Features and functions..........................................................................................................................8
4. Device description .................................................................................................................................9
4.1 Overview ........................................................................................................................................9
4.2 Camera description........................................................................................................................9
5. Installation.............................................................................................................................................11
5.1 Camera mounting.........................................................................................................................11
6. Operating and configuring via app.....................................................................................................12
7. Maintenance and cleaning...................................................................................................................25
7.1 Maintenance.................................................................................................................................25
7.2 Cleaning .......................................................................................................................................25
8. Disposal.................................................................................................................................................25
9. Tips for troubleshooting......................................................................................................................26
10. Technical data.......................................................................................................................................27

8
English
1. Intended use
The WLAN pan/tilt camera & app make powerful monitoring possible. This camera is designed for indoor
installation. The integrated infrared LEDs enable day and night surveillance for objects up to a maximum
distance of 3 metres.
Thanks to the ceiling mount, the camera can be installed individually indoors.
The easy configuration and operation via app enable access to the camera from all over the world. You
can control the camera from the live image.
For a detailed description of functions, refer to Section 3, “Features and functions”.
2. Scope of delivery
Wi-Fi pan/tilt camera & app
Power supply unit including EU, Australian and
UK adapters
5 V DC/1.5 A
LAN cable
Ceiling mount
Antenna
3. Features and functions
For effective all-round monitoring of interior spaces
Guided step-by-step installation via app (iOS, Android)
HD 720p resolution and infrared night vision function for brilliant image quality
Recording to SD card (accessory, max. 32 GB)

9
English
4. Device description
4.1 Overview
Item number
TVAC19000B
Resolution
720p
IR LEDs
IR swivel filter (ICR)
Operating voltage
5 V DC
4.2 Camera description
Front:
Light sensor
IR LEDs
Microphone

10
English
Rear:
Micro SD card slot
Power supply connection
5 V DC/1 A
Power LED
LAN interface
Antenna
connection
Reset button

11
English
5. Installation
5.1 Camera mounting
1. Use the camera to help you find a suitable place for installation.
Use the base plate to mark the drill holes on the surface, then drill the holes. Insert the wall plugs
supplied before you attach the base plate with the screws.
2. Next, tighten the base plate of the camera; use the enclosed screws to do this.

12
English
3. Then place the camera on the base plate and turn it so that the arrow is pointed at Lock.
The camera is now securely mounted. Connect the power supply unit with the camera.
6. Operating and configuring via app
The TVAC19000 Wi-Fi pan/tilt camera & app gives you the option of switching to live on the cameras and to
configure the recorder. The app for this device can be found in the App Store under the name of “App2Cam”.
To configure access to the camera, proceed as follows:
“App2Cam” app
Download the “App2Cam” app and install it on your
smartphone.
Make sure that your smartphone or tablet has internet access.
You have two options to connect the camera to the network:
Option 1:
Connect the LAN cable provided to the camera. Then connect
the cable to your router.
Connect the cable to your router in the next step.
Then connect the power supply unit provided.
Do not start to set up the camera until the LED lights up
constantly. This can take about 60 seconds.
Following this you can proceed with the setup at point .

13
English
Option 2: No adapter cable necessary
Connect the camera with the power supply unit and wait
approx. 1 minute until the red and green LEDs light up.
Look in the network settings on your mobile end device in the
“Wireless” menu for available Wi-Fi networks. For initial setup,
the camera presents its own SSID named: XXXXXXXXX
Connect your mobile end device to this Wi-Fi. The Wi-Fi is
secured with the 12345678 security code.
Begin setting up the camera once the two LEDs are lit up
permanently. This can take about 60 seconds.
Following this you can proceed with the setup at point .
Adding the system
Open the app on your mobile phone and click on “Press to
add new system”.
When starting the app for the first time, you are asked
whether you want to activate or refuse push notifications for
motion detection.
Please note that false alarms can occur for video surveillance
in outdoor areas.

14
English
Entering system information
1. Enter a name for your camera at “System Name” which
should then be displayed on your mobile phone.
2. To enter the DID automatically, click on “Search” to
display all the cameras which are connected to your
network or directly to your mobile end device. Select the
required camera and click on “Add”. You can also enter
the 20-digit DID number manually. You can find this on
the product sticker on the product. .
3. Then enter your password.
The standard security code is: 123456. When you logon
successfully, you receive a warning to inform you that
you are using the standard security code and that you
should change it for your own security.
4. Save the settings by pressing “Save”.
5. To change the camera settings, press the settings button.
Menu options then appear for every camera. Select the
settings icon to edit the system settings.
6. To obtain the live view, click on the required camera.
The camera can now be reached locally in your network. To
connect the camera to the internet, go to menu item 8.
“Advanced Settings” at “Wi-Fi” settings.
Once you have changed the camera password, it must also
be changed in the app. To do so, open the camera settings.
Connection status
If you have added you system successfully, the name of your
system and the current connection status appear. The picture
shown is the last video image of the previous session.
You can add up to 8 cameras in the app.
Press the required camera to go to the live view.
System name
e.g. Test
Connection status
Connected = you are connected with your system
Disconnected = there is no connection to the system
Press to add new system
Here you can add an additional system
System configuration
Go to the system configuration here.
Press to go to the live view again.
Updating the connection
The connection is updated.

15
English
Firmware information / PIN code / Notify
setting
Here you can see the current firmware version of
the system and save a PIN code. You can find
out how to enter a PIN code at.
Saving the PIN code
If you want to save a PIN code for this app, proceed as
follows:
1. Open the “Setup PIN Lock” at
2. Enter a 4-digit PIN code and repeat it.
3. Put a tick at “Enable lock when starting”.
When you have saved a PIN code, it will be requested when
you want to open the app.
Live view
Select the required camera from the selection list. Now you
see the live view of the camera. The picture is shown in the
4:3 mode. To view a 16:9 format, turn your mobile end device
90°.
Camera control:
To control the camera, tap in the middle of the live image and
swipe in the desired direction.
Turn to the left: Swipe from left to right.
Turn to the right: Swipe from right to left.
Tilt up: Swipe from top to bottom.
Tilt down: Swipe from bottom to top.
Snapshot
Here you have the option of making a
screenshot of your live image. The image is
then saved in your photos on your mobile
device.
The pictures saved are stamped with the date
and time and saved in the photo gallery.
Audio
You have the option of activating or
deactivating the audio here.
Starting the recording
Here you can start a manual recording; the
recording time is one minute. The recording is
saved locally on the SD card and the following
icon appears in the live view. The
recording runs for 1 minute automatically and
cannot be interrupted.

16
English
Saving the preset position
Here you have the option to define a preset
position.
To save a position, proceed as follows:
Android:
Navigate to the desired position by swiping.
To save the position, press and hold your
finger on the centre of the image for
5 seconds. Once the position is saved, the
message “Position saved” appears.
To bring up the preset function, press the PTZ
button; the camera automatically moves to the
preset position.
iOS:
Navigate to the desired position by swiping.
To save the position, press the PTZ button.
A pop-up window appears. Select “Save
position”; the preset position is now saved.
To bring up the preset function, press the PTZ
button; a pop-up window will appear. Select
“Move to preset” to bring up the preset
position.
Duplex communication
You can speak to someone else using the
microphone of the mobile terminal device on
the camera. Keep the button pressed
while speaking.
Back
You can return to the camera overview here.
The last screenshot is always shown.
Camera configuration
You go to camera configuration here.
You can choose one of the following options:
Configure the camera
Remove camera
Access to recordings on the SD card
Press to go to the live view again.

17
English
Settings
Click on to go to the settings.
You can change the camera settings here. You can also
activate or deactivate the e-mail messages here.
Click on “Advanced settings” to start the configuration.
E-mail alert
E-mail notifications are activated by motion.
Please note that false alarms can occur for video surveillance
in outdoor areas.
Enter your password to go to the settings. The standard
password is “123456”.

18
English
You can configure the camera at settings.
Admin password
The Admin password must be entered to add the camera
and to go to the settings. The standard password is
“123456”.
Change this at the initial installation to protect your camera
from unauthorised access.
If you have forgotten your password you can reset the
camera to the factory settings by pressing the reset button
for 5 seconds. The red LED starts to flash.
The camera must then be reinstalled.
Time zone
The world time zones are shown in the selection list.
Select the time zone in which the camera is installed.
Activate daylight saving if summertime applies to the world
time zone.
Daylight saving
Activate/deactivate daylight saving time.
Device security code
The standard security code is: 12345678
For reasons of security, change this code and enter a new
one (max. 8 digits).
Enter the code again to confirm.
Then confirm with “OK”.
You will need the security code later if you want to access
the cameras via the app.
If you have forgotten your security code, you can reset the
camera to the factory settings by pressing the reset button
for 5 seconds.
The camera must then be reinstalled.

19
English
Video setting
The video settings allow you to adjust the video quality and
ambient conditions for the camera.
Video quality
The video quality setting allows you to select the quality for
video streaming.
Better streaming:
The video display is smoother.
Better picture:
The video picture is displayed with a higher resolution.
HD video:
The video picture is transmitted in HD resolution. The
picture can still be shown delayed due to the large data
volume.
Only use the setting for improved picture / HD video with
sufficient bandwidth (1 Mbps) and adequate system
requirements.
Please note that, due to the different forms of transmission
technology that audio and video use, different network load
levels may be present and transmission may take place
asynchronously as a result.
Environment mode
You can make the settings for the network frequency and
the ambient conditions here.
Standard value for Germany: 50 Hz
You can choose between indoors (50 Hz), indoors (60 Hz)
and outdoors.
Indoor:
Settings for the light conditions indoors
Outdoors:
Settings for the light conditions outdoors
Low light enhancement
Adjusting the video picture for poor light conditions in night
mode. You can choose between 5 levels, whereby level 5
brightens the picture the most.
Image orientation
Here you have the option to rotate the image or display it in
mirror reverse.
Flip:
The image is rotated 180 degrees.

20
English
Reverse:
The image is displayed in mirror reverse.
Flip & reverse:
The image is rotated 180 degrees and displayed in mirror
reverse.
WiFi Setting
In the Wi-Fi settings you can select the network to be used for
the internet access by the camera.
When selecting the menu item, all the networks located in the
area are shown. Select your network and enter your own Wi-
Fi password.
To prevent access by unauthorised persons, protect your
network by encryption with WPA/WPA2/WPA2-PSK.
Once the settings are saved, the camera starts up again. Do
not forget to disconnect the Ethernet adapter cable (if used
during the initial setup).
If the connection was not successful or incorrect Wi-Fi
information was entered, press the reset button for 5 seconds
to restore the camera to the factory settings.
Other manuals for TVAC19000B
1
Table of contents
Other Abus Security Camera manuals

Abus
Abus PPIC90000 User manual

Abus
Abus IPCA62520 User manual

Abus
Abus IPCA33500 User manual

Abus
Abus HDCC63550 User manual

Abus
Abus HDCC68550 User manual

Abus
Abus eyseo TVCC40530 User manual

Abus
Abus PPIC32520 User manual

Abus
Abus IPCA52010 User manual

Abus
Abus IPCB42500 User manual

Abus
Abus TVAC14010A User manual