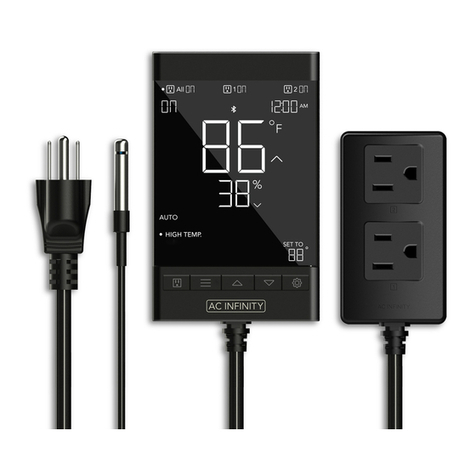
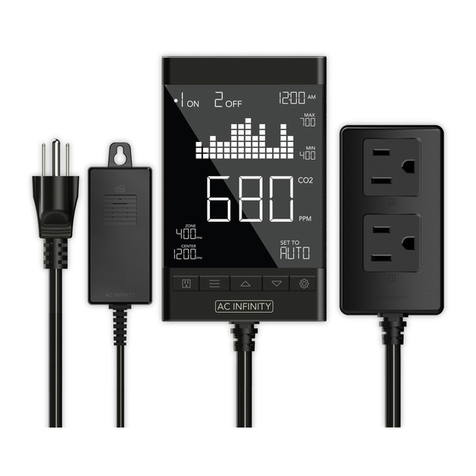
AC Infinity CONTROLLER 79 User manual

SMART OUTLET
ENVIRONMENTALLY CONTROLLED
USER MANUAL


3
WELCOME
Thank you for choosing AC Infinity. We are committed to product quality and friendly customer service.
If you have any questions or suggestions, please don’t hesitate to contact us. Visit www.acinfinity.com
and click contact for our contact information.
EMAIL
support@acinfinity.com
WEB
www.acinfinity.com
LOCATION
Los Angeles, CA

4
PRODUCT
CONTROLLER 79
CONTROLLER 75
MODEL
CTR79A
CTR75A
UPC-A
819137023680
819137022508
MANUAL CODE SOT2207X1

5
MANUAL INDEX
Manual Index .................................................................................
Product Warning ............................................................................
Interference from MH and HPS Lights ..........................................
Key Features .................................................................................
Product Contents ...........................................................................
Powering and Setup........................................................................
Programming .................................................................................
Other Settings ................................................................................
Download the App .........................................................................
Add a Device .................................................................................
FAQ ................................................................................................
Other AC Infinity Products .............................................................
Warranty ........................................................................................
Page 5
Page 6
Page 7
Page 8
Page 9
Page 10
Page 13
Page 33
Page 34
Page 35
Page 38
Page 40
Page 41

6
Ensure your power source conforms to the electrical requirements of this product.
Check your local code restrictions for additional safety measures that may be needed for a
proper code compliant installation.
Read all instructions before installing and using this product.
When cutting or drilling into a wall or ceiling, do not damage electrical wiring and other
hidden utilities.
Do not attempt to hardwire this product. Performing any retrofitting actions may result in
personal injury and/or electrical damage, and will void this product’s warranty.
If you are unfamiliar or have doubts about performing this product’s installation, seek the
services of a qualified, trained, and licensed professional. Inappropriate installation will void
this product’s warranty.
This product must not be used in potentially hazardous locations such as flammable,
explosive, chemical-laden or wet atmospheres.
Do not cover power cords with rugs or other fabric materials.
Do not depend on the on/off programming as the sole means of shutting power from this
product. Unplug the power cord before installing, servicing, or moving this product.
Do not operate this product while its cord is damaged, or if it malfunctions, has been dropped,
or is damaged in any manner.
Use this product only as intended by the manufacturer.
1.
2.
3.
4.
5.
6.
7.
8.
9.
10.
11.
PRODUCT WARNING
TO REDUCE THE RISK OF FIRE, ELECTRIC SHOCK, OR INJURY TO PERSONS,
OBSERVE THE FOLLOWING:
7
Certain grow light models with HID* ballasts that do not use electromagnetic shielding will
create an area of radio frequency interference (RFI). This can distort nearby frequency-sensitive
components like internet lines and climate sensors. RFI can be emitted from the ballast’s cords or
the ballast itself.
Follow these steps to ensure proper functionality and to prevent radio frequency interference from
affecting your sensor probe:
TIP 1
Keep the probe cord far away from
your ballast's cords to ensure the
controller properly detects climate
conditions.
You may also wrap the probe
cord and create a cone around
the sensor head with aluminum
foil tape.
TIP 2
Do NOT plug your grow light and
inline fan into the same duplex
outlet. Plug your grow light and
inline fan into separate power
strips and electrical sockets.
*MH, HPS, CMH, or CHPS
INTERFERENCE from MH and HPS LIGHTS

8
KEY FEATURES
ACTIVE MONITORING
LED display shows key data
like outlet power status,
temperature, humidity, trends,
clock, and countdowns.
WALL MOUNTING
Hard black housing and
fire-resistant casing with key-
hole hanger for easy mounting
on any hook or screw.
SMART CONTROLLER
Features automation controls
that power devices based on
temperature, humidity, timers,
and schedules.
DUAL OUTLETS
Built with a detached electrical
socket module that allows for
powering and controlling two
devices at the same time.
SENSOR PROBE
Corded probe made of
stainless steel to ensure
precise temperature and
humidity readings.
EXTRA CORD LENGTH
Extended cord length of 144
inches (12 feet) for ease of
management and flexible
mounting options.
Shown: CONTROLLER 79

9
PRODUCT CONTENTS
WALL HANG
CONTROLLER
(x1)
WALL-HANG
WOOD SCREWS
(x2)
SENSOR
PROBE
(x1)
WIRE
TIE
(x1)
CABLE TIE
MOUNT
(x1)
DESKTOP
CONTROLLER
(x1)
WALL-HANG
WOOD SCREWS
(x2)
SENSOR
PROBE
(x1)
WIRE
TIE
(x1)
CABLE TIE
MOUNT
(x1)
CTR79A
CTR75A

10
POWERING AND SETUP
STEP 1
Plug the sensor probe into the 3.5mm port
located at the bottom side of your controller.
STEP 2
Insert the power plug into a wall outlet to power
your controller.

11
POWERING AND SETUP
STEP 3
Position the corded sensor probe and secure it
by using the included zip ties and tie mounts.
STEP 4
Locate a spot free of obstruction and secure
the anchor into your wall. Twist the wood screw
into the anchor.

12
POWERING AND SETUP
STEP 6
Plug your device (not included) into one of the
two sockets to power it with your controller.
STEP 5
Hang your controller by the screw using the
hole located on its backside.

13
1. OUTLET BUTTON
Cycles through the two outlet devices. Each outlet device is programmed independently, or together
when navigating to ALL.
PROGRAMMING
2. MODE BUTTON
Cycles through each of the controller’s mode: OFF, ON, AUTO (4 triggers), TIMER TO ON, TIMER
TO OFF, CYCLE (On and Off), and SCHEDULE (On and Off).
4. SETTING BUTTON
Cycles through each of the controller’s settings: DISPLAY BRIGHTNESS, °F/ °C, CLOCK,
CALIBRATION (Temperature and Humidity), and BUFFER (Temperature and Humidity).
3. UP/DOWN BUTTONS
Adjusts the value of your current mode. The up button increases and down button decreases the
setting. Hold both to reset values to OFF or 0.
1 2 3 4
5
6
7
8
910
11
12

14
6. PROBE TEMPERATURE
Current temperature the probe is detecting. Displays “--“ if no probe is plugged in. Includes a trend
indicator that signals a rise, fall or no change in temperature within the last hour.
7. PROBE HUMIDITY
Current humidity the probe is detecting. Displays “--“ if no probe is plugged in. Includes a trend
indicator that signals a rise, fall or no change in humidity within the last hour.
PROGRAMMING
5. OUTLETS
Displays the outlet controller’s power status, indicating whether or not electricity is being fed to your
device. ON will display if your devices are being powered and OFF will display if your devices are
not being powered.
8. CONTROLLER MODE
Displays the controller’s current mode. Pressing the mode button cycles through the
available modes.
9. STATUS ICONS
Flashes or displays the alert icons of the controller. The icons include TIMER ALERT and
DISPLAY LOCK.
10. CURRENT TIME
Displays the current time. The internal battery sustains the clock so it does not default to 00:00 if
power is cut off.
11. COUNTDOWN
Displays the countdown of the TIMER TO ON, TIMER TO OFF, CYCLE, or SCHEDULE modes. TO
ON shows the amount of time left before your devices power on. TO OFF shows the amount of time
left before your devices power off.
12 . USER SETTING
Displays the value of your current mode. Use the up and down buttons to adjust the value.

15
PROGRAMMING
ALL OUTLETS
Navigate to the ALL outlet to set simultaneous
programming for all plugged in devices.
Programming set in this outlet mode applies to
all plugged in devices, but will not be active if
you navigate to other outlets. Re-entering the
ALL outlet will resume its programming.
INDIVIDUAL OUTLET
Navigate to a numbered outlet with a plugged in
device to set individual programming.
Programming will run in the background even
while you navigate to other numbered outlets.
OUTLETS
Pressing the outlet button will cycle through the controller’s available outlets: ALL, 1, and 2. Dot
indicates the current outlet.

16
CONTROLLER MODES
Pressing the mode button will cycle through the controller’s available programming modes: OFF,
ON, AUTO (4 triggers), TIMER TO ON, TIMER TO OFF, CYCLE (On and Off), and SCHEDULE
(On and Off).
ON MODE
Your device will stay on regardless of
temperature, humidity, or time-based triggers.
OFF MODE
Your device will remain off regardless of
temperature, humidity, or time-based triggers.
Jump back to OFF Mode anytime by holding the
MODE button while in other modes or settings.
PROGRAMMING

17
AUTO MODE (HIGH TEMPERATURE TRIGGER)
Pressing the up or down button sets the high
temperature trigger. Your device will turn on if the probe’s
reading meets or exceeds this threshold.
If the probe’s reading falls below this trigger point,
your device will turn off. This shut off point can be adjusted
using the buffer setting as shown on page 27.
This is typically used with devices like air conditioners and
cooling fans to help lower the temperature when it gets too
hot. For example, if you set a high temperature trigger of
90°F, then your device will activate when the temperature
reaches 90°F or higher, and turn off when it falls below
90°F. Products shown here may still be in development.
Note that any of the four AUTO Mode triggers can activate at the same time, even if you are not viewing that
specific trigger. Turn off any triggers not in use by pressing the up and down buttons together while viewing that
trigger. Triggers may be delayed from turning off by your Buffer Settings, please see page 27 for more info.
PROGRAMMING
ON
HIGH TEMPERATURE
TRIGGER POINT
90
32 194
COLDER HOTTER
OFF

18
AUTO MODE (LOW TEMPERATURE TRIGGER)
Pressing the up or down button sets the low temperature
trigger.Your device will turn on if the probe’s reading meets
or falls below this threshold.
If the probe’s reading rises above this trigger point, your
device will turn off. This shut off point can be adjusted
using the buffer setting as shown on page 28.
This is typically used with devices like heaters and seedling
mats to help raise the temperature when it gets too cold.
For example, if you set a low temperature trigger of 40°F,
then your device will activate when the temperature falls
to 40°F or lower, and turn off when it rises above 40°F.
Products shown here may still be in development.
PROGRAMMING
Note that any of the four AUTO Mode triggers can activate at the same time, even if you are not viewing that
specific trigger. Turn off any triggers not in use by pressing the up and down buttons together while viewing that
trigger. Triggers may be delayed from turning off by your Buffer Settings, please see page 27 for more info.
LOW TEMPERATURE
TRIGGER POINT
40
32 194
COLDER HOTTER
ON OFF

19
AUTO MODE (HIGH HUMIDITY TRIGGER)
Pressing the up or down button sets the high humidity
trigger.Your device will turn on if the probe’s reading
meets or exceeds this threshold.
If the probe’s reading falls below this trigger point,
your device will turn off. This shut off point can be adjusted
using the buffer setting as shown on page 29.
This is typically used with devices like dehumidifiers
to help lower the humidity when it gets too humid. For
example, if you set a high humidity trigger of 70%, then
your device will activate when the humidity rises to 70%
or higher, and turn off when it falls below 70%. Products
shown here may still be in development.
PROGRAMMING
Note that any of the four AUTO Mode triggers can activate at the same time, even if you are not viewing that
specific trigger. Turn off any triggers not in use by pressing the up and down buttons together while viewing that
trigger. Triggers may be delayed from turning off by your Buffer Settings, please see page 27 for more info.
ON
HIGH HUMIDITY
TRIGGER POINT
OFF
70
32 100
LESS HUMID MORE HUMID

20
PROGRAMMING
AUTO MODE (LOW HUMIDITY TRIGGER)
Pressing the up or down button sets the low humidity
trigger.Your device will turn on if the probe’s reading
meets or falls below this threshold.
If the probe’s reading rises above this trigger point, your
device will turn off. This shut off point can be adjusted
using the buffer setting as shown on page 30.
This is typically used with devices like humidifiers
to help raise the humidity when it gets too dry. For
example, if you set a low humidity trigger of 50%, then
your device will activate when the humidity falls to 50%
or lower, and turn off when it rises above 50%. Products
shown here may still be in development.
Note that any of the four AUTO Mode triggers can activate at the same time, even if you are not viewing that
specific trigger. Turn off any triggers not in use by pressing the up and down buttons together while viewing that
trigger. Triggers may be delayed from turning off by your Buffer Settings, please see page 27 for more info.
LOW HUMIDITY
TRIGGER POINT
ON OFF
50
32 100
LESS HUMID MORE HUMID
This manual suits for next models
3
Table of contents
Other AC Infinity Controllers manuals

AC Infinity
AC Infinity CTR69X User manual

AC Infinity
AC Infinity CONTROLLER 67 User manual

AC Infinity
AC Infinity AC-CTC7 User manual

AC Infinity
AC Infinity CONTROLLER 69 User manual

AC Infinity
AC Infinity SMART OUTLET User manual

AC Infinity
AC Infinity CONTROLLER 69 PRO User manual

AC Infinity
AC Infinity CONTROLLER 63 User manual

AC Infinity
AC Infinity AC-CRA5 User manual

AC Infinity
AC Infinity THERMAL TRIGGER User manual

AC Infinity
AC Infinity CONTROLLER 69 User manual