Acer M9D User manual

& K DSWHU
System Board
System Board 1-1
1.1 Features
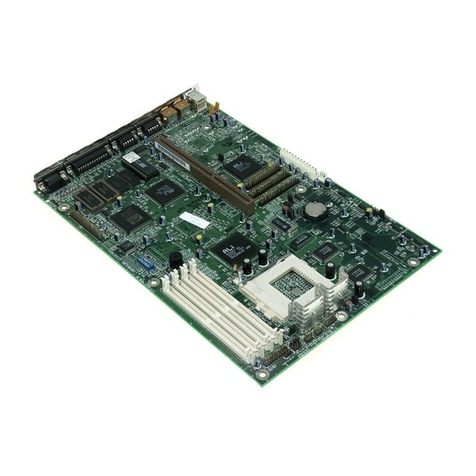
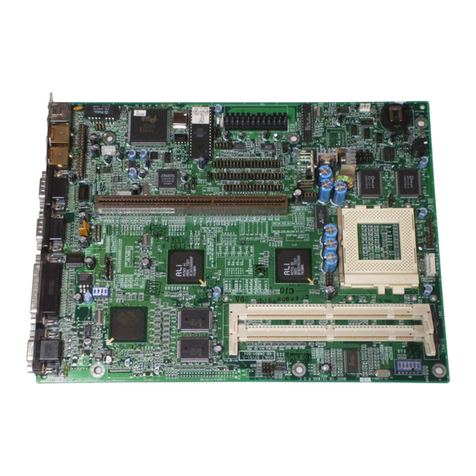
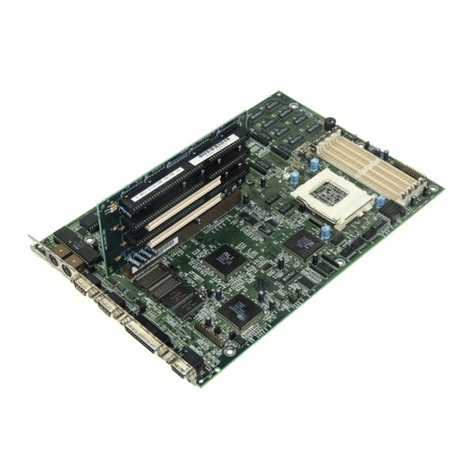
The M9D is a dual-processor system board built on an ATX baseboard
that supports the Intel Pentium II CPU processor running at 266/66
MHz, 300/66 MHz, 333/66 MHz, 350/100 MHz, 400/100 MHz, and
future Intel Pentium II processors. It contains an exclusive connector
for the CPU board that carries two slots for the Pentium II CPU
modules.
The host bus interface supports a Pentium II processor with 66 or 100
MHz bus frequency. It also supports synchronous DRAM (SDRAM)
DIMMs.
The M9D supports PCI IDE, universal serial bus (USB) host/hub, and
enhanced power management. It also supports Ultra DMA/33
synchronous DMA-compatible devices.
A 50-pin Fast SCSI (Small Computer System Interface) and two 68-pin
Wide SCSIs come with the M9D to connect SCSI devices. Wide SCSI
supports 16-bit transfers while Fast SCSI uses an 8-bit bus that
doubles the clock rate to support data transfer rates of 80 Mb/s.
The M9D system board supports the USB (Universal Serial Bus)
connector, and other standard features such as two UART NS16C550
serial ports, one parallel port with Enhanced Parallel Port
(EPP)/Extended Capabilities Port (ECP) features, a diskette drive
interface, and two embedded hard disk interfaces. It also includes a
built-in 10/100 Mb/s Intel 82558 LAN chip.
1-2 User’s Guide
To allow better server management, the system board also supports
the optional ASM Pro and Remote Diagnostic management (RDM).
ASM Pro detects problems in CPU thermal condition, CPU working
voltage detection (±12V/±5V/3.3V/1.5V), and PCI bus utilization
calculation. It also detects if the CPU fan or the chassis fan
malfunctions. Meanwhile, RDM allows execution of the RDM
diagnostic program from a remote RDM station to fix detected
problems or to reboot the system.
The system is fully compatible with MS-DOS V6.X, DOS/V, IBM OS/2
Warp, Novell Netware, Novel SFT III, SCO UNIX, and Windows NT.

System Board 1-3
1.2 Major Components
The system board has the following major components:
•CPU board slot
•Two ISA and five PCI bus slots (one PCI/ISA shared slot)
•512-KB Flash ROM for system BIOS
•System clock/calendar with battery backup
•One 50-pin Fast SCSI and two 68-pin Wide SCSI interfaces
•One RDM interface (two 24-pin connectors)
•IDE hard disk and diskette drive interfaces
•Onboard 2 MB Video DRAM
•Super I/O, SCSI, VGA, memory, and Advanced Server
Management (ASM) controller chipsets
•External ports:
•PS/2-compatible keyboard port (optional AT-keyboard port)
•PS/2-compatible mouse port
•Parallel port
•Video port
•RJ-45 connector
•Universal Serial Bus (USB) connector

1-4 User’s Guide
1.3 Layout
Figure 1-1 shows the system board components.
1 PS/2 Mouse port
2 PS/2 Keyboard port
3 Parallel port
4 Video port
5 RJ-45 connector
6 USB connector
7 LAN controller
8 PCI slots
9 Flash ROM BIOS
10 ISA slots
11 PCI to PCI bridge chipset
12 SCSI chipsets
13 SMM connector
14 Wide SCSI connectors
15 CPU board connectors
16 Narrow SCSI connector
17 PCI chipset
18 IDE connector
19 Super I/O chipset
20 Diskette drive connector
21 I/O APIC chipset
22 RDM connectors
23 Battery
24 Power connectors
25 Video controller
Figure 1-1 System Board Layout
2
1
4
3
5
15
810
6
13
12
16
14
23 17
25
7
24
22
12
11
21 18
19
20
9

System Board 1-5
1.4 Jumpers and Connectors
1.4.1 Jumper and Connector Locations
Figure 1-2 shows the jumper and connector locations on the system
board.
Figure 1-2 System Board Jumper and Connector Locations
Jumpers are prefixed “JP”. Connectors are
prefixed “CN”. The blackened pin of a jumper
and connectors represents pin 1.

1-6 User’s Guide
1.4.2 Jumper Settings
Table 1-1 lists the system board jumpers with their corresponding
settings and functions.
Table 1-1 System Board Jumper Settings
Jumper Setting Function
VGA Disable Control
JP1 1-2*
2-3 Auto
Onboard VGA disable
Password Security
JP2 1-2
2-3* Check password
Bypass password
BIOS Type
JP3 1-2
2-3* Acer
Fujitsu
Buzzer
JP4 1-2
2-3* Use LCD board’s buzzer
Use onboard buzzer
Boot Block Function
JP5 1-2
2-3* Supports boot block function
Do not support boot block function
*Default setting

System Board 1-7
1.4.3 Connector Functions
Table 1-2 lists the different connectors on the system board and their
respective functions.
Table 1-2 Connector Functions
Connector Function
CN1 Power switch connector
CN2, CN17 RDM connectors
CN3 COM 1 port connector
CN4,CN10,CN11 Power connectors
CN5 HDD LED outlet connector
CN6 Thermal inlet connector
CN7 Chassis Door Intrusion
CN8 COM2 port connector
CN9 Power LED connector
CN12 PS/2 mouse (above) / keyboard (below)
connectors
CN13 5V Standby supply and power supply connector
CN14 Debugging connector
CN15 Fail LED connector
CN16 Power supply status connector
CN18 LCD board connector
CN19 RDM LED connector
CN20 Printer/VGA outlet connector
CN21 FDD connector
CN22 IDE connector
CN23 RJ-45 LAN connector
CN24 50-pin narrow SCSI connector
CN25 USB connector
CN28 WOL adapter connector
CN29 First channel 68-pin SCSI connector
CN30 P3 hot-plug notification connector
CN31 Hot-plug LED connector

1-8 User’s Guide
Table 1-2 Connector Functions
Connector Function
CN32 Second channel 68-pin SCSI connector
CN33 P2 hot-plug notification connector
CN34 HDD LED inlet connector
CN35 SMM Card connector
FAN1-FAN4 Housing fan connectors

System Board 1-9
1.5 ESD Precautions
Always observe the following electrostatic discharge (ESD)
precautions before installing a system component:
1. Do not remove a component from its antistatic packaging until
you are ready to install it.
2. Wear a wrist grounding strap before handling electronic
components. Wrist grounding straps are available at most
electronic component stores.
Do not attempt the procedures described in
the following sections unless you are a
qualified technician.

1-10 User’s Guide
1.6 Video Function
The ATI Rage IIc VGA controller chipset is a highly integrated 64-bit
graphics accelerator that supports 2D and 3D video applications. The
board comes with a 2-MB video memory.
1.6.1 Supported Video Resolutions
The onboard video controller and MPEG decoder enable the system to
support video functions, as well as enhance the video display.
The following table lists the video resolutions that the system supports:
Table 1-3 Video Resolutions
Display
Resolution Refresh
Rate Horizontal
Frequency (KHz) Pixel Clock
(MHz)
640 x 480 60 31.4 25.1
640 x 480 72 37.7 31
640 x 480 75 37.5 31.5
640 x 480 90 47.9 39.9
640 x 480 100 52.9 44.9
800 x 600 48
int.
33.8 36.0
800 x 600 56 35.2 36.0
800 x 600 60 37.8 39.9
800 x 600 70 44.5 44.9
800 x 600 72 48.0 50.0
800 x 600 75 46.9 49.5
800 x 600 90 57.1 56.6
800 x 600 100 62.5 67.5
1024 x 768 43
int.
35.5 44.9
1024 x 768 60 48.3 65.0
1024 x 768 70 56.4 75.0

System Board 1-11
Table 1-3 Video Resolutions
Display
Resolution Refresh
Rate Horizontal
Frequency (KHz) Pixel Clock
(MHz)
1024 x 768 72 58.2 75.0
1024 x 768 75 60.0 78.8
1024 x 768 90 76.2 100
1024 x 768 100 79.0 110
1152 x 864 43
int.
45.8 65.0
1152 x 864 47
int.
44.9 65.0
1152 x 864 60 54.9 80.0
1152 x 864 70 66.1 100
1152 x 864 75 75.1 110
1280 x 1024 43
int.
50.0 80.0
1280 x 1024 47
int.
50.0 80.0
1280 x 1024 60 64 110
1280 x 1024 70 74.6 126
1280 x 1024 74 77.9 135
1280 x 1024 75 80 135
int.
interlaced

1-12 User’s Guide
1.7 Installing Expansion Cards
1.7.1 Installing a PCI Card
To install PCI cards:
1. Locate the PCI slot(s) on the mainboard.
2. Remove the bracket on the housing opposite to the empty PCI
slot.
3. Insert a PCI card into the slot. Make sure that the card is properly
seated.
4. Secure the card to the housing with a screw.
When you turn on the system, BIOS automatically detects and assigns
resources to the PCI devices.
Figure 1-3 Installing a PCI Card

System Board 1-13
1.7.2 Installing an ISA Card
Both PnP (Plug abd Play) and non-PnP ISA cards require specific
IRQs. When installing ISA cards, make sure that the IRQs required by
these cards are not previously assigned to PCI devices to avoid
resource conflicts.
Follow these steps when installing ISA cards:
1. Remove all PnP cards installed in the system, if any.
2. Install non-PnP ISA cards.
3. Turn on the system.
4. Use Windows 95 or ICU to manually assign the appropriate IRQs
to the cards. This ensures that BIOS will not use the resources
assigned to the non-PnP ISA cards.
BIOS detects and configures only PnP cards.
5. Turn off the system.
6. Locate the expansion slots and install the PnP ISA and PCI
cards.
7. Turn on the system. This time BIOS automatically configures the
PnP ISA and PCI cards with the available resources.

1-14 User’s Guide
Figure 1-4 Installing an ISA Card

System Board 1-15
1.8 ASM Pro
ASM Pro is a server management tool based on the Simple Network
Management Protocol (SNMP). It detects server problems related to
the CPU thermal condition, 5V/3.3V/1.5V detection, or PCI bus
utilization calculation.
This feature is designed primarily for server supervisors and
management information system (MIS) personnel to help them detect
errors or potential trouble spots in their network servers through a
single management station.
ASM Pro consists of two major parts:
•ASM-Station - a Windows-based monitoring station that
communicates with the ASM-Agents.
•ASM-Agent(s) - the individual servers managed by the
ASM-Station.
Refer to the ASM Pro user’s manual for more information.

1-16 User’s Guide
1.9 Remote Diagnostic Management
Remote Diagnostic Management (RDM) is a network management
tool that utilizes modems and telephone lines to control a host of
servers from a remote station. It monitors and analyzes the server
condition, updates the BIOS settings if necessary, or reboots the
server in the event of failure and quickly return it to normal operation.
This capability to execute the RDM program from a remote site
bridges the distance barrier in fixing server problems and reduces
wasted time due to system failure.
1.9.1 Installing an RDM Module
The system board comes with connectors CN2 and CN17 to
accommodate the RDM module.
Follow these steps to install the RDM module and connect the cable:
1. See Figure 1-1 for the location of the RDM connectors.
2. Gently insert the RDM module into CN2 and CN17. The module
fits only in one direction. Do not force it into the connectors.
Figure 1-5 Installing the RDM Module
Refer to the RDM User’s Guide for detailed instructions on RDM
installation.
CN2
CN17

System Board 1-17
1.10 Error Messages
Do not continue using the computer if you receive an error message of
any type. Note the message and take corrective action. This section
explains the different types of error messages and corresponding
corrective measures.
There are two general types of error messages:
•Software
•System
1.10.1 Software Error Messages
Software error messages are returned by your operating system or
application. These messages typically occur after you boot the
operating system or when you run your applications. If you receive
this type of message, consult your application or operating system
manual for help.
1.10.2 System Error Messages
A system error message indicates a problem with the computer itself.
A message of this type normally appears during the power-on self-test,
before the operating system prompt appears.
Table 1-4 lists the system error messages.

1-18 User’s Guide
Table 1-4 System Error Messages
Message Action
CMOS Battery Error Replace the RTC chip or
contact your dealer.
CMOS Checksum Error Check the RTC chip and the
necessary jumper. If the
battery is still good, run
Setup.
Display Card Mismatch Run Setup.
Diskette Drive Controller
Error or Not Installed Check and connect the
control cable to the diskette
controller.
Diskette Drive Error Diskette may be defective. If
not, replace the diskette drive.
Diskette Drive A Type
Mismatch Run Setup and select the
proper drive type.
Diskette Drive B Type
Mismatch Run Setup and select the
proper drive type.
Equipment Configuration
Error Modify the memory
configuration to agree with
one of the options in Table
2-3 or Table 2-4.
Hard disk Controller Error Run Setup.
Hard disk 0 Error Check all cable connections.
Replace hard disk.
Hard disk 1 Error Check all cable connections.
Replace hard disk.
Keyboard Error or No
Keyboard Connected Check and connect the
keyboard to the system unit.
Keyboard Interface Error Replace the keyboard or
contact your dealer.

System Board 1-19
Table 1-4 System Error Messages (continued)
Message Action
Memory Error at:
MMMM:SSSS:OOO
(W:XXXX, R:YYYY)
where:
M: MB, S: Segment,
O: Offset, X/Y: write/read
pattern
Check installed DIMMs.
Contact your dealer.
Memory Size Mismatch
CPU Clock Mismatch Run Setup. Check if the values
shown in the memory
parameters are correct. If
correct, exit Setup and reboot
the system. If the error
message reappears, seek
technical assistance.
Onboard Serial Port 1
Conflict Run Setup and disable the
port.
Onboard Serial Port 2
Conflict Run Setup and disable the
port.
Onboard Parallel Port Conflict Run Setup and disable the
port.
Pointing Device Error Check and connect pointing
device.
Pointing Device Interface
Error Replace the pointing device or
contact your dealer.
Press F1 key to continue or
Ctrl-Alt-Esc for Setup Press or
+ + to enter
Setup.
Real Time Clock Error Check the RTC chip. If it is still
good, run Setup. If not, replace
the RTC chip.
CPU BIOS Code Mismatch Contact your dealer.

1-20 User’s Guide
1.10.3 Correcting Error Conditions
As a general rule, if an error message says "Press F1 to continue," it is
caused by a configuration problem, which can be easily corrected. An
equipment malfunction is more likely to cause a fatal error, i.e., an
error that causes complete system failure.
Here are some corrective measures for error conditions:
1. Run Setup. You must know the correct configuration values for
your system before you enter Setup, which is why you should
write them down when the system is correctly configured. An
incorrect configuration is a major cause of power-on error
messages, especially for a new system.
2. Remove the system unit cover. Check that the jumpers on the
system board and any expansion boards are set correctly.
3. If you cannot access a new disk, it may be because your disk is
not properly formatted. Format the disk first using the FDISK and
FORMAT commands.
4. Check that all connectors and boards are securely plugged in.
If you go through the corrective steps above and still receive an error
message, the cause may be an equipment malfunction.
If you are sure that your configuration values are correct and your
battery is in good condition, the problem may lie in a damaged or
defective chip.
In either case, contact an authorized service center for assistance.
Other manuals for M9D
1
Table of contents
Other Acer Motherboard manuals

Acer
Acer Ferrari 1100 Series User manual

Acer
Acer V70MA Installation instructions

Acer
Acer Veriton 9100 User manual

Acer
Acer Altos 9100B User manual

Acer
Acer M11E User manual

Acer
Acer V12LC User manual

Acer
Acer V35LA-N User manual

Acer
Acer V55LA User manual

Acer
Acer V50LA User manual

Acer
Acer Aspire M5640 Manual

Acer
Acer Altos 900 Pro User manual

Acer
Acer 12000 User manual

Acer
Acer AcerPower 3000 User manual

Acer
Acer 930 User manual

Acer
Acer V38X User manual

Acer
Acer V66LT User manual

Acer
Acer V58 User manual

Acer
Acer V12LC Installation and operating instructions

Acer
Acer V59LT Installation instructions

Acer
Acer M9L Reference manual