2
1. Instroduction
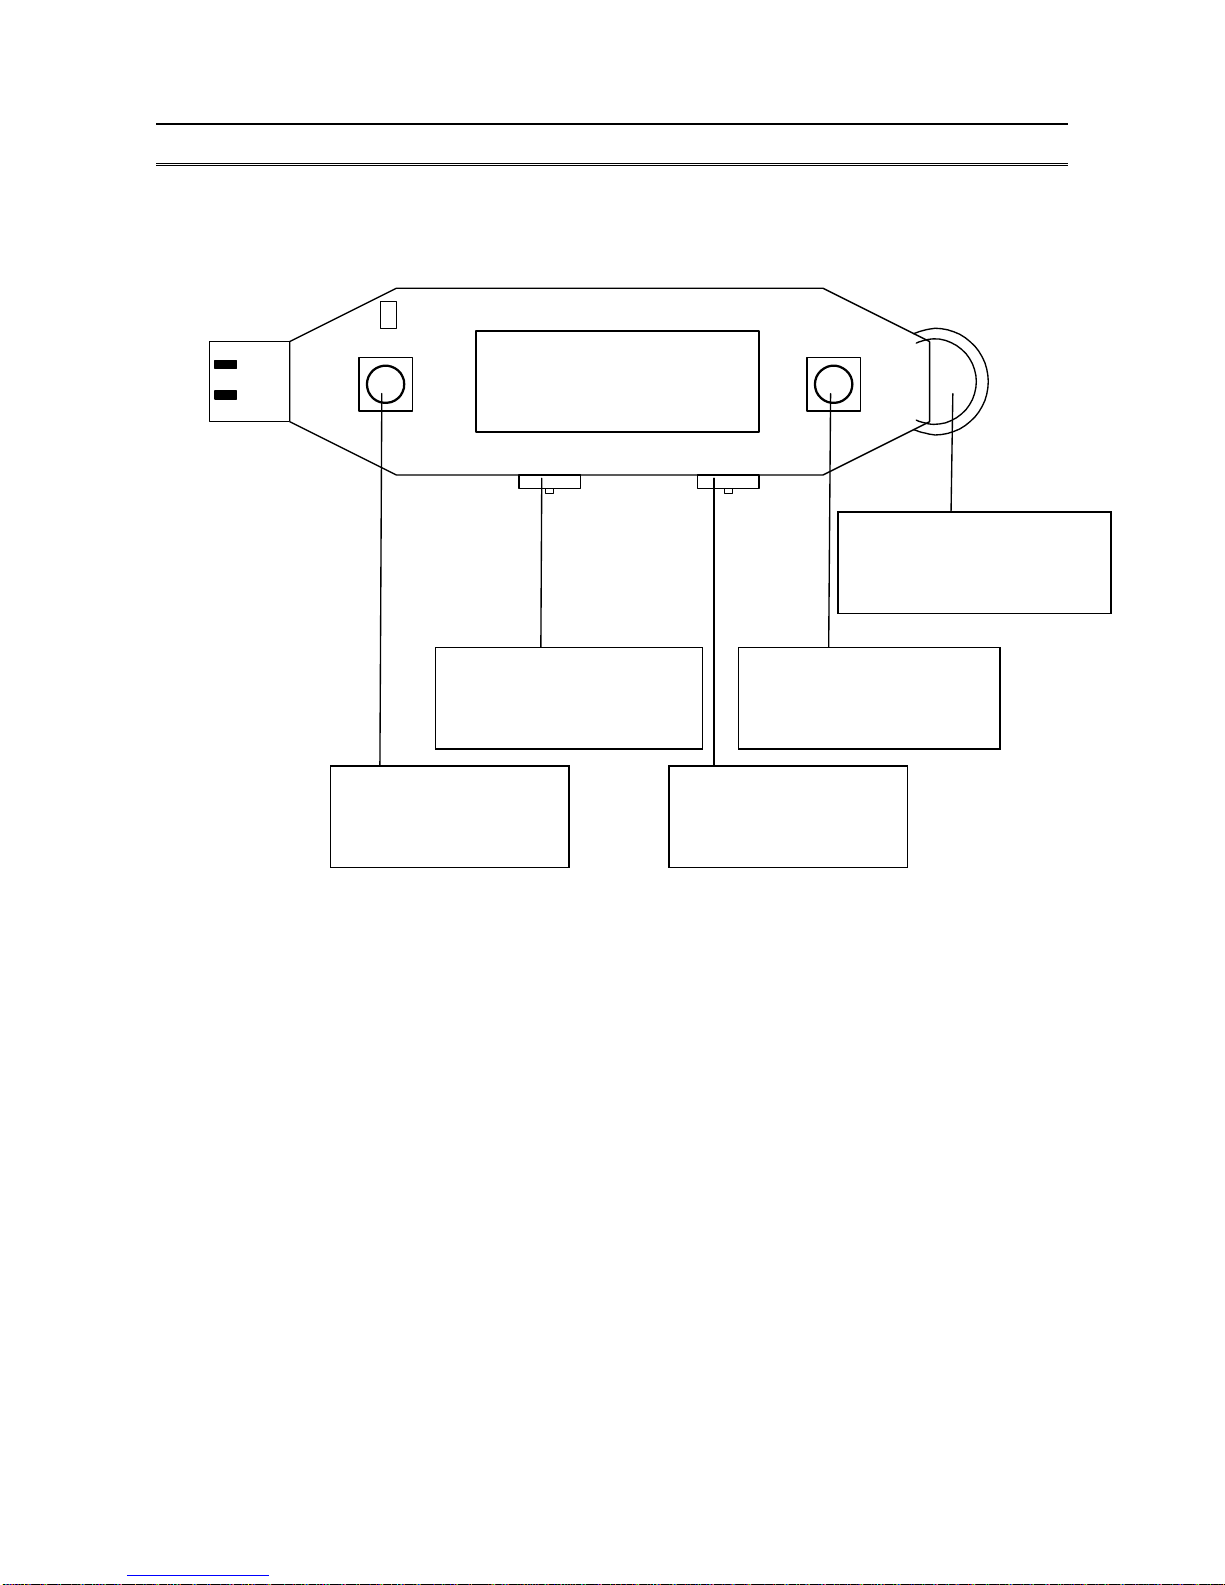
1.1 About Acer MP3 Flash Stick
Acer MP3 Flash Stick is the brand new multi-function MP3 player . Compared with the single-function MP3
Player, Acer MP3 Flash Stick owns not only the stylish outlook with an EQ built in LCD, but also the high
quality digital voice recorder. We successfully combine the convenience of well-known USB flash drive ,
popular MP3 player and delicate-design digital voice recorder in one stick . With two AAA batteries, you will
take the advantage of 12 hours non-stop playing time. Acer MP3 Flash Stick is suitable for each
occasion—for meeting, for data storage and of course, for music enjoyment. It is absolutely your best choice
from various consumer products.
1.2 Features
- Current available: 64MB / 128MB / 256MB
- Support music format: MP3 / WMA
- Earphone jack: 3.5 mm
- Audio output: 5mW+5mW
- Output frequency range: 20HZ – 20KHZ
- Battery: two of AAA battery.
- Support USB specification revision 1.1
- Transferring rate up to 12Mbit per second at “Full Speed”.
- Support power saving mode to reduce power consumption while no playing Acer MP3 Flash Stick.
- Support Windows 2000, ME, XP, Mac OS 8.6 or above and Linux 2.4.0 or above without device driver.
- Support Windows 98/98SE with device driver.
- LED indicator whenAcer MP3 Flash Stick is working.
- Key lock switch.
- Hot Plug & Play - Enable you to install Acer MP3 Flash Stick at anytime.
- Durable solid-state storage – data retention for at least 10 years.
- Erase Cycles: 1,000,000 times
- No external power is required - DC 4.5V ~ 5.5V from USB port.
- Low Power consumption:Write 39.1mA ~ 39.4mA / Read 35.0mA ~ 36.1mA.
- Read/Write Speed of USB interface: Read 800KB / Write 600KB
- Size: approximate 95.2 x 30.0 x 28.5 mm
- Unit weight: approximate 30g (not including battery)
-CE and FCC certificate of approval.