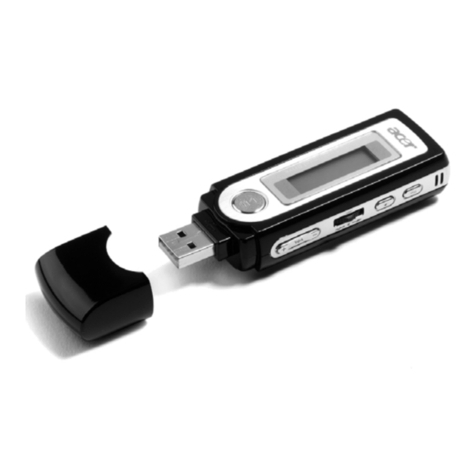
Acer MP110 User manual

Acer MP110
User’s Manual
Ver 1.0

1
Copyright
Copyright 2006 by Acer Inc., All rights reserved. No part of this publication may be
reproduced, transmitted, transcribed, stored in a retrieval system, or translated into any
language or computer language, in any form or by any means, electronic, mechanical,
magnetic, optical, chemical, manual or otherwise, without the prior written permission of
Acer Computer GmbH
Disclaimer
Acer Inc. makes no representations or warranties, either expressed or implied, with respect to the
contents hereof and specifically disclaims any warranties, merchantability or fitness for any
particular purpose. Any software described in this manual is sold or licensed "as is". Should the
programs prove defective following their purchase, the buyer (and not this company, its distributor,
or its dealer) assumes the entire cost of all necessary servicing, repair, and any incidental or
consequential damages resulting from any defect in the software. Further, Acer Computer GmbH,
reserves the right to revise this publication and to make changes from time to time in the contents
hereof without obligation to notify any person of such revision or change.
All brand and product names mentioned in this manual are trademarks and/or registered trademarks
of their respective holders.
All brand and product names mentioned in this manual are trademarks and/or registered trademarks
of their respective holders.

1
Contents
1. Safety Declaration.................................................................................................................2
2. Product Description...............................................................................................................2
2-1 Main Features.................................................................................................................2
2-2 Button Location...............................................................................................................3
2-3 Packaging/Accessories ..................................................................................................4
2-4 Installation of USB Driver................................................................................................4
2-5 USB Connection and Safe Removal...............................................................................5
3. Functions...............................................................................................................................5
3-1 Basic Operation..............................................................................................................5
3-2 Music Mode....................................................................................................................6
3-3 Voice Mode.....................................................................................................................7
3-4 Recording (Record) Mode ..............................................................................................8
3-5 Settings...........................................................................................................................8
3-6. Delete Files...................................................................................................................12
3-7 About............................................................................................................................13
3-8 Exit ...............................................................................................................................13
4. For DRM music downloading .............................................................................................13
5. Troubleshooting..................................................................................................................16
6. Product Specifications........................................................................................................17

2
1. Safety Declaration
I. Please carefully and thoroughly read this safely guide
II. Please keep this manual secure for future reference.
III. Please keep the unit dry.
IV. Please avoid exposing this unit to sunlight.
V. Don’t pour any liquid into this unit: otherwise it will cause damage or electric shock.
VI. Please contact with a professional for handing this: MP110 Player if the following situations
occur:
◆Liquid penetrates into this unit
◆ The unit is affected by damp
◆ The operation of this unit is not normal, or the user can’t return to normal operational status
by consulting this manual
◆ The unit is dropped or is damaged
VII. Please don't use MP110 Player in the following situations:
While driving a vehicle
Carrying out dangerous work
Walking on the street
Any situation that needs full concentration
VIII. If you want to format the disk of MP110 Player, please select FAT to format it.
IX. Please don’t use liquid or spraying agent to clean this unit. Please use soft, wet cloth to wipe this
unit.
X. During listening with earphones, please adjust to suitable volume to avoid hearing from being
damaged.
XI. Note: Importer use of battery may cause explosion! Please correctly use the battery as per
instruction stated in Section: Battery!
XII. Don’t throw used battery into the waste bin, it should be recycled.
2. Product Description
Thank you for purchasing this Acer MP110 product. This product shows the main menu, sub-menus,
song names, lyrics and ID3 information. Its perfect sound quality, High reliability and elegant
appearance all work together to make it a masterpiece. We sincerely hope that this product will bring
you the best experience you can expect in this digital era.
2-1 Main Features
Display-LCD display, with 7 colorful backlight
Audio play- Support a broad range of music formats, including MP3, WMDR10 WMA files.
Driver-free U-disk- Without any management program needed, you can perform file
operations through “Removable Disk” in “My Computer”. No driver is required on Windows
2000 and higher.
Record/Repeat- This unit allows you to record external audio sources through the Microphone
and save them as audio files of WAV and ACT formats In addition, you can select segment
repeat or comparison repeat to enjoy real digital repeat.
7 EQ modes- Normal, Rock, Jazz, Bass, Pop, Classical and Custom.
Multiple playing modes - Normal, repeat one, repeat all, shuffle and preview.
Multi-Language – Supports many languages, including English, French, German, Italian,
Dutch, Russian and Spanish

3
2-2. Button Location
2-2-1. Keys, Switch and Ports
This player provides five keys and one switch:
zPower ON/Power OFF/Play/Pause/Stop key: Long press to
Power ON or Power OFF, short press to play, pause and stop.
zMODE key: Under music mode or voice mode, short press to enter the main menu.
In the main menu, short press to confirm or enter the sub-menu.
zRight (Next) : In Music or voice mode, short press to enter the next song and long press to move
fast forward. In main menu, press right to select menu.
zLeft (Previous): In Music or voice mode, short press to enter the previous song and long press to
move fast backward. In main menu, press left to select menu.
zRecord/A-B Repeat key: In the pause/stop mode, long press to record. In the stop mode, short press
to change play mode. In the play/pause mode, short press to enter A-B repeat mode. In playing
mode, long press to change the EQ mode.
zVOL + key: Allow you to increase the volume in the Music and Voice mode.
zVOL – key: Allow you to decrease the volume in the Music and Voice mode.
Note: In menu interface, short press to return back to the previous menu or playing mode quickly.
zHold switch: Allow you to lock the keys.
Note: You can short press, long press or hold a key, where:
Short press: You press the key and release it in less than two seconds.
Long press: You press the key and release in more than two seconds.
Hold: You press the key and do not release it until the desired effect is achieved.
2-2-2 PORT:
zUSB: Standard USB port
zEarphone: Standard earphone jack
2-2-3 Recording
zMic: input
1 Neck strap loop
2
Power ON/Power
OFF/Play/Pause/Stop
3 Dot-Matrix LCD
4 USB plug
5 USB plug cap
6 Earphone jack
7 Battery compartment
8 Right (Next)
9 MODE key
10 Left (Previous)
11 Record/A-B repeat
12 VOL +
13 VOL -
14 HOLD key

4
2-3 Packaging/Accessories
Please confirm the packaging and accessories have the contents below:
9Acer MP110 Player
9Installation CD
9AAA Battery
9Earphone
9Quick Star Guide
2-4 Installation of USB Driver
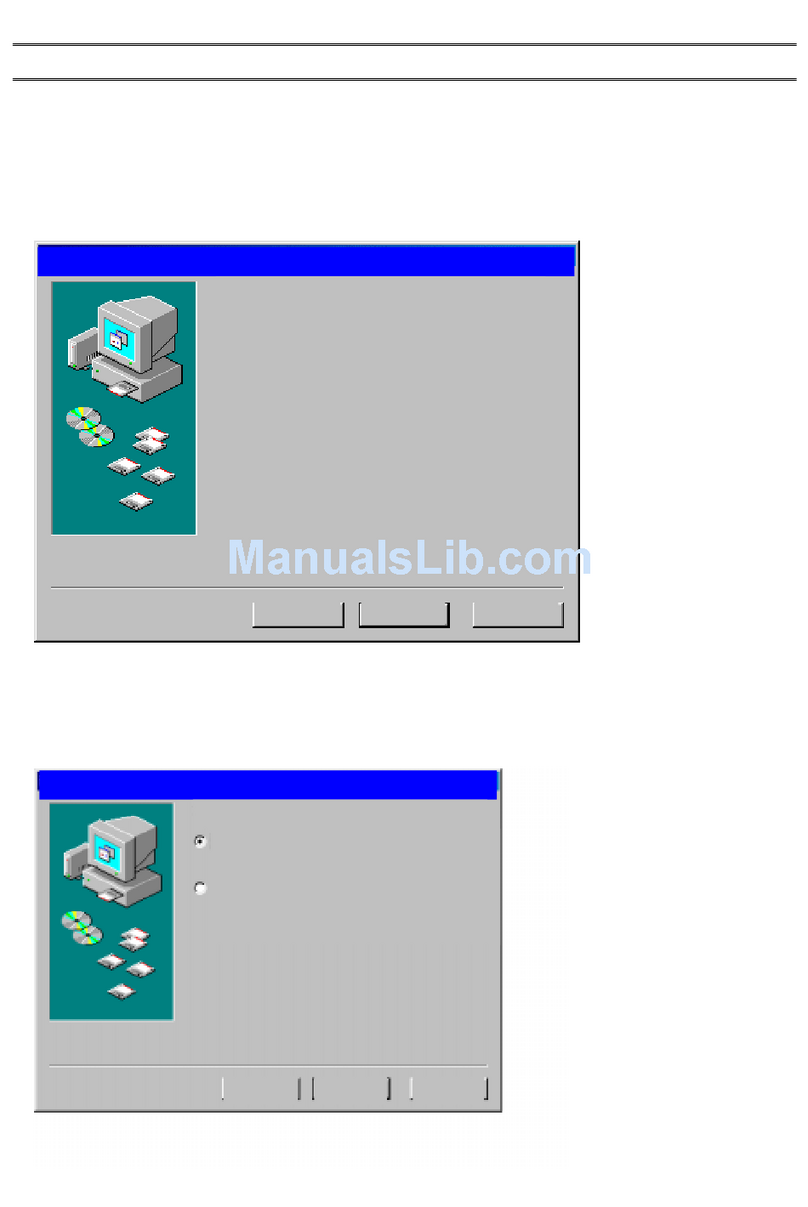
The installation is only needed for windows98 and windows 98 se computers. The steps are as follows:
Insert the accessory CD driver and it will work automatically. The interface shows as follows.
Click <Install>, and finish the installation of the drive with clues. The restart of the computer is needed
afterward.
Confirmation of the installation of USB drive
Connect the player by the USB cable to the computer
Choose “Control Panel”, “System”, and enter “Device Manager”, it will show as follows:
Choose “Disk drives” and the installed USB drive will display
Attention: if it doesn’t show as upward, then please uninstall your USB drive and reinstall it.

5
2-5 USB Connection and Safe Removal
2-5-1 When the MP3 Player is connected to computer, the LCD will show the following
picture:
Ready
And when the MP3 Player is writing &reading data, the LCD will show the following graphic:
You should not disconnect the MP3 Player from the PC while it’s reading or writing, or else it will cause
your data lost.
2-5-2 Safe Removal of USB from Your Computer
1) Select the Plug-n-play Device icon from the Windows Taskbar, right-click on it, and select Safely
Remove Hardware.
2) Select the hardware device you want to stop and click on the Stop button.
3) Select the drive you want to stop and click OK
4) Click Close to complete this process.
Caution: Failing to disconnect this product from your computer by the standard procedure may damage
this product.
3. Functions
3-1 Basic Operation
I. Turning ON/OFF
Press and hold the PLAY key for seconds to turn ON the player.
While the Player is on, press and hold the PLAY key for seconds to power OFF.

6
II. Function Selection
In the main menu, you can navigate through various modes by short pressing of the RIGHT or LEFT
key. Then, you can short press the MODE key to access the selected mode, after which the appropriate
contents appear on the display.
Music Del Files
Voice About
Record Exit
Settings
3-2 Music Mode
In this MUSIC mode, the system can play MP3 files and WMA files and DRM10.
I. Interface Description
A-B
1ALL
Pre
M
001/013 00:14
god is agirl dj
1234
5
610
79
8
S/N Description S/N Description
1 A-B repeat mode icon 6 Music icon
2 Repeat mode 7 S/N of Current music/voice file
3 Hold icon 8 Quantity of music/voice files
4 Battery indicator 9 Playback time
5 Playing status 10 ID3 information

7
II. Music Playing Status
Basic Function
While the Player is powered on, press the PLAY key to play music.
A-B
1ALL
Pre
M
001/013 00:14
God is a girl dj
Push the MODE key to the left or to the right to select the song you want to play.
Push the MODE key to the left or to the right and hold it, to fast forward or fast reverse the music.
A-B
1ALL
Pre
M001/013 00:14
God is agirldj
A-B
1ALL
Pre
M001/013 00:14
God is agirl dj
While playing music, press the PLAY key to pause or to stop playing. You can increase (+) and
decrease (-) the volume by pressing the Volume control key; the LCD Screen will display the
range of the volume level.
A-B Repeat Mode Setup
While the player is powered on, under the playing mode, press the MODE key to identify the A
point and LCD displays A-, press the MODE key again to identify the B point and LCD displays
A-B. The Player will now repeat the selected segment. Press the MODE key again to exit repeating.
While playing, you can press A-B repeat key to identify the A point and the LCD displays A-,
press the A-B repeat key to identify B point and LCD displays A-B. The player will now repeat the
selected segment.
3-3 Voice Mode
Press the PLAY key for seconds to turn on the Player, and press the MODE key to enter into the menu.
Push the MODE key to select VOICE then press the MODE key to confirm.
The LCD Screen will display how many records are stored.
You can push the MODE key to the right or to the left to select recorded files and press the PLAY key to
play them.
Press MODE key to exit and return back to the main Menu.

8
3-4 Recording (Record) Mode
A-B
1ALL
Pre
Press MODE key to enter the status of voice recording to begin to record. And press Play key to pause.
A-B
1ALL
Pre
00 : 00 :52
/VOO1.WAV
A-B
1ALL
Pre
00 : 00 :59
/VOO1.WAV
Press MODE key to exit the mode and save the recorded file.
In the Music/Voice mode, long press Record key to begin record, and then press MODE key to exit the
record mode and back to the Voice mode. Press Play key to play the last recorded file.
3-5 Settings
This section includes the Play Mode, EQ Set, Contrast, Backlight, Lightcolor, Power Set, Record Set,
Languages and Exit.
I. Play mode
If you want to listen to a single song again or to hear a 10 second ‘preview’ for each song, use the Play
mode as follows:
Press MODE key to enter into the main menu.
Select setting mode by pressing the MODE key and enter into play mode by pressing the MODE key.
Press the MODE key to confirm the mode you want to use.
The play menu includes:
zNormal: Plays all music only once orderly and then stops.
1/5
zRepeat one: Plays the current music repeatedly.
A-B
1ALL
Pre
Repeal One
2/5

9
zRepeat all: Plays all music in order repeatedly until another operation is performed.
A-B
1ALL
Pre
Repeatall
3/5
zShuffle: Plays all music randomly and repeatedly until another operation is performed.
A-B
1ALL
Pre
Shuffle
4/5
zPreview: Plays the first 10 seconds of each song and stops after the last one has played.
5/5
Press MODE key to return back to the previous menu.
II. EQ Set
You can enjoy 7 different sound effects by using the Eq mode.
Under the setting mode, enter into the Eq mode and select your favourite Eq mode and press the MODE
key to confirm.
The seven modes are: Normal, Rock, Jazz, Bass, Pop, Classical and Custom.
1/7
2/ 7
3/7
6/ 7
5/ 7
4/7
7/ 7
Custom

10
III. Contrast
You can adjust the contrast by selecting the contrast menu.
3/11
Under the setting mode, push the MODE key to the right or to the left to select Contrast, and then press
MODE key to enter into Contrast mode.
Push the MODE key to the right or to the left to adjust and press the MODE key to confirm.
IV. Backlight
You can set the length of time that the backlight remains on.
Press the MODE key to enter into the menu.
There are five modes: 5 Secs, 10 Secs, 30 Secs, Always and Off.
1/ 5
2/5
3/5
Select Backlight mode by pushing the MODE key and press it to enter into the Backlight menu.
Press the MODE key to confirm the length for lighting.
If select “Always”, it will be light always.
4/5
Select “off” to cancel the backlight.
5/5
V. Light colour
Press MODE key to enter into the backlight setting.

11
It contains 7 kinds of back colour. These include: Orange, Purple, Red, Cyan, Green, Blue and White.
1/ 8
Color1
2/ 8
Color2
3/ 8
Color3
4/ 8
Color4
5/ 8
Color5
6/ 8
Color6
7/ 8
Color7
8/ 8
Auto
VI. Power
Under the settings mode, push MODE key right or left to select Power, and the press MODE key to
enter.
A-B
1ALL
Pre
6
Power
If there is no operation in the set time, the player will automatically power off. Please enter the Power
Set menu. Choose your auto off time here.
Press the MODE key to confirm. The Power set menu includes the following choices:
If you select “Disable”, then it will not power OFF automatically.
VII. Rec Set
Under the settings mode, push MODE key right or left to select Rec set, and then press MODE key to
enter.
A-B
1ALL
Pre
This menu includes the following options: Normal, Middle and High.
You can push MODE key right or left to select the mode you’d like to, and then press MODE key to
confirm.
1/ 3
Normal
2/ 3
Middle
3/ 3
High
Disable
1 Min
2 Mins
5 Mins
10 Mins

12
VIII. Languages
A-B
1ALL
Pre
8
You can choose from the following languages. Enter the Languages menu, select one language by
pushing the MODE key to the right and to the left and then press the MODE key to confirm.
IX. Exit
Select Exit to exit the setting mode and return back to the main menu.
3-6. Delete Files
If you want to delete the file(s) in the Player, you can enter into the delete Files menu as follows:
To delete files, press the MODE key to enter into menu mode.
Push the MODE key to the right or to the left to select the file-type you want to delete (Or EXIT).
A-B
1ALL
Pre
1
A-B
1ALL
Pre
2
A-B
1ALL
Pre
3
Press the MODE key to confirm.
Press the MODE key up and down to choose the file you want to delete.
Push the MODE key to the right or to the left to select Yes, No or Exit.
1 English
2 French
3 German
4 Spanish
5 Dutch
6 Italian
7 Russian

13
If you choose Yes, it will delete the file and display as follows:
To exit the file-overview press the PLAY button for 2 seconds.
3-7 About
It will show you the information of the player.
A-B
1ALL
Pre
Ver: 1.910.51
2
A-B
1ALL
Pre
Total:2000MB
A-B
1ALL
Pre
Free:1991MB
3-8 Exit
Select this item to return to the music mode.
A-B
1ALL
Pre
7
4. For DRM music downloading
To operate DRM10.0, OS is required: Windows XP + Server Pack 1, Windows Media Player 10.3646
(WMP10) or above.
Note:
At first please turn on the new player before downloading DRM10 songs.①
If you do not use the player for a long time, you should turn on the player②before downloading
DRM10 songs.
WMP10 adopts MTP(Media Transfer Protocol) to download licensed music from website. And
Synchronize the music to the MP3 player. Users much use the Synchronization function of WMP10 to
download DRM songs.
Connect MP3 with PC.
Run WINDOWS Media Player, and run SYNC function

14
Add DRM song to the Sync List. (Just drag the DRM song to the SYNE LIST)
Press Start Sync
(synchronizing…)

15
After finished (as follows), pull out the MP3 directly
Now the Media database and License will begin to be loaded to the MP3 automatically.
Picture as follows:
Loading:
Loading finished and license renewed:
Loading failure: (only in the failure condition)
Low battery: (only in the low battery condition)
After synchronization DRM songs, users need to set the DRM time in SYSTEM SETTING if users’
operation system is XP or lower (Details please see 3.5.12 DRM Time)Ⅰ
If users’ operation system is XP or above, then userⅡs do not need to set the DRM Time

16
5. Troubleshooting
zProblem: There is nothing displayed after pressing the power button.
Reason: No battery or the battery is low.
Solution: Replace the battery and turn the power on.
zProblem: After pressing the POWER button the playback doesn’t start.
Reason: The HOLD function is enabled.
Solution: Press the HOLD button as mentioned in this User manual.
zProblem: No sound when playing a song.
Reason: The volume is too low. There are no MP3-files in your player.
Solution: Please adjust the volume. Please download and copy MP3 files to your player.
zProblem: The message “Data Error” appears.
Reason: Disconnection during an USB data transfers. The player was formatted with FAT32.
Solution: In stop mode, press Mode to enter the MENU mode. Select “Del File” by pressing the
“Prep/Next” button, and then press the MODE key shortly. In “Del File” mode select “Format
Flash” by shifting the MODE key. Press the MODE key to confirm.

17
6. Product Specifications
The index parameter
Size 96*31*22mm
Weight 25g(without battery)
MP3 format MP3/WMA
Supporting
Read: 920KB/S, Write: 850KB/S
Earphone output Power: > 5mW
MP3 Compressing rata: 32-320kbps
WMA compressing rate: 32-192kbps
Output power rage: 20Hz-20KHz
Signle-noise ratio: 85dB
Built-in memory 128M/256M/512M1GB/2GB NAND Flash
Power consumption 90mA-100mA
Trasimit interface With Full Speed USB 2.0 interface, connect with
PC directly
Power supply AAA battery
Playback time Around 8 hours
Logo The display of the LOGO can be changed by yourself.
Firmware Upgrade Easy for User to upgrate
Recording WAV
Backlight display LCD 96*26 7color backlight
Repeating Supports A-B repeats reading
EQ Normal, Rock, Pop, Classic, Bass, Jazz
Type of playing Repeat one, Repeat all, Folder, Repeat folder, Radom
DRM 10 Support DRM10
FM tunner Optiona ( 87.5MHz-108MHz)
ID3 Multi-lanuages display of ID3
Driver program Exempt drive program with the system of WIN98
above
Operating Conditions 0℃~ +40℃

18
http://www.acer-euro.com
Table of contents
Other Acer MP3 Player manuals

Acer
Acer MP3 Flash Stick Driver User manual

Acer
Acer MP500 User manual

Acer
Acer MF-580 User manual

Acer
Acer MF-380 Series User manual

Acer
Acer MF-550 User manual

Acer
Acer MP-320 User manual

Acer
Acer MP-330 User manual

Acer
Acer MP-150 1GB User manual

Acer
Acer MP3 Flash Stick User manual

Acer
Acer MP400 User manual